
Proper drone calibration — covering ESC, accelerometer, and compass — is the single most important step between assembling your drone and its first safe flight. Skip calibration and you risk a drone that flips on takeoff, drifts uncontrollably, or worse, crashes due to a compass-induced heading error. This guide covers the complete calibration process for both Betaflight (racing/freestyle) and ArduPilot (GPS multirotors) flight stacks, with step-by-step instructions for each sensor.
Why Calibration Matters
Each sensor in your drone has a raw output that needs to be mapped to real-world physical values. Without calibration:
- ESC desync: If ESCs have different throttle ranges, motors spin at different speeds at the same command — causing uncontrollable yaw or flip on throttle-up.
- Accelerometer drift: An uncalibrated accelerometer makes the flight controller believe the drone is always slightly tilted, causing it to perpetually drift in one direction in Angle/Horizon mode.
- Compass heading errors: Magnetic interference from motors and power wires can cause the compass to read 10–30° off. In GPS-assisted modes (Loiter, RTL, Auto), this translates to the drone flying in the wrong direction.
Calibration takes 15–30 minutes total. It’s time well spent — it directly determines whether your drone flies safely or crashes on the first arm.
Tools and Software Needed
- Laptop or PC with USB connection
- Betaflight Configurator (v10.9+) or Mission Planner (ArduPilot)
- USB-C or Micro-USB cable (matching your flight controller)
- Fully charged LiPo battery (for ESC calibration)
- Radio transmitter and receiver (bound and connected)
- Level surface (for accelerometer calibration)
- Open outdoor area away from metal structures (for compass calibration)
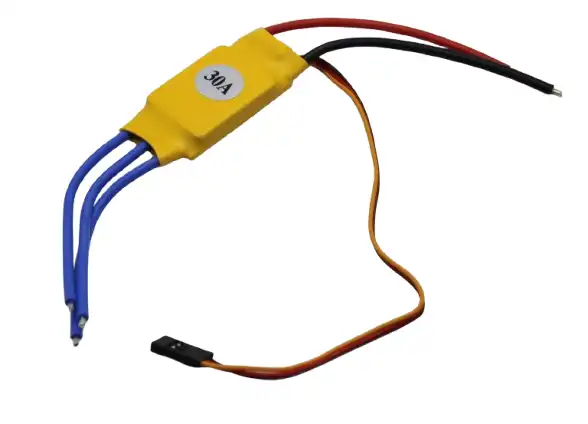
30A BLDC ESC Brushless Electronic Speed Controller
A reliable 30A ESC for quadcopter builds. Supports standard PWM calibration and BLHeli firmware for Betaflight DSHOT protocol compatibility.
ESC Calibration: All-at-Once Method (PWM)
This method calibrates all ESCs simultaneously by teaching them the radio’s full throttle range. Use this for standard PWM ESCs not running BLHeli/DSHOT.
Warning: Remove all propellers before ESC calibration.
- With the battery disconnected, turn on your radio transmitter and push the throttle stick to maximum.
- Connect the LiPo battery to the drone. You’ll hear one or two beeps from the ESCs — they’re entering calibration mode.
- Wait 2 seconds, then bring the throttle stick to minimum (all the way down).
- You’ll hear a series of confirmation beeps (typically 1 long + 2 short). This confirms the ESCs have recorded the throttle range.
- The ESCs will now arm. Slowly raise the throttle to confirm all motors spin simultaneously and at the same speed.
- Disconnect battery, re-enable arming via flight controller, and repeat motor spin test.
If motors still spin at different speeds, check that all signal wires are connected to the correct ESC/FC mapping and repeat calibration.
ESC Calibration via Betaflight (BLHeli/DSHOT)
If your ESCs run BLHeli_32 or BLHeli_S firmware, use DSHOT protocol — no PWM calibration needed. Instead, calibrate ESCs directly from Betaflight Configurator:
- Connect the flight controller to PC via USB (no battery yet).
- Open Betaflight Configurator → Motors tab.
- Enable the motor test slider toggle (you’ll see a warning checkbox).
- Go to ESC/Motor Features tab → select DSHOT600 (or DSHOT300) as protocol.
- Flash BLHeli_32 firmware to your ESCs using BLHeli32 Suite if not already done.
- In Betaflight, enable Bidirectional DSHOT if you want RPM filtering (highly recommended for noise reduction).
DSHOT ESCs self-calibrate their throttle range digitally, so the traditional all-at-once method is not required. Just ensure motor_pwm_protocol = DSHOT600 in CLI.

2204 260KV Brushless Gimbal Motor
High-quality 2204 brushless motor for lightweight drone builds and gimbal applications. Low KV for smooth, torque-rich flight performance.
Accelerometer Calibration
The accelerometer measures gravitational acceleration to determine the drone’s attitude (pitch, roll, tilt). Calibration involves placing the drone in 6 specific orientations so the flight controller can calculate correction offsets.
In Betaflight
- Place the drone on a level surface. Ensure it’s actually level — use a smartphone spirit level app.
- In Betaflight Configurator → Setup tab, click Calibrate Accelerometer.
- Keep the drone perfectly still for 3–5 seconds while the calibration completes.
- Verify the drone model on screen shows level (0°, 0°). If it shows a slight tilt, the surface wasn’t level.
In ArduPilot (Mission Planner)
ArduPilot performs a 6-point calibration:
- Connect to Mission Planner → Initial Setup → Mandatory Hardware → Accel Calibration.
- Click Calibrate Accel. Follow prompts to place the drone in each position: level, nose down, nose up, left side down, right side down, back (upside down for full 6-point).
- Press any key or click Next after each placement. Calibration saves automatically when all 6 positions are complete.
- Reboot the flight controller and verify attitude display is stable on the HUD.
Tip: If you change flight controller mount orientation (e.g., rotate FC 45° to fit frame), update the board alignment in Betaflight (Configuration tab → Board and Sensor Alignment) before running accelerometer calibration.
Compass (Magnetometer) Calibration
Compass calibration is the most critical step for GPS-enabled drones. A poorly calibrated compass will cause the drone to circle, drift, or fly away in Position Hold and Return to Home modes.
Before You Start
- Move at least 3 metres away from metal structures, power lines, and your laptop/car.
- Disconnect the battery before starting (to avoid compass interference from ESC current).
- If possible, calibrate outdoors or in a magnetically clean room.
In ArduPilot (Mission Planner)
- Initial Setup → Mandatory Hardware → Compass → click Live Calibration.
- Slowly rotate the drone through all orientations — nose up, nose down, all 4 sides, and rolled upside down. Think of it as trying to cover all points on an imaginary sphere.
- Watch the progress bars fill as you collect magnetic samples from all directions.
- After ~60 seconds, click Done. Calibration offsets are saved automatically.
- Check the offsets: values over 400 on any axis indicate strong local magnetic interference. Relocate and repeat.
In Betaflight (GPS Rescue)
Betaflight’s GPS Rescue mode uses the GPS + magnetometer. Calibrate via:
# In Betaflight CLI:
mag_calibration
Alternatively, many GPS modules include a dedicated compass calibration button sequence. Refer to your GPS module’s manual (e.g., BN-880, M8N).
Radio Transmitter Calibration
Radio calibration teaches the flight controller the actual min, mid, and max pulse widths of your transmitter sticks and switches.
In Betaflight
- Bind your receiver to the transmitter and connect via SBUS/iBUS/CRSF.
- Receiver tab → verify all channels respond correctly to stick movement.
- In Configuration tab, set channel map to AETR1234 or TAER1234 to match your transmitter mode.
- Use Rates/Expo to set stick response curves after calibration.
In ArduPilot
- Initial Setup → Mandatory Hardware → Radio Calibration → click Calibrate Radio.
- Move all sticks to their full extents (corners for aileron/elevator, full up/down for throttle, full left/right for rudder).
- Toggle all switches through their positions.
- Click Click when Done. ArduPilot saves min/max/trim values for all 8 channels.

Flysky FS-G7P 2.4GHz ANT Transmitter with FS-R7P Receiver
Reliable 7-channel 2.4GHz transmitter for drone and RC car use. Precisely calibrated output channels, compatible with standard radio calibration in ArduPilot and Betaflight.
Post-Calibration Pre-Flight Checks
Before first flight after calibration, verify these critical items:
- Prop direction: CW props on motors 1 & 4, CCW on 2 & 3 (standard Betaflight quad layout). Confirm motor direction in Betaflight Motors tab before mounting props.
- Attitude indicator: Tilt the drone manually and confirm the on-screen model mirrors the motion correctly in all axes.
- Arming test: Arm without props, verify all 4 motors spin when throttle is raised.
- Compass heading test: Point drone North, confirm Mission Planner HUD shows North ± 5°.
- GPS lock: Wait for at least 8 satellites before flying in GPS modes. Green GPS LED on flight controller confirms lock.
Common Calibration Problems and Fixes
- ESC doesn’t beep in calibration mode: Not all ESCs support all-at-once calibration. Check firmware (BLHeli supports it, SimonK has its own sequence). Some require individual calibration via servo tester.
- Motors spin at wrong speed after ESC calibration: ESC min throttle is mismatched. In Betaflight CLI, adjust
motor_idle_throttle_valueor set min throttle in ESC firmware via BLHeli Suite. - Accelerometer calibration fails / drone still drifts: Re-check the level surface. Use a bubble level on the frame. Vibrations from nearby machinery can corrupt calibration — go to a quiet location.
- Compass offsets too high (>400): Magnetic interference from frame or power cables. Mount GPS/compass further from ESCs and motors with a 10cm+ mast. Add ferrite rings on power cables.
- Drone spins on takeoff (toilet bowling in ArduPilot): Classic compass/GPS heading mismatch. Re-calibrate compass outdoors, away from the car and metal structures.
Frequently Asked Questions
- Do I need to recalibrate ESCs every time I fly?
- No. ESC calibration is only needed once per build, or after changing flight controller firmware, ESC firmware, or swapping ESCs. If you switch from PWM to DSHOT protocol, recalibration is not required (DSHOT is digital).
- Why does my drone drift even after accelerometer calibration?
- In Angle/Horizon mode, small accelerometer errors accumulate. Trim your transmitter sticks slightly until drift stops. Also check for bent propellers or uneven motor thrust — mechanical issues cause drift that no calibration can fix.
- How often should I recalibrate the compass?
- Recalibrate any time you fly in a new location far from where you originally calibrated, if you notice position hold drift, or after any crash that may have shifted the GPS/compass module.
- Can I calibrate without Mission Planner using QGroundControl?
- Yes, QGroundControl supports full ArduPilot calibration (ESC, accel, compass, radio) with a guided wizard interface. It’s often easier for beginners than Mission Planner.
- What is the minimum safe compass offset?
- ArduPilot considers offsets below 200 as good, 200–400 acceptable, and above 400 as potentially problematic. Below 600 is flyable but sub-optimal. Above 600, investigate interference sources.
Build Your Drone with Quality Components
Shop ESCs, brushless motors, transmitters, and more for your next drone build — all available at Zbotic India.


Add comment