
Understanding drone arming and failsafe configuration for your RC transmitter and flight controller is not optional — it is a core safety requirement for anyone who builds or flies drones. A misconfigured arming sequence or a missing failsafe has caused countless flyaways, crashes, and injuries. This comprehensive guide covers every aspect of arming safety, RC failsafe protocols, flight controller failsafe settings in Betaflight and ArduPilot, and ESC safety features — giving you the knowledge to fly with confidence.
What Is Arming and Why It Matters
Arming is the process of enabling the ESCs (Electronic Speed Controllers) to respond to throttle input, allowing the motors to spin. A disarmed drone will not spin its motors regardless of throttle position — this is the primary safety state. Arming intentionally before flight prevents accidental motor activation during handling, pre-flight checks, or when the drone is powered on after being set down.
The consequences of improper arming setup are severe:
- Unintended arming: Motors spin during handling, causing serious propeller injuries
- Missing failsafe: Signal loss causes drone to fly away or crash uncontrolled
- Arm-on-power-up: If the flight controller arms immediately when powered, any throttle glitch during booting can launch the drone
- No disarm failsafe: Crashed drone continues spinning motors, causing fires or further damage
Every serious drone build — from a 5-inch FPV racer to a large photography quad — requires proper arming and failsafe configuration before any flight.
Arming Methods: Stick, Switch, and Sequential
Flight controllers support multiple arming methods. Choose based on your aircraft type and pilot experience:
Throttle-Down-Yaw-Right (Stick Arming)
The traditional method: hold throttle at minimum and yaw stick to the full right for 2 seconds. To disarm: throttle minimum + yaw left. Simple, requires no aux switch. Disadvantage: easy to accidentally trigger during aggressive flying where you momentarily hit low throttle with yaw input. Not recommended for freestyle flying.
Aux Switch Arming
Assign a 2-position switch on your transmitter to an AUX channel (e.g., AUX 1). Configure the flight controller to arm when that channel goes above 1800µs. This is the preferred method for all modern builds — dedicated arm switch eliminates accidental arming and disarming mid-flight. Betaflight: Mode tab → Arm mode → add range on AUX 1 (>1800µs).
Sequential/Smart Arming (ArduPilot)
ArduPilot systems require all pre-arm checks to pass before the arm command is accepted. You can arm via GCS (Ground Control Station, e.g., Mission Planner), RC switch, or MAVLink command. ArduPilot logs a reason for any failed arm attempt, which helps diagnose issues.
Auto-Arm (NOT recommended)
Some ELRS and older F3 flight controllers supported auto-arm on throttle raise. Never use this — it bypasses intentional arming and creates significant safety risks.
Pre-Arm Checks and Arming Prevention
Pre-arm checks are conditions that must be satisfied before the flight controller will accept an arm command. Common checks:
- Throttle at minimum: Throttle channel must be below arming threshold (typically <1050µs)
- Gyro calibrated: Gyroscope initialization must complete successfully on boot
- Accelerometer level: The drone must be reasonably level (within ±10°) before arming
- Battery voltage: Must be above minimum cell voltage (3.5V/cell typical)
- GPS lock (ArduPilot GPS-assisted modes): Sufficient satellites for the selected flight mode
- Compass calibrated: Required for position-hold modes
In Betaflight, the Arming Disabled Flags in the Status tab show exactly which checks are failing. Common blocking flags: NOPREARM (prearm switch required), THROTTLE (throttle not at zero), ANGLE (tilt too steep), RXLOSS (no RC signal).
RC Transmitter Failsafe Configuration
The RC failsafe is what your transmitter and receiver do when the radio link is lost. This must be configured correctly — it is your last line of defence against a flyaway. There are three failsafe approaches at the receiver level:
No Pulse / Signal Loss
The receiver stops outputting any signal when it loses the transmitter. The flight controller detects signal loss and triggers its own failsafe. This is the default behavior of most receivers and is generally safe as long as the FC failsafe is configured.
Hold Last Position
The receiver continues to output the last valid channel values indefinitely. Dangerous — if signal is lost while at full throttle, the drone continues flying at full throttle with no control. Never use this for multirotors.
Custom Failsafe (Recommended)
You program specific channel values that the receiver outputs when signal is lost. For a multirotor: set throttle to ~950µs (below arm threshold), set all other channels to center (1500µs). Some FPV pilots add an RTH (Return to Home) trigger on the flight mode channel. Configure this on your transmitter in the Failsafe menu and verify it with the FC’s receiver tab while temporarily turning off the transmitter.

Flysky FS-G7P 2.4GHz ANT Transmitter with FS-R7P Receiver
Upgraded Flysky 7-channel transmitter with ANT protocol. Supports programmable failsafe output on all channels — critical for proper drone signal-loss safety configuration.

Flysky FS-GT2 Transmitter with FS-GR3E Receiver
Entry-level 2-channel 2.4GHz Flysky radio system for RC cars and boats. Built-in failsafe support. Ideal for ground vehicles and introductory RC projects.
Flight Controller Failsafe Modes
Even with a perfect RC failsafe, the flight controller has its own failsafe logic that activates on signal loss detection. The major FC failsafe modes are:
Drop
All motors immediately stop. The drone falls. Useful for very low-altitude flying where immediate stop is safer than uncontrolled flight. Dangerous at altitude.
Land
The flight controller activates a controlled descent and lands where it is. No GPS required (uses baro or altitude estimate). Good for indoor GPS-denied environments.
Return to Home (RTH)
The drone climbs to a safe altitude (configurable, typically 20–50m), navigates back to the home point (GPS coordinates recorded at arm), descends, and auto-lands. Requires GPS lock. The most user-friendly failsafe for photography drones.
GPS Hold / Hover
The drone hovers in place using GPS hold until the signal returns or battery critically depletes, then auto-lands. Useful when the signal loss is expected to be brief.
In Betaflight (FPV racing/freestyle): Land mode (GPS not usually available) or Drop. In ArduPilot: RTH (called RTL — Return to Launch) is standard.
ESC Safety Features
ESCs also have safety and protection features that affect arming behavior:
- Arming delay: ESC waits for a valid neutral throttle signal before enabling output. Prevents motor startup if powered with throttle inadvertently high.
- Over-temperature protection: ESC shuts down the motor if MOSFET temperature exceeds threshold (typically 100°C). Motor restarts when cooled.
- Over-current protection: Cuts motor power on current spikes beyond ESC rating (e.g., 30A rated ESC shuts off at 45A sustained). Prevents ESC burning.
- Low-voltage cutoff: ESC monitors battery voltage (per-cell) and reduces motor power or cuts out when cells drop below threshold, preventing LiPo over-discharge.
- Motor desync protection: Newer BLHeli_32 ESCs detect motor desynchronization and restart the commutation sequence automatically, preventing motor lockups mid-flight.
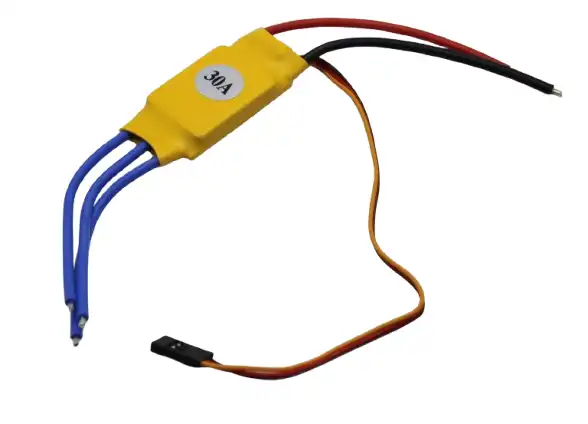
30A BLDC ESC Brushless Electronic Speed Controller
30A ESC with built-in arming safety, low-voltage cutoff, and over-current protection. Compatible with standard 2–4S LiPo packs. Suitable for 5-inch and smaller drone builds.
Betaflight Arming and Failsafe Setup
Here is the complete Betaflight arming and failsafe configuration procedure:
Arming Setup
- Connect to Betaflight Configurator via USB.
- Go to Modes tab → find ARM → click Add Range → select your AUX channel → set range to 1800–2100µs.
- Go to Configuration tab → under Arming: enable “Prevent arming if throttle is not zero”. Optional: enable “Require Prearm” for an extra safety switch.
- Check Status tab → Arming Disabled Flags. Resolve all flags before attempting first flight.
Failsafe Setup
- Go to Failsafe tab.
- Stage 1 (Channel fallback): Set each channel to the value output when signal is lost. Set Throttle to 900 (minimum), all others to 1500 (center).
- Stage 2: Choose procedure — Drop for low-altitude/racing, Land for freestyle, GPS Rescue for long-range (requires GPS).
- Set Guard Time (default 1.5s): how long signal must be lost before Stage 2 triggers. Brief interruptions do not trigger Stage 2.
- Test: With props OFF, arm the drone, raise throttle slightly, then turn off the transmitter. Verify the FC enters failsafe mode and motors stop after guard time.
Always test failsafe with props removed before any flight. This takes 2 minutes and can prevent a catastrophic flyaway.
Frequently Asked Questions
What happens if I don’t configure failsafe?
If RC signal is lost and no failsafe is set, the flight controller will likely hold the last stick position, causing the drone to continue flying in whatever direction it was last commanded — a flyaway or uncontrolled crash.
Can I arm a drone with Betaflight via the transmitter only?
Yes. Assign the ARM mode to an AUX channel switch. Toggle that switch high (>1800µs) while throttle is at minimum to arm. All pre-arm checks must pass first.
What is the difference between Stage 1 and Stage 2 failsafe in Betaflight?
Stage 1 applies channel fallback values immediately on signal loss. Stage 2 triggers after the guard time expires, activating the more aggressive response (Drop/Land/GPS Rescue).
Do I need GPS for failsafe on a racing drone?
No. For FPV racers, use Drop or Land failsafe — both work without GPS. GPS Rescue is for long-range builds where RTH is needed.
Why won’t my drone arm even with the arm switch on?
Check the Arming Disabled Flags in Betaflight Status tab. Common causes: throttle not at zero, angle too steep, no RC signal, battery voltage too low, or gyro not calibrated.
Fly Safe with Proper Arming and Failsafe Setup
Proper drone arming and failsafe configuration is the single most important safety step you can take before your first flight. It takes less than 30 minutes to configure correctly in Betaflight or ArduPilot, and it protects you, bystanders, and your equipment from the most common and preventable accidents in drone flying. Take the time to set it up properly, test with props off, and verify your failsafe before every new build flies for the first time. Zbotic stocks ESCs, RC transmitter systems, and all the components you need to build a safe, properly configured drone.


Add comment