
Table of Contents
- Why Does Your 3D Printer Need an Enclosure?
- Materials Needed and Where to Buy in India
- Enclosure Design Options
- Build 1: IKEA LACK Table Enclosure (Most Popular)
- Build 2: Cardboard + Foam Board Enclosure (Under ₹500)
- Build 3: Aluminium Frame + Acrylic Panel Enclosure
- Adding Useful Features to Your Enclosure
- Printer Upgrades That Work Well With Enclosures
- Tips for Printing ABS in an Enclosure
- FAQ
If you have been struggling with warped ABS prints, lifted corners, or layer separation on your Creality Ender 3 or similar open-frame printer, an enclosure is very likely the solution. A 3D printer enclosure traps heat around the build volume, eliminating the temperature gradients that cause warping. It also reduces noise, keeps dust out of your filament, and makes ABS/ASA printing genuinely practical.
The good news: you do not need to spend ₹5,000–₹15,000 on a commercial enclosure. With some basic materials available across India, you can build a functional enclosure for under ₹2000. This guide walks you through three different approaches — from free to fully functional — with step-by-step instructions tailored for Indian makers.
Why Does Your 3D Printer Need an Enclosure?
Open-frame 3D printers like the Ender 3, Ender 3 Pro, and similar budget machines work well for PLA. But the moment you try to print ABS or ASA, problems start:
- Warping: ABS contracts significantly as it cools. If the ambient air around the printer is cold or varies in temperature (common with ceiling fans in Indian homes), layers cool unevenly and the print warps or lifts from the bed.
- Layer delamination: Uneven cooling can cause individual layers to separate, creating weak, brittle parts.
- Draughts: Even a gentle breeze — from a fan, AC vent, or open window — can ruin an ABS print.
- Fumes: ABS emits styrene, which has an unpleasant smell and is mildly toxic in enclosed spaces. An enclosure with a carbon filter makes this manageable.
- Noise: The enclosure acts as a sound dampener, reducing the noise from stepper motors and cooling fans.
Even for PLA, an enclosure helps in dusty environments (common in Indian cities) by keeping filament and the printer cleaner between prints.
Materials Needed and Where to Buy in India
Depending on which build you choose, you will need some combination of:
| Material | Use | Where to Get | Approx. Cost |
|---|---|---|---|
| IKEA LACK tables (x2) | Frame structure | IKEA India | ₹800–1,000 |
| Foam board / Sunboard | Walls and panels | Stationery stores, Amazon | ₹100–300 |
| Acrylic sheet (3–5mm) | Transparent door/window | Local hardware, Amazon | ₹200–500 |
| Magnetic strips / velcro | Panel fastening | Amazon, local stores | ₹100–200 |
| Thermal aluminium tape | Heat reflection on inside | Amazon, hardware stores | ₹100–200 |
| PC4-M10 fittings | Filament pass-through hole | Zbotic.in, Amazon | ₹50–100 |
| Cardboard (free) | Free alternative to foam board | Any delivery box | Free |
Enclosure Design Options
There is no single right way to build an enclosure. Three approaches suit different budgets and skill levels in India:
- IKEA LACK table enclosure: The classic maker solution. Two LACK coffee tables stacked and enclosed with panels. Well-documented, aesthetically clean, and functional.
- Cardboard/foam board: The cheapest possible solution. Functional, ugly, but genuinely works for most printing scenarios.
- Aluminium frame + acrylic: More professional, takes more time to build, and costs slightly more — but looks great and is very durable.
Build 1: IKEA LACK Table Enclosure (Most Popular)
The IKEA LACK enclosure (nicknamed the “Lack Rack” in the maker community) is the most documented DIY enclosure in the world. The LACK table’s dimensions happen to be nearly perfect for enclosing a standard Ender 3 or similar printer.
What You Need
- 2× IKEA LACK tables (55cm × 55cm surface) — approximately ₹500 each at IKEA India
- 4 corner brackets (3D print these — search Thingiverse for “LACK enclosure corners”)
- Side panels: foam board, acrylic, or 3mm MDF cut to size
- Front door: acrylic sheet with magnetic closure
- Hinges for door (small aluminium hinges from hardware store)
- Rubber feet for the top table (to protect from vibration)
Step-by-Step Instructions
- Print the corner brackets: Download the bracket STL files from Thingiverse (search “LACK enclosure corner Ender 3”). Print 4 pieces in PLA or PETG. These connect the two LACK tables at the corners to create a box frame.
- Assemble the frame: Assemble one LACK table normally (bottom). Place the printed corner brackets on top of each leg. Invert the second LACK table and attach its legs into the corner brackets. You now have a box frame with open sides.
- Measure and cut panels: Measure the three sides and top gap (if needed). Cut foam board or acrylic to fit. For a back panel, foam board works well. For the two sides, either foam board or acrylic.
- Attach panels: Use magnetic tape or velcro strips to attach foam board panels. For acrylic, use small L-brackets screwed into the LACK table frame.
- Build the front door: Cut an acrylic panel slightly larger than the front opening. Attach small hinges on one side, and magnetic strip catches on the other. This creates a swing-open door.
- Add filament pass-through: Drill a 10mm hole on the top or back panel. Insert a PC4-M10 PTFE coupler to guide filament in from outside the enclosure (keeps your spool outside where it stays cooler and away from ABS heat).
- Line the inside with aluminium tape: Optional but useful — lining interior walls with thermal aluminium tape reflects heat back into the chamber, improving heat retention.
Total cost estimate: ₹1,500–₹2,000 depending on panel material choice.
Build 2: Cardboard + Foam Board Enclosure (Under ₹500)
If budget is your priority and aesthetics are not, a cardboard enclosure genuinely works. It insulates surprisingly well and can be assembled in under two hours.
Step-by-Step Instructions
- Find a large cardboard box: A washing machine, refrigerator, or large appliance delivery box is ideal — you need it to be larger than your printer. Approximate dimensions needed: 50cm × 50cm × 60cm or larger.
- Cut access openings: Use a box cutter to cut a large front opening (your “door”). Keep the cut piece to use as a door flap, attached with tape as a hinge.
- Reinforce with foam board: Line the interior with foam board panels (available at stationery stores for ₹50–100 each). This adds insulation and some structural rigidity.
- Filament entry: Cut a small slot or hole in the top or rear for filament entry. Use electrical tape to smooth the edges so filament doesn’t snag.
- Add a viewing window: Tape a piece of clear plastic (cut from a document folder or old packaging) over a rectangular hole you cut in the front door flap. This lets you monitor prints without opening the enclosure.
- Weigh down the bottom: Place the printer on a non-slip mat inside the enclosure to prevent it from moving and tipping the box.
Total cost estimate: ₹200–₹500 (mostly foam board and tape).
Important safety note: Do not leave a cardboard enclosure unattended for long prints. Cardboard is flammable. Only use it with a printer that has a functional thermal runaway protection firmware (most modern printers do, but verify yours).
Build 3: Aluminium Frame + Acrylic Panel Enclosure
For a more professional, permanent enclosure that can last years, an aluminium extrusion frame with acrylic panels is the best approach. This is also the most flexible — you can add features like LED strips, air filters, and cable management easily.
Materials
- 2020 aluminium extrusion profiles (cut to size at a local fabricator or order online)
- Corner cubes and T-nuts for joining extrusions
- 3–5mm acrylic sheets (cut to size at a local acrylic shop)
- Hinges and door latches
For an Ender 3 enclosure, you need roughly 6 meters of 2020 extrusion. Local aluminium fabricators in most Indian cities (Lajpat Rai market in Delhi, SP Road in Bengaluru, etc.) can cut these to length cheaply — often ₹100–200 per meter.
Steps
- Design your frame dimensions (typically 500mm × 500mm × 600mm for an Ender 3 with some clearance).
- Cut extrusions to length. You need 4 vertical pieces, 8 horizontal pieces.
- Join with corner cubes and M5 T-nuts at each corner.
- Have acrylic panels cut to fit each face.
- Attach acrylic with T-nut + M5 screw + washer sandwiching the panel at each edge.
- Install a hinged front door with acrylic panel and magnetic catch.
Total cost estimate: ₹1,500–₹2,500 depending on acrylic thickness and local material prices.
Adding Useful Features to Your Enclosure
Once your basic enclosure is built, consider adding these upgrades:
- LED strip lighting: A 12V or 5V LED strip along the top of the interior vastly improves visibility. Run it off the printer’s PSU or a small USB power bank.
- Carbon filter for ABS fumes: A small 5V USB fan pulling air through an activated carbon filter neutralises ABS/ASA fumes. Carbon filter media is available on Amazon India for ₹200–500.
- Temperature sensor: A DHT22 or cheap digital thermometer inside the enclosure helps you monitor chamber temperature. For ABS, you want chamber temp above 35–40°C.
- Raspberry Pi / OctoPrint: Run OctoPrint from inside or outside the enclosure to monitor, pause, and control prints remotely via web browser.
- Dry box integration: Mount your filament spool inside a sealed dry box attached to the outside of the enclosure, with the filament feed-through into the enclosure. This keeps filament dry during even long prints.
Printer Upgrades That Work Well With Enclosures
With an enclosure enabling ABS and ASA printing, you may want to upgrade a few components to handle the higher temperatures:
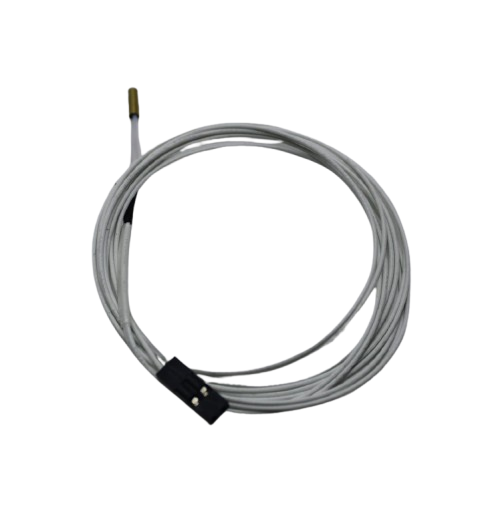
100k NTC Thermistor with Copper Tip for MK8 Extruder
Accurate hotend temperature sensing is critical for ABS printing. Upgrade or replace your thermistor to ensure precise temperature control at the higher temps ABS requires (240–260°C).
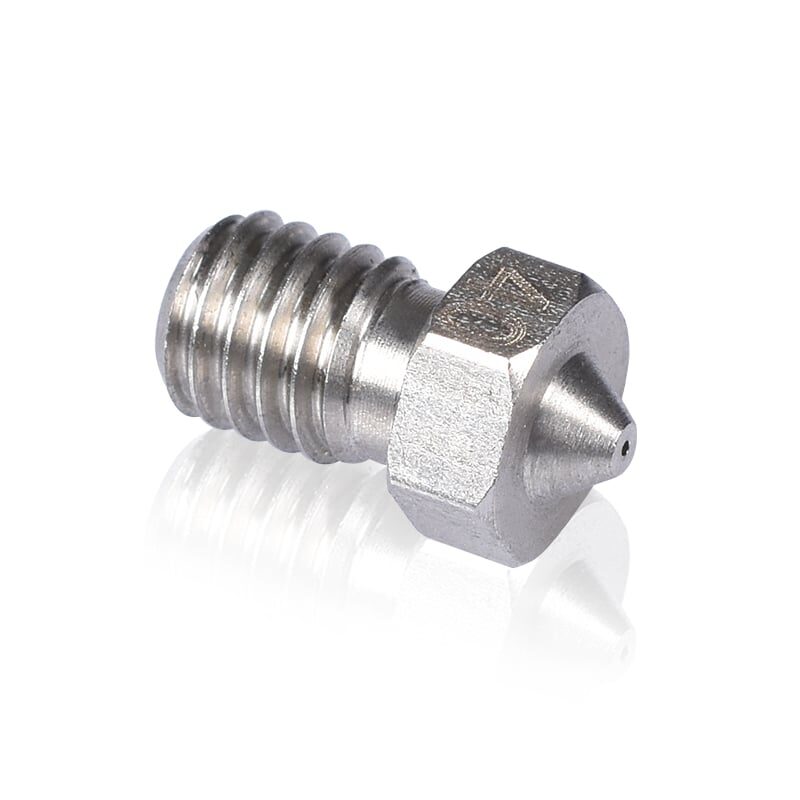
3D Printers Stainless Steel Nozzle 0.4mm
Stainless steel nozzles tolerate higher printing temperatures better than standard brass nozzles. Ideal for ABS printing in an enclosure where you’re regularly running at 240°C+.

B Type Aluminium Heat Sink for MK7 MK8 Extruder
Inside a warm enclosure, your extruder cold zone heatsink needs to work harder to prevent heat creep. This aluminium heatsink keeps the cold zone cold so filament feeds reliably during long ABS prints.
Tips for Printing ABS in an Enclosure
An enclosure alone is not enough for perfect ABS prints. These settings and practices make a big difference:
- Preheat the enclosure: Let the printer heat the bed (100–110°C) for 10–15 minutes before starting the print. This warms up the chamber air passively.
- Turn off or reduce part cooling fan: ABS needs slow, even cooling. Set part cooling fan to 0% for the first 3–5 layers, and keep it at 20–30% maximum for the rest. Too much cooling causes layer delamination.
- Use a brim or raft: ABS still benefits from a wide brim (5–10mm) to improve first-layer adhesion, especially for large flat prints.
- Increase hotend temperature: Print ABS at 240–260°C depending on brand. Bambu Lab ABS works well at 250°C with a bed at 100°C.
- Dry your filament: ABS is hygroscopic. If you hear popping while printing, your filament has absorbed moisture. Dry at 70°C for 4–6 hours before use.
- Print slowly: Reduce print speed to 40–50mm/s for ABS. Faster printing causes more temperature variation and warping.
- Ventilate after printing: Open windows and ventilate the room after a long ABS print session. The fumes are mild but real.

Bambu Lab ABS 3D Printer Filament – Black 1.75mm
Once your enclosure is ready, Bambu Lab ABS is the ideal filament to start with. Consistent diameter, minimal warping, and excellent strength for functional parts and technical components.
Frequently Asked Questions
Does an enclosure work for PLA printing?
Yes, but it is less critical for PLA. An enclosure keeps dust out, reduces noise, and can slightly improve print quality. However, PLA can actually over-heat inside a warm enclosure — if you notice poor bridging or drooping, open the front door slightly to allow some airflow and cooling.
Can I leave my printer in the enclosure unsupervised?
Only if your printer has thermal runaway protection enabled (most modern printers with Marlin firmware do). Always check before leaving. A fire alarm near your print area is also a sensible precaution, especially with a cardboard enclosure.
What chamber temperature should I aim for when printing ABS?
Aim for 35–45°C chamber temperature for ABS. Above 50°C and your stepper motor drivers may overheat (especially on older Ender 3 boards). Many makers add a small fan inside to circulate warm air without letting it escape.
How do I manage cables coming out of the enclosure?
Run all cables (power cord, USB data cable, hotbed cables) through a dedicated grommet hole or cable pass-through in the rear panel. Keep the hole as small as possible to minimise heat loss.
Is an enclosure enough to handle ABS fumes?
An enclosure reduces fume spread by keeping them contained. To actively remove fumes, add a carbon filter with a small fan. The fan draws air through activated carbon which absorbs volatile organic compounds (VOCs). Always print ABS in a ventilated room regardless.
Can I build an enclosure for a Bambu Lab printer?
Some Bambu Lab printers (like the P1S) already come with a built-in enclosure. The A1 and A1 Mini are open-frame and can be enclosed similarly to the Ender 3 using the LACK method. Note that Bambu printers already have active enclosure temperature management when in enclosed mode.
Get Started on Your Enclosure Build
Find all the 3D printer parts, filaments, and accessories you need for your enclosure project at Zbotic.in. From hotend upgrades to quality ABS filament — everything in one place with fast delivery across India.


Add comment