
Display JPEG Images on TFT LCD: ESP32 SD Card Tutorial
Displaying a JPEG image on a TFT LCD using an ESP32 and SD card is one of the most visually rewarding projects for any electronics hobbyist. Whether you want to build a digital photo frame, a custom UI for your IoT device, or a splash screen for your gadget, this tutorial will walk you through the entire process step by step. We will use an ESP32 development board, an ILI9341 or ST7789 TFT display, an SD card module, and the Arduino IDE with the TFT_eSPI library — all components easily available in India from Zbotic.
Components You Need
Before starting, gather the following hardware. Everything listed here is available at Zbotic in India:
- ESP32 Development Board (38-pin or 30-pin variant)
- TFT LCD Display — 2.4-inch (ILI9341) or 1.8-inch (ST7735/ST7789), SPI interface
- Micro SD Card Reader Module (SPI)
- Micro SD card (8GB or 16GB, FAT32 formatted)
- Jumper wires (male-to-male and male-to-female)
- USB cable and a laptop/PC with Arduino IDE installed
The TFT display and SD card module both use SPI, which means they share the MOSI, MISO, and SCK lines on the ESP32. Only the CS (chip select) pins differ, which is how the ESP32 talks to them independently.
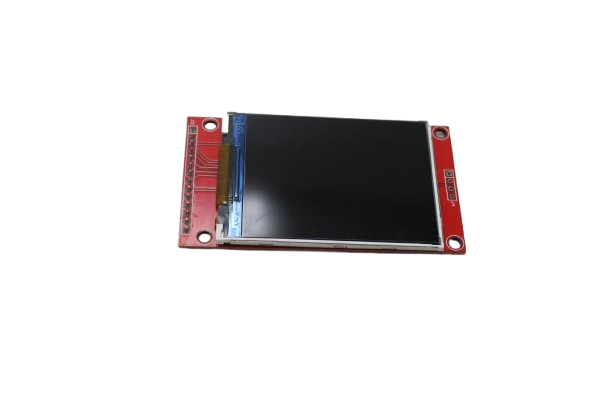
2.4-Inch SPI Interface 240×320 TFT Display Module
A 240×320 ILI9341-based SPI TFT display without touch — ideal for ESP32 JPEG image display projects. Clean pin layout, no soldering hassles.
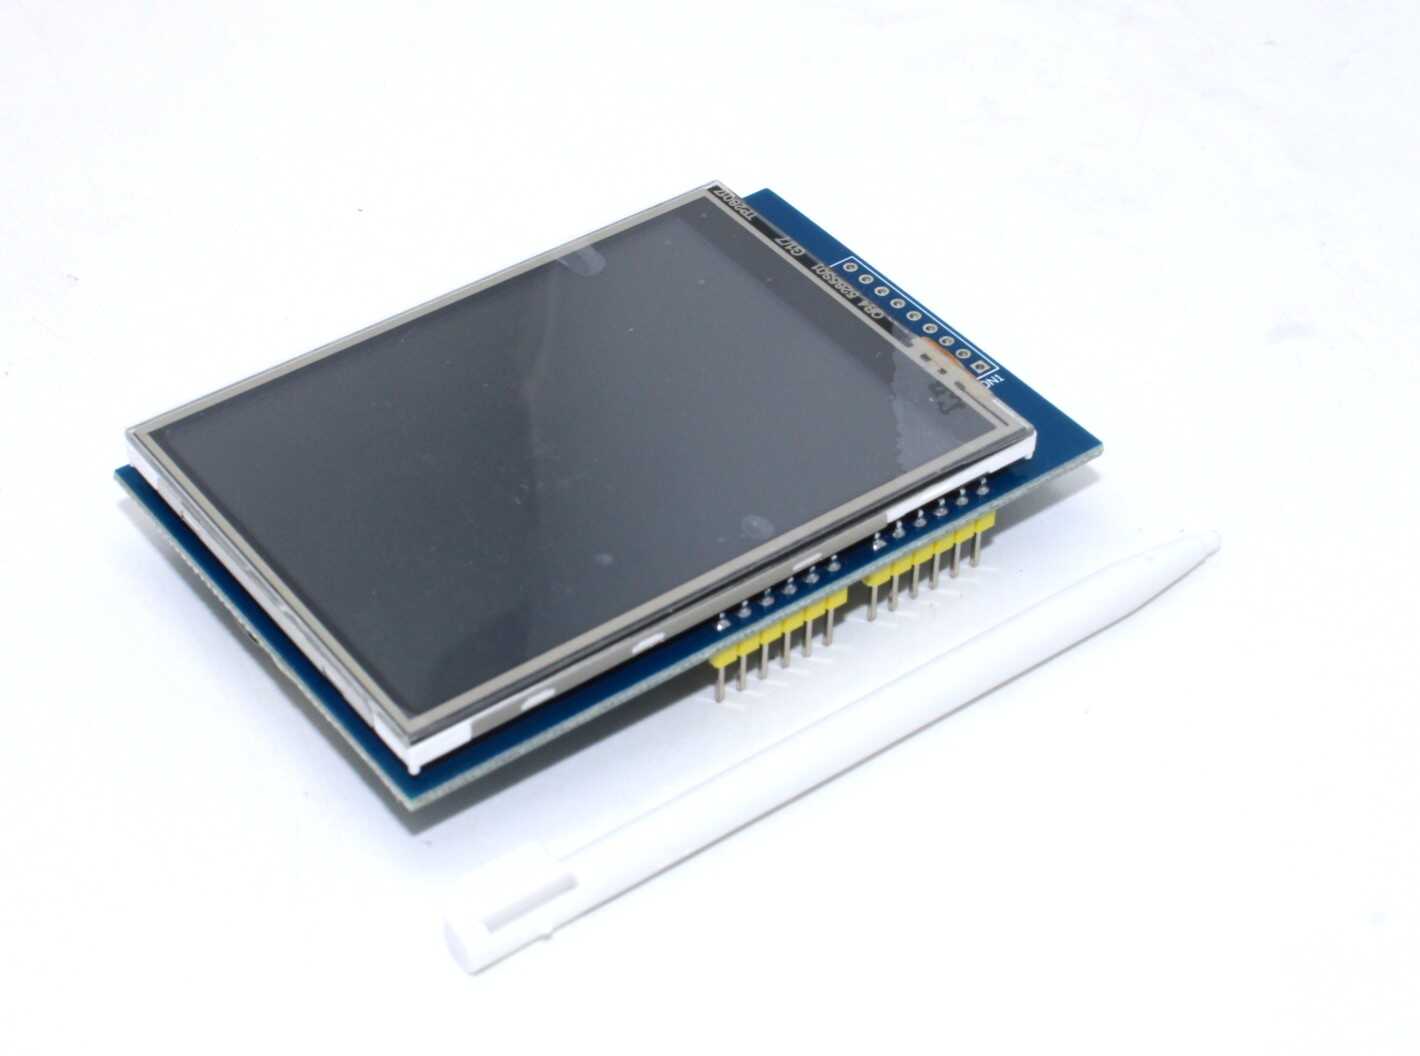
2.8 Inch ILI9341 TFT Full-Color Touch Screen Module 320×240
The popular ILI9341 2.8-inch TFT with touch support and a built-in SD card slot — one board handles both display and SD card storage.

Micro SD Card Reader Module
A standard SPI micro SD card reader module. Works at both 3.3V and 5V with the onboard level shifter. Perfect for storing JPEG images for your display project.
Wiring the TFT LCD and SD Card to ESP32
Both the TFT display and SD card module use SPI. On ESP32, the default SPI pins are:
- MOSI: GPIO 23
- MISO: GPIO 19
- SCK: GPIO 18
- TFT CS: GPIO 15
- TFT DC: GPIO 2
- TFT RST: GPIO 4
- SD CS: GPIO 5
Connect both modules to the same MOSI/MISO/SCK lines. Use separate CS pins for each device. Power the TFT at 3.3V; the SD module usually has a built-in level shifter and accepts 5V or 3.3V.
Setting Up Libraries in Arduino IDE
Install the following libraries via Arduino IDE’s Library Manager (Sketch → Include Library → Manage Libraries):
- TFT_eSPI by Bodmer — the best TFT library for ESP32. Supports ILI9341, ST7789, ST7735, and more.
- JPEGDEC by Larry Bank — a fast JPEG decoder for microcontrollers. Available in the Library Manager.
- SD — the built-in Arduino SD library (already included with ESP32 board package).
After installing TFT_eSPI, you must configure it for your specific display. Open the User_Setup.h file inside the TFT_eSPI library folder and set the correct driver (e.g., #define ILI9341_DRIVER) and pin definitions matching your wiring.
Preparing JPEG Images for the SD Card
Not all JPEG files work equally well on small TFT displays. Follow these best practices:
- Resize to display resolution: For a 240×320 display, resize your images to 240×320 pixels. Use free tools like GIMP, Paint.NET, or an online resizer. Larger images can still be decoded but take more time and RAM.
- Use progressive JPEG or baseline JPEG: The JPEGDEC library works best with standard (baseline) JPEG files. Avoid progressive JPEGs.
- Keep file size under 100KB: Smaller files decode faster. For a 240×320 image, 30–80 KB is typical with good quality at JPEG quality 80–90.
- Name files simply: Avoid spaces or special characters. Use names like
image1.jpg,photo.jpg. - Format SD card as FAT32: Use Windows disk management or
mkfs.faton Linux. FAT32 is mandatory for the Arduino SD library.
Arduino Code to Display JPEG on TFT LCD
Here is a working sketch for ESP32 + ILI9341 TFT + SD card JPEG display:
#include <TFT_eSPI.h>
#include <SD.h>
#include <JPEGDEC.h>

TFT_eSPI tft = TFT_eSPI();
JPEGDEC jpeg;
File myFile;

#define SD_CS 5

// Callback to draw decoded JPEG pixels to TFT
int jpegDrawCallback(JPEGDRAW *pDraw) {
  tft.pushImage(pDraw->x, pDraw->y,
                pDraw->iWidth, pDraw->iHeight,
                pDraw->pPixels);
  return 1;
}

void drawJpeg(const char *filename) {
  myFile = SD.open(filename);
  if (!myFile) {
    Serial.println("Failed to open file");
    return;
  }
  uint32_t fileSize = myFile.size();
  uint8_t *buf = (uint8_t *)malloc(fileSize);
  if (!buf) {
    Serial.println("Not enough RAM");
    myFile.close();
    return;
  }
  myFile.read(buf, fileSize);
  myFile.close();
  if (jpeg.openRAM(buf, fileSize, jpegDrawCallback)) {
    jpeg.decode(0, 0, 0);
    jpeg.close();
  }
  free(buf);
}

void setup() {
  Serial.begin(115200);
  tft.init();
  tft.setRotation(1);
  tft.fillScreen(TFT_BLACK);
  if (!SD.begin(SD_CS)) {
    Serial.println("SD card init failed!");
    return;
  }
  Serial.println("SD card OK");
  drawJpeg("/image1.jpg");
}

void loop() {
  // Slideshow: every 5 seconds show next image
  delay(5000);
  tft.fillScreen(TFT_BLACK);
  drawJpeg("/image2.jpg");
  delay(5000);
  tft.fillScreen(TFT_BLACK);
  drawJpeg("/image1.jpg");
}
This code reads the JPEG from the SD card into a RAM buffer, then decodes and renders it directly onto the TFT. The ESP32’s 320KB SRAM is usually enough for images under 100KB. For larger images, use the JPEGDEC file-based decoder which streams data without loading the whole file.

30-Pin ESP32 Expansion Board with Type-C USB
A handy ESP32 expansion board with clearly labeled pins, Type-C USB, and easy breadboard compatibility — perfect for TFT + SD card wiring.
Troubleshooting Common Issues
- White or blank screen: Check your TFT_eSPI User_Setup.h pin configuration. Ensure the correct driver chip is selected (ILI9341 vs ST7789). Confirm power connections.
- SD card init failed: Format the card as FAT32 (not exFAT). Try a different CS pin. Ensure 3.3V logic levels — SD cards are sensitive to 5V signalling.
- JPEG doesn’t display or shows garbage: The file might be a progressive JPEG. Re-export from GIMP as a baseline JPEG. Check that the file name matches exactly (case-sensitive on some SD card libraries).
- Out of memory crash: Use the file-based JPEGDEC decoder instead of the RAM-based one, or reduce JPEG quality and file size.
- TFT works but SD doesn’t: Both use SPI — check that MOSI/MISO/SCK are shared correctly and only CS pins differ. Add a 100nF decoupling capacitor near the SD module’s power pin.
Project Ideas: What to Build Next
Once you have JPEG display working on TFT with ESP32, you can extend it into exciting projects:
- Digital Photo Frame: Automatically cycle through all JPEGs on the SD card as a slideshow. Add WiFi over-the-air image updates.
- Weather Station UI: Download weather icons and background images over WiFi, store on SD, and display them with real-time sensor data overlaid using TFT_eSPI’s text rendering.
- Custom Boot Screen: Show a branded splash screen for your ESP32-based product or gadget.
- Game Assets: Store game sprites as JPEG/PNG on SD card for a simple 2D game on TFT.
- QR Code Display: Combine JPEG backgrounds with dynamically generated QR codes using the QRcode library.
Frequently Asked Questions
Can ESP32 display PNG images on TFT?
Yes, but PNG decoding requires more RAM and processing power than JPEG. Use the PNGdec library by Larry Bank. For most hobbyist display projects in India, JPEG is recommended over PNG due to better performance on ESP32.
Which TFT display size is best for JPEG slideshow on ESP32?
A 2.4-inch (240×320) or 2.8-inch (240×320) ILI9341 display is ideal. The resolution perfectly matches typical web/camera images after resizing, and the screen is large enough to appreciate image quality without straining ESP32’s memory.
Do I need a separate SD card module if my TFT has a built-in SD slot?
No. Many TFT modules like the 2.8-inch ILI9341 shield include an onboard SD card slot. This saves wiring and a separate module. The onboard SD shares the SPI bus with the display, with its own CS pin.
What is the maximum JPEG image size ESP32 can decode?
ESP32 has about 320KB of internal SRAM. A typical 240×320 JPEG at 80% quality is around 30–60KB. Files up to ~200KB can often be decoded using the file-based streaming approach in JPEGDEC. Images larger than 320×240 pixels will be automatically scaled down.
Can I use an ESP8266 instead of ESP32 for this project?
Technically yes, but ESP8266 has only 80KB of RAM, which makes large JPEG decoding unreliable. ESP32 is strongly recommended for any JPEG image display project. ESP32 boards are available at Zbotic at very competitive prices in India.
Get Your ESP32 + TFT Display Combo Today
Build your JPEG display project with quality components from Zbotic. Fast shipping across India, competitive prices, and genuine components.


Add comment