
The TCS34725 color sensor is one of the most popular light-to-digital converters for Arduino projects. It senses red, green, and blue (RGB) light intensities through a built-in IR filter and converts them to 16-bit digital values over an I2C interface. From sorting candy by colour to detecting liquid samples in chemistry experiments, the TCS34725 is a flexible and affordable sensor that opens up a wide range of creative projects.
This tutorial walks you through everything you need to get the TCS34725 color sensor working with Arduino — wiring, library setup, reading RGB values, converting to hex colour codes, and calibrating for real-world use.
TCS34725 Overview and Specifications
The TCS34725 is manufactured by ams-OSRAM (formerly Texas Advanced Optoelectronic Solutions). It is widely available in a breakout board form factor that makes it easy to prototype with.
| Parameter | Value |
|---|---|
| Supply Voltage | 3.3 V – 5 V |
| Interface | I2C (address 0x29) |
| Output Resolution | 16-bit per channel (RGBC) |
| Gain Options | 1x, 4x, 16x, 60x |
| Integration Time | 2.4 ms – 700 ms |
| IR Filter | Built-in |
| White LED | On-board (some breakout boards) |
| Current Consumption | ~65 µA (idle), ~235 µA (active) |
How the TCS34725 Works
Inside the TCS34725 are four photodiodes: one each for red, green, blue, and a clear (broadband) channel. An internal infrared cut filter improves colour accuracy under different ambient lighting conditions. The analog output of each photodiode is fed through a 16-bit ADC. The resulting digital values (called raw RGBC counts) are read by the microcontroller over I2C.
The raw counts are not directly usable as 0-255 RGB values. They depend on the integration time, gain setting, and incident light level. To get true colour values you need to normalise the raw counts relative to the clear channel and scale them to a 0–255 range.
Wiring TCS34725 to Arduino
The TCS34725 breakout board from Adafruit (and compatible boards) uses I2C. The wiring is straightforward.
| TCS34725 Pin | Arduino Uno/Nano | Notes |
|---|---|---|
| VIN / VCC | 5V | Board has onboard 3.3V regulator |
| GND | GND | Common ground |
| SDA | A4 | I2C data |
| SCL | A5 | I2C clock |
| LED | Any digital pin (optional) | Controls on-board white LED |
Important: Keep probe wires short (under 15 cm). Long wires on I2C buses introduce capacitance that can cause intermittent read failures, especially at the default 100 kHz bus speed.
Installing the Adafruit TCS34725 Library
Open Arduino IDE, go to Sketch → Include Library → Manage Libraries, search for Adafruit TCS34725 and install it. Also install the Adafruit Unified Sensor dependency if prompted.
Alternatively, install via Arduino CLI:
arduino-cli lib install "Adafruit TCS34725"
arduino-cli lib install "Adafruit Unified Sensor"
Basic Arduino Code: Read RGB Values
This sketch reads raw RGBC counts and converts them to normalised 0-255 RGB values every second.
#include <Wire.h>
#include <Adafruit_TCS34725.h>

// Integration time 50ms, gain 4x
Adafruit_TCS34725 tcs = Adafruit_TCS34725(
  TCS34725_INTEGRATIONTIME_50MS,
  TCS34725_GAIN_4X
);

void setup() {
  Serial.begin(9600);
  if (!tcs.begin()) {
    Serial.println("TCS34725 not found. Check wiring!");
    while (1);
  }
  Serial.println("TCS34725 ready.");
}

void loop() {
  uint16_t r, g, b, c;
  tcs.getRawData(&r, &g, &b, &c);

  // Avoid division by zero
  if (c == 0) {
    Serial.println("No light detected.");
    delay(1000);
    return;
  }

  // Normalise to 0-255
  uint8_t red   = (uint8_t)((float)r / c * 255);
  uint8_t green = (uint8_t)((float)g / c * 255);
  uint8_t blue  = (uint8_t)((float)b / c * 255);

  Serial.print("R:"); Serial.print(red);
  Serial.print(" G:"); Serial.print(green);
  Serial.print(" B:"); Serial.println(blue);

  delay(1000);
}
Open the Serial Monitor at 9600 baud. You should see RGB values printed every second. Point the sensor at different coloured objects to see the values change.
Converting RGB to Hex Color Code
Hex colour codes are the standard format used in web design and graphic tools. Converting from RGB to hex is simple in Arduino:
// After computing red, green, blue (0-255):
char hexColor[8];
snprintf(hexColor, sizeof(hexColor), "#%02X%02X%02X", red, green, blue);
Serial.print("Hex: ");
Serial.println(hexColor);
For example, a reading of R:220, G:45, B:60 would produce hex #DC2D3C — a shade of deep red. You can paste this value directly into any colour picker tool to visualise it.
Practical tip: The TCS34725 hex value will not perfectly match the printed colour on a surface. Real-world factors like ambient light colour temperature, surface gloss, and viewing angle all affect readings. Treat the hex output as an approximation rather than a reference measurement — it is more than sufficient for sorting or detection tasks.
Setting Gain and Integration Time
These two parameters control the sensor’s sensitivity and response speed. Getting them right for your environment makes a significant difference.
Integration Time
Integration time is how long the sensor accumulates light before producing a reading. Longer integration time means higher sensitivity but slower readings.
TCS34725_INTEGRATIONTIME_2_4MS— fastest (2.4 ms), use in very bright environmentsTCS34725_INTEGRATIONTIME_50MS— good general-purpose settingTCS34725_INTEGRATIONTIME_700MS— most sensitive, use in dim environments
Gain
Gain amplifies the photodiode signal internally.
TCS34725_GAIN_1X— for very bright environmentsTCS34725_GAIN_4X— general purposeTCS34725_GAIN_16X— moderate ambient lightTCS34725_GAIN_60X— very dim conditions
If the clear channel value is saturating (reaching 65535), reduce the gain or integration time. If readings are noisy (vary widely between stable readings), increase gain or integration time.
White Balance Calibration
For accurate colour detection across different surfaces, a white balance step is essential. The concept is simple: measure a known white surface and use those values as a reference to scale all future measurements.
// Step 1: Capture white reference
uint16_t r_white, g_white, b_white, c_white;
tcs.getRawData(&r_white, &g_white, &b_white, &c_white);

// Step 2: In subsequent readings, scale by white reference
float r_cal = (float)r / r_white * 255;
float g_cal = (float)g / g_white * 255;
float b_cal = (float)b / b_white * 255;

// Clamp to 0-255
r_cal = constrain(r_cal, 0, 255);
g_cal = constrain(g_cal, 0, 255);
b_cal = constrain(b_cal, 0, 255);
After white balance calibration, a red target should produce high R, low G, low B — a much more reliable result than uncalibrated raw values.
Project Ideas with TCS34725
Colour Sorting Machine
Combine the TCS34725 with a servo motor to build a candy or tablet sorter. The sensor reads the colour of each item on a conveyor belt; the Arduino triggers a servo to divert items into colour-coded bins. This is a popular robotics competition project in India.
Liquid Quality Monitor
Point the sensor at a transparent vial of liquid. The colour of the transmitted light indicates turbidity and chemical composition. Useful for basic water quality checks or chemistry demonstrations.
Colorimetric pH Indicator
Use pH indicator paper or drops in a solution. The TCS34725 reads the colour of the indicator and the Arduino maps it to an approximate pH value — a simple, low-cost pH estimation without a dedicated pH electrode.
RGB LED Colour Matching
Scan a surface and drive an RGB LED to match the detected colour in real time. A great way to build an ambient colour light that adapts to its environment.
Plant Health Monitor
The colour of plant leaves changes as chlorophyll concentration drops (stressed or nutrient-deficient plants turn yellow or pale). A TCS34725 pointed at a leaf can give a quantitative measure of greenness over time.
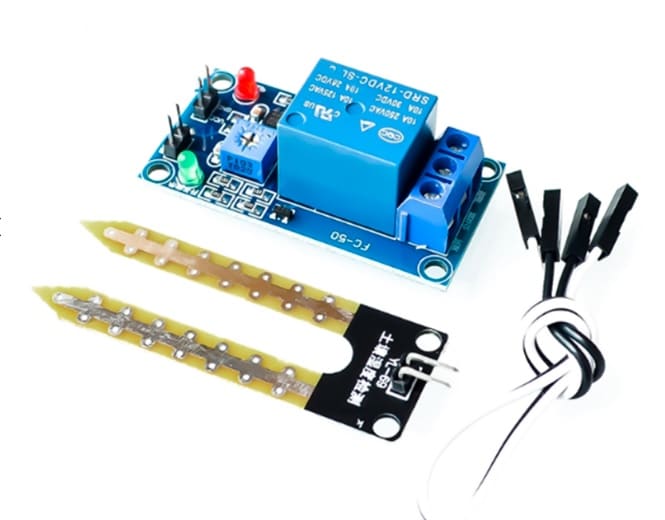
5V 12V Soil Moisture Sensor Relay Control Module
Pair with a TCS34725 leaf-colour monitor to build a comprehensive plant health station — moisture + colour in one system.
Troubleshooting Common Issues
Sensor Not Detected (“TCS34725 not found”)
- Double-check SDA/SCL connections — these are the most common wiring errors.
- Run the Arduino Wire library I2C scanner sketch and confirm address 0x29 appears.
- Verify 3.3 V or 5 V supply is present on VIN.
- Some cheap clones have the I2C address shifted to 0x28 — check your board’s datasheet.
Readings All Zero
- The sensor is powered but the integration has not completed. Add a delay of at least 60 ms after
tcs.begin()before the first read. - Check that light can actually reach the sensor — if it is face-down on the table you get zero.
Saturated Clear Channel (value = 65535)
- Reduce gain to 1x.
- Reduce integration time to 2.4 ms.
- Move the sensor farther from the light source or surface.
Readings Unstable / Fluctuating Wildly
- Ambient light interference. Shield the sensor from external light using a tube or dark enclosure.
- Enable the on-board white LED to provide consistent illumination independent of ambient light.
- Average multiple readings (e.g., 10 samples) before using the value.

BMP280 Barometric Pressure and Altitude Sensor I2C/SPI Module
Add environmental context to your colour sensing project — both BMP280 and TCS34725 use I2C and can share the same bus.
Frequently Asked Questions
Q: Can the TCS34725 detect colour through glass?
A: Yes, clear glass does not significantly attenuate visible light. Tinted glass will shift the readings. This makes it suitable for liquid colour detection in transparent containers.
Q: What is the detection range of the TCS34725?
A: The sensor is designed for close-range measurements — typically 3–10 mm from the surface. Beyond 15 mm, ambient light overwhelms the signal unless you use a shroud and controlled LED illumination.
Q: Can I use the TCS34725 with ESP8266 or ESP32?
A: Yes. Wire SDA to GPIO 21 and SCL to GPIO 22 on ESP32, or GPIO 4 (SDA) and GPIO 5 (SCL) on ESP8266. The Adafruit library works without modification.
Q: What is the difference between the clear channel and RGB channels?
A: The clear (C) channel measures broadband light (the full visible spectrum) without colour filtering. It is used as a reference to normalise the RGB channel readings and compensate for changes in overall light intensity.
Q: Can I distinguish between two similar shades of the same colour?
A: With careful white balance calibration, the TCS34725 can distinguish between quite similar shades. The key is consistent illumination — use the on-board white LED and shade external light for repeatable results.
Conclusion
The TCS34725 is a versatile, affordable, and easy-to-use colour sensor that integrates cleanly with Arduino via I2C. With the Adafruit library, reading RGB values is just a few lines of code, and converting to hex colour codes opens up connectivity with web tools and visual displays. The key to reliable results is proper gain/integration tuning, white balance calibration, and shielding the sensor from uncontrolled ambient light.
Explore more sensors and electronics components for your next Arduino project at Zbotic — India’s trusted source for hobbyist electronics.
Build Your Sensor Collection
Find sensors, modules, and Arduino accessories at Zbotic — shipped fast across India.


Add comment