
Building a Raspberry Pi camera surveillance system with motion detection is one of the most practical and rewarding projects you can do with a Raspberry Pi. Whether you want to monitor your home, office, warehouse, or farm in India, a Raspberry Pi-based surveillance system gives you full control over your data without monthly subscription fees. In this detailed step-by-step guide, we’ll walk you through building a complete motion detection surveillance camera from scratch.
Project Overview and Requirements
This project creates a fully functional IP surveillance camera with motion detection using a Raspberry Pi and a camera module. The system will:
- Stream live video accessible over your local network or the internet
- Detect motion and record video clips when movement is detected
- Send email or Telegram notifications when motion is detected
- Store recordings locally on the SD card or externally on a USB drive or NAS
- Support multiple cameras (with the right Pi model)
Components Required
- Raspberry Pi — Pi 4 (4GB recommended), Pi 5, or Pi 3B+ minimum
- Raspberry Pi Camera Module — V2, HQ, or Arducam (see camera section)
- MicroSD Card — 32GB or larger, Class 10 A1 minimum
- 5V Power Supply — 3A for Pi 4, 5A PD for Pi 5
- Camera mount or case with camera window
- Optional: PIR motion sensor, IR LEDs for night vision, USB drive for extra storage
The software stack we’ll use is:
- Raspberry Pi OS Lite (headless, for efficiency)
- Motion — open-source motion detection daemon
- MotionEye — web-based GUI frontend for Motion
- Telegram Bot API or SMTP email for alerts

Raspberry Pi 5 Model 4GB RAM
The Raspberry Pi 5 with 4GB RAM is ideal for running a multi-camera surveillance system — it handles 1080p video processing and motion detection without breaking a sweat.
Choosing the Right Camera Module
The camera module you choose will determine your video quality, low-light performance, and field of view. Here’s a comparison of the main options for a Raspberry Pi surveillance system:
Raspberry Pi Camera Module V2 (8MP)
The standard Raspberry Pi Camera Module V2 uses the Sony IMX219 sensor, captures 8MP still images, and records up to 1080p video at 30fps. It’s the most affordable official camera and works flawlessly with Raspberry Pi OS. For indoor surveillance in well-lit environments, this is a solid choice.
Raspberry Pi High Quality Camera (12MP)
The HQ Camera uses the Sony IMX477 sensor with C/CS-mount lens compatibility. The interchangeable lens system allows you to use wide-angle, telephoto, or fisheye lenses — giving you full flexibility for your surveillance setup. If you need to monitor a large area like a warehouse or a farm, the ability to attach a wide-angle lens makes this the best choice.
Arducam PTZ Camera (Pan-Tilt-Zoom)
For comprehensive coverage, an Arducam Pan-Tilt-Zoom camera allows you to remotely pan, tilt, and zoom without physically moving the camera. These are ideal for monitoring a wide area from a single installation point.
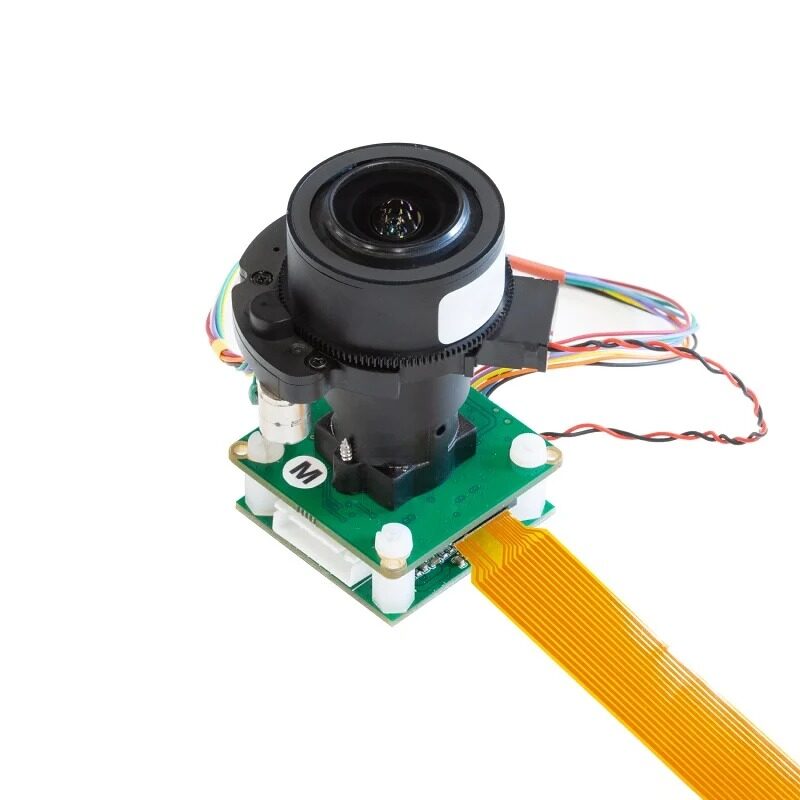
Arducam 12MP IMX477 Pan-Tilt-Zoom IR-Cut Camera for Raspberry Pi
Professional-grade 12MP PTZ camera with IR-Cut filter switching for true-colour daytime and infrared night vision — perfect for a comprehensive home or office surveillance setup.
USB Camera Option
If you don’t have a CSI camera module, a standard USB webcam also works well with the Motion software stack. USB cameras are more universally compatible and easier to position (longer cable reach).
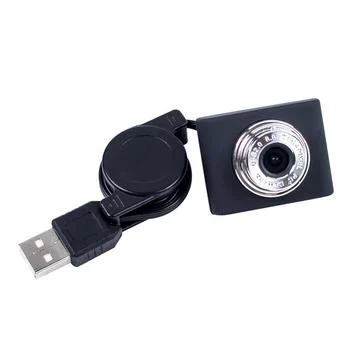
1/4 CMOS 640×480 USB Camera with Collapsible Cable for Raspberry Pi
An affordable, plug-and-play USB camera for Raspberry Pi — no driver installation needed, works immediately with Motion and MotionEye for quick surveillance projects.
Hardware Setup and Wiring
Follow these steps to physically set up your Raspberry Pi surveillance camera:
Step 1: Connect the Camera Module
For CSI cameras (Raspberry Pi Camera V2 or HQ Camera):
- Power off the Raspberry Pi completely
- Locate the CSI camera port (labelled CAMERA or CAM on the board)
- Gently lift the plastic retaining clip
- Insert the ribbon cable with the blue side facing away from the connector
- Press the clip down to secure the cable
For USB cameras, simply plug into any USB port on the Raspberry Pi — no ribbon cable needed.
Step 2: Mount the Camera
Position your camera for maximum coverage. Consider these mounting tips:
- Entrance monitoring: Mount at head height, angled slightly downward
- Room overview: Mount in a corner near the ceiling, angled diagonally across the room
- Outdoor: Ensure the camera and Pi are in an IP65-rated weatherproof enclosure
- Cable management: Use the Arducam extension ribbon cable if you need extra reach between the Pi and the camera mount
Step 3: Optional PIR Motion Sensor
For hardware-triggered motion detection (more power-efficient than software detection), connect a PIR sensor:
- PIR VCC → Pi 5V (Pin 2)
- PIR GND → Pi GND (Pin 6)
- PIR Output → Pi GPIO 17 (Pin 11)
You can configure the system to only start recording when the PIR sensor triggers, reducing false positives from lighting changes or insects.
Software Installation: Motion and MotionEye
We’ll use MotionEyeOS, a dedicated OS built specifically for Raspberry Pi surveillance systems, or install MotionEye on top of Raspberry Pi OS. The MotionEyeOS approach is easier for dedicated camera systems.
Option A: MotionEyeOS (Recommended for Dedicated Systems)
- Download MotionEyeOS image for your Pi model from the official GitHub repository
- Flash it to your microSD card using Raspberry Pi Imager
- Boot your Pi — it will auto-configure on first boot
- Connect to your network via WiFi or Ethernet
- Access the web interface at
http://[pi-ip-address]
Option B: MotionEye on Raspberry Pi OS
Install on top of a standard Raspberry Pi OS Lite installation:
# Update system
sudo apt update && sudo apt upgrade -y

# Install dependencies
sudo apt install python3-pip python3-dev libssl-dev libcurl4-openssl-dev libjpeg-dev libz-dev -y

# Install Motion
sudo apt install motion -y

# Install MotionEye
sudo pip3 install motioneye

# Setup MotionEye
sudo motioneye_init

# Start service
sudo systemctl enable --now motioneye
Access the MotionEye dashboard at http://[your-pi-ip]:8765. Default login: username admin, no password.
Enable the Camera
If using a CSI camera module, enable it first:
sudo raspi-config
# Navigate to Interface Options → Camera → Enable
# Reboot
On Raspberry Pi OS Bookworm, the camera stack has changed to libcamera. Check that the camera is detected with:
libcamera-hello --list-camerasConfiguring Motion Detection
MotionEye provides an intuitive web interface for configuring all motion detection settings. Here are the key settings to configure:
Video Settings
- Resolution: 1280×720 (720p) is a good balance of quality and CPU load. Use 1920×1080 for Pi 4/5 with sufficient cooling.
- Frame Rate: 15-25 fps for smooth video. Lower frame rates reduce CPU and storage usage.
- Video Quality: 75-85% JPEG quality gives good image quality without excessive file sizes.
Motion Detection Settings
- Frame Change Threshold: The percentage of pixels that must change to trigger motion detection. Set to 1-2% to catch real movement while ignoring camera noise.
- Minimum Motion Frames: Require motion to persist for 3-5 frames before triggering — reduces false alarms from insects or brief shadows.
- Motion Gap: How long to wait (in seconds) after the last motion before ending a recording. 10-30 seconds is typical.
- Pre-capture Buffer: Record 2-5 seconds before motion is detected — ensures you capture the beginning of an event.
- Motion Mask: Draw a mask over areas of the image to ignore (like a busy road visible through a window).
Storage Settings
- Movies Storage: Set to your desired directory. For external storage, mount a USB drive and point MotionEye to that location.
- Movie Format: MP4 (H.264) gives the best balance of quality and file size.
- Preserve Movies: Configure automatic deletion of old recordings after 7-30 days to prevent storage overflow.
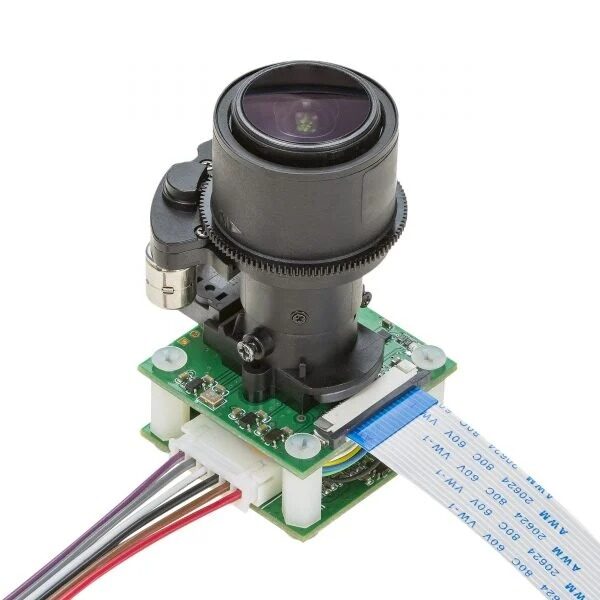
Arducam 5MP 1080p Pan-Tilt-Zoom PTZ Camera for Raspberry Pi
Full 1080p resolution with motorised pan and tilt — control the camera angle remotely through MotionEye’s web interface. Covers a wide area without moving the Pi itself.
Setting Up Alerts and Remote Viewing
Getting notified when motion is detected is essential for a practical surveillance system. Here’s how to set up alerts:
Telegram Bot Notifications
Telegram is extremely popular in India and makes an excellent notification channel. Create a Telegram bot using BotFather and note the bot token and your chat ID. Then create a motion detection script:
#!/bin/bash
# /home/pi/notify.sh
BOT_TOKEN="your_bot_token"
CHAT_ID="your_chat_id"
MESSAGE="Motion detected at $(date '+%Y-%m-%d %H:%M:%S')!"

curl -s -X POST "https://api.telegram.org/bot$BOT_TOKEN/sendMessage"
  -d "chat_id=$CHAT_ID"
  -d "text=$MESSAGE"

# Optionally send the snapshot image
curl -s -X POST "https://api.telegram.org/bot$BOT_TOKEN/sendPhoto"
  -F "chat_id=$CHAT_ID"
  -F "photo=@$1"
In MotionEye, set this script as the “Run a Command” action under Motion Notifications.
Remote Viewing via Tailscale VPN
For secure remote viewing from anywhere in India or abroad without exposing your Pi to the internet, install Tailscale (a modern VPN):
curl -fsSL https://tailscale.com/install.sh | sh
sudo tailscale up
After setup, you can access your MotionEye dashboard using the Pi’s Tailscale IP address from any device running Tailscale — your phone, laptop, or tablet.
Port Forwarding (Alternative)
If you prefer direct internet access, forward port 8765 (MotionEye) from your router to the Raspberry Pi’s local IP. Use a dynamic DNS service (like No-IP or DuckDNS) if you have a dynamic IP from your Indian ISP. Note: this approach is less secure than a VPN and requires careful firewall configuration.
ONVIF Compatibility
For integration with professional NVR (Network Video Recorder) software or smart home systems like Home Assistant, you can add ONVIF protocol support to your Raspberry Pi camera using the onvif_srvd daemon, making it appear as a standard IP camera to any ONVIF-compatible software.
Frequently Asked Questions
Can the Raspberry Pi surveillance camera work without internet?
Yes, the system works completely offline on your local network. You can view the live stream and recorded footage from any device on your home network without internet. Internet is only needed for remote viewing and Telegram/email alerts.
How much storage does a Raspberry Pi surveillance camera use?
Storage usage depends on resolution, frame rate, and how much motion your camera detects. At 720p, 15fps, a typical home camera generates approximately 1-3 GB of recordings per day. A 32GB SD card holds about 10-30 days of recordings with automatic deletion of old files enabled.
Does the Raspberry Pi camera work in the dark?
Standard Pi camera modules do not have IR LEDs for true night vision. The Arducam PTZ cameras with IR-cut filter switching can switch between colour mode (daytime) and IR mode (night) if you add external IR illuminators. Alternatively, a camera positioned under artificial lighting works well for indoor use.
How many cameras can one Raspberry Pi support?
One Raspberry Pi can typically support 1-2 CSI cameras (the Pi 5 has two CSI ports) or 2-4 USB cameras, depending on the Pi model and resolution settings. For more cameras, use multiple Pi units managed by a central MotionEye server, or use the Raspberry Pi as a network video recorder aggregating RTSP streams from IP cameras.
Is a Raspberry Pi surveillance camera legal in India?
Surveillance cameras for monitoring your own property (home, office, shop) are legal in India. You must not install cameras in bathrooms, changing rooms, or any space where people have a reasonable expectation of privacy. If cameras cover public areas or neighbouring properties, consult local regulations. Always inform employees or household members that the premises are under CCTV surveillance.
Build Your Raspberry Pi Surveillance System with Zbotic
Get all the cameras, Raspberry Pi boards, and accessories you need from Zbotic — India’s trusted electronics store. We stock Arducam PTZ cameras, USB cameras, Raspberry Pi boards, and all accessories needed for a complete surveillance build, with fast shipping across India.


Add comment