
A breathalyzer is one of the most educational and practically relevant projects you can build with an Arduino. It combines sensor science, analog signal processing, calibration methodology, and real-world safety applications in one compact device. The MQ3 alcohol sensor is the standard hobbyist choice for detecting ethanol vapor — and when combined with an Arduino, a display, and careful calibration, it can produce meaningful breath alcohol concentration estimates.
In this comprehensive project guide, you will learn how the MQ3 electrochemical sensor works, how to perform the critical calibration procedure that makes the difference between a toy and a useful instrument, how to display readings on an LCD, and how to understand the important limitations of this type of sensor. Let us build it step by step.
What Is the MQ3 Alcohol Sensor?
The MQ3 is a chemo-resistive gas sensor manufactured by Winsen Electronics specifically for detecting alcohol vapors (ethanol). It is the same basic MQ-series sensor family used for LPG (MQ2), propane (MQ5), methane (MQ4), CO (MQ7), and air quality (MQ135) — but the MQ3 uses a tin dioxide sensing layer formulated to be most sensitive to ethanol while being less sensitive to other gases like benzene, hexane, and carbon monoxide.
Key specifications of the MQ3 sensor:
- Target gas: Alcohol (ethanol) vapor
- Detection range: 25–500 ppm (parts per million) alcohol
- Heater voltage: 5V ± 0.1V
- Heater power consumption: ~800mW (this is why preheat time is needed)
- Operating temperature: -10°C to 50°C
- Operating humidity: Less than 95% RH
- Sensitivity: Rs/Ro > 5 at 100 ppm alcohol
- Response time: Less than 10 seconds
- Recovery time: Less than 30 seconds
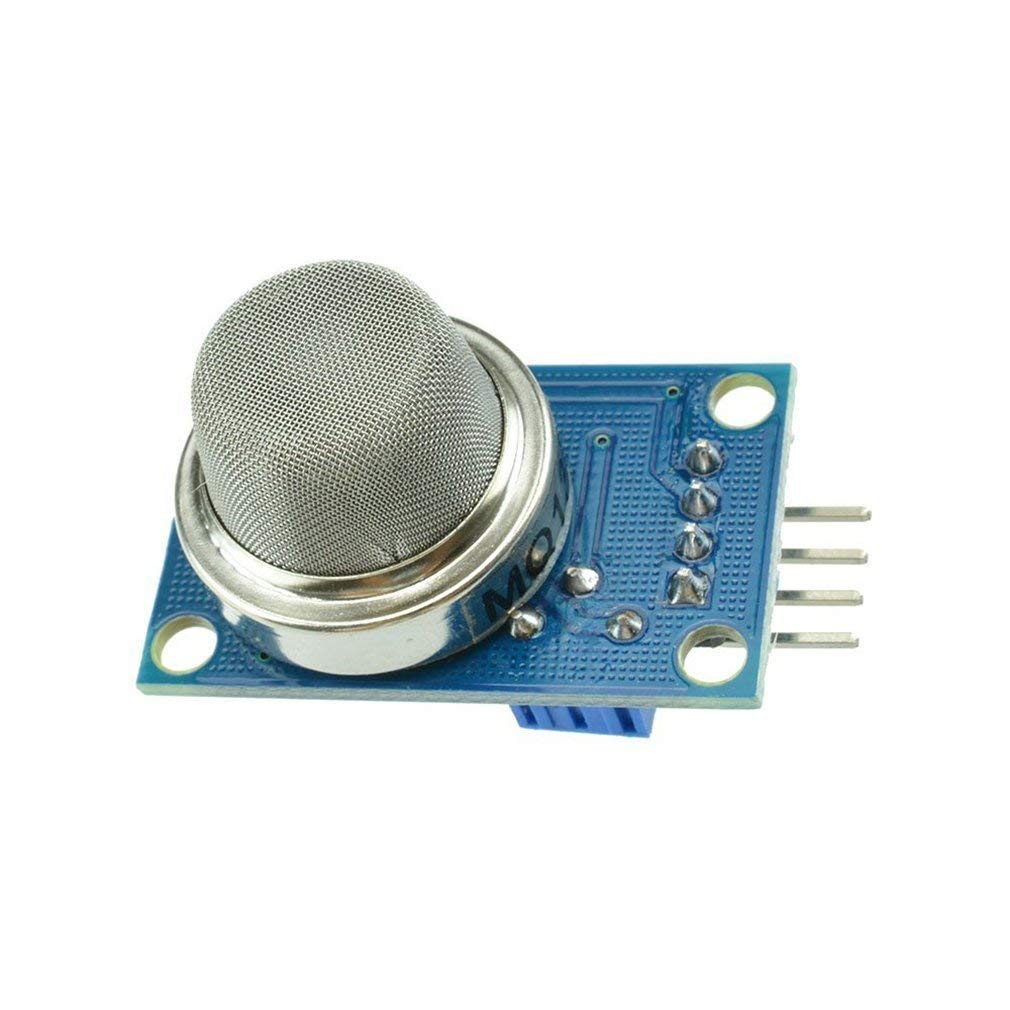
The MQ3 is available as a bare sensor (metal can with 6 pins) or as a module (with breakout PCB, load resistor, LM393 comparator, and power/signal LEDs). For Arduino projects, always use the module — it provides both analog and digital outputs with proper load resistor included.
How the MQ3 Chemi-Resistive Sensor Works
Inside the MQ3’s stainless steel mesh enclosure sits a ceramic tube coated with tin dioxide (SnO2) sensing material and an embedded nichrome heater wire. Here is what happens during operation:
- Heating phase: The nichrome heater raises the SnO2 layer to its operating temperature (~200°C). This activation temperature is required for the chemi-resistive reactions to occur.
- Clean air state: In clean air, oxygen molecules adsorb onto the SnO2 surface, capturing electrons and increasing the material’s electrical resistance. This is the baseline resistance (R0).
- Alcohol exposure: Ethanol molecules react with the adsorbed oxygen, releasing the captured electrons back to the SnO2 crystal. This decreases the resistance (Rs < R0).
- Measurement: The change in resistance is measured by the load resistor (RL) in series with the sensing element. The voltage across RL (Vout) increases as ethanol concentration increases.
The relationship between gas concentration and sensor resistance follows a logarithmic power law from the MQ3 datasheet:
log(Rs/R0) = m × log(ppm) + b

Or equivalently:
ppm = 10^((log(Rs/R0) - b) / m)

For MQ3 alcohol: m ≈ -0.68, b ≈ 1.8 (from datasheet curve fitting)
MQ3 vs MQ135: Which to Choose?
| Feature | MQ3 | MQ135 |
|---|---|---|
| Primary target | Ethanol / alcohol | Air quality (CO2, NH3, benzene) |
| Alcohol sensitivity | Highest (optimized for ethanol) | Moderate |
| Cross-sensitivity | Benzene, hexane affect reading | Responds to many gases |
| Best use | Breathalyzer, alcohol detection | Air quality monitor |
| Range | 25–500 ppm alcohol | 10–1000 ppm CO2 equivalent |
For a breathalyzer project, always use the MQ3. The MQ135 is popular but lacks the sensitivity curve optimization for ethanol that makes BAC estimation possible.
Components Required
- MQ3 alcohol sensor module
- Arduino Uno or Nano
- 16×2 LCD display (I2C backpack version recommended)
- Piezo buzzer (for alarm)
- Green LED and Red LED (with 220Ω resistors)
- Push button (trigger breath test)
- 10kΩ resistor (button pull-down)
- 100μF electrolytic capacitor (power decoupling)
- 7805 or equivalent 5V regulator (if using 9V battery)
- 9V battery and connector (or USB power bank)
- Project enclosure box
- Jumper wires and breadboard or PCB
The 7-pin universal sensor socket from Zbotic’s range is also useful for safely swapping between different MQ-series sensors during development without soldering directly to each module.
Wiring the MQ3 Module to Arduino
| MQ3 Module Pin | Arduino Pin | Notes |
|---|---|---|
| VCC | 5V | Must be stable 5V — sensor draws ~150mA |
| GND | GND | Common ground |
| A0 (AOUT) | A0 | Analog output — use for BAC estimation |
| D0 (DOUT) | D2 | Digital threshold output (optional alarm) |
Power supply note: The MQ3 heater draws approximately 150–180mA during operation. The Arduino 5V pin can supply only 200mA, leaving very little headroom for the LCD and other components. Always power the MQ3 module directly from the power supply (USB power bank or regulated 5V), not via the Arduino’s 3.3V or 5V pins. Use the 100μF capacitor across the MQ3’s power pins to absorb heater current spikes.
Additional wiring for full breathalyzer:
- LCD I2C module: SDA → A4, SCL → A5, VCC → 5V, GND → GND
- Green LED anode → D8 through 220Ω
- Red LED anode → D9 through 220Ω
- Buzzer positive → D10
- Push button: one terminal → D3, other → GND; 10kΩ from D3 to 5V
Preheat Time: Why It Matters
This is the most commonly skipped step — and the most important. The MQ3 heater must bring the SnO2 sensing layer to its operating temperature before readings are valid. This takes time.
- First power-on (cold sensor): 24–48 hours of operation for the sensor to fully stabilize. This is called the “burn-in” period. Skip this and your R0 calibration will drift significantly over the first few days of use.
- Normal warm-up (already burned-in sensor): At least 3 minutes before taking a reading. The sensor’s resistance is not stable during the first few minutes after power-on.
- Indicated on the LCD: During warm-up, display a countdown so the user knows when the sensor is ready.
How to know if warm-up is complete: Monitor the analog output. After power-on, the reading will decrease over 2–3 minutes and then stabilize. Once it is stable for 30 seconds, the sensor is ready for calibration and measurement.
Basic Arduino Code: Reading MQ3 Output
// MQ3 Alcohol Sensor - Basic Reading
// Connect AOUT to A0
// Allow 3 minutes warm-up before trusting readings

const int MQ3_AOUT = A0;
const float RL_VALUE = 200.0;  // Load resistor value in kOhm (from module schematic)
const float RO_CLEAN_AIR = 16.0; // Sensor resistance in clean air (calibrated value)

void setup() {
  Serial.begin(9600);
  Serial.println("MQ3 Warming up...");
  delay(180000); // 3-minute warm-up (MANDATORY)
  Serial.println("MQ3 Ready.");
}

float readSensorResistance() {
  int rawADC = analogRead(MQ3_AOUT);
  float vout = rawADC * (5.0 / 1023.0); // Convert to voltage

  // Calculate sensor resistance using voltage divider formula
  // Rs = RL * (Vcc - Vout) / Vout
  float rs = RL_VALUE * (5.0 - vout) / vout;
  return rs;
}

void loop() {
  float rs = readSensorResistance();
  float ratio = rs / RO_CLEAN_AIR; // Rs/R0 ratio

  Serial.print("Rs: "); Serial.print(rs, 2);
  Serial.print(" kOhm | Rs/R0: "); Serial.print(ratio, 3);
  Serial.println();

  delay(1000);
}
Calibration Procedure and Rs/R0 Ratio
Calibration determines R0 — the sensor resistance in clean air. This is the baseline against which all gas measurements are compared. Without calibration, your sensor output is just a raw ADC number with no physical meaning.
Step-by-Step Calibration
- Take the sensor outdoors or in a well-ventilated room with no alcohol vapors. Let it warm up for at least 5 minutes.
- Read the analog output 50 times over 5 minutes and average the results.
- Calculate Rs in clean air using the voltage divider formula above.
- This Rs value in clean air is your R0.
- Update
RO_CLEAN_AIRin your code with this value.
// Calibration sketch - run once in clean air
void calibrate() {
  float rsSum = 0;
  const int NUM_SAMPLES = 50;

  Serial.println("Calibrating in clean air...");
  for (int i = 0; i < NUM_SAMPLES; i++) {
    int raw = analogRead(MQ3_AOUT);
    float vout = raw * (5.0 / 1023.0);
    float rs = RL_VALUE * (5.0 - vout) / vout;
    rsSum += rs;
    delay(500);
    if (i % 10 == 0) { Serial.print("."); }
  }

  float r0 = rsSum / NUM_SAMPLES;
  Serial.print("nCalibrated R0 = "); Serial.println(r0, 2);
  Serial.println("Update RO_CLEAN_AIR with this value!");
}
Converting Sensor Output to BAC Estimate
Blood Alcohol Concentration (BAC) is measured in g/dL or as a percentage. The MQ3 measures alcohol vapor in ppm in exhaled breath. The relationship between breath alcohol (BrAC) and BAC uses a conversion factor of approximately 2100:1 — 2100mL of breath alcohol equals 1mL of blood alcohol.
From the MQ3 datasheet sensitivity curve for alcohol:
// MQ3 to BAC estimation
// Based on datasheet sensitivity curve fitting
// This is an ESTIMATE only - not legal measurement

float calculateBAC(float rs_ro_ratio) {
  // Power law from MQ3 datasheet curve
  // alcohol_ppm = a * (Rs/R0)^b
  // For MQ3: a = 0.3834, b = -1.504 (fitted from datasheet)

  float alcohol_ppm = 0.3834 * pow(rs_ro_ratio, -1.504);

  // Convert breath alcohol (ppm) to BAC (%)
  // 1 ppm breath = 1 mg/210L breath = 1 mg/dL blood
  // = 0.001 g/dL = 0.001% BAC
  float bac_percent = alcohol_ppm * 0.001 * 0.21; // approximate

  return bac_percent;
}

void loop() {
  float rs = readSensorResistance();
  float ratio = rs / RO_CLEAN_AIR;
  float bac = calculateBAC(ratio);

  Serial.print("Rs/R0: "); Serial.print(ratio, 3);
  Serial.print(" | Est. BAC: "); Serial.print(bac * 100, 3); Serial.println("%");

  delay(1000);
}
Complete Breathalyzer with LCD Display
The full breathalyzer project adds a 16×2 I2C LCD, LED indicators, a buzzer alarm, and a button-triggered test sequence:
#include <Wire.h>
#include <LiquidCrystal_I2C.h>

LiquidCrystal_I2C lcd(0x27, 16, 2); // I2C address 0x27

const int MQ3_PIN = A0;
const int BTN_PIN = 3;
const int GREEN_LED = 8;
const int RED_LED = 9;
const int BUZZER = 10;
const float RO_CLEAN_AIR = 16.0;   // YOUR calibrated value
const float RL_VALUE = 200.0;       // kOhm

void setup() {
  lcd.begin();
  lcd.backlight();
  pinMode(BTN_PIN, INPUT_PULLUP);
  pinMode(GREEN_LED, OUTPUT);
  pinMode(RED_LED, OUTPUT);
  pinMode(BUZZER, OUTPUT);

  // Warm-up sequence
  lcd.print("Warming up...");
  for (int i = 180; i > 0; i--) {
    lcd.setCursor(0, 1);
    lcd.print(i); lcd.print(" seconds    ");
    delay(1000);
  }
  lcd.clear();
  lcd.print("Press button");
  lcd.setCursor(0, 1);
  lcd.print("to blow test");
}

void loop() {
  if (digitalRead(BTN_PIN) == LOW) {
    delay(50); // debounce
    runTest();
    delay(2000);
    lcd.clear();
    lcd.print("Press button");
    lcd.setCursor(0, 1);
    lcd.print("to blow test");
  }
}

void runTest() {
  lcd.clear();
  lcd.print("Blow now...");
  delay(3000); // User blows for 3 seconds

  // Take multiple readings and average
  float rsSum = 0;
  for (int i = 0; i < 10; i++) {
    int raw = analogRead(MQ3_PIN);
    float vout = raw * (5.0 / 1023.0);
    rsSum += RL_VALUE * (5.0 - vout) / vout;
    delay(200);
  }
  float rs = rsSum / 10.0;
  float ratio = rs / RO_CLEAN_AIR;
  float bac = 0.3834 * pow(ratio, -1.504) * 0.001 * 0.21;

  lcd.clear();
  lcd.print("BAC: ");
  lcd.print(bac * 100, 3); lcd.print("%");
  lcd.setCursor(0, 1);

  if (bac * 100 < 0.03) {
    lcd.print("SOBER - OK!");
    digitalWrite(GREEN_LED, HIGH);
    digitalWrite(RED_LED, LOW);
  } else if (bac * 100 < 0.08) {
    lcd.print("CAUTION!");
    digitalWrite(GREEN_LED, LOW);
    digitalWrite(RED_LED, HIGH);
    tone(BUZZER, 1000, 500);
  } else {
    lcd.print("DO NOT DRIVE!");
    digitalWrite(GREEN_LED, LOW);
    digitalWrite(RED_LED, HIGH);
    tone(BUZZER, 2000, 2000);
  }
  delay(5000);
  digitalWrite(GREEN_LED, LOW);
  digitalWrite(RED_LED, LOW);
}
Accuracy Limitations and Safety Disclaimer
It is critical to understand what this device can and cannot do:
What It Can Do
- Detect the presence of alcohol in breath — useful as a rough screening tool
- Show relative change in alcohol level over time (e.g., during a party)
- Educational demonstration of gas sensing principles
- Industrial alarm system for alcohol vapors in storage areas
Significant Limitations
- Cross-sensitivity: The MQ3 also responds to benzene, hexane, acetone, and other volatile organic compounds. Hand sanitizer, mouthwash, paint fumes, and nail polish remover can all produce false positives.
- Temperature and humidity effects: The sensor output changes significantly with ambient temperature and humidity — up to ±15% variation between 10°C and 40°C.
- Aging: Sensor sensitivity drifts over months of use, requiring periodic recalibration.
- Individual variation: Body temperature, breathing pattern, and lung capacity all affect breath alcohol measurements.
Legal and safety disclaimer: This DIY breathalyzer is NOT a legally certified breath alcohol analyzer. Do not use it to make driving decisions. Legal blood alcohol limits in India are 0.03% for professional drivers and 0.08% for other drivers. Always use a certified, calibrated professional breathalyzer for any official or safety-critical measurement. This project is for educational purposes only.
Recommended Products from Zbotic

7 Pin Universal Sensor Socket for MQ-2, MQ-3, MQ-4, MQ-5, MQ-6, MQ-9
Easily swap between MQ-series sensors for testing and development — try MQ3 for alcohol, then swap to MQ135 for air quality without any soldering.
MQ-135 Air Quality / Gas Detector Sensor Module
Build a complete indoor air quality monitor alongside your breathalyzer — the MQ-135 detects CO2, ammonia, benzene, and smoke for a comprehensive safety station.
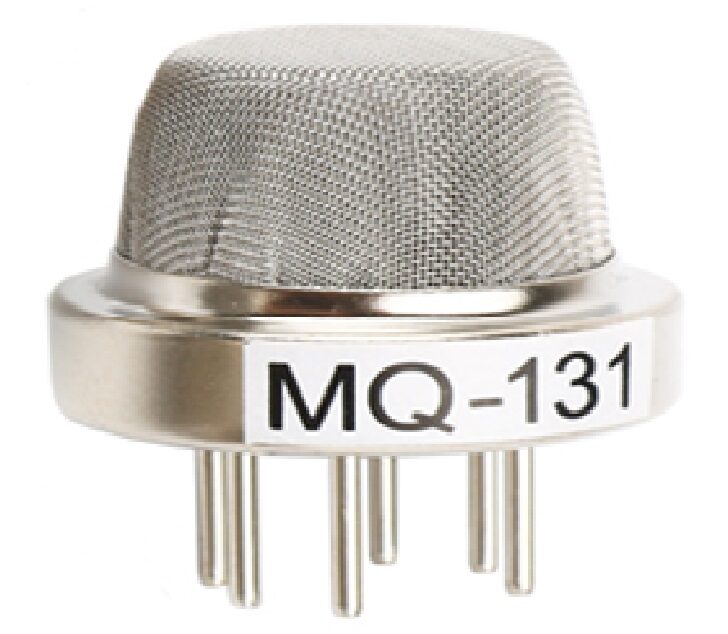
MQ-131 Ozone Gas Detection Sensor
Expand your gas sensing lab with the MQ-131 ozone sensor — useful in industrial safety stations and environmental monitoring applications alongside the MQ3.
Frequently Asked Questions
Q: Why does my MQ3 always read high even with no alcohol present?
The most common reasons are: (1) insufficient warm-up time — always wait at least 3 minutes, and for a new sensor 24–48 hours of burn-in. (2) The sensor is detecting other VOCs — hand sanitizer residue on skin, cleaning solvents in the room, or even acetone from ketone diets can trigger elevated readings. (3) R0 was not calibrated in truly clean air. Take the sensor outdoors away from any urban pollution and recalibrate.
Q: Can I power the MQ3 module from the Arduino’s 5V pin?
Technically yes, but not recommended for the final project. The MQ3 heater draws up to 180mA, and the Arduino’s voltage regulator has a total budget of about 200–300mA shared with all other components. Running near this limit causes the 5V rail to sag, which affects ADC accuracy and can cause brownout resets. Use an external 5V power supply (USB power bank or phone charger) for the MQ3 module.
Q: How often does the MQ3 need recalibration?
A well-stored MQ3 in a clean environment will remain stable for 6–12 months. If the sensor is used in environments with high alcohol vapor exposure frequently, or if temperature/humidity varies greatly, recalibrate every 2–3 months. The best practice is to always run a clean-air calibration at the start of each use session — it takes only 30 seconds after warm-up.
Q: What is the legal blood alcohol limit for driving in India?
In India, the Motor Vehicles Act specifies 30mg of alcohol per 100mL of blood (0.03%) for professional/commercial vehicle drivers, and 80mg per 100mL (0.08%) for other drivers. These limits are measured using certified evidentiary breath analyzers or blood tests — not DIY sensors. Our Arduino breathalyzer project is educational and awareness-building, not legally admissible.
Q: Can I use this breathalyzer to detect alcohol in beverages?
Yes, but the sensor needs to be very close to the vapor above the liquid (not submerged). Place the sensor 2–5cm above an open container of the beverage. The reading will increase proportionally to the alcohol content. This works well for comparing alcoholic vs non-alcoholic beverages qualitatively, but quantitative measurement is unreliable without dedicated calibration using reference solutions of known concentrations.
Q: Why does my MQ3 reading spike when I turn on a nearby motor or relay?
Electromagnetic interference (EMI) from motor switching and relay coils induces voltage spikes on the power supply lines and the analog signal wire. Fix this by: (1) adding a 100μF capacitor on the MQ3’s power pins, (2) using a shielded wire for the analog signal, (3) adding a 10kΩ resistor + 100nF capacitor low-pass filter between AOUT and the Arduino analog pin, and (4) powering the MQ3 from a separate power supply isolated from motor drivers.
Zbotic stocks the complete range of MQ-series gas sensors, Arduino boards, LCD modules, and project components. Get everything for your DIY breathalyzer in one order with fast delivery across India.


Add comment