
USB to DC Barrel Power: Build a 12V Boost from a Power Bank
Imagine being able to power any 12 V device — a router, a small LED strip, a portable fan, an Arduino motor shield — directly from the power bank in your bag. That is exactly what this project does. The idea behind USB to DC barrel 12V boost power bank DIY is simple: take the 5 V output from a standard USB power bank and use a boost converter to step it up to 12 V, then deliver it through the ubiquitous 5.5 mm / 2.1 mm DC barrel jack. In this guide we will design the circuit, choose the right components, walk through the build process, and discuss what loads you can realistically power from this setup.
Why Build a 12 V Supply from USB?
The USB power bank has become the most ubiquitous portable power source in India and the world. Every hobbyist has at least one. They are reliable, widely available, easy to charge, carry lithium protection circuits, and come in capacities from 5000 mAh all the way to 30000 mAh. The problem is that they output 5 V — the standard for USB — while a huge number of useful devices and components require 12 V.
Consider these common 12 V scenarios an Indian maker might face:
- Powering a 12 V Wi-Fi router during a power cut in areas without inverter backup
- Running 12 V LED strips for outdoor photography backdrops or events
- Operating a 12 V automotive tire inflator or fan in the field
- Powering a 12 V Arduino motor shield or DC motor driver from a portable source
- Testing 12 V sensors and actuators without a bench power supply
- Running 12 V solenoid valves or relays in agricultural automation demos
A commercial 5 V to 12 V USB boost adapter exists — they are sold on Indian e-commerce sites for Rs. 150-400 — but building one yourself teaches the fundamental principles of power conversion, lets you customize the output (set it to 9 V, 10 V, or 13 V instead of exactly 12 V), and gives you far better quality components than typical budget adapters that use unspecified boost ICs with no thermal protection.
Understanding the Power Limits
Before building, understand the hard physics constraints that govern this project:
Power Conservation Law
A boost converter does not create power — it converts it (with some efficiency loss). If your power bank outputs 5 V at maximum 2 A (10 W), and your boost converter is 85% efficient, the maximum power available at 12 V is 10 W x 0.85 = 8.5 W, delivering a maximum current of 8.5 W / 12 V = 0.71 A at 12 V.
This is the fundamental limit. You cannot get 2 A at 12 V from a 2 A USB source. You can get roughly 700 mA, and only from a good quality power bank with a proper 2 A output port.
USB Current Limits
- USB 2.0 port: 500 mA at 5 V = 2.5 W → approximately 160 mA at 12 V
- USB 3.0 port: 900 mA at 5 V = 4.5 W → approximately 280 mA at 12 V
- USB charging port (1 A): 5 W → approximately 315 mA at 12 V
- USB charging port (2 A): 10 W → approximately 630 mA at 12 V
- USB-C PD at 9 V / 2 A: 18 W → approximately 1.1 A at 12 V (much better)
- USB-C PD at 12 V / 1.5 A: 18 W → 1.5 A at 12 V (no boost needed!)
Key takeaway: if your application needs more than 700 mA at 12 V, consider using a USB-C PD power bank with a PD trigger module, or use a 3S lithium battery pack directly (which outputs 11.1-12.6 V naturally) instead of building a USB boost converter.
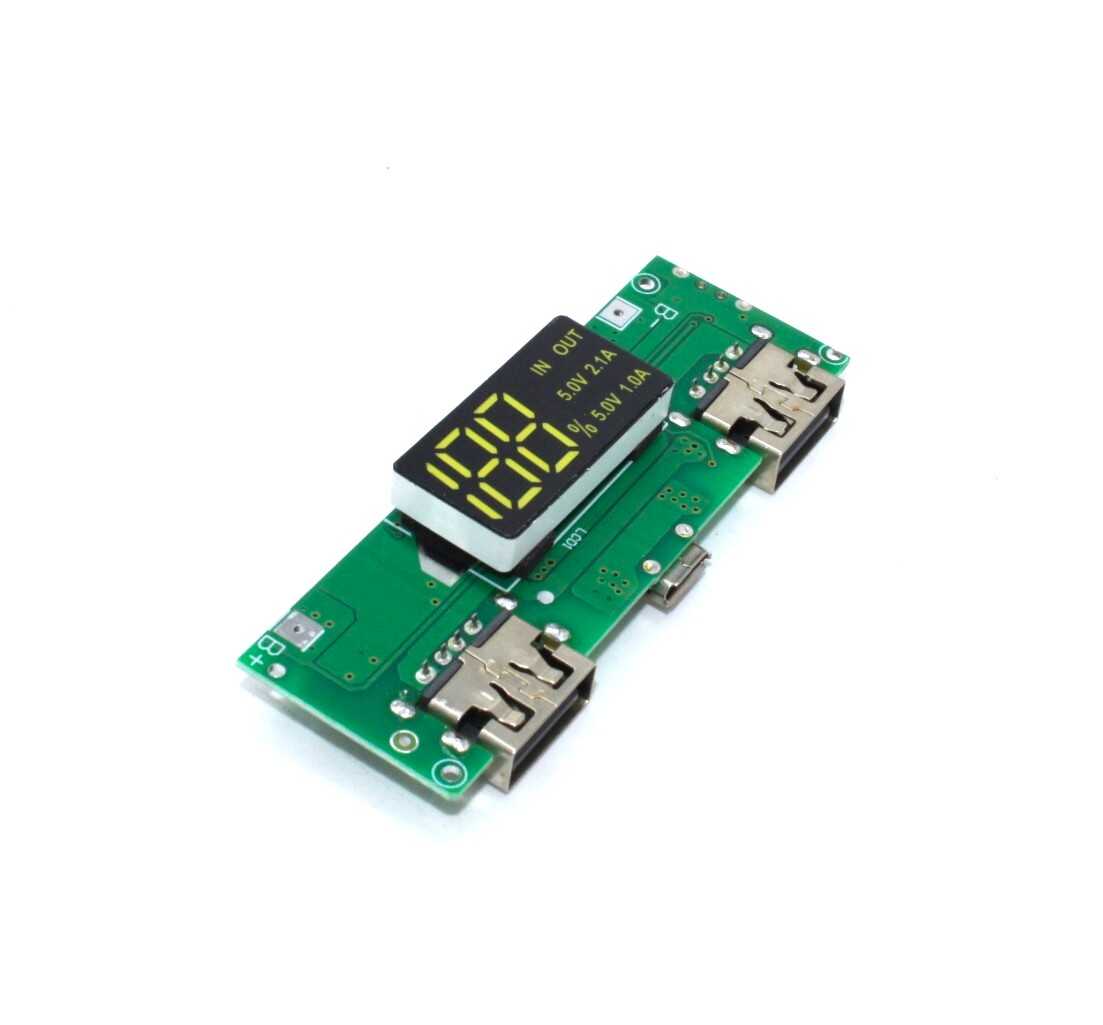
18650 5V 1A/2A Lithium Battery Digital Display and Charging Module
Build your own power bank foundation with this 18650 charger + boost + dual USB output module. Provides the 5 V starting point for your 12 V boost project.
Components You Need
Here is the full component list for a clean, reliable build:
Core Components
- XL6009 boost converter module (or MT3608 for lower current needs) — the heart of the circuit. The XL6009 handles up to 4 A switch current and accepts input from 3-32 V, making it ideal for USB 5 V input.
- USB-A male connector or USB-A to bare wire cable — for connecting to the power bank. Alternatively, cut and strip a standard USB cable.
- 5.5 mm / 2.1 mm DC barrel jack (female) — panel mount type for a clean enclosure build, or PCB mount type if you are building on a board. Make sure the jack you buy matches the plug used by your target device (positive center is standard for most 12 V DC devices).
- Multimeter — mandatory for setting output voltage before connecting any load.
- Small project enclosure — optional but highly recommended for a finished, safe build. ABS plastic project boxes in India cost Rs. 30-80 and are available in most electronics markets.
Optional but Recommended Additions
- Mini voltmeter display (0.28 inch, 3-wire type) — mount it on the enclosure to show the output voltage at a glance. Costs Rs. 20-40.
- On/off toggle switch — wire it in series with the USB input to cut power without unplugging. Prevents power bank auto-shutoff from happening when load is light.
- 100 uF, 25 V electrolytic capacitor — across the output to reduce ripple, improving compatibility with audio equipment and sensitive electronics.
- Reverse polarity protection diode — a 1N5817 Schottky diode in series with the input protects against accidentally plugging in a reversed USB cable.
Circuit Design and Wiring
The circuit is elegantly simple:
USB 5 V (from power bank) → [optional toggle switch] → XL6009 module input (Vin+, GND) → XL6009 module output (Vout+, GND) → [optional output capacitor in parallel] → DC barrel jack (center positive)
Wire diagram description:
- USB cable red wire (VBUS, +5 V) connects to the XL6009 module’s positive input terminal (marked Vin+ or IN+)
- USB cable black wire (GND) connects to the XL6009 module’s negative input terminal (marked GND or IN-)
- XL6009 module positive output (Vout+ or OUT+) connects to the DC barrel jack center pin (positive)
- XL6009 module negative output (GND or OUT-) connects to the DC barrel jack outer sleeve (negative/ground)
- If using the optional capacitor, connect it directly across the output terminals in parallel (observe polarity — positive to positive, negative to negative)
Wire gauge: use at least 24 AWG wire for the USB input connections. For the output, use 22 AWG or thicker if you plan to draw more than 500 mA. All wire runs should be as short as possible to minimize resistance and inductance.
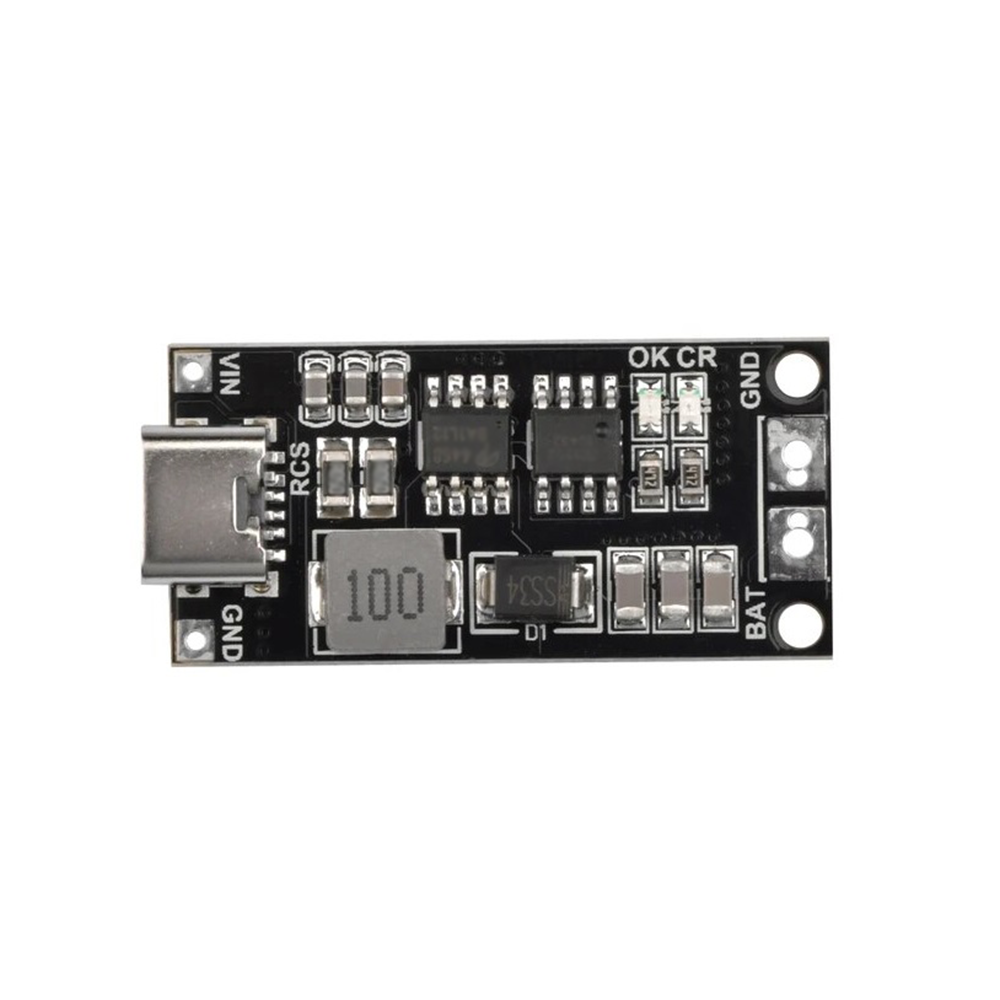
18650 Polymer Lithium Ion Charger Type C to 3S 12.6V 4A Booster Module
If you want a higher-current 12 V portable source, this all-in-one Type-C module charges your 18650 cells and boosts to 12.6 V at 4 A — no separate power bank needed.
Step-by-Step Build Guide
- Gather all components and tools. You need a soldering iron, solder, wire strippers, a multimeter, and a small Phillips screwdriver for the enclosure.
- Prepare the USB input cable. Cut a USB-A to micro-USB cable approximately 15 cm from the USB-A end. Strip the outer jacket. You will find four wires inside: red (VBUS, +5 V), black (GND), white (D-), green (D+). You only need red and black for this project. Cut and insulate the white and green wires so they cannot short against anything.
- Connect input wires to the XL6009 module. Solder the red wire to the positive input terminal and the black wire to the negative input terminal. Ensure no loose strands can bridge across both terminals.
- Set the output voltage before connecting the output components. Plug the USB-A end into your power bank (or a USB charger). Connect your multimeter to the XL6009 output terminals. Slowly turn the trimmer potentiometer until the multimeter reads 12.0-12.2 V. Disconnect power before proceeding.
- Connect the DC barrel jack. The center pin of the DC barrel jack is the positive terminal. Solder the positive output wire from the XL6009 to the center pin. Solder the negative output wire to the outer barrel/sleeve terminal.
- Add optional components. Install the toggle switch in the input line. Wire the voltmeter display across the output. Solder the 100 uF capacitor across the output terminals (observe polarity).
- Test thoroughly before enclosing. Connect a test load — a 12 V LED, a small motor, or a resistor calculated for about 200 mA at 12 V (60 ohm, 0.5 W rating minimum). Verify output voltage under load stays between 11.8-12.2 V. Monitor the XL6009 module temperature after 5 minutes of operation — warm is acceptable, hot-to-touch is not.
- Install in enclosure. Drill appropriate holes for the USB cable input, DC barrel jack, toggle switch, and voltmeter display window. Secure the XL6009 module inside the enclosure using standoffs or foam tape. Ensure no metal parts of the module can short against the enclosure if using a metal box.
What Can You Power? Realistic Load Analysis
With a 2 A USB output from a quality power bank and an 85% efficient boost converter, you have approximately 700 mA at 12 V (8.4 W). Here is what that powers realistically:
| Device | Typical 12 V Current | Feasible from 2A USB? |
|---|---|---|
| Budget Wi-Fi router | 400-600 mA | Yes |
| 12 V LED strip (1 metre) | 300-500 mA | Yes |
| Arduino + motor shield (light load) | 200-400 mA | Yes |
| 12 V solenoid valve | 200-500 mA | Yes |
| 12 V DC fan (small) | 200-400 mA | Yes |
| 12 V tyre inflator / air pump | 5-15 A | No — needs dedicated 12 V battery |
| DSLR laptop charger (19 V) | N/A | No — wrong voltage |
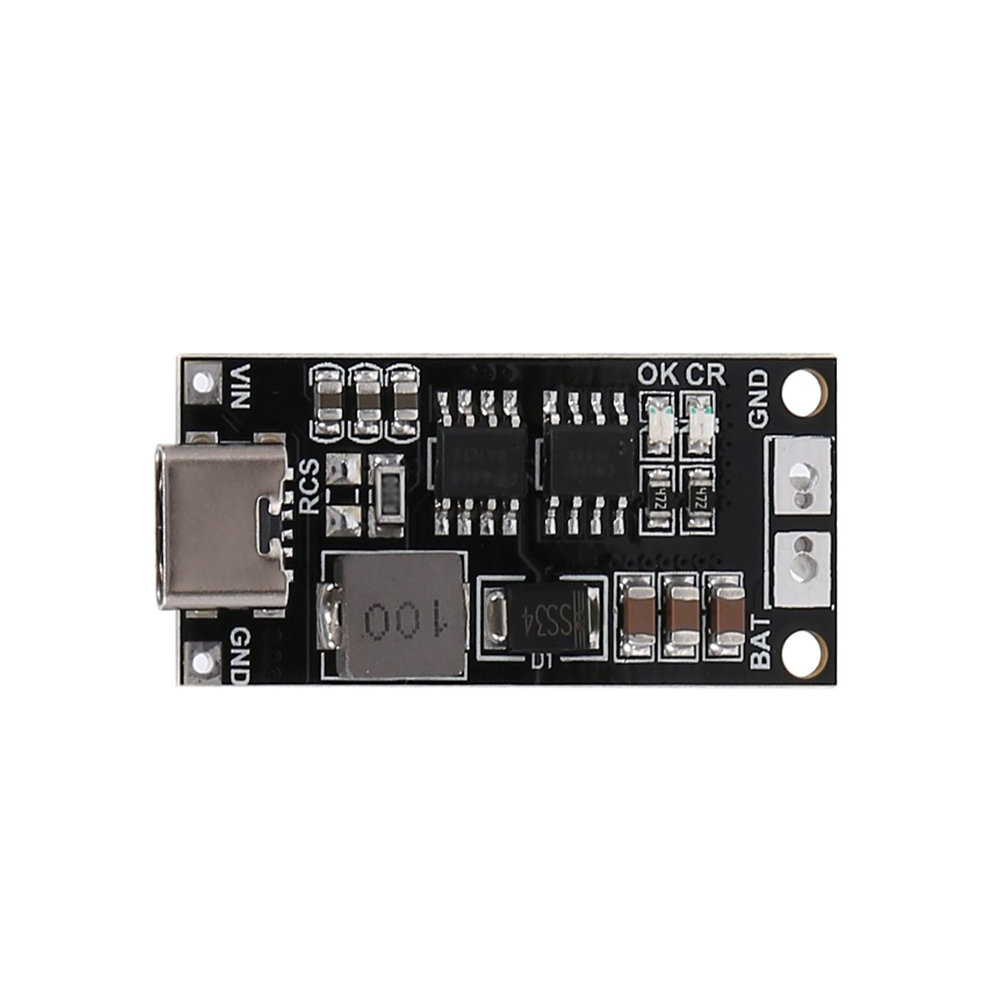
18650 Polymer Lithium Ion Charger Type C to 3S 12.6V 2A Booster Module
Skip the USB intermediate step — this 3S charger and boost module gives you 12.6 V at 2 A directly from 18650 cells via Type-C charging. Ideal for powering routers and LED strips.
Advanced Variants and Upgrades
Variant 1: USB-C PD Trigger Input
Replace the standard USB-A input with a USB-C PD trigger module set to request 9 V or 12 V from a PD power bank. At 9 V you can use a smaller boost ratio (9 V to 12 V, ratio 1.33x) which dramatically improves efficiency and allows higher output currents. If your PD power bank supports 12 V output, you do not need the boost converter at all — the PD trigger module delivers 12 V directly, skip to wiring it straight to the barrel jack.
Variant 2: Adjustable Output with Knob
Replace the onboard trimmer potentiometer of the XL6009 module with a panel-mount 10 kohm multi-turn potentiometer. Connect it through the enclosure front panel with a knob. Now you have an adjustable 6-30 V portable supply with a power bank as the source. Add a voltmeter display and you have a travel-sized adjustable bench supply.
Variant 3: 18650 Direct Input (Skip the Power Bank)
Instead of using a power bank, feed the XL6009 directly from one or two 18650 cells in series. A single 18650 (3.7-4.2 V) input to 12 V output gives a 3x boost ratio at reasonable efficiency. Two 18650 in series (7.4-8.4 V) gives a much lower boost ratio and significantly better efficiency — approximately 90% versus 80% for the single-cell configuration. Add a BMS protection board on the cell side for safe operation.
Variant 4: Add a Current Meter
Wire a small INA219 current sensor module in series with the output and connect it to an OLED display driven by an Arduino or ESP32. Now you have a portable 12 V supply that shows both voltage and current in real time — invaluable for debugging power consumption in field deployments.
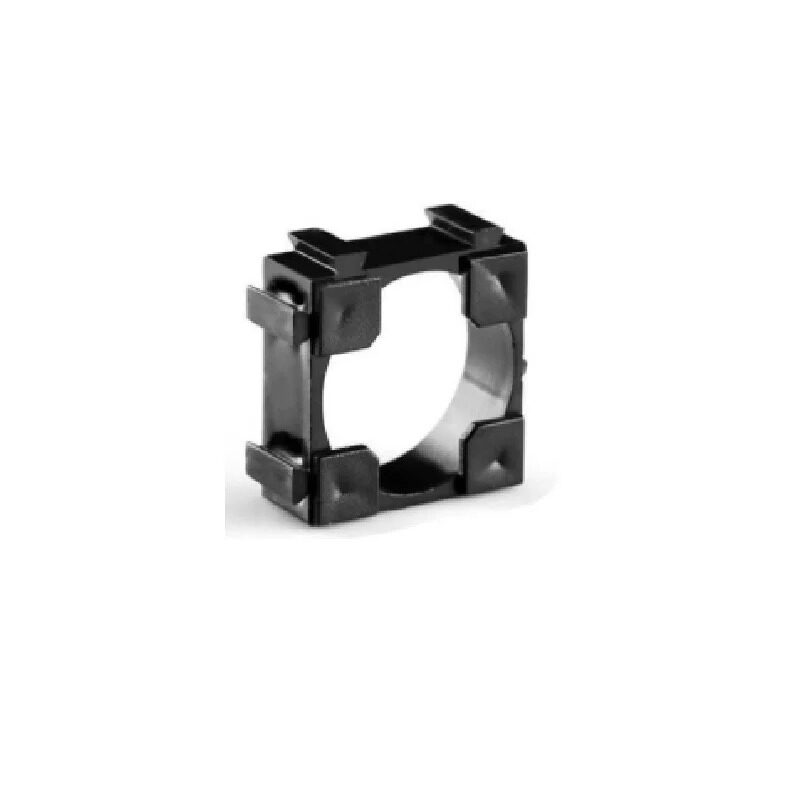
1 x 18650 Battery Holder with 18.4MM Bore Diameter (Pack of 4)
For the 18650-direct variant of this project, these holders provide a clean and replaceable power source without soldering cells directly.
Frequently Asked Questions
Will this drain my power bank faster than charging a phone?
Yes. The boost converter draws more current from the power bank than the equivalent direct USB load would, due to the boost conversion and efficiency losses. A 12 V, 500 mA load at 85% efficiency draws approximately 1.4 A from the 5 V USB port — significantly more than a typical smartphone charge at 500-1000 mA. Expect your power bank runtime to be roughly 60-70% of what you would get charging a phone at the same watt-hour energy drawn from the load.
Why does my power bank shut off shortly after I connect the boost converter with no load?
Most power banks have a low-current auto-shutoff feature. If the load draws less than approximately 50-100 mA, the power bank assumes the device has finished charging and shuts off the output after 30-90 seconds. The XL6009 module itself draws minimal quiescent current when there is no external load. Solutions: add a small bleed resistor (1 kohm, 0.25 W) across the 12 V output to draw a constant ~12 mA, or include a small 12 V LED as a power indicator — both will keep the power bank active.
Can I use a 5V to 12V USB adapter from a phone market instead of building one?
You can, but be cautious. Many cheap USB-to-12V adapters from phone markets use unbranded ICs with no thermal protection, no regulation, and wildly inaccurate voltage outputs (some output 11 V, some 13 V, some fluctuate with load). For powering a Wi-Fi router or LED strip where a volt or two does not matter, they work. For sensitive electronics, a properly built XL6009 module with verified output voltage is far more reliable.
Is the output of this converter safe for a 12 V laptop or camera charger input?
Not recommended. Laptop chargers are typically rated for 18-20 V, not 12 V. Camera chargers vary widely. Never assume a “12 V DC” label on a device means it can accept voltage from this converter without verifying the exact input specifications. Exceeding input voltage limits on a charger can cause internal component damage. For laptops, look for USB-C PD compatibility instead.
Can I make the output adjustable to cover 5 V, 9 V, and 12 V?
Yes — this is variant 2 described above. Replace the onboard trimmer with a panel-mount pot for continuous adjustment, or wire a rotary switch between three fixed-value resistors pre-calculated for each target voltage. The three-position switch approach gives you fixed, stable voltages without the risk of accidentally dialing to an incorrect voltage.
Get All Your Project Components at Zbotic
Whether you need 18650 battery holders, BMS protection boards, or complete boost and charging modules, Zbotic has everything you need to build portable power solutions. Order online and get fast delivery across India — start your 12 V project this weekend.


Add comment