
An obstacle-avoiding robot using the HC-SR04 ultrasonic sensor and servo sweep algorithm is the quintessential beginner robotics project — and for good reason. It teaches real sensor integration, decision-making algorithms, and motor control all in one build. By mounting the HC-SR04 on a servo motor, your robot can scan left and right before choosing the best path, just like a person looking both ways before crossing. This guide covers everything from wiring to a complete, well-commented Arduino sketch.
How the HC-SR04 Ultrasonic Sensor Works
The HC-SR04 is a two-transducer ultrasonic distance sensor. Here’s its operating principle:
- The Trig pin receives a 10µs HIGH pulse from the microcontroller.
- The sensor fires an 8-cycle burst of 40kHz ultrasonic sound from the transmitter transducer.
- The sound bounces off any object in its path and returns to the receiver transducer.
- The Echo pin goes HIGH for the duration of the sound’s travel time (there and back).
- Distance = (pulse_duration × speed_of_sound) / 2 = (duration × 0.0343 cm/µs) / 2
Specifications at a glance:
- Operating voltage: 5V DC
- Measuring range: 2cm – 400cm (practical reliable range: 2–200cm)
- Accuracy: ±3mm
- Beam angle: ~15° cone
- Min trigger interval: 60ms (to avoid echo overlap)
Hardware You Need
- Arduino Uno or Nano
- HC-SR04 ultrasonic sensor
- SG90 servo motor (for sensor sweep)
- L298N motor driver module
- 2WD robot chassis with 2 DC gear motors and wheels
- 9V battery or 2S LiPo for motor power
- 5V USB power bank for Arduino
- Jumper wires, breadboard, zip ties
- Small bracket or 3D-printed mount for servo+HC-SR04

2WD Mini Round Double-Deck Smart Robot Car Chassis DIY Kit
Perfect two-wheel drive robot platform for obstacle avoidance projects. Dual-deck design gives room for Arduino, motor driver, battery and sensor on separate levels.

TowerPro SG90 180° Rotation Servo Motor
Lightweight SG90 servo for mounting and sweeping the HC-SR04 sensor. Its 180° range covers left, centre, and right sweep positions with ease.
Wiring Diagram
Connect the components as follows:
HC-SR04 → Arduino:
- VCC → 5V
- GND → GND
- Trig → Pin 9
- Echo → Pin 10
SG90 Servo → Arduino:
- Red (power) → 5V
- Brown (GND) → GND
- Orange (signal) → Pin 6
L298N Motor Driver → Arduino + Motors:
- IN1 → Pin 2, IN2 → Pin 3, IN3 → Pin 4, IN4 → Pin 5
- ENA → Pin 11 (PWM), ENB → Pin 12 (PWM)
- L298N 12V → Battery positive, GND → Battery negative + Arduino GND
- L298N 5V output → can power Arduino if battery is 9–12V
Important: If using a 9V battery, you can power the Arduino from the L298N’s 5V output. Remove the 5V jumper on the L298N if battery is above 12V.
Reading Distance with HC-SR04
Before integrating the sweep algorithm, test bare distance sensing:
#define TRIG 9
#define ECHO 10

void setup() {
  Serial.begin(9600);
  pinMode(TRIG, OUTPUT);
  pinMode(ECHO, INPUT);
}

long getDistance() {
  digitalWrite(TRIG, LOW);
  delayMicroseconds(2);
  digitalWrite(TRIG, HIGH);
  delayMicroseconds(10);
  digitalWrite(TRIG, LOW);
  long duration = pulseIn(ECHO, HIGH, 30000); // 30ms timeout
  return duration * 0.0343 / 2;
}

void loop() {
  Serial.print("Distance: ");
  Serial.print(getDistance());
  Serial.println(" cm");
  delay(100);
}
Upload this sketch and open Serial Monitor at 9600 baud. Move an object toward the sensor and verify distance readings decrease. The sensor returns 0 if no echo is received within the timeout (object too far or out of beam).
The Servo Sweep Algorithm Explained
The servo sweep algorithm is the intelligence layer of the obstacle avoidance robot. Here’s how it works in plain language:
- Moving forward: Robot drives forward while continuously checking front distance.
- Obstacle detected: If front distance falls below
SAFE_DISTANCE(e.g., 20cm), stop. - Sweep left: Rotate servo to 150° (left), measure distance. Record as
distLeft. - Sweep right: Rotate servo to 30° (right), measure distance. Record as
distRight. - Centre servo: Return servo to 90° (forward).
- Decision:
- If both distances are too short (dead end) → reverse, then turn
- If
distLeft > distRight→ turn left - If
distRight > distLeft→ turn right - If both distances are clear → choose the longer path
- Resume forward: After turning, continue forward movement and restart obstacle checking.
This gives the robot a look-ahead capability — it doesn’t just stop and reverse, it actively scouts the environment and picks the smarter path.
L298N Motor Control Functions
Define clean movement functions first — this makes the main logic readable:
#define IN1 2
#define IN2 3
#define IN3 4
#define IN4 5
#define ENA 11
#define ENB 12

void setupMotors() {
  for(int p : {IN1,IN2,IN3,IN4,ENA,ENB}) pinMode(p, OUTPUT);
  analogWrite(ENA, 160);  // ~63% speed - adjust as needed
  analogWrite(ENB, 160);
}

void forward()  { digitalWrite(IN1,1);digitalWrite(IN2,0);digitalWrite(IN3,1);digitalWrite(IN4,0); }
void backward() { digitalWrite(IN1,0);digitalWrite(IN2,1);digitalWrite(IN3,0);digitalWrite(IN4,1); }
void turnLeft() { digitalWrite(IN1,0);digitalWrite(IN2,1);digitalWrite(IN3,1);digitalWrite(IN4,0); }
void turnRight(){ digitalWrite(IN1,1);digitalWrite(IN2,0);digitalWrite(IN3,0);digitalWrite(IN4,1); }
void stopMotors(){ digitalWrite(IN1,0);digitalWrite(IN2,0);digitalWrite(IN3,0);digitalWrite(IN4,0); }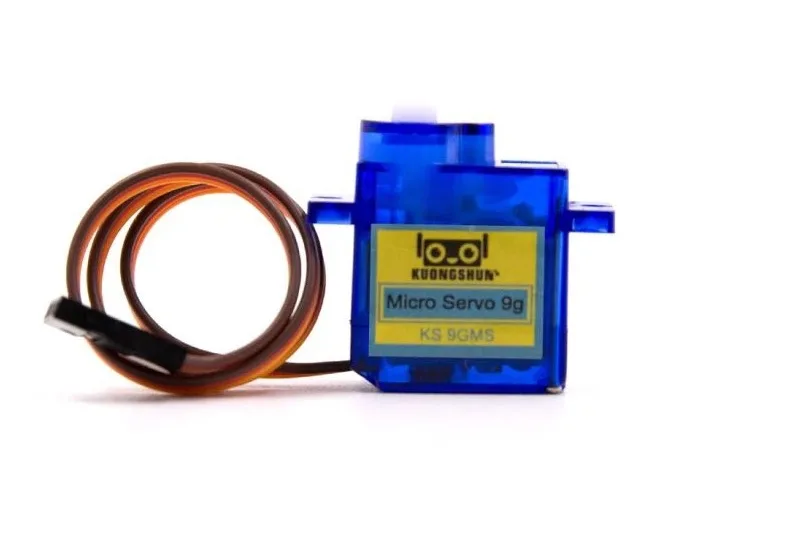
Servo SG90 9g 180 Degree
Budget-friendly SG90 variant — reliable for the servo sweep mechanism on your obstacle avoidance robot without adding significant weight to the front.
Full Arduino Obstacle Avoidance Code
Here’s the complete sketch integrating all the pieces:
#include <Servo.h>

// Pins
#define TRIG 9
#define ECHO 10
#define SERVO_PIN 6
#define IN1 2
#define IN2 3
#define IN3 4
#define IN4 5
#define ENA 11
#define ENB 12

#define SAFE_DIST  20  // cm — stop and scan if closer
#define DEAD_END   10  // cm — reverse if both sides blocked
#define SPEED     160  // PWM 0-255
#define TURN_TIME 400  // ms to turn 90 degrees (calibrate!)

Servo scanner;

void setup() {
  Serial.begin(9600);
  for(int p : {IN1,IN2,IN3,IN4,ENA,ENB}) pinMode(p, OUTPUT);
  analogWrite(ENA, SPEED); analogWrite(ENB, SPEED);
  pinMode(TRIG, OUTPUT); pinMode(ECHO, INPUT);
  scanner.attach(SERVO_PIN);
  scanner.write(90);   // centre sensor
  delay(500);
}

long getDistance() {
  digitalWrite(TRIG, LOW);  delayMicroseconds(2);
  digitalWrite(TRIG, HIGH); delayMicroseconds(10);
  digitalWrite(TRIG, LOW);
  long d = pulseIn(ECHO, HIGH, 25000);
  return (d == 0) ? 200 : d * 0.0343 / 2; // return 200 if no echo
}

long scanAt(int angle) {
  scanner.write(angle);
  delay(400);           // wait for servo to reach position
  return getDistance();
}

void stopMotors() { for(int p:{IN1,IN2,IN3,IN4}) digitalWrite(p,0); }
void forward()    { digitalWrite(IN1,1);digitalWrite(IN2,0);digitalWrite(IN3,1);digitalWrite(IN4,0); }
void backward()   { digitalWrite(IN1,0);digitalWrite(IN2,1);digitalWrite(IN3,0);digitalWrite(IN4,1); }
void turnLeft()   { digitalWrite(IN1,0);digitalWrite(IN2,1);digitalWrite(IN3,1);digitalWrite(IN4,0); }
void turnRight()  { digitalWrite(IN1,1);digitalWrite(IN2,0);digitalWrite(IN3,0);digitalWrite(IN4,1); }

void loop() {
  long front = getDistance();
  Serial.print("Front: "); Serial.println(front);

  if (front > SAFE_DIST) {
    forward();
  } else {
    stopMotors();
    delay(200);

    // Sweep and scan
    long distLeft  = scanAt(150);   // look left
    long distRight = scanAt(30);    // look right
    scanAt(90);                     // return centre

    Serial.print("L:"); Serial.print(distLeft);
    Serial.print(" R:"); Serial.println(distRight);

    if (distLeft < DEAD_END && distRight < DEAD_END) {
      // Dead end — back up and do U-turn
      backward(); delay(600);
      turnLeft(); delay(TURN_TIME * 2);
    } else if (distLeft > distRight) {
      turnLeft();  delay(TURN_TIME);
    } else {
      turnRight(); delay(TURN_TIME);
    }
    stopMotors(); delay(100);
  }
  delay(60); // HC-SR04 min re-trigger interval
}
Tuning, Optimisation and Upgrades
Getting the basic code running is just the start. Here’s how to make your robot smarter and more reliable:
Calibrating TURN_TIME
Place the robot on a flat surface and run only the turnLeft() function with Serial output. Time how many milliseconds it takes to turn approximately 90°. That’s your TURN_TIME. This varies by motor speed, surface friction, and wheel width. Typical values: 300–600ms on carpet, 200–400ms on hard floor.
Multiple Scan Angles
Instead of just three positions (left/centre/right), scan at 5 angles: 30°, 60°, 90°, 120°, 150°. Choose the direction with maximum clearance. This gives smoother, more intelligent navigation in cluttered environments.
Speed Control with PWM
Reduce speed when an obstacle is detected nearby. When front > SAFE_DIST but < SAFE_DIST * 2, slow down proportionally. This prevents the robot from running into obstacles because of its own inertia at high speed.
Add an Infrared Sensor
Mount IR sensors on the sides of the robot facing downward to detect table/stair edges. Combine with HC-SR04 front sensing for a robot that won’t fall off tables.
PID Wall Following
Advanced upgrade: add a second HC-SR04 on the right side. Implement a PID controller that keeps a constant distance from the right wall. The robot now navigates corridors and follows walls intelligently.

Servo Mount Holder Bracket for SG90/MG90 (Pack of 2)
Rigid servo brackets for securely mounting the SG90 to your robot chassis front. Keeps the HC-SR04 sensor angle stable during sweeps for accurate readings.
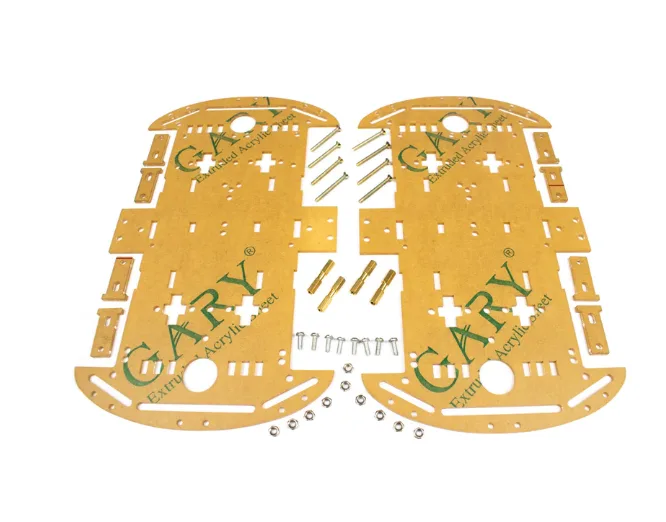
4 Wheels Car Chassis Acrylic Frame
A 4-wheel acrylic chassis that handles more terrain types for obstacle avoidance testing. Extra stability reduces false obstacle triggers from vibration.
Frequently Asked Questions
- Why does my HC-SR04 give incorrect readings?
- Common causes: supply voltage below 4.75V (use a good 5V source), objects at an acute angle deflecting sound away from receiver, soft/fabric surfaces absorbing ultrasound, or trigger interval too short causing echo overlap. Always wait 60ms minimum between triggers.
- My robot turns randomly even with no obstacles. Why?
- Check for electrical noise on the Echo pin. Add a 100Ω resistor on the Echo line and a 0.1µF capacitor between VCC and GND on the HC-SR04. Also ensure the servo power doesn’t share the same supply as the Arduino.
- Can I use three HC-SR04 sensors instead of one servo?
- Yes, a fixed 3-sensor setup (left, front, right) responds faster than a servo sweep since there’s no mechanical delay. Use separate Trig/Echo pins for each sensor and poll them in sequence with 60ms between each trigger.
- Why is pulseIn() blocking my code?
pulseIn()blocks until the echo returns. Use a timeout parameter (e.g.,pulseIn(ECHO, HIGH, 25000)for 25ms max) to prevent freezing when no object is in range. For a fully non-blocking approach, use theNewPinglibrary which supports timer-based async sensing.- What is the best scan speed for the servo sweep?
- Wait 300–500ms after commanding each servo position before reading. SG90 moves at ~0.1s per 60° — a 60° sweep needs at least 100ms travel + stabilisation time. Too little wait = reading the sensor before it reaches position = wrong direction distances.
Get Your Obstacle Avoidance Robot Parts
Robot chassis, servo motors, ultrasonic sensors, and motor drivers — everything for your build is available at Zbotic India.


Add comment