
When a servo doesn’t behave as expected in your robot project, knowing whether to use a servo tester or direct Arduino control for debugging can save you hours of frustration. Servo problems can stem from the servo itself, the PWM signal, the power supply, the code, or the mechanical load. Each debugging method isolates different parts of this chain. This guide explains both approaches in depth, covers the most common servo failure modes, and gives you a systematic debugging workflow to resolve servo issues fast.
How Servos Work: PWM Basics
A servo motor is a closed-loop actuator that moves to a specific position based on a PWM (Pulse Width Modulation) signal. Standard RC servos use a 50 Hz signal (period of 20ms) where the pulse width encodes position:
- 1000 µs (1ms): Full left / 0°
- 1500 µs (1.5ms): Center / 90°
- 2000 µs (2ms): Full right / 180°
The servo’s internal electronics compare the commanded position (from PWM width) with the actual position (from an internal potentiometer) and drives the motor until they match. If the pulse width falls outside the servo’s accepted range, behavior is undefined — the servo may jitter, hunt, buzz, or not move at all.
Important: the 1000–2000µs range is a standard, not a law. Many servos accept 500–2500µs for extended range. Others (especially cheap clones) have narrower or asymmetric ranges. This is one reason servo testers are useful — they let you probe the full range without writing code.
What Is a Servo Tester and When to Use It
A servo tester is a small standalone device that generates PWM servo signals. You plug the servo directly into the tester and use a knob, button, or auto-sweep to control position — no Arduino, no code, no breadboard required. Most servo testers provide three modes:
- Manual mode: Turn a potentiometer to manually sweep the servo through its range
- Auto/sweep mode: Automatically oscillates the servo back and forth at a set speed
- Neutral mode: Sends a fixed center pulse (1500µs)
When to use a servo tester:
- First power-on: verify the servo is mechanically functional before wiring it to any controller
- Isolate hardware vs. software: if it works on the tester but not on Arduino, the problem is in your code or wiring, not the servo
- Check range: sweep the full range to verify the servo doesn’t bind or stall at endpoints
- Verify a “dead” servo: distinguish between a dead servo, a bad signal, and a bad power supply
- Compare multiple servos: quickly test a batch of servos for consistency before building a multi-servo project
Limitations of servo testers:
- Cannot produce precise microsecond-level PWM values (pot-based testers are approximate)
- Cannot test code-driven sequences like arming pulses or IK-computed positions
- Usually powered by the servo’s own supply — cannot reproduce the exact power conditions of your final circuit

TowerPro SG90 180 Degree Rotation Servo Motor
The benchmark servo for debugging and testing. SG90 is widely documented, consistent, and used as the reference servo in most tester comparisons. Ideal for validating your debugging workflow.
Direct Arduino Control: Strengths and Limits
Controlling a servo directly from an Arduino using the Servo library (or writeMicroseconds()) gives you precise, repeatable, programmable PWM signals. This is how servos are controlled in all production builds.
Strengths of Arduino direct control:
- Precision:
servo.writeMicroseconds(1500)sends exactly 1500µs (within the timer resolution of ~4µs on a 16MHz Arduino) - Repeatability: Same code always generates the same signal — useful for calibration
- Sequencing: Test complex multi-servo sequences, IK-computed positions, and timed sweeps exactly as the final code will run them
- Real load testing: Run the servo under the same power conditions, same timing, same code path as the deployed robot
- Serial debugging: Print servo positions, error states, and timing data to Serial Monitor alongside servo control
Limitations:
- Requires a working wiring setup and correctly loaded code — adds variables to the debugging process
- Arduino’s
Servolibrary uses Timer1/Timer5, which can conflict with other libraries (tone(), certain motor drivers) - The Arduino 5V pin cannot supply enough current for more than 1–2 servos — this is the most common cause of Arduino-specific servo problems
Servo Tester vs Arduino: Side-by-Side Comparison
| Feature | Servo Tester | Arduino Direct |
|---|---|---|
| Setup time | 30 seconds | 5–10 minutes |
| Signal precision | Low (pot-based) | High (±4µs) |
| Isolates servo hardware | Yes — completely | Partial |
| Tests production code | No | Yes |
| Multi-servo sweep | 1 servo at a time | Up to 12 simultaneously |
| Best for | Hardware verification | Software debugging |
Common Servo Problems and How to Diagnose Them
Servo Jitters Continuously
Symptom: Servo twitches and hunts even when no input changes.
Causes: Electrical noise on the PWM signal, power supply voltage sag, loose signal wire, or a worn internal potentiometer.
Debug: Test on servo tester — if jitter disappears, the Arduino PWM signal has noise. Add a 100µF capacitor across servo VCC/GND. Try a different signal pin. Check ground connection between Arduino and servo power supply.
Servo Doesn’t Move to Full Range
Symptom: servo.write(0) and servo.write(180) produce the same angle, or range is clipped.
Causes: Some servos respond to 1000–2000µs range but are physically limited to less. Others respond to 500–2500µs for full travel.
Debug: Use servo.writeMicroseconds() with values from 500 to 2500 in 100µs steps. Find the actual min and max µs values for your specific servo. Set those as your software limits.
Servo Moves Once Then Stops
Symptom: Servo responds to the first command but ignores subsequent ones.
Causes: Timer conflict with another library, detach() called unintentionally, or servo power brownout causing reset.
Debug: Check for library conflicts. Print servo state in loop. Monitor power supply voltage with a multimeter while the servo moves.
Servo Makes Grinding/Clicking Noise
Symptom: Audible grinding, skipping, or clicking during movement.
Causes: Mechanical overload (servo commanded past physical stop), stripped gears (plastic gears on cheap SG90s), or the connected mechanism is binding.
Debug: Disconnect the mechanism and run the servo unloaded. If noise stops, the mechanical load is binding. If noise continues, gears are stripped — replace the servo.
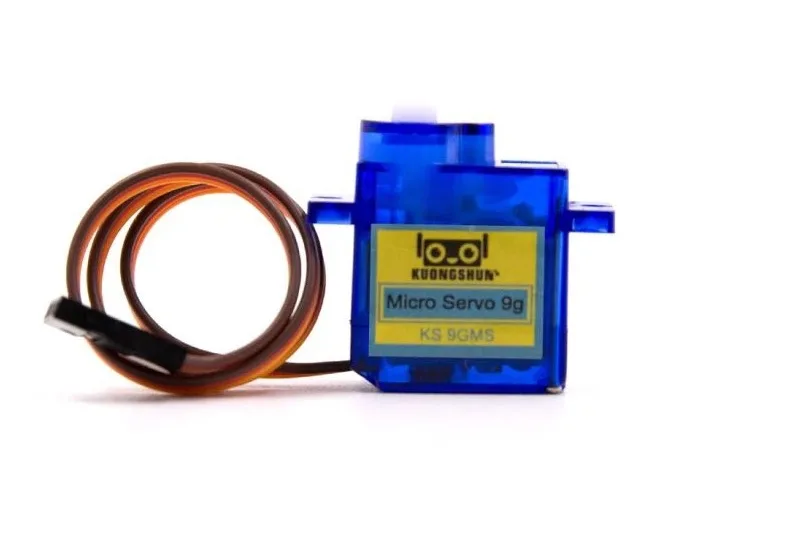
Servo SG90 9g 180 Degree
Standard SG90 servo for robotics projects. Consistent behavior makes it easy to debug — any deviation from expected performance is clearly a wiring or code issue rather than a servo variance problem.
Power Supply: The Most Overlooked Issue
The number one cause of servo problems in Arduino projects is incorrect power delivery. Here are the rules:
- Never power servos from Arduino’s 5V pin: The Arduino 5V rail can supply ~400–500mA. A single SG90 draws up to 700mA under load. Two servos will brown out the Arduino, causing random resets and servo misbehavior.
- Use a dedicated 5V supply: A 5V 2A USB phone charger or a bench supply with 5V output. Connect GND to Arduino GND.
- Add decoupling capacitors: Place a 100–470µF electrolytic capacitor across servo VCC/GND rails. This absorbs inrush current spikes when the servo starts moving.
- Check wire gauge: Thin 28AWG Dupont wires have enough resistance to cause voltage drop under servo current. Use 22AWG or thicker for power runs longer than 30cm.
- Measure voltage under load: Use a multimeter to check the servo supply voltage WHILE the servo is moving. If it drops below 4.5V, you have a power supply or wiring issue.

Servo Mount Holder Bracket For SG90/MG90 (Pack of 2)
Metal servo mounting brackets for SG90 and MG90 servos. Proper mechanical mounting reduces binding, which is a common cause of spurious servo jitter and apparent electrical faults.
Servo Calibration and Endpoint Adjustment
Calibration maps your software’s logical range (0–180°) to the servo’s actual physical travel in microseconds. This is important because:
- Different servo brands have different µs ranges for the same physical angle
- Even servos of the same model can vary by ±5–10% in their response
- For multi-servo projects (robot arms, Stewart Platforms), uncalibrated servos produce different actual angles for the same commanded angle
Calibration procedure using Arduino:
- Start with
servo.writeMicroseconds(1500)— this is the nominal center. - Measure the actual physical angle with a protractor or ruler.
- Adjust in steps of 10µs until the servo is at exactly 90°. Record this as your center offset.
- Set
servo.writeMicroseconds(1000)and measure actual angle. Adjust until the servo reaches 0° (or your mechanical minimum). Record as MIN_US. - Set
servo.writeMicroseconds(2000)and measure actual angle. Adjust until the servo reaches 180°. Record as MAX_US. - Use
map(angle, 0, 180, MIN_US, MAX_US)in your code for accurate angle-to-microsecond conversion.
Store calibration constants in EEPROM for multi-servo systems so they survive power cycles without re-calibration.
Frequently Asked Questions
What is the difference between servo.write() and servo.writeMicroseconds()?
servo.write(angle) maps 0–180 degrees to approximately 544–2400µs internally (Arduino library defaults). servo.writeMicroseconds() sends the exact value you specify in microseconds. For debugging, always use writeMicroseconds() — it removes the internal mapping ambiguity.
Why does my servo jitter when connected to Arduino but not on a servo tester?
The most common cause is PWM signal noise from the Arduino or voltage sag on the servo power rail. Add a 100µF capacitor across servo VCC/GND, use a separate servo power supply, and add a 10Ω resistor in series with the signal wire to reduce noise coupling.
Can I control more than 12 servos with one Arduino Uno?
The Arduino Servo library supports up to 12 servos on Uno (using Timer1 and Timer2). For more servos, use a PCA9685 16-channel I²C PWM driver — it offloads all PWM generation and supports up to 16 independent servo channels via just two I²C wires.
How do I find the exact PWM range of an unknown servo?
Use a servo tester set to manual mode and sweep slowly from one end to the other. Note the positions where the servo starts moving and where it hard-stops (or stalls). Then verify with Arduino writeMicroseconds() in increments of 100µs to confirm.
What causes a servo to overheat?
Overheating is caused by sustained stall current — the servo motor draws maximum current when it is trying to hold a position against a mechanical load it cannot overcome. Reduce the load, increase the servo torque rating, or add a spring/counterweight to balance the mechanism.
Debug Smarter with the Right Tools
Use a servo tester to quickly verify servo hardware in isolation, and use direct Arduino control with writeMicroseconds() to debug software, power, and signal issues in your actual circuit. The two approaches are complementary, not competing — experienced robotics builders keep both at hand. Zbotic stocks SG90 servos and servo mounting brackets to help you build reliable, well-calibrated servo systems for any robot project.


Add comment