
Seven Segment Decoder: BCD to Display Driver IC Guide
The seven segment BCD decoder and driver IC is one of the most fundamental building blocks in digital electronics, yet it remains as relevant today as it was in the 1970s. Whether you’re designing a digital voltmeter, a score counter, a frequency meter, or a school electronics project, understanding how a BCD-to-seven-segment decoder IC works will give you precise control over numeric displays without needing any microcontroller code. In this guide, we cover the theory of seven segment displays, how BCD (Binary Coded Decimal) encoding works, the popular 74LS47, CD4511, and MAX7219 driver ICs, and how to use them both standalone and with Arduino for practical display projects.
Seven Segment Display Basics
A seven segment display consists of seven individual LED segments arranged in the shape of a figure-8, labelled A through G, plus an optional decimal point (DP). By turning combinations of segments on or off, digits 0–9 and some letters (A, b, C, d, E, F) can be displayed.
There are two types of seven segment displays:
- Common Cathode (CC): All cathodes (negative terminals) of the LEDs are connected together to GND. Segments light up when their anode pin is driven HIGH. Most BCD decoder ICs designed for common cathode output include CD4511 and MAX7219.
- Common Anode (CA): All anodes (positive terminals) are connected to VCC. Segments light up when their cathode pin is driven LOW (active-low logic). The 74LS47 is the classic BCD decoder for common anode displays.
Segment-to-digit mapping for a common cathode display:
| Digit | A | B | C | D | E | F | G |
|---|---|---|---|---|---|---|---|
| 0 | 1 | 1 | 1 | 1 | 1 | 1 | 0 |
| 1 | 0 | 1 | 1 | 0 | 0 | 0 | 0 |
| 2 | 1 | 1 | 0 | 1 | 1 | 0 | 1 |
| 3 | 1 | 1 | 1 | 1 | 0 | 0 | 1 |
| … | 4–9 follow standard segment patterns | ||||||
What Is BCD (Binary Coded Decimal)?
BCD is a way of representing each decimal digit (0–9) using four binary bits. Unlike straight binary where all bits combine to form one number (e.g., 1010 = 10), in BCD each group of four bits represents a single decimal digit independently.
For example, the decimal number 47 in BCD is 0100 0111 — where 0100 = 4 and 0111 = 7. This is different from straight binary (47 in binary = 00101111).
BCD encoding is natural for display systems because each digit can be decoded and displayed separately. The BCD decoder IC takes the four BCD input bits (A, B, C, D — representing 2⁰, 2¹, 2², 2³) and outputs seven individual segment control signals.
The 4-bit BCD inputs allow values 0000 (0) through 1001 (9). Inputs 1010 through 1111 (10–15) are invalid BCD codes — different decoder ICs handle these differently (blank, dash, or garbage display).
Popular BCD Decoder ICs: 7447, CD4511, and MAX7219
74LS47 — Classic Common Anode BCD Decoder
The 74LS47 (also available as 7447, SN74LS47) is a TTL-logic BCD-to-seven-segment decoder specifically designed for common anode displays. It has four inputs (A0–A3), seven segment outputs (a–g), and three special control pins: LT (Lamp Test — turns all segments on when LOW), RBI (Ripple Blanking Input — blanks leading zeros), and RBO (Ripple Blanking Output — for cascading digits).
Key specifications: VCC = 5V, output is open-collector (active LOW, sinks up to 40mA per segment), compatible with common anode displays directly with appropriate resistors.
CD4511 — CMOS Common Cathode BCD Decoder
The CD4511 is the CMOS equivalent for common cathode displays. It operates from 3V to 18V (making it ideal for 5V and 12V systems), provides active-HIGH outputs, and includes LE (Latch Enable — freezes the display), BL (Blanking — turns off all segments), and LT (Lamp Test) control pins. Output can source up to 25mA per segment.
MAX7219 — Serial Interface 8-Digit Driver
For multi-digit displays and Arduino projects, the MAX7219 is the modern solution. It controls up to eight 7-segment digits via a 3-wire SPI interface (DIN, CLK, LOAD), handles all multiplexing internally, includes a segment current control register (no external resistors needed per segment), and cascades easily for even more digits. The LedControl Arduino library makes programming it trivial.

LM35 Temperature Sensor
Use an LM35 as the input to your BCD decoder seven segment display project — build a simple analog thermometer with hardware-only decoding.
Building a Circuit with 74LS47
Here is how to wire the 74LS47 to a common anode seven segment display for a simple BCD digit displayer:
- Connect VCC (pin 16) to +5V, GND (pin 8) to ground.
- Connect LT (pin 3) to VCC (disable lamp test), RBI (pin 5) to VCC (disable blanking).
- Connect BCD inputs A (pin 7), B (pin 1), C (pin 2), D (pin 6) to your switches or Arduino output pins.
- Connect segment outputs a–g (pins 13, 12, 11, 10, 9, 15, 14) through 220Ω current-limiting resistors to the corresponding segment pins of the common anode display.
- Connect the common anode pin of the display to +5V.
Set the BCD inputs to 0100 (DCBA = 0,1,0,0) and the display should show the digit 4. Try all combinations from 0000 to 1001 to verify all digits.
Using the CD4511 with Common Cathode Displays
The CD4511 wiring is similar but inverted polarity — outputs are active HIGH for common cathode displays:
- Connect VDD (pin 16) to +5V (or up to 18V for CMOS operation), VSS (pin 8) to GND.
- Pull LE (pin 5) LOW, BL (pin 4) HIGH, LT (pin 3) HIGH for normal operation.
- Connect BCD inputs A (pin 7), B (pin 1), C (pin 2), D (pin 6) to your input source.
- Connect outputs a–g through 330Ω resistors to the common cathode display segments.
- Connect the common cathode pin to GND.
Integrating with Arduino: Software vs Hardware Decoding
You have two approaches when using Arduino with seven segment displays:
Option 1 — Hardware decoding (use BCD IC): Arduino outputs 4-bit BCD values on four digital pins. The 74LS47 or CD4511 decodes them and drives the display. This offloads segment control from the microcontroller and uses only 4 Arduino pins per digit (plus chip-select for multi-digit).
// Output BCD for digit '5' to 74LS47
// DCBA = 0101
int pins[] = {7, 6, 5, 4}; // D,C,B,A pins
int bcd[]  = {0, 1, 0, 1}; // Digit 5 in BCD

void setup() {
  for (int i = 0; i < 4; i++) {
    pinMode(pins[i], OUTPUT);
    digitalWrite(pins[i], bcd[i]);
  }
}
void loop() {}
Option 2 — Software decoding (MAX7219 or direct GPIO): Use the MAX7219 with 3 SPI pins to drive up to 8 digits. This is far more pin-efficient and flexible.
#include <LedControl.h>
// DIN=11, CLK=13, CS=10, 1 device
LedControl lc = LedControl(11, 13, 10, 1);

void setup() {
  lc.shutdown(0, false);  // Wake up MAX7219
  lc.setIntensity(0, 8);  // Brightness 0-15
  lc.clearDisplay(0);
  lc.setDigit(0, 0, 4, false);  // Digit 0 = 4
  lc.setDigit(0, 1, 2, false);  // Digit 1 = 2
  lc.setDigit(0, 2, 7, true);   // Digit 2 = 7. (with decimal)
}
void loop() {}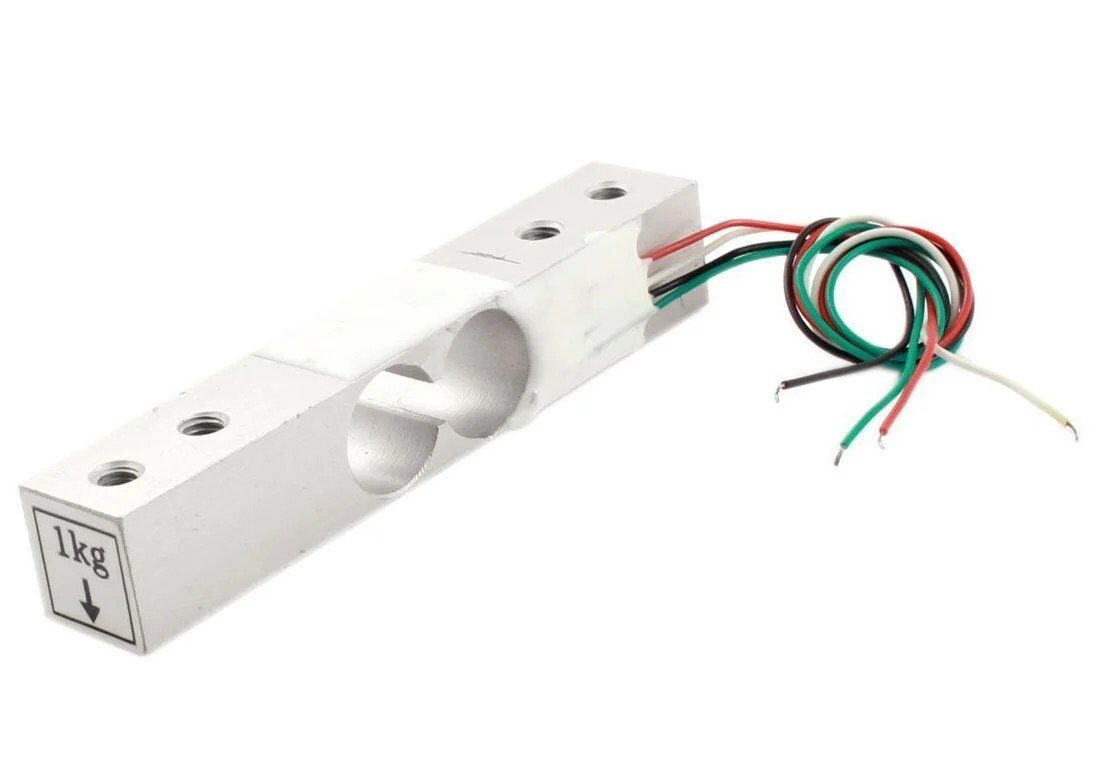
1Kg Load Cell — Electronic Weighing Scale Sensor
Build a digital weighing scale with HX711 + load cell, displaying the weight on a seven segment display driven by MAX7219 or BCD decoder IC.
Multiplexing Multiple Seven Segment Digits
Driving multiple seven segment digits simultaneously would require 7 pins per digit — impractical for 4+ digits. Multiplexing solves this by displaying one digit at a time, cycling through all digits faster than the eye can detect (typically at 100–1000 Hz refresh rate).
In a multiplexed setup:
- All segment lines (A–G) are shared across all digits.
- Each digit has a common control line (common cathode or anode) that enables only one digit at a time.
- The microcontroller or driver IC cycles through all digit enables rapidly.
The MAX7219 does all multiplexing internally and invisibly. If using discrete BCD decoder ICs, you need 74LS138 demultiplexers for digit selection and a timer circuit or microcontroller to cycle through them.
Practical Project Examples
- Digital Clock: Use a DS3231 RTC module to get time, convert hours and minutes to BCD, feed to 74LS47 or MAX7219 to drive a 4-digit seven segment clock display.
- Digital Voltmeter: Use Arduino’s ADC to measure voltage, compute the 4 BCD digits of the reading, and output them to four 74LS47s for a clean hardware-decoded display.
- Score Counter: Simple up/down push buttons increment/decrement a counter, with BCD output to 74LS47 for a 0–99 score display. No code needed — implement the counter with 74HC192 up/down counter ICs.
- Frequency Counter: Measure frequency of a signal on Arduino Timer1, display the frequency on a 6-digit MAX7219 driven display.
- Weighing Scale: Combine HX711 + load cell for weight measurement, display 4 digits on MAX7219 seven segment display with decimal point.
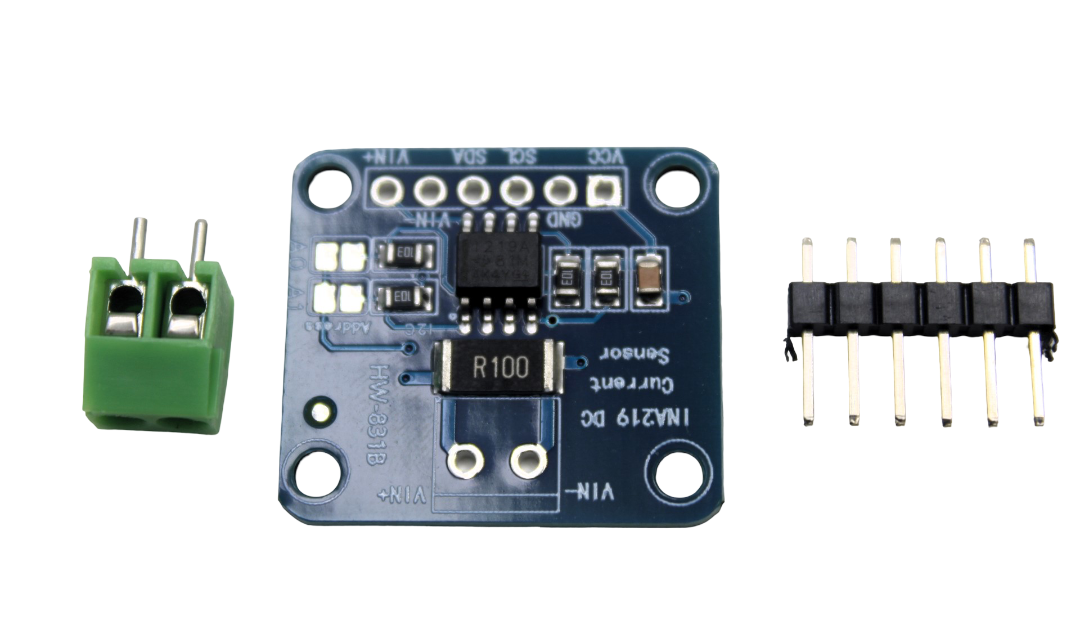
INA219 I2C Bi-Directional Current/Power Monitoring Module
Measure current and voltage precisely, then display the readings on a seven segment display — build a professional power analyser with BCD decoder IC.
Frequently Asked Questions
What is the difference between 7447 and 7448 decoder ICs?
The 74LS47 is designed for common anode displays (active-LOW outputs, open-collector). The 74LS48 is designed for common cathode displays (active-HIGH outputs, totem-pole). They are not interchangeable — using the wrong one will result in all segments being on or all off.
Why does my 74LS47 show strange symbols for inputs above 1001 (9)?
Inputs 1010 through 1111 (decimal 10–15) are undefined in BCD. The 74LS47 may display partial patterns or undefined characters for these inputs. Always ensure your BCD source does not send invalid codes. If you are using a counter IC, use one with a modulo-10 reset (like the 74HC4017) to ensure only valid BCD codes 0–9 are generated.
Can I use a BCD decoder IC at 3.3V for ESP32 or Raspberry Pi GPIO?
The CD4511 supports 3V to 18V operation, so it works with 3.3V GPIO from ESP32 or Pi. The 74LS47 requires 5V TTL input levels and is not suitable for direct connection to 3.3V systems without a level shifter. Use CD4511 for 3.3V applications.
How do I display negative numbers on a seven segment display?
A minus sign is displayed by turning on only the middle segment (G) of one digit. In code, you detect a negative value, output a dash on the most significant digit position, then output the absolute value on the remaining digits. Dedicated minus display is not handled by standard BCD decoders — you must control segment G directly or use a MAX7219 which has a built-in dash character.
How many current-limiting resistors do I need for a 4-digit display with BCD decoder?
For a non-multiplexed setup with one BCD decoder IC per digit, you need 7 resistors per digit (one per segment) × 4 digits = 28 resistors total. For multiplexed setups (e.g., with MAX7219), the current is set globally with just one external resistor (the RSET resistor on pin 18 of MAX7219), reducing BOM significantly.
Ready to Build Your Seven Segment Display Project?
BCD decoder ICs like the 74LS47, CD4511, and MAX7219 bring numeric display capabilities to your electronics projects — from simple school experiments to professional instruments. Whether you go the hardware-only route or combine with Arduino, these ICs are reliable, affordable, and universally available in Indian electronics markets.
Find sensors, modules, and components for your display projects at Zbotic.in — your go-to maker electronics store in India.


Add comment