
Table of Contents
- Why Use a Motor Driver Shield?
- Types of Motor Driver Shields
- Top 5 Motor Driver Shields in India 2026
- Comparison Table
- How to Choose the Right Shield
- Basic Wiring Guide
- Sample Arduino Code
- Products Available at Zbotic
- FAQ
Why Use a Motor Driver Shield?
An Arduino’s digital I/O pins can source or sink a maximum of 40 mA per pin and 200 mA total. A typical DC motor draws anywhere from 200 mA to several Amperes, and a stepper motor needs a carefully regulated current source. Connecting a motor directly to an Arduino pin will damage the microcontroller instantly.
A motor driver shield solves this by sitting on top of the Arduino (using its stackable headers) and providing a dedicated H-bridge or driver IC capable of handling the motor’s current demands. The Arduino’s pins carry only low-current control signals; the shield handles the heavy power switching.
This buying guide covers the five most practical and available motor driver shields in India in 2026, explains what each one is good for, and helps you pick the right one for your project — whether you are building a line-following robot, a CNC machine, a robotic arm, or an automated vehicle.
Types of Motor Driver Shields
Before diving into specific products, it helps to understand the three main categories of motor driver shields:
1. DC Motor Shields (H-Bridge Based)
Use an H-bridge IC (L293D, L298N, TB6612FNG) to drive brushed DC motors in both directions. Typically support 2–4 independent DC motor channels. Best for wheeled robots, fans, pumps, and conveyor belts.
2. Stepper Motor Driver Shields
Use dedicated stepper driver ICs (A4988, DRV8825, TMC2208) with current limiting via Vref. Usually support 1–2 stepper axes plus optional DC motors. Best for CNC, 3D printers, and precise positioning.
3. Servo Driver Shields
Provide PWM output channels for controlling servo motors. Most use the PCA9685 PWM expander via I2C, giving 16 channels from just 2 Arduino pins. Best for robotic arms, pan-tilt mechanisms, and multi-servo animatronics.
Top 5 Motor Driver Shields in India 2026
1. Adafruit Motor Shield V2 (Compatible) — Best All-Rounder
The Adafruit Motor Shield V2 uses the TB6612FNG dual H-bridge driver controlled via a PCA9685 I2C PWM controller. This means you use just two I2C pins (SDA/SCL) to control up to 4 DC motors (1.2 A each, 3 A peak) or 2 stepper motors — and you can stack up to 32 shields on the same Arduino for 128 DC motors!
Pros:
- I2C control — frees up digital pins
- Stackable design
- Supports DC, stepper, and servo motors on one shield
- Excellent library (Adafruit_MotorShield.h)
Cons:
- 1.2 A per channel limits use with heavy motors
- Slightly more expensive than basic shields
Best for: Multi-motor robots, educational projects, maker builds where pin economy matters.
2. L293D Motor Shield — Best for Beginners
The classic L293D shield uses two L293D ICs to drive up to 4 DC motors (0.6 A each) or 2 stepper motors, plus 2 servo channels. It uses digital pins 3, 4, 5, 6, 7, 8, 11, and 12, along with PWM pins 9 and 10 for servo control.
Pros:
- Very affordable — easily the cheapest motor shield in India
- No extra libraries needed (or use AFMotor.h)
- Widely documented with thousands of tutorials
- Includes servo headers
Cons:
- Only 0.6 A per channel — not suitable for medium or large motors
- High pin usage (uses most of the Arduino’s digital pins)
- L293D is inefficient — significant heat dissipation
Best for: Beginners learning robotics, small toy motors, classroom projects, and first robot builds.
3. L298N Motor Driver Module — Best for High-Current DC Motors
The L298N is technically a standalone module rather than a stackable shield, but it is the most popular motor driver in India due to its availability, low cost, and 2 A per channel current capacity. It can drive two DC motors bidirectionally or one stepper motor.
Pros:
- 2 A per channel (4 A peak) — handles medium-sized DC and stepper motors
- Onboard 5 V regulator to power Arduino from motor supply (up to 12 V)
- Extremely well-documented
- Very affordable
Cons:
- Not a stackable shield — requires jumper wires
- Voltage drop: the L298N drops ~2 V across the H-bridge, reducing effective motor voltage
- Gets hot at high current — needs ventilation
Best for: High-current DC motors (up to 2 A), budget stepper motor control, projects where board form factor is flexible.
4. CNC Shield V3 + A4988 — Best for Stepper Motors
The CNC Shield V3 is an Arduino Uno/Mega expansion board specifically designed for stepper motor control. It accepts up to 4 plug-in stepper driver modules (A4988, DRV8825, or TMC2209) and is the standard solution for DIY CNC machines, laser engravers, and 3D printer controllers.
Pros:
- Supports 4 independent stepper axes (X, Y, Z + clone)
- Compatible with GRBL firmware for CNC
- Adjustable microstepping per axis
- Accepts powerful drivers like DRV8825 (2.2 A) or TMC2209 (2.8 A) for heavy motors
Cons:
- GRBL-specific — general-purpose use requires custom programming
- Not suitable for DC motor or servo control
- Driver modules (A4988) sold separately
Best for: CNC routers, laser engravers, 3D printers, any project requiring precise multi-axis stepper control.
5. TB6612FNG Dual Motor Driver — Best for Efficiency
The TB6612FNG is the modern replacement for the L298N. It uses MOSFET H-bridges instead of bipolar transistors, resulting in far less power dissipation and no voltage drop penalty. It delivers 1.2 A continuous (3.2 A peak) per channel and runs cooler at the same current.
Pros:
- MOSFET-based — minimal voltage drop (0.1 V vs 2 V on L298N)
- Runs much cooler than L298N
- Built-in standby mode for power saving
- Supports PWM up to 100 kHz
Cons:
- 1.2 A continuous limits use with larger motors
- Less widely documented in India compared to L298N
Best for: Battery-powered robots, efficiency-critical applications, compact builds where heat management is important.
Comparison Table
| Shield | Driver IC | Current/Ch | DC Motors | Steppers | Interface |
|---|---|---|---|---|---|
| Adafruit V2 | TB6612FNG | 1.2 A | 4 | 2 | I2C |
| L293D Shield | L293D | 0.6 A | 4 | 2 | Digital Pins |
| L298N Module | L298N | 2 A | 2 | 1 | Digital Pins |
| CNC Shield + A4988 | A4988 | 1.0 A | 0 | 4 | Step/Dir |
| TB6612FNG Module | TB6612FNG | 1.2 A | 2 | 1 | Digital Pins |
How to Choose the Right Shield
Use this quick decision framework:
- Small toy/hobby motors (<0.5 A): L293D shield — cheap, easy, plenty of tutorials.
- Medium DC motors (0.5–2 A): L298N module or TB6612FNG — TB6612 if efficiency matters, L298N if budget is tight.
- Stepper motors for CNC/3D printer: CNC Shield V3 + A4988 or DRV8825 drivers.
- Multi-motor robot with many axes: Adafruit Motor Shield V2 (stackable, I2C).
- Battery-powered robot: TB6612FNG — lowest quiescent current and no voltage drop penalty.
- Servo-heavy builds: PCA9685 16-channel servo shield — not an H-bridge, but gives 16 PWM channels over I2C.

A4988 Stepper Motor Driver Controller Board – RED
Plug-in stepper driver for CNC Shield V3 and Ramps boards. Supports up to 1/16 microstepping and 1A continuous per coil. Essential for precise stepper motor control.
Basic Wiring Guide
Here is how to wire up the most common shield types with an Arduino Uno:
L293D Shield
- Stack the L293D shield directly onto the Arduino Uno headers — no extra wiring needed
- Connect motor power (6–25 V) to the EXT_PWR terminal on the shield
- Connect motors to M1, M2, M3, or M4 terminals
- The shield draws logic power from the Arduino’s 5 V rail
L298N Module
- Connect motor supply (6–35 V) to VS pin; GND to GND
- Connect IN1, IN2 to two Arduino digital pins for Motor A direction control
- Connect ENA to an Arduino PWM pin for Motor A speed control (or bridge the jumper for full speed)
- Repeat IN3, IN4, ENB for Motor B
- If motor supply is under 12 V, keep the 5 V jumper and power Arduino from the L298N’s 5 V output
CNC Shield + A4988
- Insert A4988 drivers into the X, Y, Z, A sockets (check orientation — pin 1 mark matters!)
- Set microstepping jumpers as required (all three jumpers = 1/16 step)
- Connect motor power (12–24 V) to the power terminals
- Connect stepper motor coil pairs to the motor terminals per axis
- Set Vref on each A4988 before powering on (see our A4988 Vref guide)
Sample Arduino Code
L298N — Simple DC Motor Forward/Reverse
// L298N Motor A: IN1=pin 7, IN2=pin 8, ENA=pin 9
#define IN1 7
#define IN2 8
#define ENA 9

void setup() {
  pinMode(IN1, OUTPUT);
  pinMode(IN2, OUTPUT);
  pinMode(ENA, OUTPUT);
}

void loop() {
  // Forward at 70% speed
  digitalWrite(IN1, HIGH);
  digitalWrite(IN2, LOW);
  analogWrite(ENA, 178);  // 178/255 = ~70%
  delay(2000);

  // Stop
  analogWrite(ENA, 0);
  delay(500);

  // Reverse at 70% speed
  digitalWrite(IN1, LOW);
  digitalWrite(IN2, HIGH);
  analogWrite(ENA, 178);
  delay(2000);

  analogWrite(ENA, 0);
  delay(500);
}
A4988 — Basic Stepper Control (without library)
// A4988: STEP=pin 3, DIR=pin 4, ENABLE=pin 8
#define STEP_PIN 3
#define DIR_PIN 4
#define EN_PIN 8

void setup() {
  pinMode(STEP_PIN, OUTPUT);
  pinMode(DIR_PIN, OUTPUT);
  pinMode(EN_PIN, OUTPUT);
  digitalWrite(EN_PIN, LOW); // Enable driver
}

void loop() {
  digitalWrite(DIR_PIN, HIGH); // Clockwise
  for (int i = 0; i < 200; i++) {
    digitalWrite(STEP_PIN, HIGH);
    delayMicroseconds(1000);
    digitalWrite(STEP_PIN, LOW);
    delayMicroseconds(1000);
  }
  delay(1000);

  digitalWrite(DIR_PIN, LOW); // Counter-clockwise
  for (int i = 0; i < 200; i++) {
    digitalWrite(STEP_PIN, HIGH);
    delayMicroseconds(1000);
    digitalWrite(STEP_PIN, LOW);
    delayMicroseconds(1000);
  }
  delay(1000);
}
42HS48-1204A NEMA17 5.6 kg-cm Stepper Motor
Pair with the A4988 driver or CNC Shield V3 for a complete stepper motion system. Available with detachable cable for easy wiring in CNC and 3D printer builds.
Products Available at Zbotic
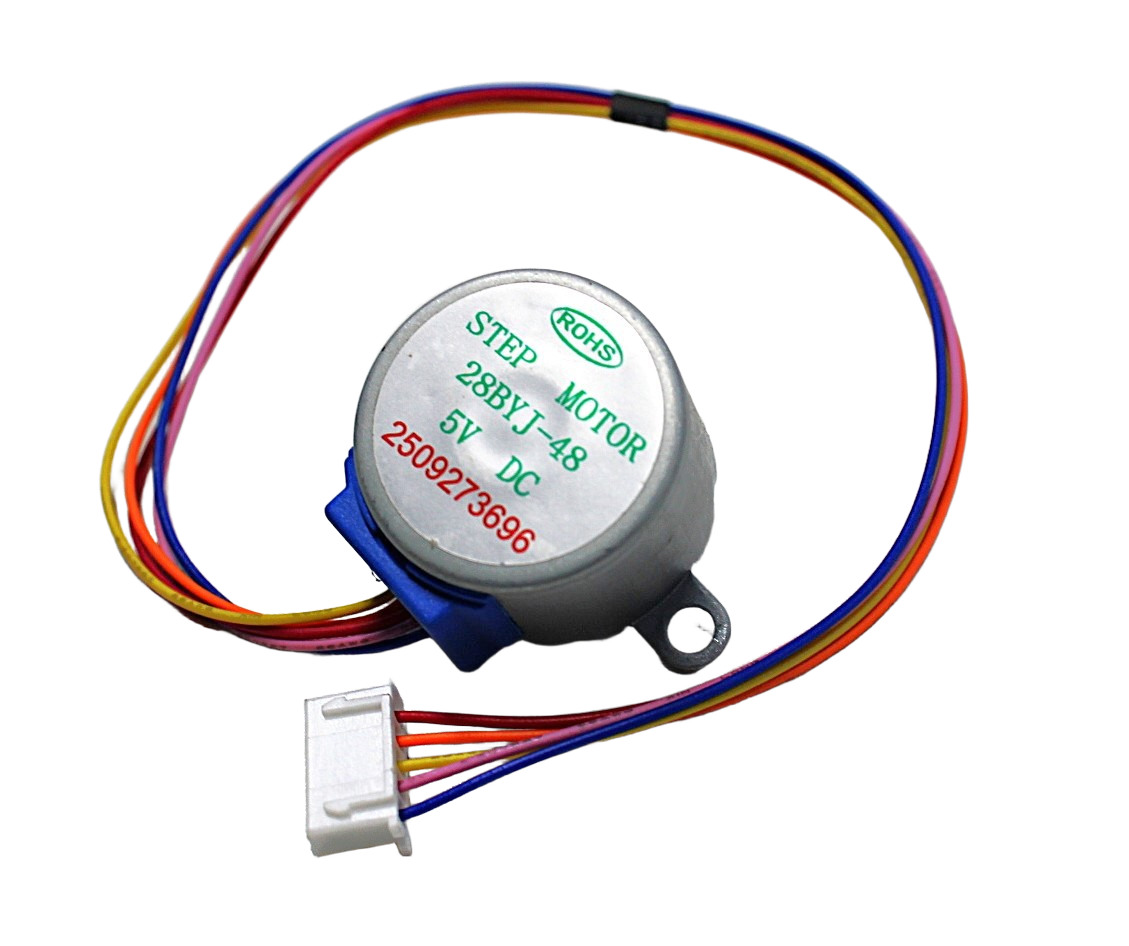
28BYJ-48 5V Stepper Motor
A great beginner stepper motor with ULN2003 driver board. Perfect for learning stepper concepts before moving to NEMA17 + A4988 for larger projects.
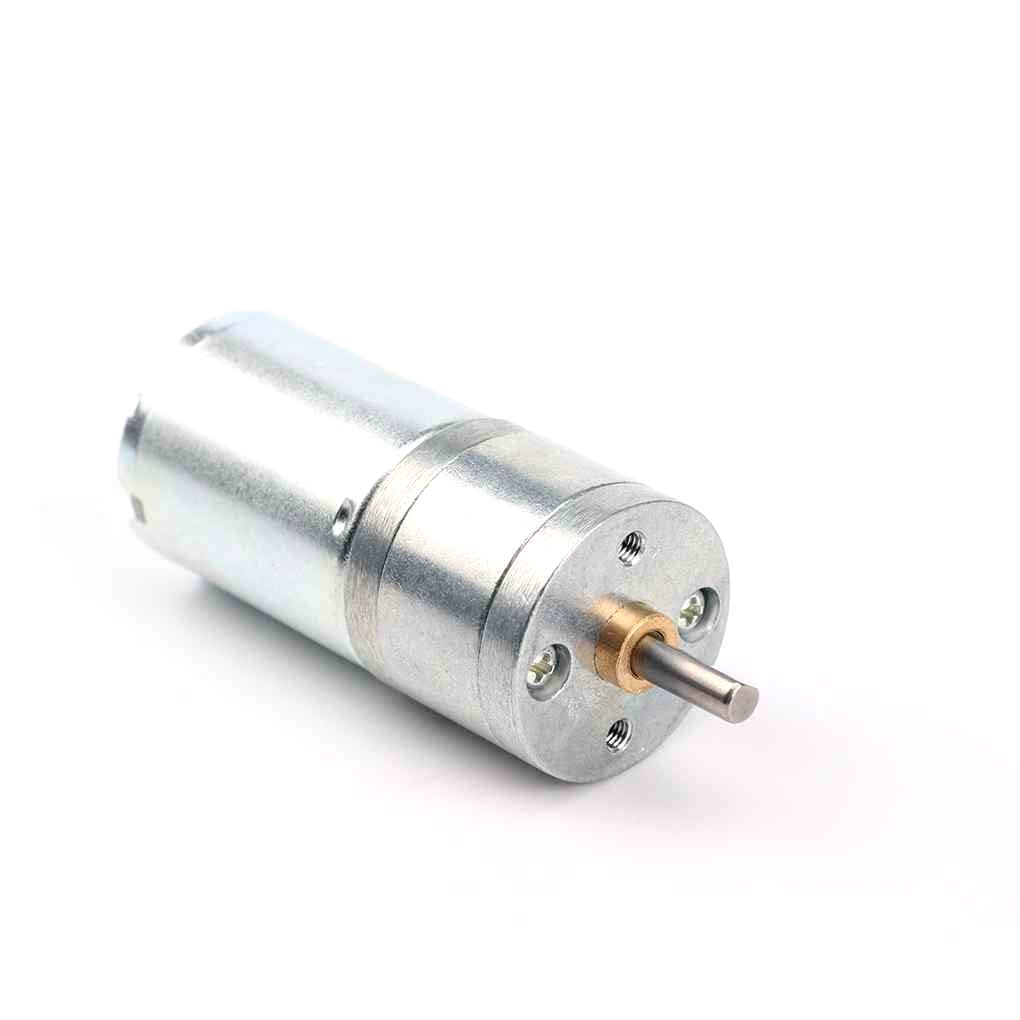
25GA-370 12V 12RPM DC Reducer Gear Motor
A compact gear motor ideal for robot wheels, conveyor belts, and slow-speed mechanisms. Drive with L298N or TB6612FNG motor driver from Arduino.
Frequently Asked Questions
Can I use the L293D shield for a NEMA17 stepper motor?
No. The L293D is rated at only 0.6 A per channel, while most NEMA17 motors need 1.0–1.5 A. Running a NEMA17 on an L293D will result in the IC overheating and possible damage. Use an A4988 or DRV8825 driver instead.
What is the best motor driver shield for a line-follower robot in India?
For a basic line-follower using small DC motors (under 0.5 A), the L293D shield is the most affordable and beginner-friendly option. If your motors draw more than 0.5 A, upgrade to the TB6612FNG or L298N module.
Can I drive servo motors from a motor driver shield?
Many motor driver shields (L293D, Adafruit V2) include dedicated servo output pins that connect to the Arduino’s PWM pins. However, for more than 2–3 servos, use a dedicated PCA9685 servo shield that provides 16 PWM channels over I2C.
What voltage should I supply to my motor driver shield?
It depends on your motors. Most small robots use 7.4 V (2S LiPo) or 12 V (3S LiPo or bench supply). The L298N handles up to 46 V, the A4988 up to 35 V, and the L293D up to 36 V. Always check the shield’s maximum VMOT voltage against your supply.
Is the L298N module compatible with Arduino Mega?
Yes, the L298N module works with any Arduino (Uno, Nano, Mega, Leonardo) since it uses standard digital GPIO pins and PWM pins. On the Mega, you have more PWM pins to choose from, giving more flexibility in pin assignment.
Conclusion
Choosing the right motor driver shield for your Arduino project comes down to your motor type, current requirement, and the number of axes you need to control. Beginners starting out with small motors should go with the affordable L293D shield. Those building serious robots or CNC machines should invest in the Adafruit Motor Shield V2 or the CNC Shield V3 with A4988 drivers.
The good news is that all of these drivers are available in India with fast delivery. Explore the full range of motors and drivers at Zbotic and get your project moving.


Add comment