
Table of Contents
- Why Your Raspberry Pi Needs a UPS
- How a Raspberry Pi UPS Works
- Components You Need
- Wiring and Assembly Guide
- Software Setup and Monitoring
- Advanced Options and Upgrades
- Troubleshooting Common Issues
- Frequently Asked Questions
If you are running a Raspberry Pi as a home server, a surveillance camera, or an IoT gateway, a sudden power cut can corrupt your SD card and destroy hours of work. Building a UPS for Raspberry Pi — an uninterruptible power supply build — is the single most important upgrade you can make for any critical Pi project. In India, where power outages are frequent, this project can save you from constant headaches. This guide walks you through a complete DIY UPS build using 18650 lithium cells, a BMS, and a boost converter to deliver a rock-solid 5V supply to your Raspberry Pi at all times.
Why Your Raspberry Pi Needs a UPS
The Raspberry Pi is a powerful single-board computer, but it has one major Achilles heel: it has no graceful shutdown mechanism when power is cut abruptly. The Raspberry Pi OS writes to the SD card frequently for logging, caching, and system operations. When power disappears mid-write, the filesystem can become corrupted. In the worst case, the OS refuses to boot and all your data is lost.
For hobbyist projects, this is a minor inconvenience. But for serious applications — a home automation hub running Home Assistant, a local NAS, a Pi-hole DNS server, or a network gateway — downtime and data loss are unacceptable. A UPS solves this problem by providing battery backup power the moment mains power drops, giving the Pi time to either keep running or perform a graceful shutdown.
Beyond data protection, a UPS also shields the Pi from voltage fluctuations and brownouts. Indian power grids in many cities and towns experience frequent voltage dips that cause the Pi to brown out and reboot, which has the same corrupting effect as a power cut. A well-designed UPS with a boost converter maintains a stable 5V regardless of input variations.
How a Raspberry Pi UPS Works
The basic architecture of a Raspberry Pi UPS build is straightforward. You use lithium-ion 18650 cells as the energy storage. A Battery Management System (BMS) protects these cells from overcharge, over-discharge, and short circuits. A boost (step-up) or charge-discharge module converts the battery voltage (typically 3.7V for a single cell or 7.4V for two cells) to a steady 5V output for the Pi.
The most popular topology for a simple UPS is a pass-through charging circuit. In this design, the charger module (like a TP4056 for single-cell builds or a dedicated UPS module) charges the battery while simultaneously powering the output load. When mains power is present, the output comes from the charger with the battery topped up. When mains power fails, the battery seamlessly takes over. The switchover is instantaneous — the Pi never sees a power interruption.
For higher-power Raspberry Pi 4 and Pi 5 builds that require 3A at 5V, a two-cell series (7.4V) configuration with a dedicated UPS HAT or a multi-cell boost module is recommended. Single 18650 cells can typically deliver 2A continuously, which is marginal for a Pi 4 under load.
Components You Need
Here is a complete bill of materials for a reliable Raspberry Pi UPS build:
- 18650 Li-ion cells: 2x 2500mAh or 3000mAh cells (Samsung 25R, Sony VTC6, or Panasonic NCR18650B are excellent choices). Never use unbranded cells — they often have false capacity ratings and poor discharge performance.
- 18650 Battery Holder: A 2S (series) holder or two single holders wired in series.
- BMS (Battery Management System): A 2S 7.4V BMS rated for at least 3A continuous. This protects your cells from overcharge and over-discharge.
- Boost Converter Module: A 5V 3A boost module. The MT3608 or XL6009 based modules are widely available. Set the output to exactly 5.1V for the Pi (slightly higher to compensate for cable drop).
- Charger Module: Either an integrated UPS module (that handles charge and boost in one PCB) or a separate TP4056-based charger feeding into the BMS.
- Power indicator LEDs: Optional but helpful for knowing battery status.
- USB-A or USB-C connector: To connect to the Raspberry Pi’s power input.
- Enclosure: A 3D-printed or off-the-shelf project box to house everything safely.
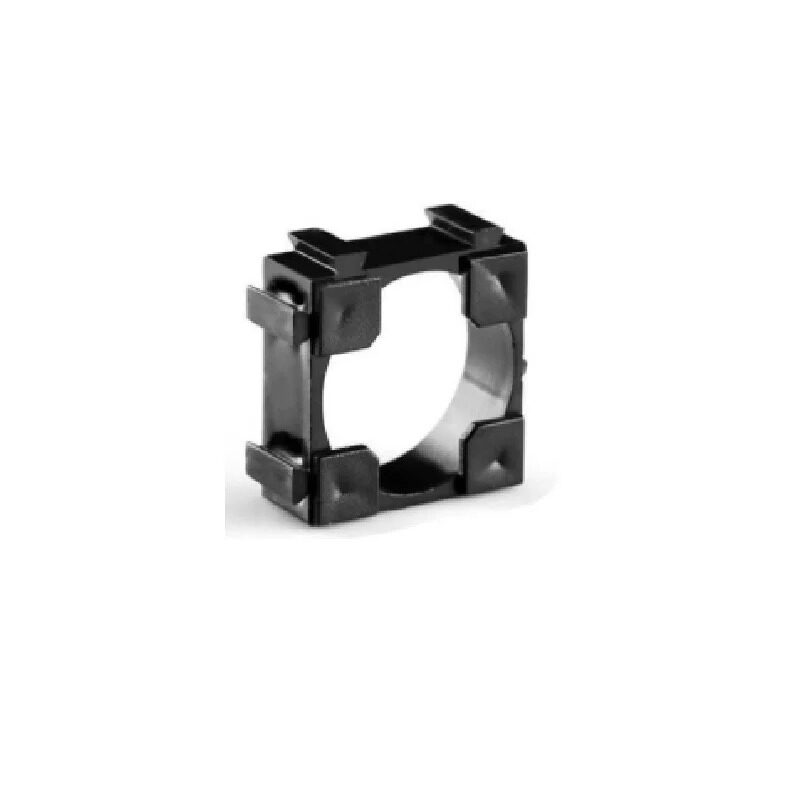
1 x 18650 Battery Holder with 18.4MM Bore Diameter – Pack of 4
Sturdy single-cell 18650 holders with 18.4mm bore — buy two and wire in series for a 2S UPS configuration. Spring contacts ensure reliable connection.

1S 18650 Li-ion Lithium Battery BMS Charger Protection Board for 3.7V Battery
All-in-one BMS protection board for single 18650 cells. Handles overcharge, over-discharge, and short circuit protection — essential for safe UPS builds.
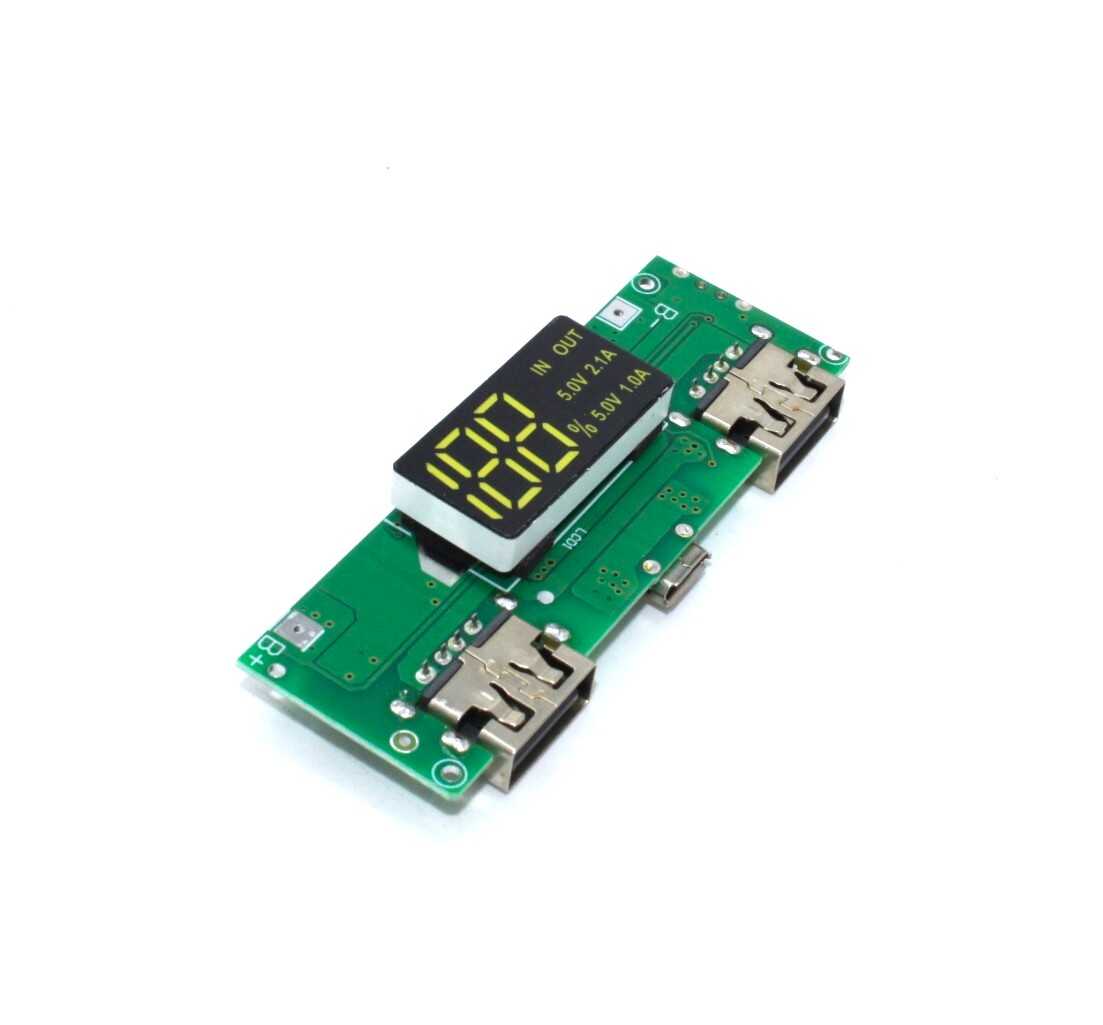
18650 5V 1A/2A Lithium Battery Digital Display & Charging Module, Dual USB Output
An all-in-one charging and boost module with digital display for 18650 cells. Perfect for a compact Raspberry Pi UPS — handles charging, protection, and 5V output in one board.
Wiring and Assembly Guide
Follow these steps carefully. Work with discharged batteries until you have verified the circuit is correct.
- Prepare the battery holders: If using two single 18650 holders wired in series, connect the positive terminal of holder 1 to the negative terminal of holder 2. This gives you a 2S 7.4V pack with positive from holder 2 and negative from holder 1.
- Connect the BMS: Wire the battery pack positive and negative to the BMS B+ and B- pads. The BMS P+ and P- are your protected output terminals.
- Wire the boost converter: Connect BMS P+ and P- to the boost converter input. Set the boost converter output to 5.1V using a multimeter before connecting the Pi. This is critical — too high a voltage will damage the Pi.
- Add the charger input: Wire your 5V USB charger input to the BMS charging input (C+ and C- if present, or directly to B+ and B- for simpler BMS boards). The charger must be rated for the cell chemistry (4.2V max per cell for Li-ion).
- Connect to the Raspberry Pi: Use a short USB-A to micro USB or USB-C cable from the boost converter output to the Pi. Keep the cable short to minimise resistance losses.
- Test thoroughly: Power on with cells installed. Measure the output voltage. Plug in the charger. Unplug the charger and verify the Pi continues running on battery.
Safety tip: Always use a fuse (1A for single cell, 3A for dual cell) on the positive output wire. A short circuit in a lithium battery pack can cause fire if unprotected. The BMS provides some protection, but an inline fuse is a good additional safeguard.
Software Setup and Monitoring
A hardware UPS alone is useful, but adding software monitoring makes it far more powerful. With a voltage sense circuit and a few lines of Python, your Pi can detect when it has switched to battery power and initiate a safe shutdown after a configurable timeout.
Option 1: Commercial UPS HAT with I2C communication
HATs from brands like Geekworm (X728) or PiJuice communicate with the Pi over I2C and provide accurate battery state-of-charge data. They expose battery percentage, voltage, and charge status as registers you can read from Python.
Option 2: ADC-based voltage monitoring
Connect a voltage divider from your battery pack to an ADC (like the MCP3008) connected to the Pi’s SPI interface. Read the voltage in Python and map it to battery percentage. Trigger a shutdown when voltage drops below your threshold (e.g., 3.3V per cell for Li-ion).
Option 3: GPIO power-loss detection
Wire a simple circuit that pulls a GPIO pin HIGH when mains power is present, and LOW when running on battery. A Python script monitors this pin and starts a shutdown countdown when it goes LOW.
A minimal shutdown script looks like this:
import RPi.GPIO as GPIO
import time
import os

POWER_PIN = 17
GPIO.setmode(GPIO.BCM)
GPIO.setup(POWER_PIN, GPIO.IN, pull_up_down=GPIO.PUD_UP)

while True:
    if GPIO.input(POWER_PIN) == GPIO.LOW:
        print("Power lost! Shutting down in 60 seconds...")
        time.sleep(60)
        os.system("sudo shutdown -h now")
    time.sleep(5)
Run this script as a systemd service so it starts automatically on boot. This ensures your Pi always has protection even after a reboot.
Advanced Options and Upgrades
Expanding battery capacity: For longer runtime, you can wire multiple 18650 cells in parallel (same voltage, added capacity). Three cells in parallel gives you 3x the runtime. Use cells of the same brand, model, and age, and always balance them before connecting in parallel.
Using a dedicated UPS module: Several purpose-built UPS modules are available that integrate the BMS, charger, and boost converter in a single board with I2C monitoring. These are more reliable than discrete component builds and recommended for production projects.
LiFePO4 cells for longevity: While 18650 Li-ion cells are the most accessible, LiFePO4 (lithium iron phosphate) cells offer 2000+ charge cycles vs 300-500 for standard Li-ion. They are heavier and larger for the same capacity but will outlast the Raspberry Pi itself in terms of cycle life.
Adding a power button: Wire a momentary pushbutton between the boost converter output and the Pi to allow a clean power-on. Many UPS HATs include this feature. For DIY builds, a MOSFET-based soft power circuit can be added.
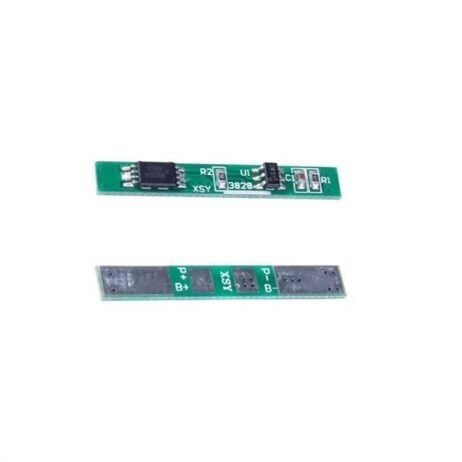
1S 3.7V 2A 1MOS BMS Li-ion 18650 Battery Protection Board
Compact single-cell BMS with 2A continuous rating. Pairs perfectly with the 18650 charging module for a clean, safe UPS build.
Troubleshooting Common Issues
Pi keeps rebooting under load: This is usually a voltage drop due to insufficient current from the battery or boost converter. Check that your boost converter is rated for at least 3A, and that your 18650 cells are high-drain rated (look for cells with a 10A+ discharge rating). Cheap boost modules often cannot sustain their rated current.
BMS keeps tripping: The BMS overcurrent protection is triggering. Either the load is too high, the cells are too old, or the BMS rating is too low. Try a BMS rated for 5A or higher.
Battery not charging: Check the charger input voltage. The TP4056 requires at least 4.5V input; many cheap USB adapters drop below this under load. Also check that the BMS charge input is correctly wired — the B+ and C+ pins are different on some BMS boards.
Output voltage drifts: Boost converters can drift over time or temperature. Use a module with a feedback resistor and a multi-turn trimmer pot for stable output. Check output voltage every few months and readjust if needed.
Frequently Asked Questions
How long will the UPS run the Raspberry Pi on a single 18650 cell?
A single 2500mAh 18650 cell at full charge can power a Raspberry Pi 3B+ drawing 600mA at 5V for approximately 2-3 hours in light use. A Pi 4 drawing 1.2A under moderate load would get about 1-1.5 hours. Use two cells in parallel for double the runtime.
Can I use this UPS build with other single-board computers like Orange Pi or Banana Pi?
Yes, as long as the SBC uses a 5V power input and the current draw is within your UPS capacity. Check the power specifications of your board and ensure the boost converter is rated accordingly.
Is it safe to leave the UPS plugged in indefinitely?
With a proper BMS, yes. The BMS stops charging once the cell reaches 4.2V and prevents over-discharge. However, keeping lithium cells at 100% charge constantly does accelerate degradation slightly. Some UPS modules allow you to set a charge ceiling (e.g., 80%) to improve cycle life.
What happens if the battery runs fully flat?
The BMS will disconnect the output to prevent over-discharge damage to the cells (below ~2.5V per cell for Li-ion). The Pi will lose power abruptly. This is why software monitoring with a graceful shutdown is important — it ensures the Pi shuts down cleanly before the BMS cutoff.
Can I use old laptop battery cells for this UPS?
Technically yes, but it is not recommended. Old cells have reduced capacity, higher internal resistance, and may be imbalanced. For a reliable UPS build, always use fresh cells from a reputable brand. The cost difference between a fresh cell and a used cell is small compared to the peace of mind.
Build Your Raspberry Pi UPS Today
A DIY UPS for Raspberry Pi is one of the most satisfying and practical electronics projects you can build. It protects your SD card, your data, and your projects from the unpredictable Indian power grid. With an 18650 cell, a BMS protection board, and a boost converter, you can have a complete uninterruptible power supply build for under ₹500 in parts. Shop all the components you need at Zbotic.in — India’s trusted source for electronics components delivered fast.


Add comment