
Fixed Wing Drone for Beginners: Parts, Build & First Flight
When most people think of drones, they picture quadcopters. But fixed-wing drones — aircraft that generate lift from wings rather than spinning rotors — have significant advantages that make them the preferred choice for survey professionals, long-range mapping teams, and efficient agricultural monitoring operations across India.
If you have been curious about fixed-wing drones but did not know where to start, this complete beginner’s guide covers every part you need, how to assemble them, how to configure your flight controller, and how to safely complete your first flight.
Why Choose a Fixed-Wing Drone?
Fixed-wing drones have a fundamentally different efficiency profile from multirotors. Instead of using rotors to generate all their lift (which is energy-intensive), they use wings to generate aerodynamic lift, requiring power only to maintain forward speed. This translates into:
- Longer flight times: 45–90 minutes compared to 15–30 minutes for typical quadcopters at the same battery weight
- Greater range: Coverage of 5–20 km on a single battery charge
- Higher cruise speed: 60–120 km/h cruise vs 40–60 km/h for multirotors
- Better wind resistance: Wings provide stability in crosswinds that would ground a multirotor
- Large area coverage: Ideal for agricultural surveys, mapping, and photogrammetry missions over hundreds of acres
In India, fixed-wing drones are widely used in Gujarat and Maharashtra for crop health monitoring, in Rajasthan for large-scale mapping, and by defence-aligned start-ups for border area surveillance applications.
Types of Fixed-Wing Drone Configurations
Conventional Layout (Tractor)
Motor and propeller at the nose, tail with horizontal and vertical stabilisers. The most beginner-friendly layout because it behaves predictably and is easy to recover from unusual attitudes. Examples: Easy Glider, Bixler.
Pusher Layout
Motor at the tail pushing the aircraft forward. Keeps the nose clear for camera payloads. More aerodynamically efficient in some designs. Popular for survey drones because the camera has an unobstructed forward view. Examples: Skywalker X8, Mini Talon.
Flying Wing
No separate tail; all control is via elevons (combined aileron/elevator) on the trailing edge. Compact, fast, and aerodynamically efficient. Harder to tune and less forgiving for beginners. Examples: Zephyr, Custom delta designs.
High-Wing vs Low-Wing
High-wing configurations (wing mounted on top of fuselage) are more stable and self-levelling — ideal for beginners. Low-wing designs are faster and more manoeuvrable but require more active control input.
Recommendation for beginners: Start with a conventional layout or pusher-prop design with a high-wing configuration. Once you are comfortable, graduate to flying wings.
Complete Parts List
Here is a comprehensive parts list for building a beginner-friendly fixed-wing drone with autonomous flight capability:
Airframe
- EPP or EPO foam airframe with 1.2m–1.8m wingspan (complete with servos and servo horns)
- Optional: fibreglass or carbon fibre reinforcement strips for wing joints
Propulsion
- Brushless motor: 900KV–1,300KV for a 1.5m wingspan conventional design
- ESC: 30A–60A, BLHeli firmware preferred for smooth throttle response
- Propeller: 9″–11″ diameter, 4.7″–5.5″ pitch for a pusher; 9″–10″ for a tractor
Control
- Flight controller: Pixhawk (Cube Orange, Pixhawk 6C, or similar) running ArduPlane
- GPS module: M8N or M9N with external compass
- Radio receiver: compatible with your RC transmitter (FrSky, TBS Crossfire, ExpressLRS)
- RC transmitter: Minimum 6-channel, 8–10 channels preferred (Mode 2 is standard in India)
Communication
- Telemetry radio: 915MHz 100mW pair (ground unit + air unit)
- Optional FPV camera and video transmitter for visual orientation aid
Power
- LiPo battery: 3S or 4S, 3,000–5,000mAh for a 1.5m wingspan build
- Battery charger: Balance charger with matching connector
- BEC/Power module: Provides regulated 5V/12V to FC and servos from main battery
Tools & Accessories
- Prop balancer
- Soldering iron and solder
- Multimeter
- Servo connector crimping tool
- CA (super glue) and epoxy for airframe assembly
- Landing mat or helipad for take-off reference
Choosing and Preparing the Airframe
For a first build, a pre-cut foam airframe kit is strongly recommended over scratch building. These kits include all foam parts precision-cut, pre-installed servos in the wings, and sometimes motor mounts already reinforced.
Foam Types
- EPO (Expanded Polyolefin): Durable, flexible, crash-resistant. Preferred for beginners. Slightly heavier than EPP.
- EPP (Expanded Polypropylene): More flexible, slightly lighter, better at absorbing impact energy without breaking. Harder to glue.
- Balsa wood: Traditional RC plane material, lightweight and stiff. Requires more skill to work with and is less crash-resistant.
Wing Jointing
Most kits have removable wing panels that attach to a central spar. Reinforce the spar tube with a thin film of epoxy and check for flex before first flight. A wing that flexes excessively at the root causes control surface inefficiency and can flutter at speed.
CG Marking
Identify the correct CG location from the kit documentation (typically 25–33% of the MAC from the wing’s leading edge). Mark this point on the fuselage with a permanent marker — you will reference it repeatedly during assembly.
Propulsion System: Motor, ESC & Propeller
Motor Selection
Fixed-wing motors need different characteristics from multirotor motors. They spin larger, slower propellers at moderate efficiency rather than small props at high RPM. Key parameters:
- KV rating: Lower KV (900–1,500) for larger diameter propellers. Higher KV (1,800–2,400) for smaller props at higher RPM.
- Watts: Plan for 100–150W of motor output per kg of aircraft weight for adequate climb performance.
- Motor size: 2826, 2830, 3520 stator sizes are common for 1.5m wingspan builds.
Propeller Selection
Propeller selection for a fixed wing is a balance between static thrust (needed for hand launch) and cruise efficiency (needed for endurance). Start with the manufacturer’s recommended prop size and pitch, then experiment. Never exceed the maximum current rating of your ESC.
For pusher configurations, the prop rotates in the reverse direction of the motor shaft — ensure you order a pusher prop (right-hand or left-hand thread) matching your motor’s rotation direction.
ESC Configuration
Unlike multirotor ESCs, fixed-wing ESCs often have different braking profiles. Disable the brake function (prop free-spinning when motor is off) to prevent the abrupt drag change that disrupts flight. Set the throttle curve to linear for predictable cruise control.
Electronics: FC, GPS, Receiver & Telemetry
Flight Controller Placement
Mount the FC level with the aircraft’s flight attitude (nose forward, flat in level flight). Use vibration-damping foam pads between the FC and the fuselage. Incorrect axis orientation will cause the FC to fight the aircraft’s natural stability.
GPS Placement
Mount the GPS module as far from motors, ESCs, and power wiring as possible — typically at the tail or on a short mast on the fuselage. If compass readings are affected by interference, rotate the GPS module 90° or 180° and set the correct orientation in ArduPlane’s COMPASS_ORIENT parameter.
Receiver Placement
Diversity receivers (two antennas) provide better link reliability during banking manoeuvres where the aircraft’s body can block line of sight. Orient one antenna horizontally and one vertically. Position antennas away from carbon fibre parts which attenuate RF signals.
Telemetry Radio
The air unit attaches to the FC via UART serial port. Mount the telemetry antenna at 90° to the aircraft’s long axis for maximum side-facing gain (most flight time is spent broadside to the ground station).
Step-by-Step Assembly
- Airframe: Assemble the foam fuselage, attach wing panels to the main spar, and secure the tail surfaces. Test all hinge points for free movement.
- Servo linkages: Connect servo horns to control surface pushrods. Set all surfaces to neutral (zero deflection) position before connecting to the receiver.
- Motor and ESC: Mount the motor, run ESC wires to the battery connection point. Solder the ESC to the power bus. Test motor direction before fitting the propeller.
- FC installation: Mount the FC on vibration dampers. Connect all servo outputs, ESC signal wire, and power module.
- GPS and compass: Mount externally, connect to FC. Set COMPASS_ORIENT if needed.
- Receiver: Bind to transmitter, connect to FC. Verify all channels map correctly.
- Telemetry: Connect air unit to spare UART on FC. Verify link in Mission Planner.
- Battery mount: Slide battery into fuselage. Adjust position forward or back to hit the CG mark. This is the most important single step — a wrong CG makes the aircraft unflyable.
- CG verification: With battery installed, balance the aircraft on two fingers at the CG mark. It should balance level or very slightly nose-heavy. Never tail-heavy.
- Propeller: Fit and secure. Confirm it is pushed fully onto the motor shaft and the prop nut is tight.
Software Setup with ArduPlane / Mission Planner
Initial Setup
- Flash latest stable ArduPlane firmware via Mission Planner
- Run the Frame Type wizard (fixed wing, not copter or rover)
- Calibrate accelerometer (6-position calibration)
- Calibrate compass (outdoors, away from metal objects)
- Calibrate radio (move all sticks/switches to full travel)
- Set failsafe actions (RTL — Return to Launch)
Control Surface Direction
In Stabilize mode, verify that stick inputs move the surfaces correctly AND that the flight controller’s stabilisation pushes surfaces in the correct direction to level the aircraft. This is the most common setup error and causes crashes on first flight.
Auto-Tune
ArduPlane has an AUTOTUNE mode that flies the aircraft through a series of small manoeuvres and tunes the roll and pitch PIDs automatically. Run AUTOTUNE on the second or third flight once you are confident the basic setup is correct.
Pre-Flight Checks
- GPS lock: minimum 8 satellites, HDOP below 2.0
- Battery voltage: full charge (4.2V/cell for LiPo)
- Control surfaces: all moving in the correct direction
- Prop secure: no wobble, correct rotation direction
- CG: verify with fully loaded aircraft
- Area clear: 500m radius, no people, no power lines, no trees
- Wind: below 25 km/h for first flight
- Telemetry: connected and reading on laptop
- Failsafe: tested (remove receiver binding to confirm motor cuts to safe)
First Flight Guide
Fixed-wing drones require either a hand launch or a rolling takeoff. For beginners, hand launch is the most practical method in India where paved runways are rarely available.
Hand Launch Procedure
- Set mode to FBWA (Fly By Wire A — the aircraft maintains wings level, you control heading and altitude)
- Apply 75% throttle and hold for 2 seconds to verify motor is running
- Throw the aircraft level into the wind with a firm, forward push (not upward) from slightly below the fuselage
- Release cleanly — do not toss upward or nose-high
- The aircraft will climb away; apply small pitch corrections if needed
- Climb to safe altitude (minimum 50m) before attempting any turns
Flying Fixed-Wing in FBWA
In FBWA mode, the aircraft automatically corrects for roll and prevents excessive pitch. Roll stick controls bank angle (typically limited to 45°), pitch stick controls climb/descend. This is the safest mode for first flights.
Landing
Approach into the wind at reduced throttle. Fixed-wing drones glide — do not cut throttle to zero on the approach, maintain enough power for a shallow descent. Flare (pull back on pitch) just before touchdown to bleed off speed. Land on grass if possible to cushion the impact.
Recommended Products from Zbotic

3DR 100mW Radio Telemetry 915MHz for APM/PX4/Pixhawk
Essential for fixed-wing autonomous missions. Provides real-time telemetry back to Mission Planner so you can monitor GPS lock, battery, altitude, and course corrections from the ground.
View on Zbotic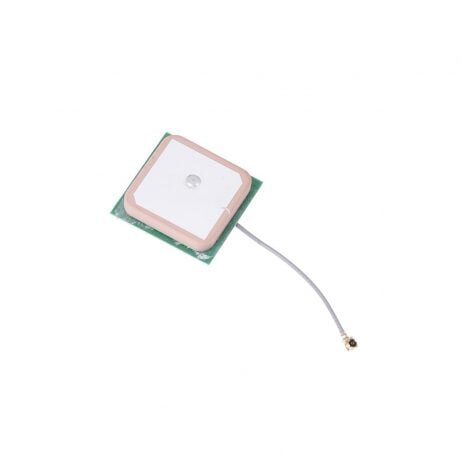
28dB High Gain Ceramic Active GPS Antenna (NEO-6M/7M/8M)
Fast satellite acquisition for long-range fixed-wing missions. The high gain ensures reliable GPS lock even during aggressive manoeuvres or in areas with partial sky obstruction.
View on Zbotic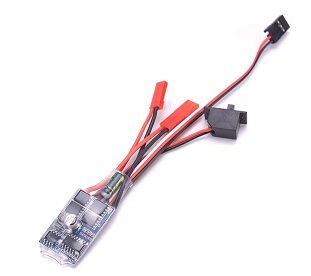
30A Brushed ESC No Brake
Reliable ESC for fixed-wing cruise motor applications. The no-brake configuration allows the propeller to free-spin when motor is off, reducing drag during glide phases for better endurance.
View on Zbotic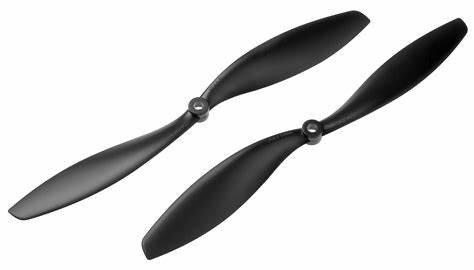
1045 Carbon Fiber Propeller CW&CCW
Lightweight and stiff carbon fibre propeller set. The 10-inch diameter is ideal for 1.3m–1.8m wingspan fixed-wing builds, offering excellent efficiency at cruise RPM ranges.
View on Zbotic
110cm Fast-Fold Landing Pad / Helipad
A clear landing reference is essential for fixed-wing approaches in fields. Protects electronics from ground debris and provides a visual target for belly-landing approach alignment.
View on ZboticFrequently Asked Questions
Is a fixed-wing drone harder to fly than a quadcopter?
In manual mode, yes — fixed-wing requires more skill because you cannot hover to recover from a mistake. However, in assisted modes like FBWA or AUTO on ArduPlane, the flight controller does most of the work and the learning curve is manageable. Start in assisted modes and gradually transition to manual control as your skills develop.
Can I use a fixed-wing drone for FPV?
Absolutely. Fixed-wing FPV (fast-moving first-person view flying over long distances) is a popular style in its own right. You need a wide-angle FPV camera, a video transmitter, and FPV goggles. Many pilots fly fixed-wing FPV purely for the recreational experience of gliding over landscapes.
How far can a fixed-wing drone fly?
A typical DIY fixed-wing build achieves 15–30km range on a single battery charge. With dual batteries or larger capacity packs, 50–80km is achievable. Range is also limited by your RC link distance and DGCA regulations (visual line of sight required without special permissions in India).
What is the best fixed-wing drone for mapping in India?
For agricultural and land mapping, a fixed-wing with a 1.5m–2m wingspan, a survey camera payload, and autonomous mission capability on ArduPlane or PX4 is standard. Popular airframes include the Skywalker X8 (pusher, excellent payload volume), the Phantom Wing series, and custom designs for specific area/altitude requirements.
Do I need a runway for a fixed-wing drone?
Not for most designs. EPP/EPO foam fixed-wings can be hand-launched and belly-landed on grass. Some heavier or faster designs benefit from a short grass runway. VTOL-capable fixed-wings (see our VTOL guide) take off and land vertically and need no runway at all.
Conclusion
Building your first fixed-wing drone is a deeply satisfying project that opens up mission capabilities far beyond what a quadcopter can offer. The keys to success are a stable airframe, correct CG setup, thorough software configuration, and the discipline to fly in assisted modes until you are fully comfortable with the aircraft’s behaviour.
India’s wide open agricultural plains, coastal regions, and highland plateaus offer excellent flying environments for fixed-wing drones. As long as you comply with DGCA regulations and fly safely away from populated areas, fixed-wing drone flying is one of the most rewarding aspects of the RC hobby.
Get Your Fixed-Wing Drone Components from Zbotic
Fast delivery across India. Browse ESCs, GPS modules, telemetry radios, propellers, and more — everything for your first fixed-wing build.
Shop at Zbotic Now


Add comment