
If you have ever wanted to add precise, repeatable mechanical motion to your Arduino or microcontroller project without spending a lot of money, the 28BYJ-48 stepper motor with ULN2003 driver is the perfect place to start. This combination is used by millions of hobbyists worldwide in pan-tilt camera mounts, clock mechanisms, smart blinds, robot joints, and countless other projects.
In this complete tutorial you will learn everything about the 28BYJ-48 stepper motor, how the ULN2003 driver board works, how to wire the system to an Arduino, and how to write code that controls direction, speed, and position — all from scratch.
About the 28BYJ-48 Stepper Motor
The 28BYJ-48 is a small unipolar 5-wire geared stepper motor. Despite its tiny size (about 28mm diameter), it is surprisingly capable for light-load applications. Here are its key specifications:
| Parameter | Value |
|---|---|
| Operating Voltage | 5V DC |
| Number of Phases | 4 |
| Step Angle (full step) | 5.625° / 64 |
| Gear Ratio | 64:1 (actually ~63.68:1) |
| Steps per Revolution (half step) | 4096 (512 electrical × 8 half steps) |
| Rated Current | ~160mA per coil |
| No-load Speed | ~15 RPM at 5V |
| Torque | ~34 mN·m (at output shaft after gearbox) |
Why 5 wires?
The 28BYJ-48 is a unipolar motor. Its two coils each have a centre tap, and the two centre taps are joined inside the motor housing to form one common wire. That gives: 4 coil-end wires + 1 common = 5 wires total. The common wire goes to the positive supply (5V), and the driver switches the four coil ends to ground in sequence to create stepping motion.
The built-in gearbox
A 64:1 planetary gearbox (technically 63.68:1) dramatically increases torque and reduces speed. This is why 4096 half-steps produces exactly one full rotation of the output shaft — even though the motor’s own rotor completes many more internal rotations. The gearbox also makes the motor self-locking at rest.
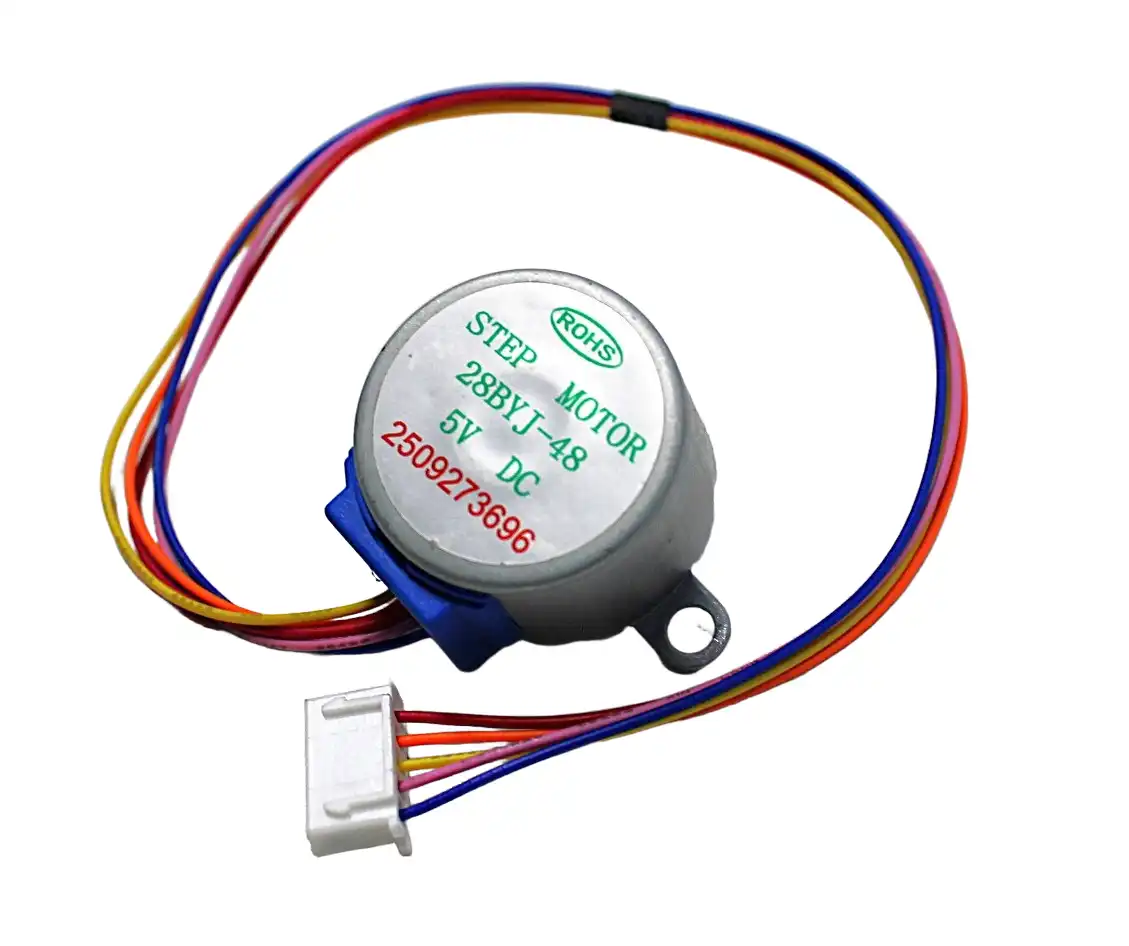
28BYJ-48 5V Stepper Motor
The most beginner-friendly stepper motor available — 5V operation, built-in gearbox, 5-wire connector ready to plug into the ULN2003 driver board.
The ULN2003 Driver Board
The ULN2003 is a Darlington transistor array IC containing seven NPN Darlington pairs. Each channel can sink up to 500mA at up to 50V, making it more than sufficient for the 28BYJ-48’s ~160mA per coil requirement.
What the ULN2003 module provides
- 4 LED indicators — show which coil is energised (great for debugging)
- 5-pin JST connector — directly matches the 28BYJ-48’s cable
- 4 input pins (IN1–IN4) — connect directly to Arduino digital pins
- Power terminals — separate 5V supply for motor (recommended for Arduino projects to avoid brownouts)
Why not drive the motor directly from Arduino pins?
Arduino GPIO pins supply a maximum of 40mA. The 28BYJ-48 draws up to 160mA per active coil. Connecting the motor directly would immediately damage the microcontroller. The ULN2003 acts as a buffer — your Arduino sends a logic signal (5mA or less), and the ULN2003 handles the actual motor current from the power supply.
Wiring: 28BYJ-48 + ULN2003 + Arduino
Component list
- Arduino Uno (or Nano / Mega)
- 28BYJ-48 5V stepper motor
- ULN2003 driver module
- 5V 1A power supply (separate from Arduino for best results)
- Jumper wires
Connection table
| ULN2003 Pin | Connect To |
|---|---|
| IN1 | Arduino Digital Pin 8 |
| IN2 | Arduino Digital Pin 9 |
| IN3 | Arduino Digital Pin 10 |
| IN4 | Arduino Digital Pin 11 |
| VCC (motor power) | 5V (external supply or Arduino 5V for light loads) |
| GND | Arduino GND (share GND between all components) |
| Motor connector | 28BYJ-48 5-pin JST (plug directly) |
Important: Share the GND between the Arduino, ULN2003 power supply, and any external supply. Different grounds cause erratic behaviour.
Step Modes: Full Step, Half Step & Wave Drive
The ULN2003 and 28BYJ-48 combination supports three stepping modes, each with different torque and resolution characteristics:
Wave drive (1-phase stepping)
Only one coil is energised at a time. Sequence: IN1→IN2→IN3→IN4. This uses the least power but gives the lowest torque. Step angle: 5.625° per step, 512 steps per output revolution (before gearing).
Full step drive (2-phase stepping)
Two adjacent coils are energised simultaneously. Sequence: IN1+IN2 → IN2+IN3 → IN3+IN4 → IN4+IN1. This gives about 40% more torque than wave drive. Same step angle as wave drive but smoother motion.
Half step drive (recommended)
Alternates between 1-phase and 2-phase energisation. Sequence: IN1 → IN1+IN2 → IN2 → IN2+IN3 → IN3 → IN3+IN4 → IN4 → IN4+IN1. This doubles resolution to 4096 steps per revolution and produces the smoothest motion. Most Arduino libraries default to half step mode.
Arduino Code & Library Tutorial
Method 1: Using the built-in Stepper library
Arduino IDE includes a Stepper.h library that works with the ULN2003 in full step mode:
#include <Stepper.h>

// Steps per revolution for 28BYJ-48 in full step mode
const int stepsPerRevolution = 2048;

// Create stepper object — pins IN1, IN3, IN2, IN4 (note order!)
Stepper myStepper(stepsPerRevolution, 8, 10, 9, 11);

void setup() {
  myStepper.setSpeed(10); // 10 RPM
  Serial.begin(9600);
}

void loop() {
  Serial.println("Clockwise one revolution");
  myStepper.step(2048);   // Forward one revolution
  delay(1000);

  Serial.println("Counterclockwise one revolution");
  myStepper.step(-2048);  // Backward one revolution
  delay(1000);
}
Note the pin order: The Arduino Stepper library uses the sequence IN1, IN3, IN2, IN4 — not IN1, IN2, IN3, IN4. This is because the library was originally written for bipolar motors and the coil energisation order is different. Using the wrong order causes the motor to vibrate without rotating.
Method 2: Using AccelStepper library (recommended for projects)
The AccelStepper library gives you non-blocking movement, acceleration, deceleration, and position tracking. Install it via Arduino IDE → Tools → Manage Libraries → search “AccelStepper”.
#include <AccelStepper.h>

// Use HALF4WIRE mode for half-step (4096 steps/rev)
#define HALFSTEP 8

// Pin order for 28BYJ-48: IN1, IN3, IN2, IN4
AccelStepper stepper(HALFSTEP, 8, 10, 9, 11);

void setup() {
  stepper.setMaxSpeed(1000);      // Steps per second
  stepper.setAcceleration(500);   // Steps per second squared
  stepper.setSpeed(200);
  stepper.moveTo(4096);           // Move one full revolution forward
}

void loop() {
  // Non-blocking: call run() repeatedly
  if (stepper.distanceToGo() == 0) {
    // Reached target — reverse direction
    stepper.moveTo(-stepper.currentPosition());
  }
  stepper.run();
}
Method 3: Manual stepping (learn the fundamentals)
const int stepPins[4] = {8, 9, 10, 11};

// Half-step sequence for 28BYJ-48
const int stepSequence[8][4] = {
  {1,0,0,0}, {1,1,0,0}, {0,1,0,0}, {0,1,1,0},
  {0,0,1,0}, {0,0,1,1}, {0,0,0,1}, {1,0,0,1}
};

void setup() {
  for(int i=0;i<4;i++) pinMode(stepPins[i], OUTPUT);
}

void step(int stepNum) {
  for(int i=0;i<4;i++) digitalWrite(stepPins[i], stepSequence[stepNum%8][i]);
}

void loop() {
  for(int i=0;i<4096;i++) { step(i); delay(2); } // One revolution CW
  for(int i=4095;i>=0;i--) { step(i); delay(2); } // One revolution CCW
}
Speed Control & Acceleration
The 28BYJ-48 has a maximum no-load speed of about 15 RPM at full step mode. Push it faster and the motor will miss steps or stall. Here are the limits to respect:
- Maximum speed (half step): ~1 ms per step delay → ~15 RPM at output shaft
- Reliable speed (half step): 2–5 ms per step delay → 3–7 RPM
- Minimum delay: Never go below 1ms between steps
With AccelStepper, always use setMaxSpeed() and setAcceleration() together. Acceleration prevents step skipping at start-up and allows faster peak speeds because the motor builds up kinetic energy gradually.
Torque at speed: The 28BYJ-48 loses torque rapidly above 10 RPM due to the inductance of its small coils. If your application needs speed, consider a NEMA17 stepper with an A4988 driver instead.
Troubleshooting Common Issues
Motor vibrates but does not rotate
The coil sequence is wrong. Swap IN2 and IN3 in your code or wiring. For the Arduino Stepper library, the constructor argument order must be (steps, IN1, IN3, IN2, IN4).
Motor makes noise but does not move
Insufficient current — usually caused by using the Arduino’s 3.3V pin instead of 5V, or sharing the Arduino’s 5V pin with too many other devices. Use a separate 5V 1A supply for the motor.
Motor skips steps or loses position
Speed is too high. Reduce the step delay or use AccelStepper with a lower max speed. Also check that the motor supply voltage is exactly 5V — lower voltage means less holding torque.
LEDs on ULN2003 board blink but motor does not move
The motor connector is not fully seated, or one wire in the 5-pin JST connector is broken. Test each coil with a multimeter.
Motor gets very hot
Unipolar steppers draw current even when stationary. If your application holds position for long periods, disable the motor outputs between moves: stepper.disableOutputs() in AccelStepper. Note this loses holding torque.
Project Ideas with 28BYJ-48
- Pan-tilt camera mount: Two 28BYJ-48 motors with an Arduino for a tracking webcam or time-lapse rig
- Smart clock mechanism: Replace clock hands with precise stepper movement for a custom digital-analog hybrid clock
- Motorised window blinds: Low-torque applications like rotating slat blinds fit perfectly within the motor’s output torque
- Linear slider (using lead screw): A small 3D-printed bracket converts rotation to linear motion for small camera sliders
- Robot gripper: Use as a finger actuator in a small robotic hand prototype
- Automated plant watering: Rotate a valve or drive a small pump mechanism on a timer schedule

NEMA17 5.6 kg-cm Stepper Motor
Ready to upgrade from the 28BYJ-48? This NEMA17 with D-type shaft and detachable cable offers 165× more torque for CNC and 3D printing applications.
Recommended Products
Everything you need to get started with stepper motor projects is available at Zbotic with fast delivery across India.

A4988 Stepper Motor Driver Controller Board
When your project outgrows the 28BYJ-48, use this A4988 driver with NEMA17 for professional-grade microstepping control up to 1/16 step resolution.
Frequently Asked Questions
How many steps does the 28BYJ-48 need for one full revolution?
In half-step mode (the recommended mode), the 28BYJ-48 requires 4096 steps for one complete revolution of the output shaft. In full-step mode it requires 2048 steps. This accounts for the 64:1 internal gearbox ratio.
Can I control the 28BYJ-48 with an ESP32 or Raspberry Pi?
Yes. The ULN2003 driver board works with any microcontroller that has 3.3V or 5V logic outputs. For ESP32 or Raspberry Pi GPIO (3.3V), the ULN2003 responds reliably to 3.3V input signals. Just make sure the motor power supply is still 5V.
Can two 28BYJ-48 motors be run simultaneously?
Yes, with two separate ULN2003 driver boards. They can share the same power supply if it is rated for the combined current (about 400mA). Use AccelStepper’s non-blocking run() approach — never use delay() when driving two motors simultaneously.
What is the maximum weight the 28BYJ-48 can lift?
The motor produces about 34 mN·m of torque at the output shaft. This translates to roughly 34 grams at a 10mm moment arm (direct shaft). For a threaded rod with 1mm pitch, it can push or pull objects up to about 3–5 kg theoretically, but realistically under 1 kg for reliable operation.
Why does the Arduino Stepper library pin order seem wrong?
The Arduino Stepper library expects pins in the order IN1, IN3, IN2, IN4 for four-wire motors. This is a well-known quirk. Using the logical order IN1, IN2, IN3, IN4 causes the motor to vibrate instead of rotate because the internal coil energisation sequence is different from what you would expect.
How do I make the motor hold its position?
Simply leave the last step energised — the motor will hold its position with static holding torque. With AccelStepper, just stop calling run() after reaching the target. Call stepper.disableOutputs() only if you want to remove holding torque to save power or reduce heat.
Pick up the 28BYJ-48 stepper motor and explore our full range of motors, drivers, and actuators at Zbotic — India’s favourite electronics store for makers and engineers. Shop Motors & Actuators


Add comment