
India is home to some of the most polluted cities in the world, and fine particulate matter — specifically PM2.5 — is one of the most damaging air pollutants. Particles smaller than 2.5 micrometres penetrate deep into lung tissue and enter the bloodstream. Building your own PM2.5 monitor at home has never been easier thanks to the Plantower PMS5003, a laser particle counter that measures PM1.0, PM2.5, and PM10 concentrations with accuracy approaching laboratory-grade instruments. At under ₹800, it is accessible to every electronics enthusiast. This complete tutorial shows you how to wire the PMS5003 to an Arduino, parse its UART data, and build a self-contained air quality display station.
1. How the PMS5003 Works
The PMS5003 uses laser light scattering — a technique called laser nephelometry. Inside the sealed sensor body, a 650 nm red laser diode illuminates a measurement chamber. A high-speed fan draws ambient air through the chamber. Particles in the air scatter the laser light toward a photodetector. By counting individual light pulses and analysing their intensity, the onboard microprocessor classifies particles by size and outputs calibrated mass concentration values for PM1.0, PM2.5, and PM10.
Unlike the GP2Y1010AU which measures optical density (a bulk proxy for dust), the PMS5003 actually counts individual particles in six size bins simultaneously:
- 0.3 µm and above
- 0.5 µm and above
- 1.0 µm and above
- 2.5 µm and above
- 5.0 µm and above
- 10.0 µm and above
These raw counts are then converted to µg/m³ values using Plantower’s factory calibration algorithm. The result is a calibrated PM2.5 reading with ±10 µg/m³ (below 100 µg/m³) accuracy — comparable to instruments costing 10 times more.
2. Sensor Specifications
| Parameter | Value |
|---|---|
| Supply Voltage | 5.0 V DC |
| Active Current | ≤100 mA |
| Standby Current | ≤200 µA |
| Output Interface | UART (9600 baud, 3.3 V logic) |
| Measurement Range | 0–500 µg/m³ (PM2.5) |
| Accuracy | ±10 µg/m³ at ≤100 µg/m³; ±10% at >100 µg/m³ |
| Particle count accuracy | ±10% (D50 = 0.5 µm) |
| Response Time | <10 seconds (fan stabilisation) |
| Data Rate | 1 frame per second |
| Operating Temperature | −10°C to +60°C |
| Operating Humidity | 0–99% RH (non-condensing) |
| Sensor Life | >3 years (continuous use) |
| Connector | 1.27 mm pitch 10-pin FPC |
3. PMS5003 vs GP2Y1010AU: Why Laser Wins
| Feature | PMS5003 | GP2Y1010AU |
|---|---|---|
| Sensing Method | Laser particle counting | IR optical density |
| Output | Calibrated PM1/PM2.5/PM10 µg/m³ | Analog voltage (needs conversion) |
| Accuracy | ±10 µg/m³ | ~±50 µg/m³ estimated |
| Min Detectable Size | 0.3 µm | ~1 µm |
| Interface | UART (digital) | Analog + digital pulse |
| Cost (approx.) | ₹700–₹900 | ₹200–₹350 |
| Fan Required | Built-in fan | No fan (passive diffusion) |
4. Wiring to Arduino
The PMS5003 communicates via 3.3 V UART at 9600 baud. The FPC connector is fiddly — most sellers provide an adapter breakout board. Key pins on the adapter:
| PMS5003 Pin | Arduino Uno/Nano | Notes |
|---|---|---|
| VCC (5 V) | 5 V | Powers sensor and fan |
| GND | GND | Common ground |
| TX | Pin 10 (SoftwareSerial RX) | 3.3 V logic — Arduino 5 V pins tolerate this |
| RX | Pin 11 (SoftwareSerial TX) | Use 1 kΩ + 2 kΩ voltage divider to reduce 5 V → 3.3 V |
| SET | 3.3 V (or leave floating) | HIGH = active mode; LOW = sleep mode |
| RESET | 3.3 V or leave floating | Active LOW reset |
Voltage note: PMS5003 TX outputs 3.3 V logic — safe to connect directly to a 5 V Arduino input. For the RX line (Arduino → sensor), add a 1 kΩ + 2 kΩ voltage divider between Arduino TX and sensor RX to prevent 5 V damage to the sensor input.
5. PMS5003 UART Data Format
The sensor continuously sends 32-byte frames at 1 Hz. Each frame starts with two start bytes 0x42, 0x4D and ends with a 16-bit checksum. The data layout (big-endian, 2 bytes per value):
| Bytes | Name | Description |
|---|---|---|
| 0–1 | Start bytes | 0x42, 0x4D |
| 2–3 | Frame length | 0x001C (28 bytes) |
| 4–5 | PM1.0 standard | µg/m³, factory calibrated |
| 6–7 | PM2.5 standard | µg/m³, factory calibrated |
| 8–9 | PM10 standard | µg/m³, factory calibrated |
| 10–11 | PM1.0 atmospheric | µg/m³, under atmospheric environment |
| 12–13 | PM2.5 atmospheric | µg/m³ (use this for AQI calculation) |
| 14–15 | PM10 atmospheric | µg/m³ |
| 16–17 | Particles >0.3 µm | Count per 0.1 L of air |
| 18–19 | Particles >0.5 µm | Count per 0.1 L of air |
| 20–21 | Particles >1.0 µm | Count per 0.1 L of air |
| 22–23 | Particles >2.5 µm | Count per 0.1 L of air |
| 24–25 | Particles >5.0 µm | Count per 0.1 L of air |
| 26–27 | Particles >10 µm | Count per 0.1 L of air |
| 28–29 | Version + Error | Version byte, error code |
| 30–31 | Checksum | Sum of all preceding bytes |
6. Complete Arduino Code
// PMS5003 PM2.5 Sensor — Arduino Uno with SoftwareSerial
// PMS5003 TX → Arduino Pin 10
// PMS5003 RX → Arduino Pin 11 (via 1k+2k divider)

#include <SoftwareSerial.h>

SoftwareSerial pmsSerial(10, 11);  // RX, TX

struct PMS5003Data {
  uint16_t pm1_0_std;
  uint16_t pm2_5_std;
  uint16_t pm10_std;
  uint16_t pm1_0_atm;
  uint16_t pm2_5_atm;
  uint16_t pm10_atm;
  uint16_t cnt_0_3;
  uint16_t cnt_0_5;
  uint16_t cnt_1_0;
  uint16_t cnt_2_5;
  uint16_t cnt_5_0;
  uint16_t cnt_10;
};

bool readPMS5003(PMS5003Data &data) {
  uint8_t buf[32];
  // Wait for start byte 0x42
  while (pmsSerial.available() < 32) delay(1);
  // Drain buffer to latest frame
  while (pmsSerial.available() > 32) pmsSerial.read();

  if (pmsSerial.read() != 0x42) return false;
  if (pmsSerial.read() != 0x4D) return false;

  for (int i = 0; i < 28; i++) buf[i] = pmsSerial.read();

  // Verify checksum
  uint16_t sum = 0x42 + 0x4D;
  for (int i = 0; i < 26; i++) sum += buf[i];
  uint16_t checksum = (buf[26] << 8) | buf[27];
  if (sum != checksum) return false;

  // Parse big-endian 16-bit values
  #define WORD(i) (((uint16_t)buf[i] << 8) | buf[i+1])
  data.pm1_0_std  = WORD(2);  // bytes 4-5 (offset 2 after header)
  data.pm2_5_std  = WORD(4);
  data.pm10_std   = WORD(6);
  data.pm1_0_atm  = WORD(8);
  data.pm2_5_atm  = WORD(10);
  data.pm10_atm   = WORD(12);
  data.cnt_0_3    = WORD(14);
  data.cnt_0_5    = WORD(16);
  data.cnt_1_0    = WORD(18);
  data.cnt_2_5    = WORD(20);
  data.cnt_5_0    = WORD(22);
  data.cnt_10     = WORD(24);
  return true;
}

void setup() {
  Serial.begin(115200);
  pmsSerial.begin(9600);
  delay(3000);  // Allow fan to spin up and stabilise
  Serial.println("PMS5003 Air Quality Monitor");
  Serial.println("PM1.0 | PM2.5 | PM10  (µg/m³)");
}

void loop() {
  PMS5003Data data;
  if (readPMS5003(data)) {
    Serial.print(data.pm1_0_atm);
    Serial.print("  |  ");
    Serial.print(data.pm2_5_atm);
    Serial.print("  |  ");
    Serial.println(data.pm10_atm);
  } else {
    Serial.println("Frame error — retrying");
  }
  delay(1000);
}
7. Adding an OLED Display
A self-contained monitor needs a display. Wire a 128×64 SSD1306 I2C OLED to A4 (SDA) and A5 (SCL) on the Arduino Uno, install the Adafruit SSD1306 library, and add this display function:
#include <Adafruit_SSD1306.h>
Adafruit_SSD1306 display(128, 64, &Wire, -1);

void showOnOLED(PMS5003Data &d) {
  display.clearDisplay();
  display.setTextSize(1); display.setTextColor(WHITE);
  display.setCursor(0,0);  display.println("Air Quality Monitor");
  display.setCursor(0,14); display.print("PM1.0: "); display.print(d.pm1_0_atm); display.println(" ug/m3");
  display.setCursor(0,24); display.print("PM2.5: "); display.print(d.pm2_5_atm); display.println(" ug/m3");
  display.setCursor(0,34); display.print("PM10:  "); display.print(d.pm10_atm);  display.println(" ug/m3");

  // Simple AQI label
  display.setCursor(0,48);
  if      (d.pm2_5_atm <= 30)  display.println("Status: GOOD");
  else if (d.pm2_5_atm <= 60)  display.println("Status: SATISFACTORY");
  else if (d.pm2_5_atm <= 90)  display.println("Status: MODERATE");
  else if (d.pm2_5_atm <= 120) display.println("Status: POOR");
  else if (d.pm2_5_atm <= 250) display.println("Status: VERY POOR");
  else                          display.println("Status: SEVERE!");
  display.display();
}
8. ESP32 Version with Wi-Fi Logging
The ESP32 has two hardware UARTs making PMS5003 integration cleaner. Use Serial2 (pins 16/17) for the sensor and Serial (USB) for debug. Add Wi-Fi logging to a free ThingSpeak channel:
#include <WiFi.h>
#include <HTTPClient.h>

HardwareSerial pmsSerial(2);  // ESP32 Serial2

void setup() {
  Serial.begin(115200);
  pmsSerial.begin(9600, SERIAL_8N1, 16, 17);  // RX=16, TX=17
  WiFi.begin("SSID", "PASSWORD");
  while (WiFi.status() != WL_CONNECTED) delay(500);
  Serial.println("Wi-Fi connected");
}

void sendToThingSpeak(int pm25) {
  HTTPClient http;
  String url = "http://api.thingspeak.com/update?api_key=YOUR_KEY&field1=" + String(pm25);
  http.begin(url);
  http.GET();
  http.end();
}
With ThingSpeak you get free cloud logging, charts, and email alerts when PM2.5 exceeds a threshold you define. This turns your home monitor into a full IoT air quality station accessible from anywhere.
9. Sensor Placement and Best Practices
- Height: Place at breathing height (1.0–1.5 m above floor) for the most representative readings.
- Away from sources: Keep at least 1 m from cooking hobs, candles, and incense during baseline calibration. Move near them intentionally to test event detection.
- No direct airflow: Avoid placing in front of AC vents, fans, or open windows. Natural room circulation is sufficient — the internal fan handles sampling.
- 30-second warm-up: On power-up, ignore the first 30 seconds of readings while the fan and laser stabilise.
- Humidity effects: At RH >85%, water droplets are measured as particles — readings will be elevated. The sensor spec says 0–99% RH but accuracy degrades above 75% RH. Consider adding a BME280 to log humidity alongside PM2.5.
- Cleaning: After 1–2 years, particle residue can accumulate inside the sensing chamber. If readings drift high permanently, carefully blow compressed air through the intake and exhaust ports.
10. Related Products at Zbotic
MQ-135 Air Quality / Gas Detector Sensor Module
Add CO2, NH3, and VOC gas detection alongside your PMS5003 PM2.5 readings for a complete indoor air quality station covering both particles and chemical pollutants.
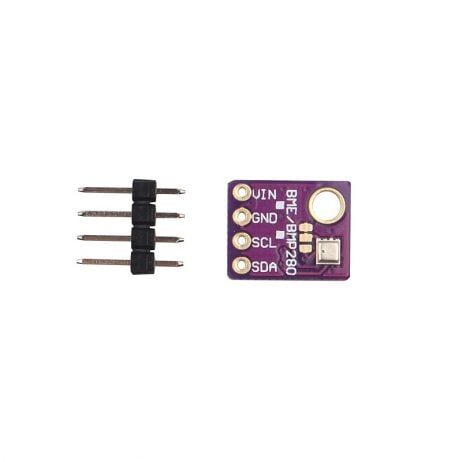
GY-BME280-5V Temperature and Humidity Sensor
Log temperature and humidity alongside PM2.5 data to understand how weather conditions affect indoor air quality. 5 V compatible — plugs straight into Arduino.
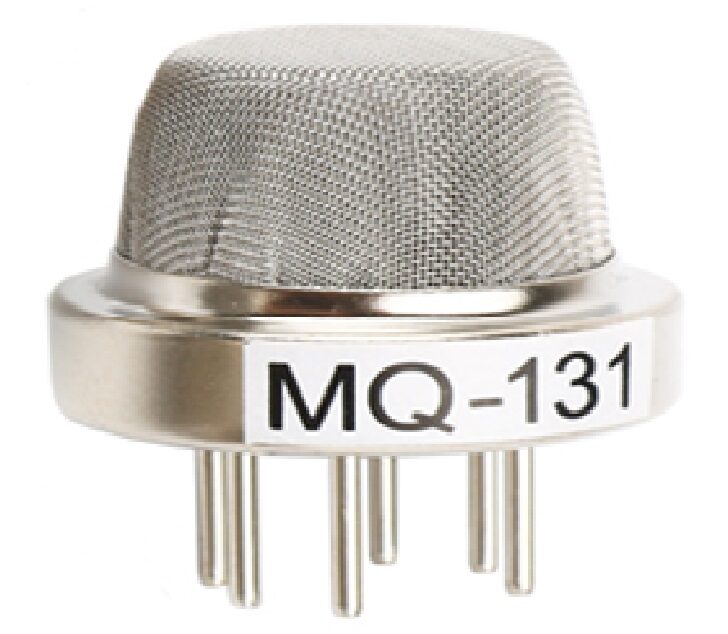
MQ-131 Ozone Gas Detection Sensor
Ground-level ozone correlates strongly with fine particulate events. Monitor ozone alongside PM2.5 for a comprehensive outdoor air quality station.
11. Frequently Asked Questions
Q: The PMS5003 reads very high even in clean air. What is wrong?
Wait at least 30 seconds after power-on before trusting readings — the laser and fan need time to stabilise. If readings remain high, check: (1) Are you reading the “atmospheric” PM2.5 bytes (bytes 12–13), not the “standard” bytes? (2) Is humidity above 80%? Water droplets are counted as particles. (3) Is the sensor in a smoke-filled room from a previous event? Open windows and allow it to clear for 5–10 minutes.
Q: Can I use PMS5003 with ESP8266 (NodeMCU)?
Yes. ESP8266 has one hardware UART (Serial) used for programming, but you can use SoftwareSerial on GPIO pins 12 (RX) and 13 (TX) for the PMS5003. Since ESP8266 runs at 3.3 V, no voltage divider is needed on RX — PMS5003 TX is already 3.3 V. Connect PMS5003 VCC to a 5 V external supply (the ESP8266’s 3.3 V regulator cannot supply 100 mA).
Q: What is the difference between PM2.5 “standard” and “atmospheric” readings?
“Standard” readings are calibrated assuming a standard particle density (1.65 g/cm³, used for industrial pollution testing). “Atmospheric” readings use different assumptions appropriate for ambient outdoor air. For home monitoring and AQI calculation, use the atmospheric PM2.5 value (bytes 12–13 in the 32-byte frame).
Q: How long does the PMS5003 last?
Plantower rates the PMS5003 for over 3 years of continuous 24/7 operation. In practice, the laser diode and fan are the weak points. Power cycling (sleep mode during low-pollution nights) can significantly extend lifespan. Community users report 4–5 years of service from well-treated sensors.
Q: Is the PMS5003 accurate enough for scientific research?
It is significantly more accurate than the GP2Y1010AU but below regulatory-grade instruments (which cost ₹3–10 lakh). For citizen science, community monitoring networks, and indoor air quality research it is excellent. Many published academic papers use PMS5003 data, validating it against reference monitors with correlation coefficients of R² = 0.9 or higher in controlled environments.
Q: Can I measure cooking smoke or cigarette smoke?
Yes — and very effectively. Cigarette smoke produces massive spikes in PM2.5 (often 300–500 µg/m³ near the source) that the PMS5003 detects within seconds. Cooking (especially frying) also produces significant PM2.5 events. This makes the PMS5003 an excellent smoke alarm complement that gives quantitative readings, not just binary on/off.
Monitor Your Home Air Quality Today
Zbotic stocks a wide range of gas sensors, environmental modules, and Arduino-compatible components for your next air quality project. Free shipping available on qualifying orders across India.


Add comment