
Table of Contents
- What Is a USB PD Trigger Module?
- How USB Power Delivery Negotiation Works
- Choosing the Right Output Voltage
- Wiring a 12V USB-C PD Trigger — Step by Step
- Practical Use Cases for Indian Makers
- Tips and Safety Considerations
- Recommended Products
- FAQ
Running 12V electronics from a slim USB-C charger sounds like magic, but with a USB PD trigger module, it is completely straightforward. USB Power Delivery (PD) is the modern standard that lets a USB-C charger negotiate voltages from 5V all the way up to 48V — and a PD trigger board taps into that negotiation to lock in exactly the voltage your circuit needs. For Indian hobbyists and makers who want to power routers, LED strips, motor drivers, or even 3D printer beds from a GaN travel charger, this tutorial walks you through getting stable 12V from a USB-C PD charger without a single line of code.
What Is a USB PD Trigger Module?
A USB PD trigger (also called a PD decoy or PD sink module) is a tiny PCB that contains a USB-C port and a programmable controller chip. When you plug a PD charger into it, the chip sends a Request Data Object (RDO) on the CC lines — the control lines inside the USB-C cable — telling the charger which voltage profile to supply. The charger then switches its output to that voltage, which appears on the VBUS lines and is broken out to screw terminals or solder pads on the trigger board.
Common fixed-voltage trigger boards available from Zbotic and similar stores support: 5V, 9V, 12V, 15V, and 20V. Some programmable variants let you select voltage via DIP switches or onboard pads. For most 12V projects, a fixed-12V module is the simplest and most reliable choice.
Key specifications to check when buying:
- Maximum current rating: Most budget modules handle 3-5A at 12V. Verify against your load.
- Input connector type: USB-C on newer modules; some older PD trigger boards use USB-A QC3.0.
- Cable included or not: Some kits include a USB-C cable; others ship just the PCB.
- Supported PD standard: Look for USB PD 2.0 or PD 3.0 compatibility with the charger you plan to use.
How USB Power Delivery Negotiation Works
Standard USB was designed to supply 5V at up to 900 mA. USB PD extends this by defining a Power Delivery Specification where the charger (source) advertises a list of Voltage-Current profiles called Source Capabilities PDOs (Power Data Objects). A PD trigger board acts as the sink device. The handshake happens like this:
- You plug the USB-C cable into the charger and the trigger board.
- The charger signals its capabilities on the CC line (e.g., 5V/3A, 9V/3A, 12V/3A, 15V/3A, 20V/5A).
- The PD trigger chip sends an RDO saying “I want 12V/3A”.
- The charger acknowledges and switches its internal DC-DC converter to output 12V.
- VBUS now carries 12V, available on your output terminals.
This all happens in under 500 ms after plugging in. If the charger does not support 12V in its PDO list, the trigger board will either fall back to 9V or 5V (depending on the module) or fail to negotiate entirely. Always verify your charger supports the exact voltage profile you need before building around it.
Choosing the Right Output Voltage
12V is the most universally useful PD output for hobbyists because it matches the automotive, LED strip, and DC barrel jack ecosystem. But here is a quick reference for common loads:
| Load | Voltage Needed | PD Profile |
|---|---|---|
| Arduino / ESP32 via Vin | 7-12V | 9V or 12V |
| LED strip (12V) | 12V | 12V |
| Router / modem | 9-12V | 12V |
| DC motor (small) | 12V | 12V |
| Laptop (65W) | 20V | 20V |
Note that not every USB-C charger supports 12V. Many cheap 65W GaN chargers only support 5V/9V/15V/20V. Check the charger’s spec sheet or packaging for the full PDO list. Chargers labelled “Apple 96W” or “laptop charger” usually include 12V; phone-first chargers sometimes skip it.
Wiring a 12V USB-C PD Trigger — Step by Step
This guide assumes you have a fixed-12V PD trigger board. The process for programmable or switch-selectable boards is similar — just set the DIP switch to 12V before plugging in.
What you need
- USB-C PD trigger module (fixed 12V or programmable, set to 12V)
- USB-C PD charger (65W or higher, supporting 12V PDO)
- USB-C to USB-C cable rated for PD (not a charge-only cable)
- Your 12V load (LED strip, motor driver board, etc.)
- 18-20 AWG wire for power connections
- Multimeter for verification
Step 1 — Set the voltage (if programmable)
If your module has DIP switches or solder pads for voltage selection, configure them to 12V before connecting any power. Refer to the datasheet for the exact switch combination. For fixed-12V modules, skip this step.
Step 2 — Connect your load
Solder or clamp your load’s positive wire to the V+ (or VOUT+) pad and the negative wire to GND on the trigger board. Use appropriately rated wire — for a 3A load at 12V you need at least 22 AWG, but 20 AWG is safer.
Step 3 — Plug in the charger
Connect the USB-C cable from the charger to the trigger module’s USB-C port. Do NOT have the load running at the moment of first connection — verify voltage first.
Step 4 — Verify voltage
Use a multimeter on the DC voltage setting. Probe V+ and GND on the output terminals. You should read 12.0V plus or minus 0.2V. If you see 5V or 9V, the charger may not support 12V or negotiation failed — try a different charger.
Step 5 — Connect and test the load
Once voltage is confirmed, connect your load. Monitor the junction for heat if running near the current limit. Most budget trigger boards do not have onboard current limiting, so a blown charger or damaged board means your load protection is up to you — add an inline fuse appropriately rated for your circuit.
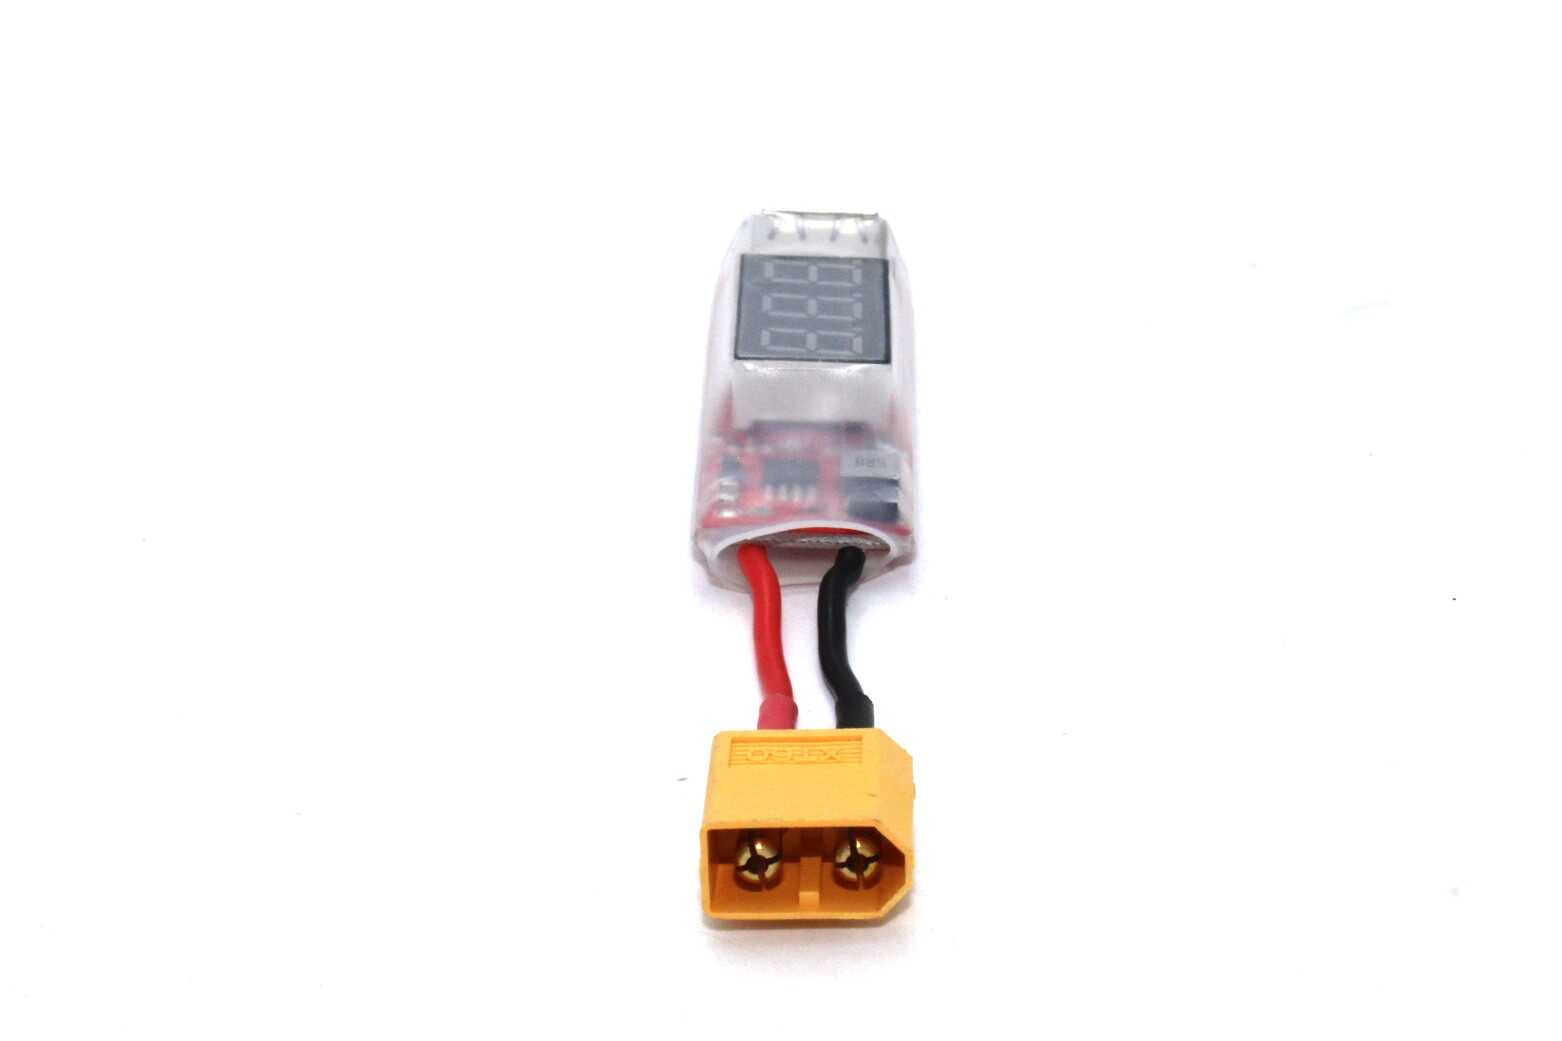
2S-6S LiPo XT60 to USB Adapter with Voltage Display
Power USB devices from your LiPo in the field while monitoring pack voltage. A great companion when your USB-C PD charger is not available at a remote site.
Practical Use Cases for Indian Makers
Here are some of the most popular applications Indian hobbyists are building with USB PD trigger boards:
1. Router and modem backup during power cuts
Most home routers draw 9-12V at 1-2A. Connect a USB PD trigger to a 65W GaN power bank (which supports PD output), wire it to your router’s barrel jack, and you have a clean 12V UPS solution. Many GaN power banks now advertise “65W PD Output” — these work perfectly with a 12V PD trigger module.
2. Bench power supply replacement
For low-current breadboard testing (under 2A), a 12V PD trigger connected to a quality GaN charger replaces a bulky benchtop supply. Add a small USB-powered voltmeter for instant readout. Total cost: under Rs.300 for the trigger board plus your existing charger.
3. 12V LED strip lighting for photography or studio
LED strip lights rated for 12V can be driven directly from a USB-C PD charger via trigger board. A 65W charger can supply up to 5A at 12V — enough for 3-4 metres of 60 LED/m strip at full brightness.
4. Portable motor driver for robotics
Pair a 12V PD trigger with a compact motor driver board to build a rover or robotic arm that can be recharged anywhere using any USB-C laptop charger. No more custom 12V Li-ion packs or barrel-jack adapters.
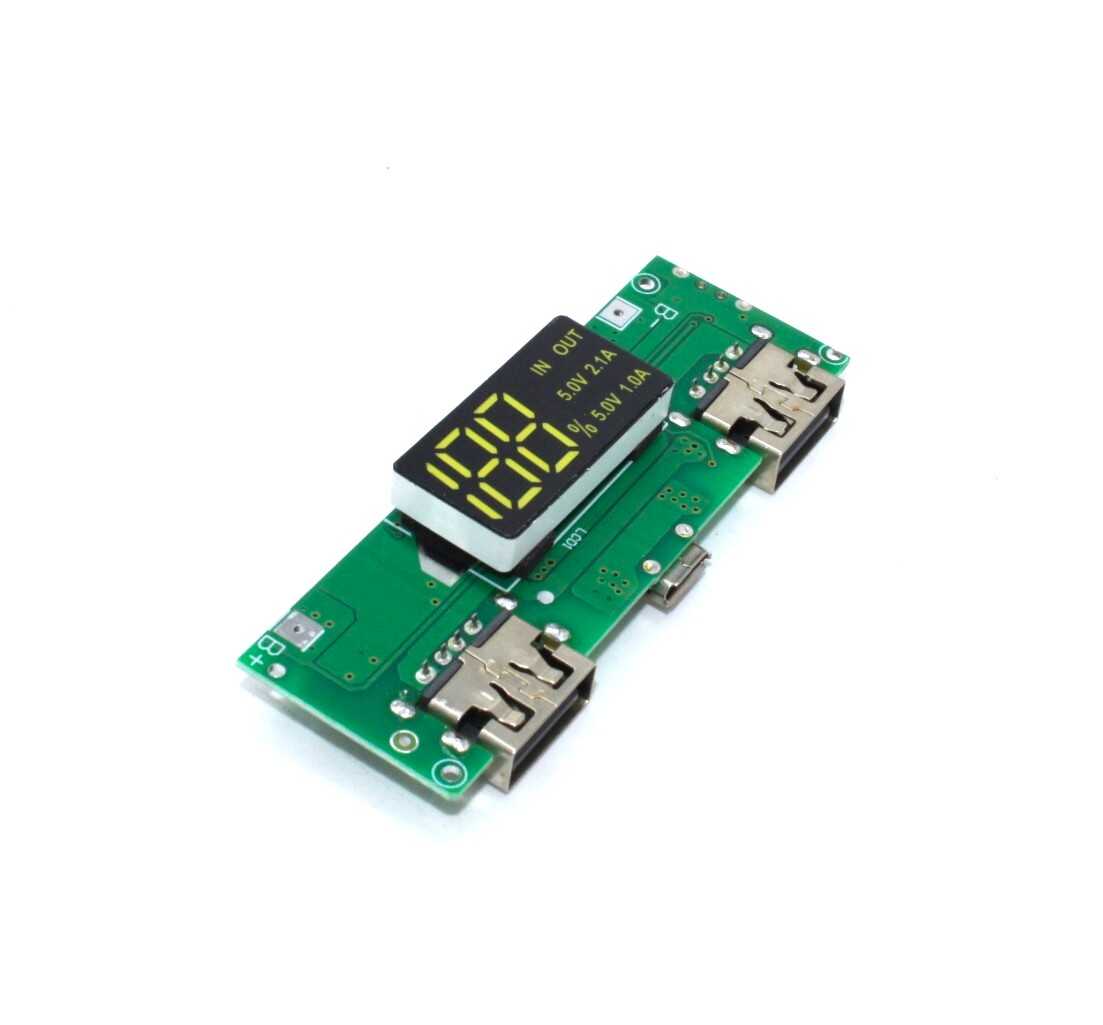
18650 5V 1A/2A Lithium Battery Charging Module with Dual USB Output
A 5V USB output booster module for 18650 cells. Combine with a PD trigger and a 3S 12.6V booster to build compact, multi-voltage portable power setups.
Tips and Safety Considerations
- Always use a PD-rated cable. Cheap USB-C cables may only carry power without CC wire communication. The trigger negotiation will fail silently and you will see 5V output. Use cables rated for USB PD or check that the cable has E-Marker chip.
- Add an inline fuse. PD trigger boards do not protect against overload. A 3A or 5A automotive mini-fuse in series with V+ protects your load and the charger in case of a short.
- Match charger and module current ratings. If the charger is rated for 3A at 12V (36W), do not draw 5A. Stay at 80% of the rated current for safe continuous operation.
- Allow ventilation. At high loads (3A+), the USB-C connector and internal switch in the charger generate heat. Do not enclose them in a sealed box without airflow.
- Do not hot-swap loads. Connecting or disconnecting an inductive load (motor, relay) while the trigger is live can cause voltage spikes. Add a flyback diode across inductive loads.
- Use only with PD chargers. Standard USB-A chargers, even QC3.0 ones, use a different protocol. A PD trigger module will not negotiate with them correctly.
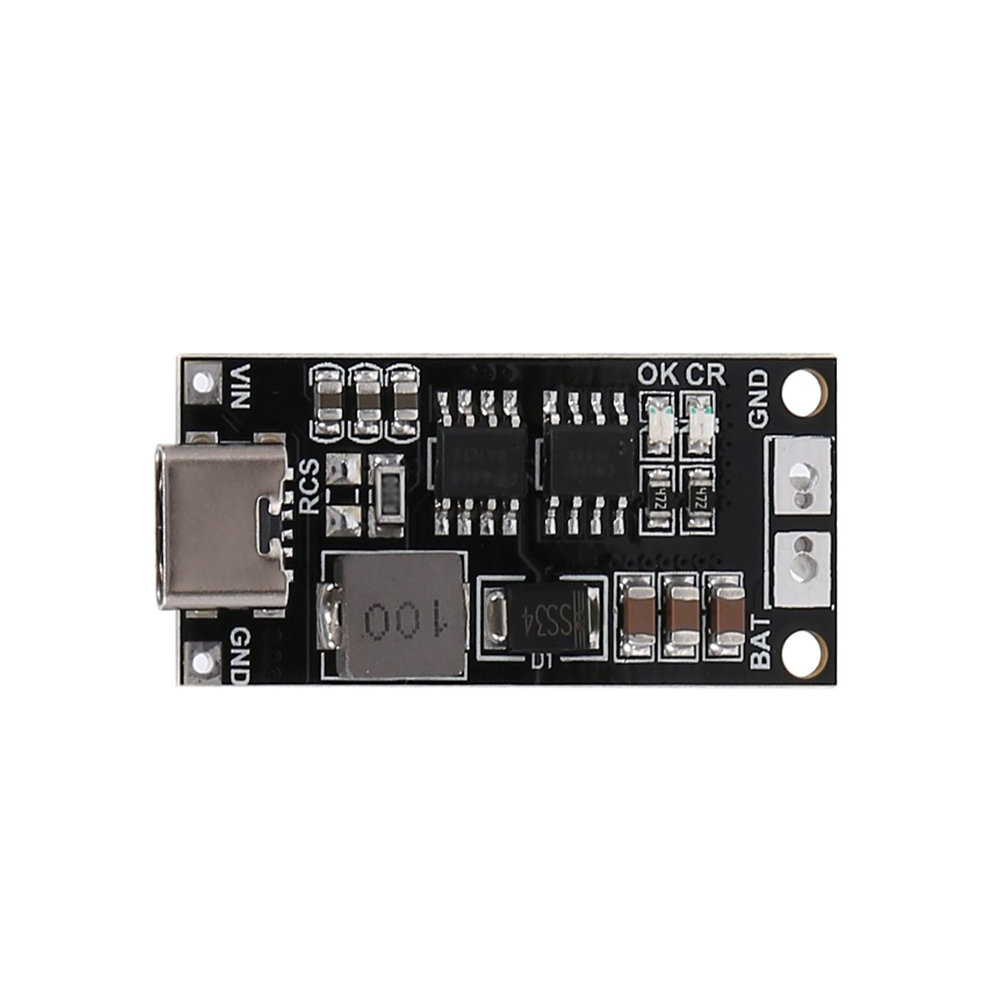
18650 Type-C to 3S 12.6V 2A Booster Module
Charge a 3S 18650 pack directly from any USB-C PD charger at up to 2A. A great alternative when you need a battery-buffered 12V output rather than a direct trigger setup.
More Recommended Products
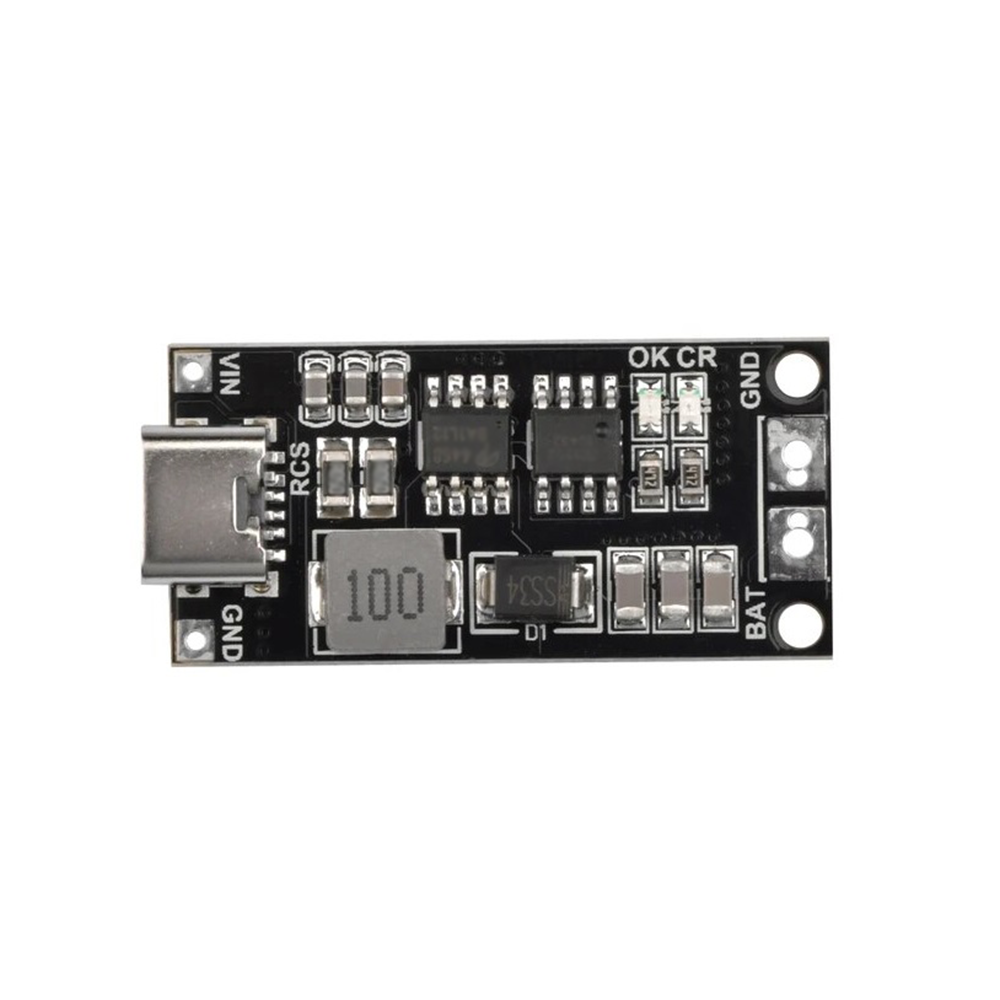
18650 Type-C to 3S 12.6V 4A Booster Module
Higher 4A version for power-hungry 12V loads. Charge a 3S pack via USB-C and power 12V LED strips, fans, or motor drivers simultaneously.
Frequently Asked Questions
Will any USB-C charger work with a PD trigger module?
No — only chargers that support USB Power Delivery (PD) will negotiate. Look for “USB PD” or “PD 3.0” in the charger specs. Regular 5V chargers and QC3.0-only chargers will not work with PD trigger boards.
My module shows 5V even though I bought a 12V trigger. Why?
The most common cause is a non-PD-rated USB-C cable that lacks CC wires. The negotiation cannot happen without CC wire contact. Try a different cable rated for USB PD. Also verify your charger actually lists 12V as a supported output voltage.
Can I get more than 12V from a USB-C PD charger?
Yes — PD supports 15V and 20V profiles as well. Simply use a module configured for those voltages, assuming your charger supports them. 20V at 5A gives 100W from a single USB-C port.
Is it safe to power a laptop from a PD trigger output?
No. Laptops negotiate PD themselves via their built-in charging circuitry. Feeding unregulated 20V into a laptop’s barrel jack (bypassing its PD IC) risks damage. Use PD trigger output only for non-PD-aware loads like LED strips, routers, and motor boards.
How do I know the current limit of my trigger module?
Check the module’s datasheet or seller listing for the maximum continuous current. Most budget 12V trigger boards are rated 3A (36W). Some premium modules handle 5A. Always stay at 80% of the rated max for safe long-term operation.
Build Smarter, Carry Less
USB PD trigger modules are one of the most practical tools in a maker’s toolkit. They let a single slim GaN charger replace a heavy 12V wall adapter, a separate USB charger, and a laptop brick — all at once. Now that you know exactly how a USB PD trigger powers 12V from a USB-C charger, you can explore Zbotic’s range of power delivery modules, booster boards, and BMS circuits to take your projects further.


Add comment