
If your RC vehicle, drone, or boat is not performing as expected — if the motor does not respond at low throttle, if the full throttle point feels wrong, or if the ESC beeps in unusual patterns — there is a very good chance you simply need to calibrate your ESC’s throttle range. RC ESC calibration is the process of teaching the Electronic Speed Controller what signal corresponds to full throttle and what signal corresponds to zero throttle from your transmitter or flight controller.
This comprehensive guide walks through every step of the calibration process, explains what is happening electronically during calibration, covers common calibration methods for different ESC types, and troubleshoots the most frequent problems Indian RC enthusiasts and robotics builders encounter.
What Is ESC Calibration and Why Is It Needed?
An ESC translates a PWM (Pulse Width Modulation) signal from your receiver or flight controller into motor speed. The ESC needs to know two things: what pulse width means “zero throttle” (motor stopped) and what pulse width means “full throttle” (motor at maximum speed). These endpoints define the throttle range.
The problem is that different transmitters and receivers produce slightly different PWM signal ranges. The RC standard specifies 1000 microseconds (1ms) for zero throttle and 2000 microseconds (2ms) for full throttle. But in practice, transmitters may output 1050µs at stick bottom and 1950µs at stick top, or 980µs to 2020µs, or any variation within roughly ±10% of the standard.
If you connect an ESC to a transmitter without calibrating, the ESC may interpret the transmitter’s “zero” as some throttle, causing the motor to spin before you move the stick. Alternatively, the ESC may never reach full throttle because the stick’s top output is below what the ESC considers maximum. Calibration solves both problems by teaching the ESC the actual endpoints of your transmitter.
In multi-motor vehicles (quads, planes, boats with multiple motors), mismatched ESC calibrations cause motors to spin at different speeds for the same throttle command — creating handling problems and control issues.
Understanding PWM Signals in RC Systems
RC PWM signals are pulses sent at 50 Hz (once every 20ms). The width of the pulse determines the throttle position:
- 1000µs (1.0ms): Minimum throttle / armed, motor stopped
- 1500µs (1.5ms): Mid-point (used as neutral for steering channels)
- 2000µs (2.0ms): Maximum throttle
Some modern ESCs and flight controllers also support digital protocols (DSHOT, Oneshot, Multishot) that replace analog PWM with digital communication. DSHOT ESCs do not require throttle range calibration — the protocol is inherently digital and not subject to analog timing variations. This guide focuses on standard PWM ESCs, which are by far the most common type used in Indian RC and robotics projects.
The ESC reads the incoming pulse, maps it to a 0–100% motor command based on its stored minimum and maximum pulse widths, and then drives the motor phases at the corresponding power level.
When to Calibrate Your ESC
You should calibrate your ESC in these situations:
- When you first set up any new ESC
- When you change your transmitter or receiver
- When the motor spins at “zero” throttle without input
- When you cannot reach full RPM at maximum throttle stick
- When you change flight controller firmware or do a factory reset
- When motors in a multi-motor vehicle run at noticeably different speeds
- After adjusting your transmitter’s endpoint settings (ATV/EPA)
- After updating ESC firmware
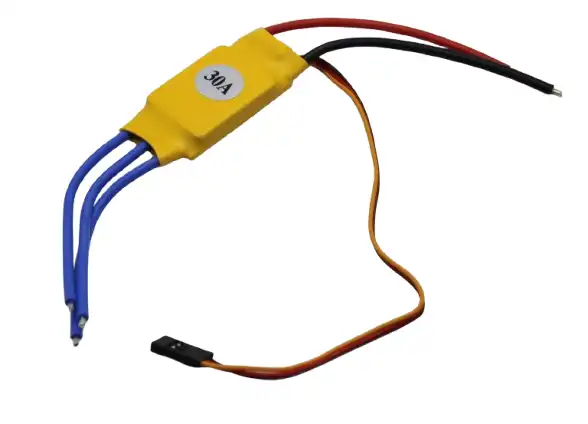
30A BLDC ESC Brushless Electronic Speed Controller
30A brushless ESC suitable for fixed-wing aircraft and medium-size RC vehicles. Requires throttle range calibration when used with any new transmitter setup.
Single ESC Calibration (Standard Method)
This is the universal calibration procedure that works with the vast majority of hobby-grade ESCs including those from Hobbywing, ZTW, Flysky/AECC compatible ESCs, and generic Chinese ESCs sold in India. Always remove the propeller or disconnect the load before calibrating.
Step-by-Step Instructions
- Remove propeller/load. Calibration involves the motor spinning unexpectedly. Remove any propeller, wheel, or gear before starting. This is a critical safety step.
- Turn on transmitter and set throttle to maximum. Move the throttle stick to the full-up (maximum) position. Keep it there.
- Connect the ESC battery. With the throttle stick held at maximum, connect the main battery (or power supply) to the ESC. You should hear the ESC power-up beeps.
- Wait for the calibration confirmation beeps. Most ESCs play a series of musical tones (often a musical scale: beep-beep-boop) to confirm they have registered the maximum throttle position. The exact sequence varies by brand. Wait until you hear this confirmation — usually within 2–5 seconds.
- Move the throttle to minimum. Pull the throttle stick all the way down (minimum position) immediately after hearing the confirmation beeps.
- Wait for minimum confirmation beeps. The ESC will beep again to confirm it has registered the minimum throttle point. You typically hear a single long beep or a different tone sequence.
- Arm the ESC. After minimum registration, the ESC should beep a final arming tone and is now ready to use. Test by gradually increasing throttle — the motor should start spinning smoothly from zero and reach full speed at full throttle.
Troubleshooting If the Motor Runs at Zero Throttle After Calibration
If the motor idles or creeps at zero throttle, the ESC’s stored minimum is slightly above your transmitter’s zero output. On your transmitter, reduce the throttle channel’s sub-trim slightly (by -5 to -10 points) and repeat calibration. Alternatively, reduce the throttle channel EPA/ATV lower endpoint by 5% to lower the zero throttle output.
All-at-Once Calibration for Multi-Motor Systems
For drones, multi-engine planes, and robots with multiple independent ESCs, you can calibrate all ESCs simultaneously to ensure they all have identical throttle ranges. This is the recommended method for any quadcopter build in India.
Prerequisite
All ESC signal wires must be connected to your flight controller or receiver. If using a flight controller (Betaflight, ArduPilot), the FC must be in passthrough mode — motor outputs go directly to ESC signal inputs. Most flight controller software has a motor test tab that allows this.
Procedure
- Remove all propellers.
- Set transmitter throttle to maximum.
- Connect all ESC battery connectors simultaneously (or use a power distribution board with a single connector).
- Wait for all ESCs to confirm max throttle (musical beep pattern).
- Move throttle to minimum.
- Wait for minimum confirmation from all ESCs.
- All ESCs are now calibrated to the same range.
After all-at-once calibration, test each motor individually using the flight controller’s motor test function. All motors should start at the same throttle percentage and reach similar RPM at 50% and 100% throttle.
ESC Calibration with Arduino
If you are using an ESC with an Arduino (for a robot, automated vehicle, or other project), calibration works slightly differently since there is no transmitter involved. You need to send specific PWM signal widths from the Arduino to set the ESC endpoints.
#include <Servo.h>

Servo esc;
const int ESC_PIN = 9;

void setup() {
  esc.attach(ESC_PIN, 1000, 2000);  // Min 1000us, Max 2000us

  // Step 1: Send maximum throttle signal
  esc.writeMicroseconds(2000);  // Full throttle
  delay(2000);  // Wait for ESC to register max

  // Step 2: Send minimum throttle signal
  esc.writeMicroseconds(1000);  // Zero throttle
  delay(2000);  // Wait for ESC to register min and arm

  // ESC is now calibrated and armed
}

void loop() {
  // Gradually increase speed from 0 to full over 3 seconds
  for (int speed = 1000; speed <= 2000; speed += 10) {
    esc.writeMicroseconds(speed);
    delay(30);
  }
  delay(1000);

  // Return to zero
  esc.writeMicroseconds(1000);
  delay(2000);
}
The key in the Arduino code is the order of operations: send 2000µs first (to register maximum), then 1000µs (to register minimum and arm the ESC). The ESC enters calibration mode automatically when it sees full throttle at power-up, so no special button press is required if your ESC supports auto-calibration.
ESC Programming: Beyond Basic Throttle Calibration
Most ESCs have a programming card or programming mode accessible through the throttle stick that allows you to configure additional parameters beyond the throttle range:
Brake Mode
Active braking stops the motor quickly when throttle drops to zero by applying reverse current briefly. Useful for precision RC cars and robots. Disable it for drones and aircraft where regenerative braking can cause issues.
Battery Cutoff Voltage
Sets the voltage at which the ESC cuts power to protect the battery from over-discharge. For LiPo batteries, set this to 3.2V per cell (9.6V for 3S, 12.8V for 4S). Critical setting — incorrect cutoff can destroy expensive LiPo batteries.
Timing
Motor timing affects efficiency at different RPM ranges. Low timing (0°) is best for slow torquey motors. High timing (25°) is better for high-RPM speed motors. Use auto timing if unsure.
Motor Direction
Many ESCs let you reverse motor direction through programming rather than swapping two motor wires. Useful when the motor is already installed and rewiring is difficult.
ESC Beep Codes Explained
The startup and calibration beeps from an ESC are a diagnostic language. Here are the most common patterns:
| Beep Pattern | Meaning |
|---|---|
| 1 beep, 1 beep, 1 beep (pause, repeat) | 1S LiPo detected (1 cell) — one beep per cell |
| 3 beeps then 1 long beep | 3S LiPo detected, ESC armed — ready to run |
| Musical scale ascending (do-re-mi-fa) | Maximum throttle point registered during calibration |
| Two short beeps | Minimum throttle registered — ESC armed |
| Continuous rapid beeping | Throttle is too high at power-up (safety interlock). Move throttle to zero. |
| Long beep, pause, repeat indefinitely | No signal detected — check wiring from receiver to ESC |
| 4 beeps then motor stutters | Motor detection failed — check motor phase wires |
Beep codes vary between manufacturers. Always check the manual for your specific ESC model. Hobbywing, Flycolor, ZTW, and other common ESC brands each have slightly different patterns.
Troubleshooting Calibration Problems
ESC Does Not Enter Calibration Mode
Some ESCs require a specific entry sequence. Try: power on with throttle at maximum, wait for a different beep pattern (some ESCs play a different melody), then proceed. If the ESC immediately enters normal arm sequence rather than calibration, it may have auto-calibration disabled. Connect a programming card to enable it.
Motor Spins in Wrong Direction
For brushless motors, swap any two of the three motor phase wires. For brushed motors, swap the two wires. Alternatively, use the ESC’s programming mode to reverse direction if your ESC supports it.
Motor Stutter at Low Throttle
Usually caused by incorrect timing settings. Try reducing motor timing in the ESC programming menu. Also verify that the minimum throttle endpoint in the ESC matches your transmitter’s actual zero output — use a servo tester or oscilloscope to measure the actual pulse width at zero throttle.
ESC Cuts Out at Full Throttle
Temperature protection may be triggering. Feel the ESC case after the cutout. If it is very hot, the motor is drawing more current than the ESC is rated for. You need a higher-rated ESC. Alternatively, the battery is under-voltage at high load — use a higher capacity battery or check cell health with a voltage checker.
Different Motors Run at Different Speeds
Perform all-at-once calibration to synchronise all ESC throttle ranges. Also check that the motors themselves are identical — mixing different KV ratings will result in different RPMs at the same throttle even after perfect calibration.

2204 260KV Brushless Gimbal Motor
Precision brushless motor for gimbal stabilisation. ESC calibration is essential to ensure smooth, jitter-free gimbal movement at low throttle.
Frequently Asked Questions
Q: How often should I calibrate my ESC?
Calibrate once when setting up, then only re-calibrate if you change your transmitter, receiver, or flight controller, or if you notice throttle response issues. ESCs store calibration in non-volatile memory — it does not reset when power is removed. There is no benefit to re-calibrating unless something has changed.
Q: Do I need to calibrate ESCs for a drone?
For drones using a flight controller (like Betaflight or ArduPilot), the flight controller can calibrate all ESCs simultaneously through its motor calibration function. You do not need to calibrate each ESC individually. If your ESCs support DSHOT protocol, calibration is unnecessary entirely.
Q: Can I calibrate an ESC without a transmitter?
Yes. Use an Arduino or servo tester to send the required PWM signals. Send 2000µs at power-up to register maximum throttle, then send 1000µs to register minimum and arm the ESC. This is exactly what the Arduino code example in this guide does.
Q: What does “arming” an ESC mean?
Arming is the process of confirming to the ESC that you intentionally want it to run. Most ESCs require the throttle to be at zero (minimum) at power-up before they will respond to throttle commands. This prevents accidental motor start-up if the throttle is accidentally left in a raised position when power is applied. After calibration, the ESC arms automatically when minimum throttle is confirmed.
Q: My ESC gets very hot during use. Is this normal?
Some warmth is normal. If it gets uncomfortably hot (over 60°C), the ESC is under-rated for your motor’s current draw. Check the motor’s rated current against the ESC’s continuous current rating. Use an ESC rated for at least 20% more than your motor’s maximum current. Add an ESC cooling fan for high-performance applications.
Q: Can incorrect ESC calibration damage my motor?
Incorrect calibration is unlikely to damage the motor itself, but it can cause inefficient operation (wrong speed for given input, possible overheating from running at wrong timing). More seriously, if minimum throttle is set incorrectly and the motor runs at low speed without your command, it can cause safety hazards in RC vehicles and drones. Always calibrate before first use.
Ready to power up your RC project? Zbotic stocks brushless motors, ESCs, and all the components you need to build and fly. Browse ESCs and brushless motors at Zbotic.in — fast shipping anywhere in India.


Add comment