
Setting up an MQTT broker with Mosquitto on a Raspberry Pi for IoT is one of the most impactful steps you can take toward building a robust, private, and scalable smart home or industrial sensor network. MQTT (Message Queuing Telemetry Transport) is a lightweight publish-subscribe protocol designed specifically for constrained devices and unreliable networks — making it the perfect communication backbone for ESP32 and ESP8266 sensor nodes. In this comprehensive guide, we’ll cover everything from installing Mosquitto on a Raspberry Pi to securing it with authentication and TLS, writing ESP32 client code, and connecting the broker to a Node-RED dashboard for real-time visualisation.
What is MQTT and Why Does It Matter for IoT?
MQTT was originally developed by IBM in the late 1990s for monitoring oil pipeline sensors over satellite links — a scenario where bandwidth was expensive and connections were unreliable. Today it is the dominant protocol for IoT communication, used in everything from home automation hubs to industrial SCADA systems to cloud IoT platforms like AWS IoT Core and Azure IoT Hub.
The protocol works on a publish-subscribe model. Devices (clients) connect to a central broker. Publishers send messages to named channels called topics (e.g., home/bedroom/temperature). Subscribers express interest in topics and receive every message published to those topics in real time. The broker handles all routing — publishers and subscribers never communicate directly with each other.
Key advantages of MQTT for IoT:
- Tiny overhead: MQTT headers are just 2 bytes minimum. Ideal for microcontrollers with limited RAM and bandwidth-constrained connections.
- QoS levels: Three Quality of Service levels allow you to trade reliability for performance: QoS 0 (fire and forget), QoS 1 (at least once), QoS 2 (exactly once).
- Retained messages: The broker stores the last message on a topic. New subscribers immediately receive the current state rather than waiting for the next update.
- Last Will and Testament: When a device disconnects unexpectedly, the broker can automatically publish a predefined message (e.g.,
offline) on the device’s status topic. - Persistent sessions: Devices can reconnect and receive messages they missed while offline.
Setting Up Raspberry Pi as the Broker Server
Any Raspberry Pi model from the Pi 3 onwards is suitable as an MQTT broker for a home or small office IoT network. A Pi 3B+ can comfortably handle hundreds of concurrent MQTT connections with Mosquitto, consuming less than 200 MB of RAM. For a production deployment with thousands of devices, a Pi 4 or a dedicated VPS is more appropriate.
Raspberry Pi Configuration
- Install Raspberry Pi OS Lite (no desktop needed) using the Raspberry Pi Imager.
- Enable SSH in the Imager’s Advanced Options before flashing.
- Connect the Pi to your home network via Ethernet (preferred) or Wi-Fi.
- Assign a static IP address to the Pi. On most Indian home routers, log into the admin panel (typically 192.168.1.1) and set a DHCP reservation for the Pi’s MAC address. This ensures the broker is always reachable at a fixed IP.
- SSH into the Pi:
ssh [email protected] - Update the system:
sudo apt update && sudo apt full-upgrade -y
You’ll want the Pi running 24/7 for your MQTT broker. India has fairly frequent power fluctuations in some areas — investing in a UPS or at least a quality power bank with pass-through charging is strongly recommended to prevent SD card corruption from unexpected shutdowns.
Installing and Configuring Mosquitto
Installation
sudo apt install mosquitto mosquitto-clients -y
sudo systemctl enable mosquitto
sudo systemctl start mosquitto
Verify the broker is running:
sudo systemctl status mosquitto
mosquitto -v  # Check version (should be 2.x)
Testing with mosquitto_pub and mosquitto_sub
Open two SSH sessions to the Pi. In the first, subscribe to a test topic:
mosquitto_sub -h localhost -t "test/hello"
In the second, publish a message:
mosquitto_pub -h localhost -t "test/hello" -m "Hello from Zbotic!"
You should see the message appear in the subscriber window. Your MQTT broker is working.
Mosquitto Configuration File
Create a configuration file at /etc/mosquitto/conf.d/default.conf:
# Default listener on port 1883 (local network only)
listener 1883
allow_anonymous false
password_file /etc/mosquitto/passwd

# WebSocket listener for web dashboards
listener 9001
protocol websockets
allow_anonymous false
password_file /etc/mosquitto/passwd

# Logging
log_dest file /var/log/mosquitto/mosquitto.log
log_type error
log_type warning
log_type information
persistence true
persistence_location /var/lib/mosquitto/
Restart Mosquitto after any configuration change: sudo systemctl restart mosquitto
Securing Your MQTT Broker with Authentication and TLS
Running an MQTT broker without authentication on your home network is acceptable for initial testing, but you should always add password protection before deploying real IoT devices — especially if the broker is ever accessible from the internet.
Creating User Accounts
# Create the password file and add a user
sudo mosquitto_passwd -c /etc/mosquitto/passwd iot_user
# Enter password when prompted

# Add additional users (omit -c flag)
sudo mosquitto_passwd /etc/mosquitto/passwd esp32_node1
TLS Encryption (for Internet-Accessible Brokers)
If you expose your MQTT broker on port 8883 to the internet (e.g., for remote monitoring of a farm or warehouse), you must use TLS. Generate a self-signed certificate or use Let’s Encrypt. For a local network, TLS is optional but good practice.
# Generate CA and server certificates
openssl req -new -x509 -days 1826 -extensions v3_ca -keyout ca.key -out ca.crt
openssl genrsa -out server.key 2048
openssl req -new -out server.csr -key server.key
openssl x509 -req -days 1826 -CA ca.crt -CAkey ca.key
    -CAcreateserial -in server.csr -out server.crt
Add TLS settings to /etc/mosquitto/conf.d/default.conf:
listener 8883
cafile /etc/mosquitto/certs/ca.crt
certfile /etc/mosquitto/certs/server.crt
keyfile /etc/mosquitto/certs/server.key
allow_anonymous false
password_file /etc/mosquitto/passwd
ESP32 MQTT Client: Publishing Sensor Data
Now let’s write firmware for the ESP32 to read a BME280 sensor and publish data to our Mosquitto broker. We’ll use the PubSubClient library for MQTT and the Adafruit BME280 library.

BMP280 Barometric Pressure and Altitude Sensor I2C/SPI Module
The BMP280 is perfect for MQTT-based IoT nodes measuring atmospheric pressure and temperature — reliable, affordable, and easy to wire to any ESP32 project.
#include <WiFi.h>
#include <PubSubClient.h>
#include <Adafruit_BME280.h>
#include <ArduinoJson.h>

const char* SSID        = "YourWiFi";
const char* PASSWORD    = "YourPassword";
const char* MQTT_SERVER = "192.168.1.100";
const int   MQTT_PORT   = 1883;
const char* MQTT_USER   = "esp32_node1";
const char* MQTT_PASS   = "yourpassword";
const char* CLIENT_ID   = "esp32-bedroom";
const char* DATA_TOPIC  = "home/bedroom/env";
const char* STATUS_TOPIC = "home/bedroom/status";

Adafruit_BME280 bme;
WiFiClient      espClient;
PubSubClient    mqttClient(espClient);

void reconnect() {
  while (!mqttClient.connected()) {
    if (mqttClient.connect(CLIENT_ID, MQTT_USER, MQTT_PASS,
                           STATUS_TOPIC, 1, true, "offline")) {
      mqttClient.publish(STATUS_TOPIC, "online", true);
    } else {
      delay(3000);
    }
  }
}

void setup() {
  Serial.begin(115200);
  WiFi.begin(SSID, PASSWORD);
  while (WiFi.status() != WL_CONNECTED) delay(500);

  Wire.begin(21, 22);
  bme.begin(0x76);

  mqttClient.setServer(MQTT_SERVER, MQTT_PORT);
}

void loop() {
  if (!mqttClient.connected()) reconnect();
  mqttClient.loop();

  static unsigned long lastMsg = 0;
  if (millis() - lastMsg > 30000) {  // every 30 seconds
    lastMsg = millis();

    StaticJsonDocument<200> doc;
    doc["temperature"] = bme.readTemperature();
    doc["humidity"]    = bme.readHumidity();
    doc["pressure"]    = bme.readPressure() / 100.0F;

    char payload[200];
    serializeJson(doc, payload);
    mqttClient.publish(DATA_TOPIC, payload, true);
  }
}
Note the Last Will and Testament (LWT) configuration in mqttClient.connect(). The fifth and sixth arguments set the LWT topic and message: if the ESP32 loses power or Wi-Fi unexpectedly, the broker automatically publishes offline to home/bedroom/status, allowing Home Assistant or Node-RED to detect the device going offline.
MQTT Topic Design Best Practices
A well-designed topic hierarchy makes your IoT network much easier to manage as it grows. A recommended structure for Indian home automation projects:
home/{room}/{device_type}— e.g.,home/hall/temperaturefarm/{field_id}/{sensor_type}— e.g.,farm/field1/soil_moisturebuilding/{floor}/{zone}/{sensor}— for commercial deployments
Always publish JSON payloads rather than raw values — it’s easier to add fields later without breaking subscribers, and it makes Node-RED/Home Assistant parsing trivial.

Ai Thinker NodeMCU-32S ESP32 Development Board – IPEX Version
A reliable ESP32 development board ideal for MQTT client nodes. The IPEX external antenna version gives better Wi-Fi range in large homes or offices.
Visualising Data with Node-RED
Node-RED is a visual flow-based programming tool that runs on Node.js. It can be installed on the same Raspberry Pi as Mosquitto and provides a web-based dashboard for real-time IoT data visualisation.
Installing Node-RED on Raspberry Pi
bash <(curl -sL https://raw.githubusercontent.com/node-red/linux-installers/master/deb/update-nodejs-and-nodered)
sudo systemctl enable nodered
sudo systemctl start nodered
Access the Node-RED interface at http://192.168.1.X:1880 from any browser on your network.
Creating an MQTT-to-Dashboard Flow
- Install
node-red-dashboardvia the Node-RED Palette Manager. - Drag an mqtt in node to the canvas and configure it: Server = localhost:1883, Topic =
home/bedroom/env, QoS = 1. - Add a JSON node to parse the payload.
- Add separate change nodes to extract
msg.payload.temperature,msg.payload.humidity, etc. - Connect each to a ui_gauge or ui_chart node from the dashboard palette.
- Deploy the flow and navigate to
http://192.168.1.X:1880/uito see your live dashboard.
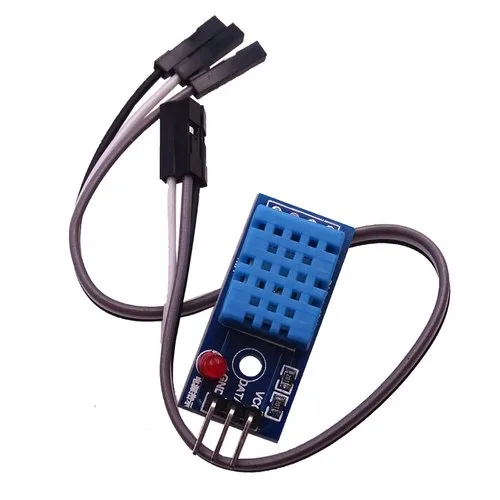
DHT11 Temperature And Humidity Sensor Module with LED
A beginner-friendly DHT11 module with status LED — great for your first MQTT IoT sensor node sending temperature and humidity data to a Mosquitto broker on Raspberry Pi.
Frequently Asked Questions
What port does MQTT use and do I need to open it on my router?
MQTT uses port 1883 (unencrypted) and port 8883 (TLS encrypted). For local home use, you do not need to open these ports on your router — all ESP32 and other clients communicate on the internal LAN. Only open these ports in your router’s firewall if you need remote access (e.g., monitoring a farm sensor from your office). In that case, always use TLS (port 8883) and strong passwords.
How many MQTT clients can Mosquitto handle on a Raspberry Pi?
Mosquitto is extremely lightweight. A Raspberry Pi 3B+ running Mosquitto can handle 1,000+ concurrent persistent connections with typical IoT message rates. At 30-second publish intervals, a network of 100 ESP32 nodes generates only about 3–4 messages per second — well within the Pi’s capability. For larger deployments (thousands of devices), consider running Mosquitto on a cloud VM or using HiveMQ/EMQX.
What happens to MQTT messages when the ESP32 loses Wi-Fi?
If the ESP32 uses a persistent MQTT session (CleanSession=false) and QoS 1 or 2, the broker queues messages published to subscribed topics while the device is offline and delivers them when it reconnects. For an ESP32 that only publishes data (and doesn’t subscribe), the published messages while offline are simply lost unless you buffer them in ESP32 flash storage (e.g., using SPIFFS) and replay them on reconnection.
Can I use MQTT with Home Assistant even if I set up my own Mosquitto broker?
Yes. Home Assistant has a built-in MQTT integration. Go to Settings → Devices & Services → Add Integration → MQTT. Enter your broker IP, port, username, and password. Home Assistant will then be able to subscribe to any MQTT topic and expose values as entities. You can also use the MQTT Discovery feature, where Home Assistant auto-creates entities from special discovery topics published by your devices.
Is MQTT suitable for sending sensor data to the cloud?
Yes. MQTT is the protocol used by AWS IoT Core, Azure IoT Hub, Google Cloud IoT Core, and most other cloud IoT platforms. You can bridge your local Mosquitto broker to a cloud MQTT endpoint using Mosquitto’s built-in bridge feature, allowing local-first operation with cloud backup and remote access without exposing your Raspberry Pi directly to the internet.
Build Your MQTT IoT Network Today
Get ESP32 development boards, sensors, and accessories for your Mosquitto MQTT IoT project from Zbotic — India’s trusted electronics component store with fast nationwide delivery.


Add comment