
Linear actuators convert rotary motor motion into straight-line push-pull movement. They are indispensable for solar panel trackers, motorised furniture, agricultural machinery, robotics end-effectors, and automated vents. But many users buy a linear actuator only to discover that controlling where it stops — rather than just extending and retracting fully — requires feedback. This guide covers every aspect of linear actuator position control: choosing the right actuator, reading position feedback, writing Arduino control code, and building real projects suited to the Indian maker market.
Types of Linear Actuators
Electric linear actuators used in maker projects generally fall into two categories:
Gear/Leadscrew Actuators
These use a DC motor driving a threaded leadscrew through a gearbox. The nut on the screw is attached to the output shaft — as the screw turns, the shaft extends or retracts. They offer high force (hundreds of newtons), slow speed (2–50 mm/s), and are self-locking when stopped (the leadscrew cannot be back-driven). The DC12V 500mm, LA-T8-100, and 100MM 1500N actuators sold by Zbotic fall into this category.
Rack and Pinion / Belt Actuators
Used in high-speed applications like CNC stages. Faster but not self-locking. Require encoder or limit switch feedback for position control. Not the subject of this guide — covered under CNC/motion control topics.
For most Indian maker applications — solar trackers, agricultural gates, medical positioning tables, and robotic toolheads — the leadscrew linear actuator is the right choice: robust, high-force, and electrically simple to control.
Position Feedback Methods
A basic linear actuator without feedback is binary: fully extended or fully retracted. To stop at intermediate positions you need one of these feedback mechanisms:
- Built-in potentiometer: Many actuators include a linear potentiometer coupled to the output shaft. Resistance changes proportionally with position — the easiest method to use with an Arduino analog input.
- Built-in encoder: Some actuators include a Hall-effect sensor on the motor shaft. You count pulses to track position, similar to DC gear motor encoders.
- External linear potentiometer: Mount a separate 10 kΩ slide potentiometer mechanically coupled to the actuator rod using a bracket and pivot.
- External ultrasonic/laser sensor: Measure the actuator rod extension directly with a distance sensor. Adds cost but works with any actuator and requires no mechanical coupling.
- External limit switches + time: Count milliseconds between limit switches and interpolate position. Simple but suffers from drift due to load-dependent speed variation.
For most projects, a built-in potentiometer actuator or an externally-mounted slide pot provides the best balance of simplicity, accuracy, and cost. The potentiometer approach gives 10-bit ADC resolution (1024 counts over the stroke), translating to roughly 0.1–0.5 mm accuracy on typical actuators.
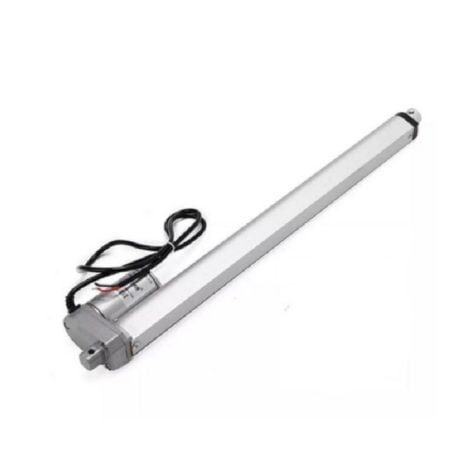
DC12V 500MM 7MM/S 2000N Electric Linear Actuator
High-force 2000N actuator with 500mm stroke. Ideal for solar panel tilt, agricultural gate, and heavy-duty industrial positioning. 12V DC controlled via H-bridge.
Potentiometer Feedback: The Simplest Approach
A linear potentiometer (or slide pot) provides a voltage that varies proportionally with position. Connect it as a voltage divider between 5 V and GND, with the wiper to an Arduino analog pin. The Arduino reads 0–1023, corresponding to the full stroke of the actuator.
Calibration is essential: the mechanical travel of the pot and the actuator stroke rarely match perfectly. In software, define POT_MIN (ADC value when fully retracted) and POT_MAX (ADC value when fully extended) by manually driving the actuator to each limit and recording the ADC reading. Then use map() to convert between ADC counts and millimetres:
// Calibration constants (measure on your specific actuator)
const int POT_MIN = 120;   // ADC at fully retracted
const int POT_MAX = 890;   // ADC at fully extended
const int STROKE_MM = 100; // actuator stroke in mm

float adcToMM(int adc) {
  return map(adc, POT_MIN, POT_MAX, 0, STROKE_MM);
}
Average multiple ADC readings (over-sampling) to reduce noise: read the pot 8–16 times in rapid succession and take the average. This increases effective resolution and smooths out the small voltage fluctuations common in industrial environments.
Encoder Feedback on Linear Actuators
If your actuator has an internal Hall-effect encoder, the position feedback method is pulse counting — exactly the same as with DC gear motors. The encoder gives a known number of pulses per millimetre of extension. Typical values: 20–50 pulses/mm on common 12V actuators.
Encoder feedback is more accurate than a potentiometer (no non-linearity or wiper wear) but requires interrupt pins and careful noise management. Since the motor and encoder share the same housing, motor brush noise can corrupt encoder signals — add 100 nF capacitors close to the encoder connector on both channels.
Wiring a Linear Actuator with Potentiometer to Arduino
| Connection | From | To |
|---|---|---|
| Pot VCC | Potentiometer pin 1 | Arduino 5V |
| Pot GND | Potentiometer pin 3 | Arduino GND |
| Pot Wiper | Potentiometer pin 2 | Arduino A0 |
| Motor IN1 | L298N IN1 | Arduino Pin 8 |
| Motor IN2 | L298N IN2 | Arduino Pin 9 |
| Motor ENA | L298N ENA | Arduino Pin 10 (PWM) |
| Actuator Motor+ | L298N OUT1 | Actuator positive terminal |
| Actuator Motor- | L298N OUT2 | Actuator negative terminal |
| 12V Supply | Power supply positive | L298N VMOT |
Use an L298N H-bridge or an IBT-2 (BTS7960) driver. The L298N handles up to 2A continuous (sufficient for small actuators). For large actuators drawing 5–10A (like the 2000N 500mm model), use the IBT-2 BTS7960 driver which handles 43A peak.
Arduino Code: Bang-Bang Position Control
The simplest position control strategy is bang-bang (on/off): extend if below target, retract if above target, stop when within a deadband:
#define IN1 8
#define IN2 9
#define ENA 10
#define POT_PIN A0

const int POT_MIN = 120;
const int POT_MAX = 890;
const int DEADBAND = 10; // ADC counts (tune to your pot)

void extend() { digitalWrite(IN1,HIGH); digitalWrite(IN2,LOW); analogWrite(ENA,200); }
void retract() { digitalWrite(IN1,LOW); digitalWrite(IN2,HIGH); analogWrite(ENA,200); }
void stopMotor() { digitalWrite(IN1,LOW); digitalWrite(IN2,LOW); analogWrite(ENA,0); }

void moveToADC(int targetADC) {
  int pos;
  do {
    pos = analogRead(POT_PIN);
    if (pos  targetADC + DEADBAND) retract();
    else stopMotor();
    delay(10);
  } while (abs(pos - targetADC) > DEADBAND);
  stopMotor();
}

void setup() {
  pinMode(IN1, OUTPUT); pinMode(IN2, OUTPUT); pinMode(ENA, OUTPUT);
  Serial.begin(9600);
}

void loop() {
  // Example: move to 25%, 50%, 75%, 100% of stroke
  moveToADC(map(25, 0, 100, POT_MIN, POT_MAX));
  delay(2000);
  moveToADC(map(75, 0, 100, POT_MIN, POT_MAX));
  delay(2000);
}
Bang-bang control is simple but causes the actuator to overshoot and hunt around the target if the deadband is too small, or be inaccurate if the deadband is too large. For applications requiring smooth, accurate positioning — medical equipment, precision tools, camera rigs — use PID control.
Smooth PID Position Control
PID control applies motor power proportional to how far the actuator is from its target, gradually reducing power as it approaches. This produces smooth, overshoot-free positioning:
#include <PID_v1.h>

double setpoint, input, output;
double Kp = 2.0, Ki = 0.5, Kd = 0.1;
PID myPID(&input, &output, &setpoint, Kp, Ki, Kd, DIRECT);

void setup() {
  // ... pin setup as before ...
  myPID.SetMode(AUTOMATIC);
  myPID.SetOutputLimits(-255, 255); // negative = retract
}

void loop() {
  setpoint = 512; // target: midpoint ADC
  input = analogRead(POT_PIN);
  myPID.Compute();

  if (output > 5) {
    extend();
    analogWrite(ENA, abs((int)output));
  } else if (output < -5) {
    retract();
    analogWrite(ENA, abs((int)output));
  } else {
    stopMotor();
  }

  delay(20); // 50 Hz control loop
}
Start tuning with Kp=1.0, Ki=0, Kd=0. Increase Kp until the actuator reaches target quickly without excessive oscillation, then add Ki to eliminate any remaining position error at rest, and add Kd if there is overshoot. Self-locking leadscrews have built-in mechanical damping, which makes PID tuning easier than for free-spinning systems.
Using Limit Switches for Safety
Always include limit switches at both ends of travel, regardless of your feedback method. If a sensor fails, software glitches, or the actuator is pushed beyond its calibrated range, limit switches prevent mechanical damage:
#define LIMIT_EXTEND  6
#define LIMIT_RETRACT 7

void extend() {
  if (digitalRead(LIMIT_EXTEND) == LOW) { stopMotor(); return; } // at limit
  digitalWrite(IN1, HIGH); digitalWrite(IN2, LOW);
}

void retract() {
  if (digitalRead(LIMIT_RETRACT) == LOW) { stopMotor(); return; } // at limit
  digitalWrite(IN1, LOW); digitalWrite(IN2, HIGH);
}
Use normally-closed limit switches wired to INPUT_PULLUP pins. When the switch opens (actuator hits it), the pin reads HIGH and you stop. This is fail-safe — if a wire breaks, the switch appears triggered and motion stops.
Choosing the Right Motor Driver
- L298N: 2A continuous. Good for small actuators (LA-T8-100, 100MM 1500N at low load). Needs heatsink for sustained operation.
- IBT-2 (BTS7960): 43A peak, 15A continuous. Correct choice for the 2000N 500mm actuator. Widely available in India, low cost.
- Relay: For simple full-extend/full-retract (no position feedback). Two relays in H-bridge configuration handle any current. No PWM control possible.
- Cytron MD30C: 30A continuous, supports PWM speed control. Excellent build quality, well-suited for Indian industrial applications.

LA-T8-100 100MM Stroke DC6V Linear Actuator for Doors/Windows
Compact 100mm stroke actuator at 150mm/s — fast for window and door automation. 6V operation compatible with small SLA batteries and USB power banks with boost converters.

Linear Actuator 100MM Stroke 1500N 12V
Heavy-duty 1500N force actuator for demanding applications. 12V operation, 7mm/s speed — suitable for solar panel tilt systems and agricultural machinery with L298N or IBT-2 driver.
Project Ideas for India Makers
- Single-axis solar tracker: LDR pair detects sun position; actuator tilts the panel. Potentiometer feedback ensures panel returns to rest at night.
- Automated greenhouse vent: Temperature sensor triggers actuator to open/close roof vents. Limit switches define open and closed positions.
- Motorised standing desk: Two actuators in sync (using two L298Ns and one Arduino) raise/lower a study desk between preset heights. Button saves/recalls heights via EEPROM.
- Camera slider with precise stop points: Actuator replaces motor+belt for compact cinematography slider. PID control allows precise positioning for stop-motion animation.
- Paddy field gate controller: Actuator opens/closes irrigation gates on schedule via RTC module. Useful for small-scale farmers in India who need automated water management.
Frequently Asked Questions
What is the accuracy I can achieve with a potentiometer-feedback actuator?
With a 10-bit Arduino ADC (1024 counts) and good over-sampling, you can typically achieve ±0.5 mm on a 100 mm stroke actuator and ±2–3 mm on a 500 mm stroke unit. Mechanical backlash in the leadscrew (usually 0.5–2 mm) is often the limiting factor, not the electronics.
Can I control a linear actuator with a Raspberry Pi instead of Arduino?
Yes, but the Raspberry Pi lacks analog inputs — you need an external ADC (like the MCP3208) to read the potentiometer. The Pi’s GPIO then drives the motor driver exactly as Arduino would. The Pi is better suited when you need network control, data logging, or integration with a camera.
My actuator extends and retracts correctly but position is inaccurate at the extremes.
This is a calibration issue. Drive the actuator fully to each limit (with limit switches to prevent damage) and read the pot ADC value at each position. Use those exact values as POT_MIN and POT_MAX. Also check that the pot mechanically reaches its limits before the actuator does — if the actuator overruns the pot range, calibration breaks.
Can I run two linear actuators in perfect sync from one Arduino?
Yes, with two independent feedback loops running in the same loop() function. Read both pots, compute both errors, apply both motor commands. Since both loops run in the same time step, synchronisation is reasonably good. For critical sync applications (like raising a heavy platform), add a cross-coupling term: if one actuator is ahead, slow it slightly until the other catches up.
Where can I buy linear actuators in India with fast delivery?
Zbotic.in stocks multiple linear actuator models — from the compact LA-T8-100 (6V, 100mm stroke, 6.4N) to the heavy-duty DC12V 500mm 2000N model — with GST invoices and pan-India shipping. See all actuators in the Motors and Actuators category.
Browse force ratings from 6.4N to 2000N at Zbotic Motors & Actuators. All products ship with GST invoice across India.


Add comment