
Choosing between an LDO vs buck converter is one of the most common decisions you will face when powering a microcontroller project. Both step voltage down — but the way they do it, and the trade-offs involved, are vastly different. Pick the wrong one and you could end up with a hot component that wastes half your battery, or a noisy power rail that destabilises a precision sensor. This guide breaks down both technologies in plain language so you can make the right call every time.
How an LDO Regulator Works
An LDO (Low Dropout) regulator is a linear voltage regulator. It works by placing a pass element — typically a MOSFET or bipolar transistor — in series between the input and output. This pass element acts like a variable resistor, dissipating the excess voltage as heat to maintain a stable output.
The term “Low Dropout” refers to the minimum voltage difference (dropout voltage) that the regulator needs between input and output to function correctly. Older linear regulators (like the 7805) needed at least 2V of headroom. Modern LDOs like the AMS1117 need as little as 1–1.2V, while premium LDOs can work with as little as 100 mV of dropout.
Simple formula for understanding LDO power loss:
Power Dissipated = (Vin − Vout) × Iout
So, if you power an Arduino Uno (5V, 50mA load) from a 12V supply through an LDO, the regulator dissipates (12−5) × 0.05 = 350 mW as heat. That is 7× the power actually delivered to the load — efficiency of just 42%.
How a Buck Converter Works
A buck converter is a switching regulator. It uses a high-frequency switch (MOSFET), a diode, an inductor, and capacitors to transfer energy in pulses. By adjusting the duty cycle of the switch (how long it is on vs off), the converter can regulate the output voltage to any value below the input — with very little energy wasted as heat.
The magic is in the inductor: it stores energy during the on-time and releases it during the off-time, smoothing the pulsed current into a relatively steady DC output. Efficiencies of 85–97% are typical for modern buck converter ICs.
Same example with a buck converter: Powering an Arduino at 5V, 50mA from 12V with a 90% efficient buck converter, the input draws only 27.8 mA. The regulator dissipates just 33 mW — versus 350 mW for the LDO.
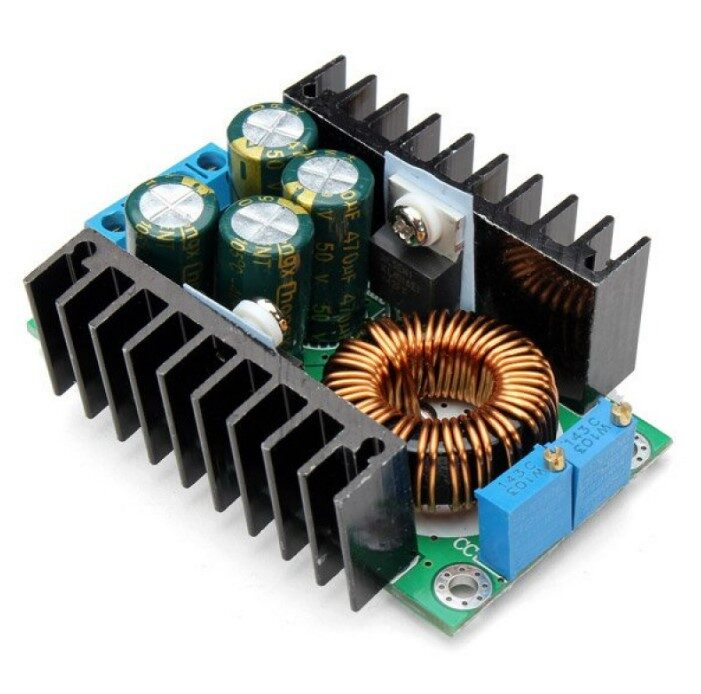
300W 10A DC-DC Step-Down Buck Converter Adjustable Module
High-power adjustable buck converter module. Ideal for powering high-current loads from 12V–48V input with minimal heat dissipation.
Efficiency Comparison
Efficiency is where the LDO vs buck converter debate is most stark. Here is a comparison table across typical operating scenarios:
| Scenario | LDO Efficiency | Buck Efficiency |
|---|---|---|
| 12V → 5V, 500mA | 42% | 88–93% |
| 5V → 3.3V, 100mA | 66% | 85–92% |
| 3.7V → 3.3V, 50mA (battery) | 89% | 87–91% |
| 12V → 3.3V, 1A | 27% | 86–95% |
Notice the third row: when the input–output voltage difference is small (like a 3.7V Li-Ion cell powering a 3.3V MCU), the LDO’s efficiency is actually comparable to a buck converter. This is a key insight — LDOs are efficient when the voltage drop is small.
Noise and Output Ripple
This is the LDO’s strongest advantage. Because it has no switching elements, an LDO produces an inherently clean, low-noise output. There is no switching frequency, no inductor current ripple, no EMI (electromagnetic interference) from fast-switching MOSFETs.
A buck converter, by contrast, always produces some output voltage ripple — typically 10–100 mV peak-to-peak depending on the design. While this is acceptable for digital circuits and most microcontrollers, it can be problematic for:
- ADC (Analog-to-Digital Converter) reference voltage: Noise on the ADC reference degrades measurement accuracy.
- RF circuits: Switching noise can appear as spurs in the RF spectrum.
- Audio circuits: Switching noise can be audible as a whine.
- Precision op-amp circuits: PSRR (Power Supply Rejection Ratio) has limits.
A common design pattern is to use a buck converter to efficiently step down a high voltage, then follow it with an LDO to clean up the ripple for noise-sensitive circuits. This hybrid approach gives you both efficiency and a clean supply rail.
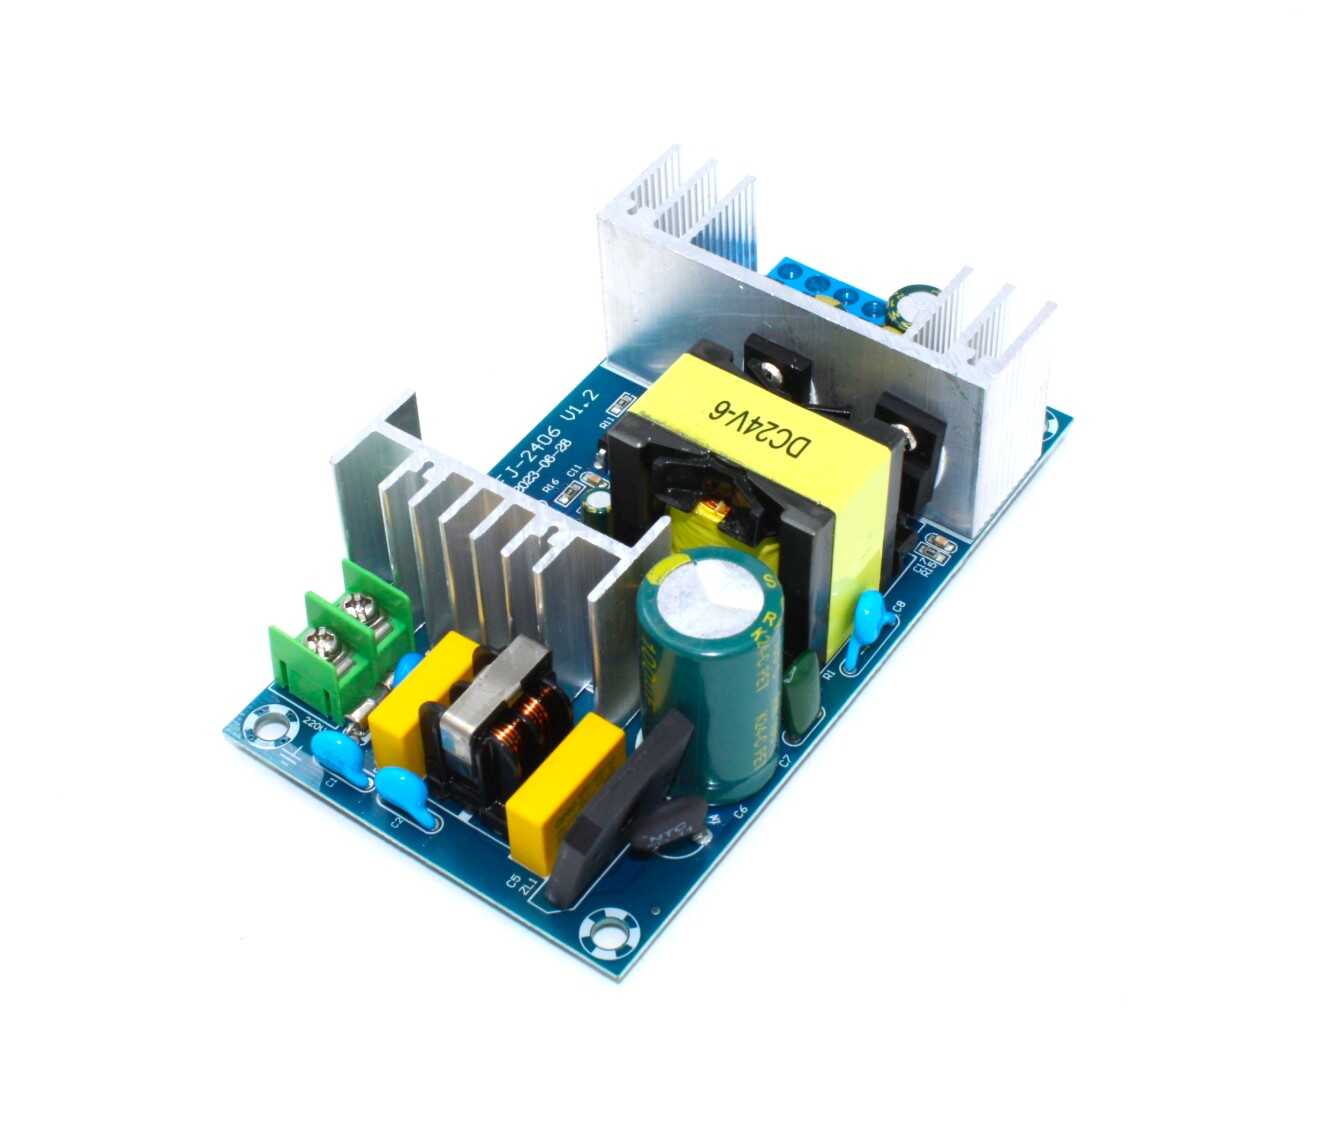
150W AC-DC Buck Converter 100V-240V to 24V Step Down Module
Convert mains AC directly to regulated 24V DC. Perfect for powering LED drivers, motor controllers and industrial automation projects.
Cost, Size and Design Complexity
LDO: Simple and Cheap
An LDO regulator circuit is beautifully simple. The AMS1117-3.3, one of the most popular LDOs in India, costs just ₹5–₹15 per piece. The complete circuit requires only 2–4 capacitors. PCB footprint is tiny (SOT-223 or TO-92 package). Design is virtually foolproof — connect input, output, ground, and add the capacitors shown in the datasheet.
Buck Converter: More Components, Higher Performance
A buck converter circuit requires an inductor, multiple capacitors (input and output), a sense resistor or feedback network, and possibly a bootstrap capacitor. Integrated buck converter modules (like the popular XL4016 or MP2307-based modules available on Zbotic) come with all components pre-assembled, making them nearly as easy to use as an LDO — just wire input and output, and trim the potentiometer for the desired voltage.
For a custom PCB design, however, buck converters require more careful layout — keep high-current switching loops short, place output capacitors close to the IC, and route the feedback pin away from noisy traces.
When to Use an LDO
- The input voltage is close to the output voltage (small dropout, so efficiency is high)
- Load current is small (under 100–200mA typically)
- Output noise must be ultra-low (ADC reference, RF, audio)
- PCB space is at a premium and simplicity matters
- Battery-powered with a single Li-Ion cell → 3.3V MCU (3.7V → 3.3V, tiny LDO works great)
- Post-regulator after a buck converter to clean up ripple
When to Use a Buck Converter
- Large voltage difference between input and output (e.g., 12V → 5V or 24V → 3.3V)
- Load current is high (above 200mA, especially above 1A)
- Battery-powered design where run time matters — every milliwatt counts
- Powering motors, LED strips, or other high-power loads
- Input voltage varies widely (solar panels, vehicle power, unstable mains adapters)
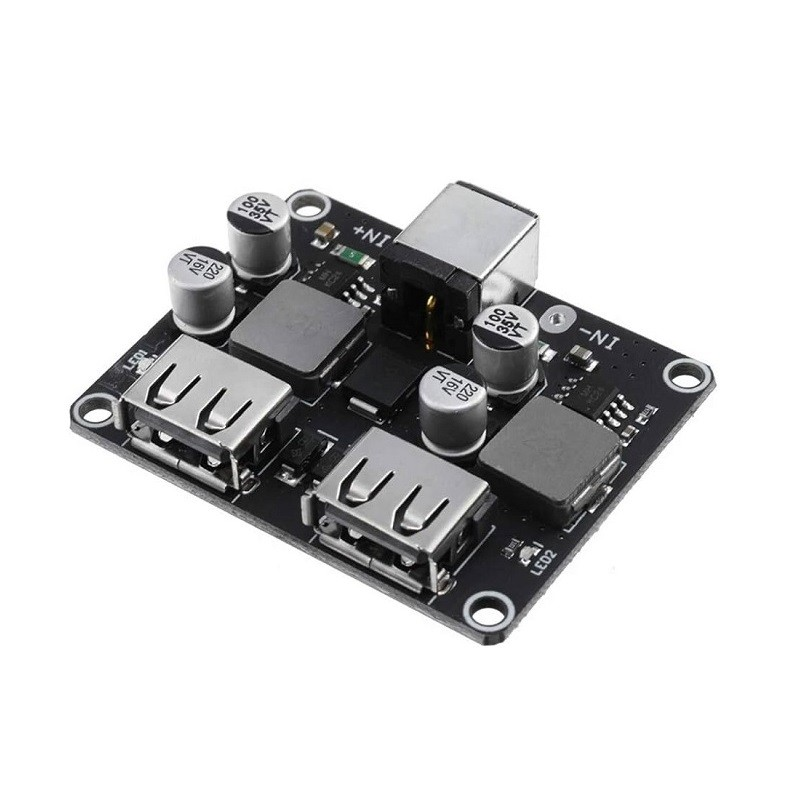
2 Channel USB QC3.0 DC-DC Buck Converter Charging Module
Step down 6–32V input to fast-charge USB QC3.0 output at 9V/12V/20V. Great for DIY power banks and vehicle USB chargers.
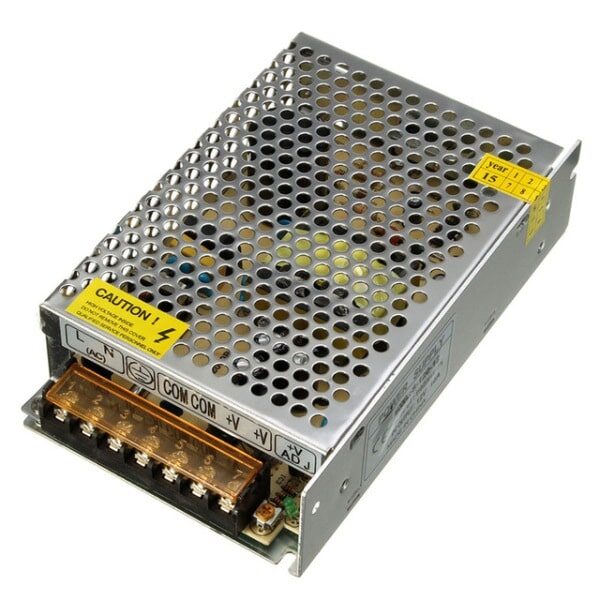
12V 10A SMPS 120W DC Metal Power Supply
Reliable mains-to-DC supply for bench and project use. Pair with a buck converter module for any custom output voltage your project needs.
Frequently Asked Questions
Q1: Can I use a buck converter instead of an LDO for my Arduino?
Yes, you can. In fact, if you are powering an Arduino from a 12V adapter, a buck converter is far more efficient. Just ensure the output voltage is accurately set (5V for Uno, 3.3V for 3.3V boards) before connecting, as a higher voltage could damage the MCU.
Q2: Why does my LDO get so hot?
Because it converts the excess voltage (Vin − Vout) directly into heat. Power dissipated = (Vin − Vout) × Iout. If your LDO gets too hot, either add a heatsink, reduce the load current, lower the input voltage, or switch to a buck converter.
Q3: What is the dropout voltage?
The dropout voltage is the minimum voltage difference between the input and output at which the LDO can still regulate. Below this, the output voltage “drops out” and follows the input. For example, an AMS1117 with a 1.2V dropout on a 3.7V battery can only regulate to a maximum of 3.7 − 1.2 = 2.5V output.
Q4: Does a buck converter work with batteries?
Yes, and it extends battery life significantly compared to an LDO. Modern buck converters can even enter a very low-power discontinuous conduction mode (DCM) at light loads, maintaining high efficiency even when the load is nearly zero — ideal for IoT devices in deep sleep.
Q5: Can I use both LDO and buck converter together?
Absolutely — and this is a recommended design pattern for RF or precision analogue circuits. Use a buck converter for the primary step-down (12V → 5V at high efficiency) and then add a small LDO after it (5V → 3.3V) to filter out the switching noise before it reaches sensitive circuitry.
Zbotic stocks buck converter modules, SMPS units, power adapters, and all the components you need for clean, efficient power design. Browse Power Supply Products at Zbotic — fast shipping across India.


Add comment