
Knowing how to read a circuit diagram is the single most empowering skill in electronics. Whether you are debugging an Arduino project, following a DIY tutorial, or studying for your B.Tech exams, every electronics challenge eventually comes down to understanding a schematic. Yet for most beginners in India, circuit diagrams look like abstract art — a jumble of lines, symbols, and numbers that refuse to make sense.
This tutorial changes that. We will walk through the complete process of reading any circuit diagram, from identifying power rails to tracing signal flow, using plain language and practical examples suited to the Indian maker and student community.
Table of Contents
- What Is a Circuit Diagram?
- Tools You Need Before You Start
- Recognising the Key Symbols
- Understanding Wires, Nodes, and Junctions
- Finding Power and Ground Rails
- Tracing Signal Flow Step by Step
- Reading a Real Example: LED + Resistor + Transistor Switch
- Common Mistakes Beginners Make
- Frequently Asked Questions
What Is a Circuit Diagram?
A circuit diagram (also called a schematic diagram or schematic) is a simplified graphical representation of an electrical circuit. Unlike a physical layout diagram (which shows where components sit on a PCB or breadboard), a schematic is purely conceptual — it shows how components connect electrically, not where they sit physically.
This distinction matters enormously. A resistor physically located at the top-right corner of a PCB might appear in the middle of a schematic because that is where it fits logically in the signal chain. When reading a schematic, forget the physical position and focus entirely on connections.
There are two main standards for circuit diagram symbols:
- IEC (International Electrotechnical Commission) — used in India, Europe, and most of the world
- ANSI/IEEE — common in older American textbooks and many open-source projects
Both are widely used in Indian engineering colleges and online tutorials, so it pays to be familiar with both.
Tools You Need Before You Start
You do not need expensive equipment to start reading schematics. Here is what helps:
- A printed or digital schematic — always have the diagram open and zoomable
- The component datasheets — for any IC or specialised component in the schematic
- A pencil — mark up a printed schematic as you trace paths; it dramatically reduces errors
- A multimeter — when you move from reading to building, you will need it to verify connections
- A breadboard and jumper wires — the best way to learn is to build the circuit you are reading

10CM Female To Female Breadboard Jumper Wires 2.54MM – 40Pcs
Essential for connecting modules to breadboards as you build circuits straight from schematics. 40-piece pack covers most beginner project layouts.
Recognising the Key Symbols
Every circuit diagram is built from a vocabulary of standard symbols. You do not need to memorise all of them before starting — just the most common ones. Here are the symbols that appear in the vast majority of hobby and educational schematics:
| Component | Symbol Description | Common Use |
|---|---|---|
| Resistor | Zigzag (ANSI) or rectangle (IEC) | Current limiting, voltage dividing |
| Capacitor | Two parallel lines | Filtering, decoupling, timing |
| LED | Diode triangle + bar with outward arrows | Visual indicators |
| NPN Transistor | Arrow on emitter pointing out | Switching, amplification |
| IC (Chip) | Rectangle with numbered pins | Processing, regulation, amplification |
| GND | Three decreasing horizontal lines | 0V reference |
| VCC/V+ | Upward arrow or horizontal line with voltage label | Positive power supply |
Understanding Wires, Nodes, and Junctions
One of the trickiest parts of reading a circuit diagram for beginners is understanding when wires are connected and when they merely cross over each other without connecting. The rule is simple but critical:
- Filled dot at a crossing = junction (connected). The two wires share the same electrical node.
- No dot at a crossing = no connection. The wires pass over each other like a bridge.
- A node is any point in a circuit that shares the same voltage. All components connected to the same node are electrically equivalent from a voltage perspective.
- Net labels are named nodes. If two points in a schematic share the same net label (e.g., “SDA” or “+5V”), they are connected even if no wire visually links them. This is common in complex schematics to avoid spaghetti wiring.

10CM Male To Female Breadboard Jumper Wires 2.54MM – 40Pcs
Perfect for connecting Arduino or Raspberry Pi GPIO pins to breadboard components — exactly the kind of node-to-node connections schematics describe.
Finding Power and Ground Rails
The very first thing you should do when opening any circuit diagram is identify the power supply and ground. This gives you the big picture and lets you understand the voltage levels the circuit operates at.
Step 1: Find all GND symbols. These are your reference — the 0V baseline for every other measurement in the circuit. In digital circuits there is usually a single GND. In audio or RF circuits, you may see separate analog and digital grounds that join at one point.
Step 2: Find all supply symbols. Labels like VCC, VDD, VBAT, +5V, +3.3V, +12V tell you the positive supply rails. A circuit may use multiple rails (e.g., a 3.3V microcontroller section plus a 12V motor section).
Step 3: Check for voltage regulators. If you see an IC like a 7805, LM317, or AMS1117 between the raw supply and the logic section, the regulated voltage is what powers the logic — not the raw input.
Step 4: Note bypass capacitors near ICs. A small 100nF ceramic capacitor between VCC and GND right next to an IC is a decoupling capacitor. This is standard practice and not part of the main signal path — do not be confused by them.
Tracing Signal Flow Step by Step
Once you understand the power structure, trace how the signal (data, analog waveform, or control signal) moves through the circuit. A disciplined, step-by-step approach prevents confusion:
- Identify the input. What is driving the circuit? A sensor, a microcontroller pin, a button, an antenna? Find it on the left side of the schematic.
- Follow the connections from input to output. Move right through the schematic, component by component. Ask yourself: what does this component do to the signal?
- Understand each stage. Common stages include: amplification (op-amp), switching (transistor or relay), filtering (RC network), regulation (voltage regulator), and indication (LED or buzzer).
- Identify feedback loops. If a wire runs from the output back to an earlier stage, it is feedback — essential for stability in amplifiers and control systems.
- Find the output. What is the circuit ultimately driving? A display, a speaker, a motor, a wireless module?
Reading a Real Example: LED + Resistor + Transistor Switch
Let us apply these steps to one of the most common beginner circuits — using a transistor to switch an LED from a microcontroller pin.
The schematic shows:
- A +5V rail at the top connected through a 330Ω resistor to the anode of an LED
- The cathode of the LED connected to the collector of an NPN transistor (e.g., BC547)
- The emitter of the transistor connected to GND
- The base of the transistor connected through a 10kΩ resistor to a microcontroller GPIO pin
Reading this step by step: When the GPIO pin goes HIGH (typically 3.3V or 5V), current flows through the 10kΩ base resistor into the transistor base. This turns the transistor ON, creating a low-resistance path from collector to emitter. Current now flows: +5V → 330Ω resistor → LED → transistor collector → emitter → GND. The LED lights up. When the GPIO pin goes LOW, the transistor turns off, the LED path is broken, and the LED goes dark.
The 330Ω resistor limits current through the LED (preventing it from burning out). The 10kΩ base resistor limits base current to a safe level. Two resistors, one transistor, one LED — a complete switching circuit readable in under two minutes once you know the symbols.
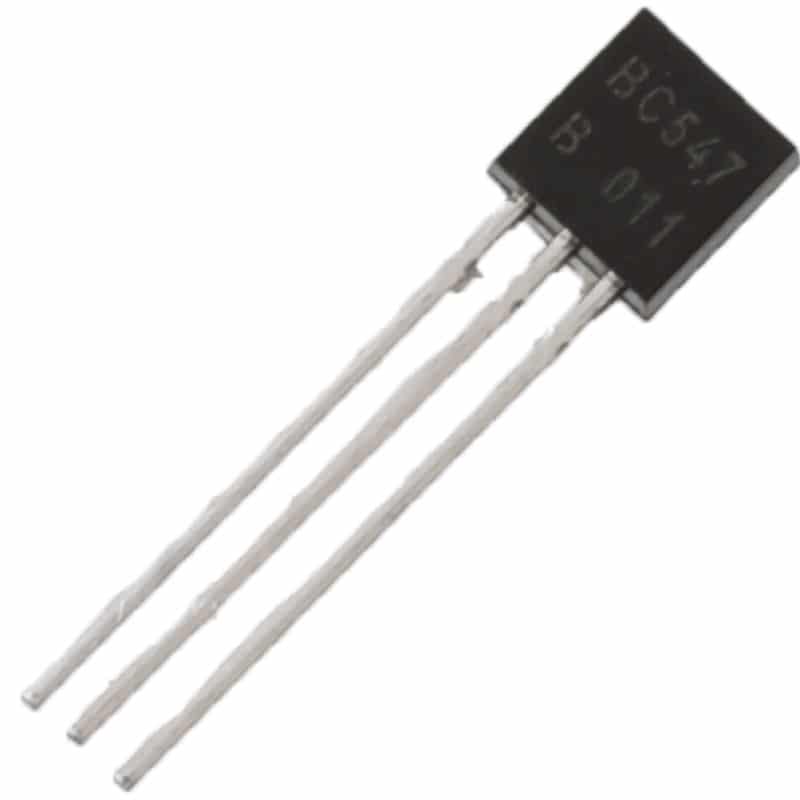
BC547 NPN 100mA Transistor TO-92 (Pack of 10)
The BC547 is one of the most common transistors in Indian project schematics. Build the LED switching circuit above with this pack and see schematic reading come alive.
Common Mistakes Beginners Make
Confusing physical layout with schematic layout
A schematic is not a PCB layout. The left-right position of a component on the schematic has nothing to do with where it sits on the board. Many beginners try to wire up a breadboard by copying the schematic’s visual layout — this leads to incorrect connections. Always follow the connections, not the positions.
Missing no-connect markers
Pins with an X symbol are explicitly left unconnected (no-connect). Do not wire them to anything. Floating these pins may cause issues with CMOS inputs, but the designer has marked them no-connect deliberately.
Ignoring pin numbers on ICs
Every pin of an IC has a number. Always cross-reference with the datasheet. The schematic may show a pin labelled “CLK” going to a clock source — but the physical IC package has that as pin 6, not pin 1. Wiring to the wrong physical pin is one of the most common beginner errors.
Treating net labels as visual wire ends
If a wire ends with a label and no connected component, it continues somewhere else in the schematic under the same label. Search the document for other instances of that label to find where the wire goes.

10 x 10 cm Universal PCB Prototype Board Single-Sided 2.54mm
Once you can read a schematic confidently, the next step is building permanent circuits. This universal PCB board lets you solder components exactly as a schematic specifies.
Frequently Asked Questions
How long does it take to learn to read circuit diagrams?
Most beginners can read simple schematics (5–15 components) confidently within 2–4 weeks of regular practice. Complex multi-page schematics for full products take months of experience. The key is consistent practice — try reading one new schematic every day and actually building simple ones on a breadboard.
What is the best free software to draw and read circuit diagrams?
KiCad is the industry-standard open-source tool and is completely free. For quick online work, use EasyEDA (browser-based, free, great for beginners). Fritzing is popular for breadboard-style diagrams but also includes a schematic editor. All three are widely used by Indian students and makers.
How do I read a circuit diagram when I do not recognise a symbol?
First check the schematic’s legend or component list (most professional schematics include one). If not found there, Google the symbol or use a reference like this guide or the IEC 60617 standard. For unknown ICs, identify the part number from the label and look up the datasheet on the manufacturer’s website.
Is there a difference between a circuit diagram and a wiring diagram?
Yes. A circuit diagram (schematic) shows logical electrical connections using standard symbols. A wiring diagram shows physical wire routing, often used in automotive or building electrics. A PCB layout shows where components physically sit on a board. All three can represent the same circuit but serve different purposes.
Can I learn circuit diagram reading without a formal electronics background?
Absolutely. Thousands of self-taught makers and hobbyists across India read schematics daily without formal engineering degrees. Start with simple Arduino project schematics, build the circuits, measure them with a multimeter, and your schematic reading skill will grow naturally with every project you complete.
Build Your First Circuit From a Schematic
Reading circuit diagrams is a learnable skill, and every schematic you work through makes the next one easier. The process — identify power rails, trace signal flow, understand each component’s role — becomes second nature with practice.
The best next step is to pick a simple project schematic and build it on a breadboard. Zbotic has all the components you need — resistors, transistors, capacitors, sensors, and jumper wires — shipped quickly anywhere in India. Visit our Electronics Basics store to grab your starter components and turn those schematics into working circuits today.


Add comment