
The FSR402 (Force Sensitive Resistor) is a thin, flexible sensor that changes its electrical resistance in response to applied force or pressure. It is one of the most popular pressure-sensing components in the maker community because of its low cost, ease of use, and thin flat form factor. In this complete tutorial, we cover everything you need to know about using the FSR402 with Arduino — from the physics of how it works to complete project code examples.
What Is the FSR402?
The FSR402 is manufactured by Interlink Electronics and is part of their FSR (Force Sensing Resistor) product line. It has an 18.28mm diameter active sensing area and comes with two flexible leads for easy breadboard or PCB connection. The FSR402 can measure forces from approximately 100g to 10kg, making it suitable for a wide range of pressure-sensing applications.
Key characteristics of the FSR402:
- Flexible and thin — 0.45mm total thickness, can be bent around curves
- Large force range — 100g to 10kg (0.2N to 20N)
- Passive component — no power required for the sensor itself
- Short response time — <3 milliseconds
- Wide temperature range — -30°C to +70°C
The FSR series is commonly used in gaming controllers (force feedback), medical devices (pressure mats), smart furniture (seat occupancy detection), and numerous robotics and wearables projects.
How Force Sensitive Resistors Work
The FSR402 uses a polymer thick film (PTF) technology. The sensing element consists of two thin layers:
- Resistive layer: A conductive polymer coating with a high base resistance
- Electrode layer: An interdigitated (interleaved) electrode pattern printed on a flexible substrate
When no force is applied, the two layers are separated and resistance is very high (essentially open circuit — greater than 1MΩ). When force is applied, the layers are pressed together. More contact points form between the resistive polymer and the electrodes, reducing the resistance. The more force applied, the lower the resistance.
This relationship is non-linear — the resistance drops steeply at first, then more slowly as force increases. The force-resistance curve follows approximately a power law relationship, which we account for during calibration.
FSR402 Specifications
| Parameter | Value |
|---|---|
| Sensing Diameter | 18.28mm (0.72 inch) |
| Force Range | 0.2N to 20N (approx 20g to 2kg) |
| Resistance (no load) | > 1MΩ |
| Resistance (at 100g) | ~30kΩ |
| Resistance (at 1kg) | ~5kΩ |
| Resistance (at 10kg) | ~200Ω |
| Total Thickness | 0.45mm |
| Response Time | <3ms |
| Repeatability | ±2% of full scale |
| Operating Temperature | -30°C to +70°C |
The Voltage Divider Circuit
The FSR402 is a variable resistor, so we need a voltage divider circuit to convert its changing resistance into a voltage that Arduino’s ADC can read. The formula is:
Vout = Vcc × R_fixed / (R_FSR + R_fixed)
Choosing the right fixed resistor (R_fixed) is important:
- For light touch applications (20g–500g): Use 100kΩ — gives better resolution at low forces
- For medium force (100g–2kg): Use 10kΩ — best overall linearity
- For heavy force (1kg–10kg): Use 1kΩ — gives resolution at high forces
For most Arduino projects, 10kΩ is the best starting point. The voltage output will be approximately:
- No force: ~0V (R_FSR >> 10kΩ)
- Light touch: ~1V
- Firm press: ~3–4V
- Maximum force: ~4.5V
Wiring FSR402 to Arduino
Standard Voltage Divider Wiring
- FSR Pin 1 → Arduino 5V
- FSR Pin 2 → Arduino A0 AND one end of 10kΩ resistor
- Other end of 10kΩ resistor → Arduino GND
That’s it — only 3 connections needed! The 10kΩ resistor forms the lower half of the voltage divider and pulls the analog pin low when no force is applied.
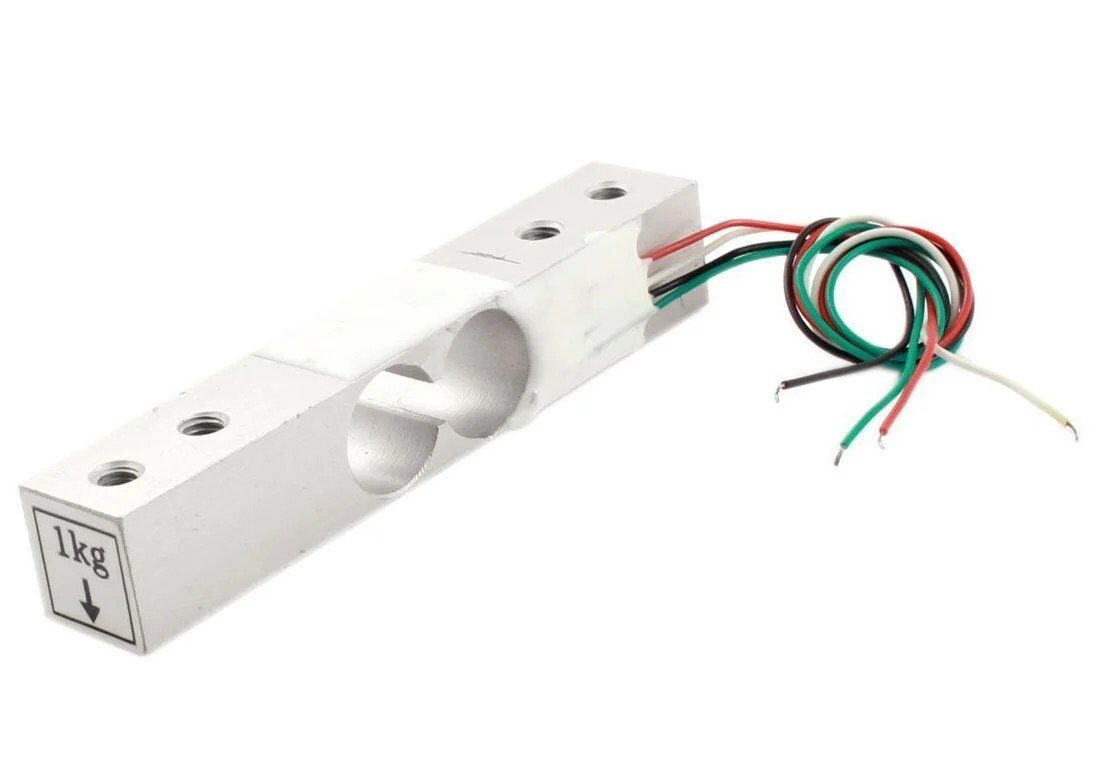
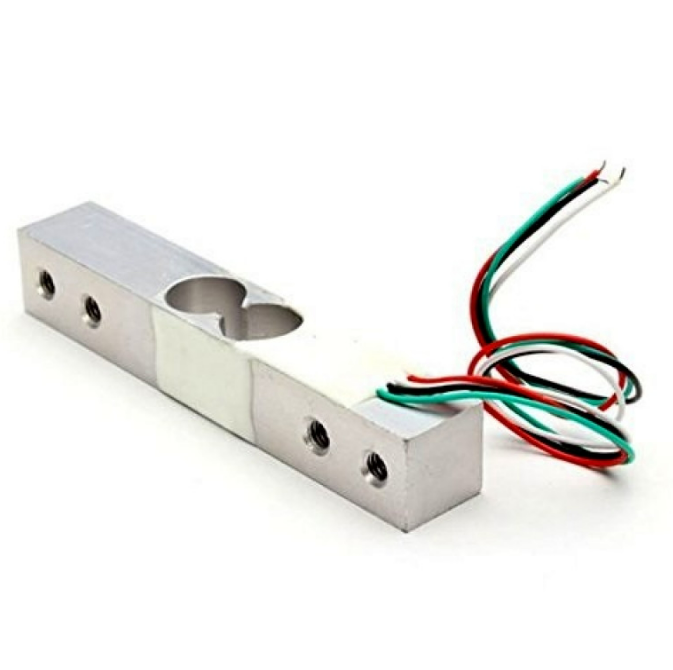
1Kg Load Cell – Electronic Weighing Scale Sensor
For precision weight measurement projects, upgrade to a load cell — more accurate than FSR for calibrated weight readings up to 1kg.
Arduino Code
Basic FSR Reading
// FSR402 Basic Reading Example
// Voltage divider: FSR + 10kΩ to GND

const int FSR_PIN = A0;
const float VCC = 5.0;       // Supply voltage
const float R_DIV = 10000.0; // 10kΩ fixed resistor

void setup() {
  Serial.begin(9600);
  Serial.println("FSR402 Pressure Sensor");
  Serial.println("ADC | Voltage | FSR Resistance");
}

void loop() {
  int adcReading = analogRead(FSR_PIN);

  if (adcReading == 0) {
    Serial.println("No pressure detected");
  } else {
    // Convert ADC to voltage
    float voltage = adcReading * VCC / 1023.0;

    // Calculate FSR resistance from voltage divider
    float fsrResistance = R_DIV * (VCC / voltage - 1.0);

    Serial.print("ADC: "); Serial.print(adcReading);
    Serial.print(" | V: "); Serial.print(voltage, 2);
    Serial.print("V | R_FSR: "); Serial.print(fsrResistance);
    Serial.println(" Ω");
  }

  delay(500);
}
Converting ADC Readings to Newtons
The FSR402’s resistance-to-force relationship is non-linear, but Interlink Electronics provides a conductance (1/R) vs force graph in the datasheet. Conductance is roughly linear with force, which makes calculations easier:
// FSR402 Force Estimation in Newtons
// Uses conductance approach from Interlink datasheet

const int FSR_PIN = A0;
const float VCC = 5.0;
const float R_DIV = 10000.0;

void setup() {
  Serial.begin(9600);
}

void loop() {
  int adcReading = analogRead(FSR_PIN);

  if (adcReading <= 5) {
    Serial.println("No force");
  } else {
    float voltage = adcReading * VCC / 1023.0;
    float fsrResistance = R_DIV * (VCC / voltage - 1.0);
    float conductance = 1.0 / fsrResistance; // in Siemens

    float forceGrams;
    // Piecewise linear approximation from datasheet
    if (conductance <= 0.00085) {
      // Low force region: 100g to ~600g
      forceGrams = conductance / 0.00000085;
    } else {
      // High force region: 600g to 10kg
      forceGrams = conductance / 0.000000085;
    }

    float forceNewtons = forceGrams * 9.81 / 1000.0;

    Serial.print("Force: ");
    Serial.print(forceGrams);
    Serial.print(" g | ");
    Serial.print(forceNewtons, 3);
    Serial.println(" N");
  }
  delay(500);
}
Note: These formulas give approximate readings. For accurate measurements, always calibrate with known weights as described in the next section.
Calibration with Known Weights
For reasonably accurate force measurements, calibrate the FSR with known weights:
- Create a flat, even mounting surface — mount the FSR on a hard flat surface. Irregular surfaces cause uneven pressure distribution and inaccurate readings.
- Zero calibration: Record the ADC value with no weight.
- Apply known weights: Use calibrated weights (coin + known weight in grams works in a pinch). Record ADC values at 50g, 100g, 200g, 500g, 1kg.
- Build a lookup table or calculate a best-fit polynomial from the data points.
- Interpolate between table entries for readings between known weights.
Important tips for accurate readings:
- Always apply force through a flat actuator (small disc or coin) — never press with a sharp point
- Creep: FSR readings drift under sustained load — not suitable for long-duration static weight measurement
- Temperature affects resistance — recalibrate if temperature changes significantly
- Hysteresis: readings may differ slightly during loading vs unloading
Project Ideas
1. Smart Doorbell (Pressure-Based)
Embed an FSR402 behind a door nameplate. When someone presses it, trigger a buzzer or IoT notification. No moving parts — completely silent and weatherproof with proper waterproofing.
2. Seat Occupancy Detector
Place FSR under a chair cushion to detect if someone is seated. Useful for automated lighting, smart desks, or elderly care monitoring. Trigger a timer if the person has been seated continuously for too long without moving (sedentary alert).
3. Grip Strength Monitor
Encapsulate the FSR in a soft rubber grip and squeeze to measure hand grip force. Log data over time to track rehabilitation progress. Pair with Bluetooth to send data to a smartphone app.
4. Smart Kitchen Scale
Use 3–4 FSR sensors in parallel under a weighing platform to create a basic kitchen scale. The parallel arrangement averages out uneven force distribution. Note: for precise measurements over 500g, load cells are more reliable.
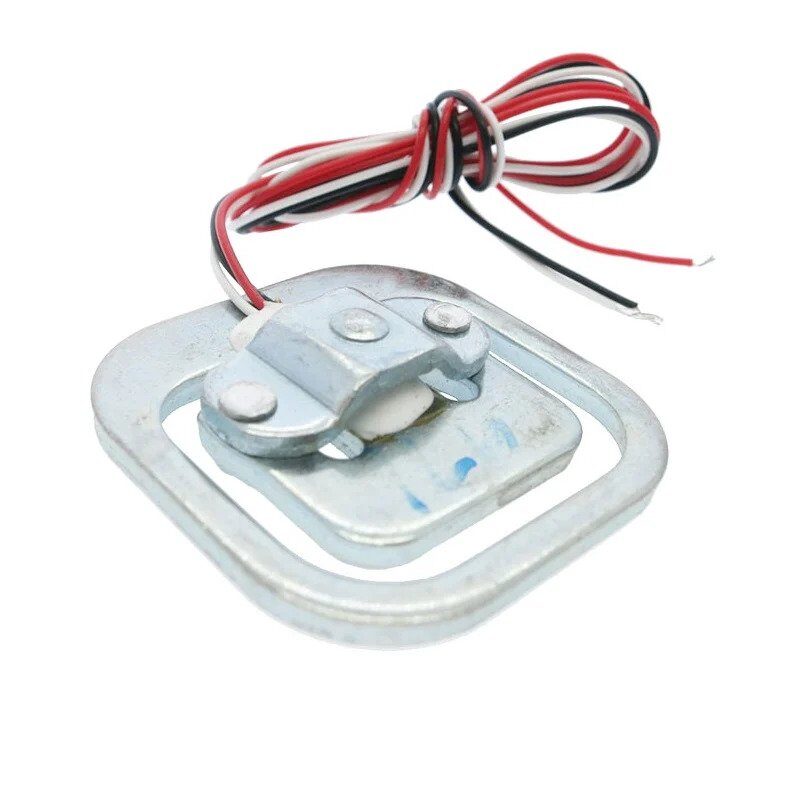
10Kg Load Cell – Electronic Weighing Scale Sensor
Need to weigh heavier items? The 10kg load cell with HX711 amplifier gives precision weight measurement far beyond what FSRs can provide.
5. Piano/Keyboard Keys
Place FSR sensors under piano keys or drum pads to create a velocity-sensitive MIDI controller. The harder you press, the higher the MIDI velocity value — creating a realistic playing feel.
FSR402 vs Load Cell: Which to Use?
| Feature | FSR402 | Load Cell (with HX711) |
|---|---|---|
| Accuracy | ±5–10% | ±0.1–0.5% |
| Cost | ~₹150–300 | ~₹200–500 + HX711 |
| Form Factor | Thin, flexible | Rigid, requires mounting |
| Wiring | 2 wires + resistor | 4 wires + HX711 module |
| Hysteresis | High | Very low |
| Best Use | Touch detection, presence sensing | Precise weight measurement |
50kg Half-bridge Body Scale Load Cell
Build a bathroom scale or heavy-duty weighing system — this 50kg load cell with HX711 is ideal for applications where the FSR402’s range isn’t enough.
Frequently Asked Questions
The FSR402 is not inherently waterproof. For outdoor use, protect it with a silicone sealant or encapsulate in a waterproof casing. Avoid extended UV exposure which can degrade the polymer film over time.
Interlink rates the FSR402 up to approximately 10kg (100N). Exceeding this force will not immediately damage the sensor but will cause the resistance to bottom out (around 200Ω) and readings will no longer increase. For heavier loads, use the FSR406 or a proper load cell.
FSRs have inherent hysteresis (up to 10%) and drift. The reading depends on how force is applied — use a flat, rigid actuator disc for consistent results. Readings also drift over the first few seconds after applying force (creep effect). For repeatable measurements, always let the reading stabilize for 1–2 seconds.
Not directly for analog readings. However, you can use it as a simple touch threshold detector with a voltage divider — set the threshold resistor so that any meaningful touch pushes the voltage above 2.5V, then use digitalRead() for a simple touch/no-touch detection. For actual force values, you must use analogRead().
All are from Interlink’s FSR series with the same sensing technology but different sensing areas: FSR400 (0.63cm round), FSR402 (1.27cm round, most popular), FSR406 (2.54cm long strip), FSR408 (4.57cm long strip). The force range and resistance-force characteristics are similar across the series — choose based on the size of area you need to sense.
Conclusion
The FSR402 force sensor is an excellent introduction to pressure and force sensing in Arduino projects. Its thin, flexible form factor, simple two-wire interface, and reasonable force range make it ideal for touch detection, occupancy sensing, interactive devices, and dozens of other applications.
Remember: the FSR402 is best suited for relative force detection and touch/press sensing. If you need precision weight measurement (better than ±5% accuracy), pair it with a proper load cell and HX711 amplifier for accurate results.
The key to getting good FSR readings: use the right divider resistor for your force range, apply force through a flat actuator, add software averaging to smooth the readings, and calibrate with known weights for your specific use case.
Find Load Cells & Force Sensors at Zbotic
Shop FSR sensors, load cells, and all electronic components for your Arduino projects — fast delivery across India.


Add comment