
An ESP32 web server lets you control and monitor your hardware from any browser — on your phone, tablet, or PC — without installing any app. The ESP32 hosts its own web page over Wi-Fi, and anyone on the same network can open it and toggle LEDs, read sensor data, or control relays. This is one of the most satisfying and practical projects a beginner can build, and in this step-by-step tutorial, we will go from a blank sketch to a fully functional GPIO control panel hosted right on your ESP32.
How the ESP32 Web Server Works
The ESP32 connects to your home Wi-Fi network (or creates its own Access Point). It then starts listening on TCP port 80, just like a regular web server. When you type its IP address into a browser, your browser sends an HTTP GET request. The ESP32 receives the request, generates an HTML response, and sends it back. Your browser renders the page.
For GPIO control, clicking a button on the web page sends a new HTTP request with a parameter (e.g., /led?state=on). The ESP32 reads that parameter and changes the GPIO state accordingly, then responds with an updated page.
There are two main approaches:
- Basic WiFiServer / WiFiClient: Built into the Arduino ESP32 core. Good for simple projects, synchronous (one request at a time).
- ESPAsyncWebServer: Third-party library. Handles multiple concurrent requests, supports WebSockets for real-time updates, much more powerful.
We will cover both, starting simple and working up to async.
Hardware Setup and Wiring
For this tutorial you will need:
- ESP32 development board (any standard 30-pin or 38-pin)
- 2 LEDs (red and green) with 220Ω resistors
- DHT11 sensor module (for the sensor dashboard section)
- Breadboard and jumper wires
- USB cable for programming
Wiring:
- LED 1 anode → 220Ω → GPIO26 (ESP32), LED cathode → GND
- LED 2 anode → 220Ω → GPIO27 (ESP32), LED cathode → GND
- DHT11 DATA → GPIO4, VCC → 3.3V, GND → GND
The ESP32’s built-in LED on GPIO2 can also be used for testing without any external components.

30Pin ESP32 Expansion Board with Type-C and Micro USB
Makes GPIO wiring much easier with clearly labelled headers — ideal for web server projects where you need to wire multiple LEDs and sensors quickly.
Building a Basic HTML Web Server
Let us start with the simplest possible web server — it serves a static HTML page with your ESP32’s IP address:
#include <WiFi.h>

const char* ssid = "YourSSID";
const char* password = "YourPassword";

WiFiServer server(80);

void setup() {
  Serial.begin(115200);
  WiFi.begin(ssid, password);
  while (WiFi.status() != WL_CONNECTED) {
    delay(500); Serial.print(".");
  }
  Serial.println("nWi-Fi connected!");
  Serial.print("ESP32 IP: ");
  Serial.println(WiFi.localIP());
  server.begin();
}

void loop() {
  WiFiClient client = server.available();
  if (!client) return;

  String request = client.readStringUntil('r');
  client.flush();

  String html = "HTTP/1.1 200 OKrnContent-Type: text/htmlrnrn";
  html += "<!DOCTYPE html><html><head><title>ESP32 Server</title></head>";
  html += "<body><h1>Hello from ESP32!</h1><p>Your web server is working.</p></body></html>";
  client.print(html);
  delay(1);
  client.stop();
}
Upload this sketch. Open Serial Monitor, note the IP address (e.g., 192.168.1.105), and type it into any browser on the same Wi-Fi network. You will see your ESP32’s web page.
GPIO ON/OFF Control from Browser
Now let us make it interactive. We will add buttons that toggle GPIO26 and GPIO27:
#include <WiFi.h>

const char* ssid = "YourSSID";
const char* password = "YourPassword";

const int LED1 = 26;
const int LED2 = 27;
bool led1State = false;
bool led2State = false;

WiFiServer server(80);

void setup() {
  Serial.begin(115200);
  pinMode(LED1, OUTPUT);
  pinMode(LED2, OUTPUT);
  WiFi.begin(ssid, password);
  while (WiFi.status() != WL_CONNECTED) delay(500);
  Serial.print("IP: "); Serial.println(WiFi.localIP());
  server.begin();
}

String buildPage() {
  String page = "<!DOCTYPE html><html><head>";
  page += "<meta name='viewport' content='width=device-width, initial-scale=1'>";
  page += "<style>body{font-family:sans-serif;max-width:400px;margin:40px auto;text-align:center}";
  page += ".btn{padding:14px 30px;font-size:18px;border:none;border-radius:8px;cursor:pointer;margin:10px}";
  page += ".on{background:#4CAF50;color:#fff}.off{background:#f44336;color:#fff}</style></head>";
  page += "<body><h2>ESP32 GPIO Control</h2>";
  page += "<p>LED 1 is " + String(led1State ? "ON" : "OFF") + "</p>";
  page += "<a href='/led1/on'><button class='btn on'>LED1 ON</button></a>";
  page += "<a href='/led1/off'><button class='btn off'>LED1 OFF</button></a><br>";
  page += "<p>LED 2 is " + String(led2State ? "ON" : "OFF") + "</p>";
  page += "<a href='/led2/on'><button class='btn on'>LED2 ON</button></a>";
  page += "<a href='/led2/off'><button class='btn off'>LED2 OFF</button></a>";
  page += "</body></html>";
  return page;
}

void loop() {
  WiFiClient client = server.available();
  if (!client) return;

  String request = client.readStringUntil('r');
  client.flush();

  if (request.indexOf("/led1/on") != -1)  { led1State = true;  digitalWrite(LED1, HIGH); }
  if (request.indexOf("/led1/off") != -1) { led1State = false; digitalWrite(LED1, LOW); }
  if (request.indexOf("/led2/on") != -1)  { led2State = true;  digitalWrite(LED2, HIGH); }
  if (request.indexOf("/led2/off") != -1) { led2State = false; digitalWrite(LED2, LOW); }

  client.println("HTTP/1.1 200 OK");
  client.println("Content-Type: text/html");
  client.println("Connection: close");
  client.println();
  client.println(buildPage());
  delay(1);
  client.stop();
}
Upload and open the IP in your phone browser. You will see two sets of ON/OFF buttons. Tap them — the LEDs respond instantly. This is the core of any browser-controlled IoT device.
Adding a Live Sensor Data Dashboard
Static button clicks are great, but what about reading sensor data? Let us add a DHT11 temperature/humidity display that auto-refreshes every 5 seconds:
Add this to the HTML string inside buildPage():
// In setup(), add:
// #include <DHT.h>
// DHT dht(4, DHT11);
// dht.begin();

// In buildPage(), add sensor card:
float temp = dht.readTemperature();
float hum = dht.readHumidity();
page += "<div style='background:#f0f0f0;padding:20px;border-radius:8px;margin-top:20px'>";
page += "<h3>Sensor Readings</h3>";
page += "<p>Temperature: <b>" + String(temp, 1) + " °C</b></p>";
page += "<p>Humidity: <b>" + String(hum, 1) + " %</b></p>";
page += "</div>";
// Add meta refresh to the <head>:
// page += "<meta http-equiv='refresh' content='5'>";
The meta refresh tag makes the browser reload the page every 5 seconds, giving you a live sensor dashboard without any JavaScript.

DHT11 Temperature and Humidity Sensor Module with LED
Display live temperature and humidity on your ESP32 web server dashboard — simple wiring, Arduino library support, and LED status indicator included.
Using ESPAsyncWebServer for Better Performance
The basic WiFiServer approach blocks while serving one request. For anything beyond a simple demo, use ESPAsyncWebServer — it handles multiple concurrent requests and supports WebSockets for real-time push updates without page refresh.
Install Libraries
From Library Manager, install:
- ESPAsyncWebServer by ESP Async Web Server (search exact name)
- AsyncTCP by ESP Async TCP
Async Server Example
#include <WiFi.h>
#include <ESPAsyncWebServer.h>

const char* ssid = "YourSSID";
const char* password = "YourPassword";

AsyncWebServer server(80);
bool ledState = false;
const int LED = 26;

const char index_html[] PROGMEM = R"rawliteral(
<!DOCTYPE html><html>
<head><meta name="viewport" content="width=device-width, initial-scale=1"></head>
<body style="font-family:sans-serif;text-align:center;padding:40px">
<h2>ESP32 Async Web Server</h2>
<p>LED State: <span id="state">%LED_STATE%</span></p>
<button onclick="fetch('/toggle').then(r=>r.text()).then(t=>{document.getElementById('state').innerText=t})" style="padding:12px 28px;font-size:16px;border-radius:8px;border:none;background:#ff6b00;color:#fff;cursor:pointer">Toggle LED</button>
</body></html>
)rawliteral";

String processor(const String& var) {
  if (var == "LED_STATE") return ledState ? "ON" : "OFF";
  return String();
}

void setup() {
  Serial.begin(115200);
  pinMode(LED, OUTPUT);
  WiFi.begin(ssid, password);
  while (WiFi.status() != WL_CONNECTED) delay(500);
  Serial.println(WiFi.localIP());

  server.on("/", HTTP_GET, [](AsyncWebServerRequest *req) {
    req->send_P(200, "text/html", index_html, processor);
  });

  server.on("/toggle", HTTP_GET, [](AsyncWebServerRequest *req) {
    ledState = !ledState;
    digitalWrite(LED, ledState ? HIGH : LOW);
    req->send(200, "text/plain", ledState ? "ON" : "OFF");
  });

  server.begin();
}

void loop() {}
Notice the loop() is completely empty — the async server handles everything in the background. The toggle button uses JavaScript fetch() to call /toggle without reloading the page, and the state updates instantly. This is a much more professional user experience.
Recommended Hardware from Zbotic
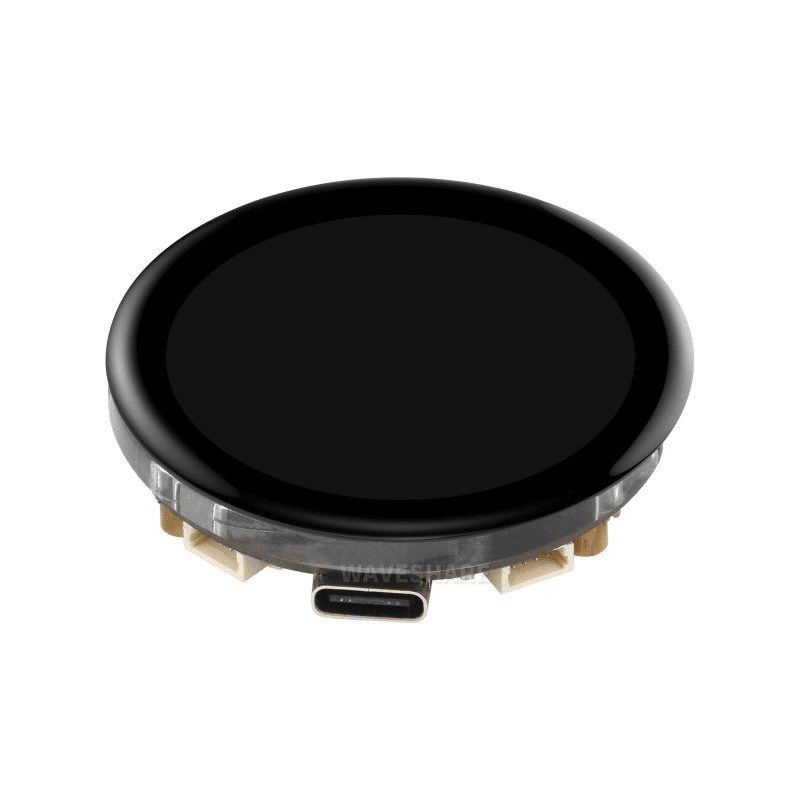
Waveshare ESP32-S3 1.43″ AMOLED Display Development Board
Run a web server on the S3 while showing GPIO status on the stunning built-in AMOLED display — the ultimate ESP32 web server with local display.
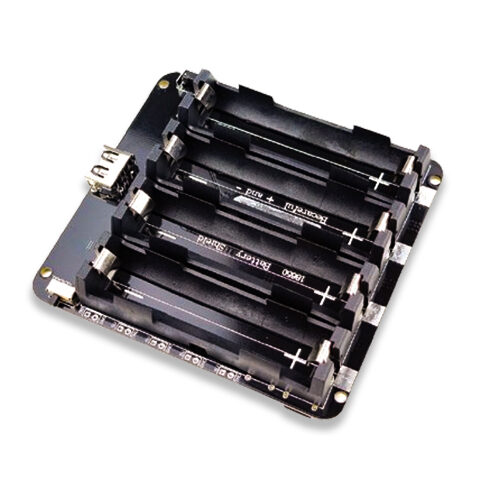
4×18650 Lithium Battery Shield for Arduino/ESP32/ESP8266
Four-cell battery shield to power your ESP32 web server project for extended periods — on/off switch and dual USB output for peripherals.
Frequently Asked Questions
Can I access the ESP32 web server from outside my home network?
Not directly — the ESP32 is on your local network with a private IP. To access it remotely, you have options: (1) use a service like ngrok to create a public tunnel, (2) set up port forwarding on your router (not recommended for security reasons without authentication), or (3) use MQTT with a cloud broker so the ESP32 pushes data to a server you can access from anywhere.
What is the maximum number of simultaneous connections ESP32 web server can handle?
The basic WiFiServer handles one connection at a time. ESPAsyncWebServer can handle 5–7 simultaneous connections reliably, which is sufficient for most home projects. For higher traffic, you would need a dedicated microcontroller or move to a Raspberry Pi.
How do I assign a static IP to my ESP32 so the address never changes?
Add this before WiFi.begin(): WiFi.config(IPAddress(192,168,1,200), IPAddress(192,168,1,1), IPAddress(255,255,255,0)); — choose an IP outside your router’s DHCP range. Alternatively, assign a static IP via your router’s DHCP reservation (bind the ESP32’s MAC address to a fixed IP — this is the cleaner approach).
Can I password-protect the ESP32 web server?
Yes. ESPAsyncWebServer supports HTTP Basic Auth: call req->requestAuthentication() if !req->authenticate("admin", "password") returns false. For more security, use HTTPS with ESPAsyncWebServer + SSL, though this requires significant RAM and is challenging on the ESP32.
My ESP32 disconnects from Wi-Fi occasionally. How do I handle reconnection?
Add a reconnect check in loop(): if (WiFi.status() != WL_CONNECTED) { WiFi.reconnect(); }. Or register a Wi-Fi event callback with WiFi.onEvent() to handle SYSTEM_EVENT_STA_DISCONNECTED and trigger reconnection automatically.
Build Your ESP32 Web Server Project with Parts from Zbotic
From ESP32 dev boards to sensors, relays, and battery shields — Zbotic has everything you need to build browser-controlled IoT projects, with fast delivery across India.


Add comment