
One of the most exciting capabilities of the ESP32 is its ability to act as a full ESP32 HTTP web server dashboard — hosting a live, interactive control panel that any device on your local network can access through a browser. No cloud, no app, no subscription. This tutorial walks you through building a production-quality web dashboard on your ESP32 using ESPAsyncWebServer, covering everything from basic GET/POST handling to real-time WebSocket data streaming.
Why Use ESPAsyncWebServer?
The ESP32’s built-in WebServer library (from the Arduino framework) is synchronous — it blocks the main loop while handling requests. For a simple demo, this works. For any real project, it creates problems: your sensor readings freeze while serving a web page, and concurrent requests cause timeouts.
ESPAsyncWebServer solves this by running the web server in a separate FreeRTOS task, using asynchronous I/O. Your loop() continues running normally. The library also supports WebSockets, Server-Sent Events (SSE), multipart file uploads, and automatic GZIP handling — features that would require significant custom code otherwise.
Installing Required Libraries
In Arduino IDE, install these libraries via the Library Manager:
- ESPAsyncWebServer by lacamera or me-no-dev
- AsyncTCP (for ESP32)
- ArduinoJson by Benoit Blanchon (for JSON responses)

Ai Thinker NodeMCU-32S-ESP32 Development Board – IPEX Version
The dual-core ESP32 with WiFi is perfect for running an async web server and reading sensors simultaneously without lag or blocking.
Setting Up Your First HTTP Server
Let’s start with a minimal but functional server that demonstrates the core patterns you’ll use throughout this tutorial:
#include <WiFi.h>
#include <ESPAsyncWebServer.h>

const char* SSID = "Your_WiFi";
const char* PASS = "Your_Password";

AsyncWebServer server(80);

void setup() {
  Serial.begin(115200);

  WiFi.begin(SSID, PASS);
  while (WiFi.status() != WL_CONNECTED) {
    delay(500);
    Serial.print(".");
  }
  Serial.println("nIP: " + WiFi.localIP().toString());

  // Route: GET /
  server.on("/", HTTP_GET, [](AsyncWebServerRequest* req) {
    req->send(200, "text/html",
      "<h1>ESP32 Dashboard</h1>"
      "<p>Server is running!</p>");
  });

  // Route: GET /status (returns JSON)
  server.on("/status", HTTP_GET, [](AsyncWebServerRequest* req) {
    String json = "{"uptime":" + String(millis()/1000) +
                  ","heap":" + String(ESP.getFreeHeap()) + "}";
    req->send(200, "application/json", json);
  });

  // Route: POST /control
  server.on("/control", HTTP_POST, [](AsyncWebServerRequest* req) {
    if (req->hasParam("pin", true) && req->hasParam("state", true)) {
      int pin = req->getParam("pin", true)->value().toInt();
      int state = req->getParam("state", true)->value().toInt();
      digitalWrite(pin, state);
      req->send(200, "application/json", "{"ok":true}");
    } else {
      req->send(400, "application/json", "{"error":"Missing params"}");
    }
  });

  // 404 handler
  server.onNotFound([](AsyncWebServerRequest* req) {
    req->send(404, "text/plain", "Not found");
  });

  server.begin();
}

void loop() {
  // Sensor reading, business logic, etc.
  delay(10);
}
Serving HTML/CSS/JS from LittleFS
Instead of embedding HTML as strings in your sketch, store proper files in LittleFS. This makes your dashboard much easier to develop and update:
#include "LittleFS.h"

// In setup():
if (!LittleFS.begin(true)) {
  Serial.println("LittleFS failed!");
  return;
}

// Serve entire /data directory as web root
// Files: data/index.html, data/style.css, data/app.js
server.serveStatic("/", LittleFS, "/")
      .setDefaultFile("index.html")
      .setCacheControl("max-age=600");  // Cache 10 minutes

// Dynamic endpoints still work alongside static files
server.on("/api/sensors", HTTP_GET, handleSensors);
With GZIP compression, you can pre-compress your HTML, CSS, and JS files offline and upload the .gz versions. ESPAsyncWebServer automatically serves gzipped files with the correct Content-Encoding: gzip header, reducing transfer sizes by 60-80% and making the dashboard load faster.
// Serve pre-compressed files
server.on("/app.js", HTTP_GET, [](AsyncWebServerRequest* req) {
  AsyncWebServerResponse* resp =
    req->beginResponse(LittleFS, "/app.js.gz", "text/javascript");
  resp->addHeader("Content-Encoding", "gzip");
  req->send(resp);
});
Building a REST API for Sensor Data
A well-structured REST API separates your dashboard’s data from its presentation. Here’s a complete sensor API handler using ArduinoJson:
#include <ArduinoJson.h>
#include "DHT.h"

DHT dht(4, DHT11);  // Data pin 4

void handleSensors(AsyncWebServerRequest* req) {
  JsonDocument doc;

  doc["temperature"] = dht.readTemperature();
  doc["humidity"] = dht.readHumidity();
  doc["uptime_s"] = millis() / 1000;
  doc["free_heap"] = ESP.getFreeHeap();
  doc["wifi_rssi"] = WiFi.RSSI();

  // Add timestamp
  doc["timestamp"] = millis();

  String output;
  serializeJson(doc, output);

  // Add CORS headers for browser access
  AsyncWebServerResponse* resp =
    req->beginResponse(200, "application/json", output);
  resp->addHeader("Access-Control-Allow-Origin", "*");
  req->send(resp);
}

// Register in setup():
// server.on("/api/sensors", HTTP_GET, handleSensors);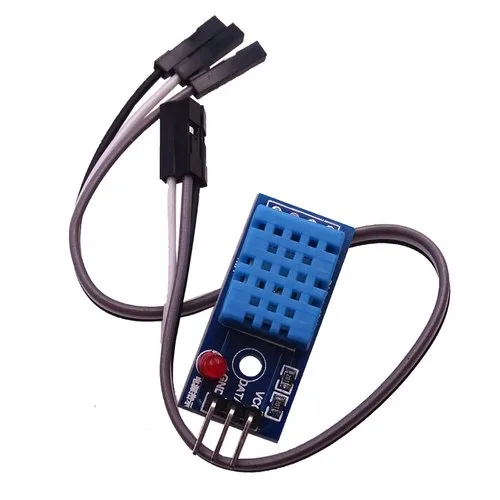
DHT11 Temperature And Humidity Sensor Module with LED
The classic sensor for ESP32 web dashboards — pair it with your web server to display live temperature and humidity on any browser.
Real-Time Updates with WebSockets
Polling the API every second works but wastes bandwidth and adds latency. WebSockets provide a persistent bidirectional connection — the ESP32 pushes data to all connected browsers the moment it changes.
#include <ESPAsyncWebServer.h>

AsyncWebServer server(80);
AsyncWebSocket ws("/ws");  // WebSocket endpoint

void onWsEvent(AsyncWebSocket* server, AsyncWebSocketClient* client,
               AwsEventType type, void* arg, uint8_t* data, size_t len) {
  if (type == WS_EVT_CONNECT) {
    Serial.printf("Client #%u connectedn", client->id());
    // Send welcome message
    client->text("{"type":"connected"}");
  } else if (type == WS_EVT_DISCONNECT) {
    Serial.printf("Client #%u disconnectedn", client->id());
  } else if (type == WS_EVT_DATA) {
    // Handle incoming commands from browser
    AwsFrameInfo* info = (AwsFrameInfo*)arg;
    if (info->final && info->index == 0 &&
        info->len == len && info->opcode == WS_TEXT) {
      String msg = String((char*)data).substring(0, len);
      Serial.println("WS received: " + msg);
      // Parse command and control GPIO, etc.
    }
  }
}

void setup() {
  ws.onEvent(onWsEvent);
  server.addHandler(&ws);
  server.begin();
}

void loop() {
  // Clean up disconnected clients
  ws.cleanupClients();

  // Broadcast sensor data every 2 seconds
  static unsigned long lastBroadcast = 0;
  if (millis() - lastBroadcast > 2000) {
    lastBroadcast = millis();
    float temp = dht.readTemperature();
    String json = "{"type":"sensor","temp":" +
                   String(temp, 1) + "}";
    ws.textAll(json);  // Send to all connected clients
  }
}
Complete Dashboard HTML Example
Here’s a complete single-file dashboard that connects to the WebSocket, displays live sensor data, and allows GPIO control. Save this as data/index.html in your sketch:
<!DOCTYPE html>
<html><head>
<meta charset="UTF-8">
<meta name="viewport" content="width=device-width, initial-scale=1">
<title>ESP32 Dashboard</title>
<style>
  * { box-sizing: border-box; }
  body { font-family: 'Segoe UI', sans-serif; margin: 0;
         background: #1a1a2e; color: #eee; }
  .header { background: #16213e; padding: 20px; text-align: center;
             border-bottom: 2px solid #ff6b00; }
  .header h1 { margin: 0; color: #ff6b00; }
  .grid { display: grid; grid-template-columns: repeat(auto-fit, minmax(200px, 1fr));
           gap: 20px; padding: 20px; }
  .card { background: #16213e; border-radius: 12px; padding: 20px;
           text-align: center; border: 1px solid #0f3460; }
  .card .value { font-size: 48px; font-weight: bold; color: #ff6b00; }
  .card .label { font-size: 14px; color: #aaa; margin-top: 5px; }
  .status { display: inline-block; width: 12px; height: 12px;
             border-radius: 50%; background: #4caf50; margin-right: 8px; }
  .btn { padding: 10px 20px; border: none; border-radius: 6px;
          cursor: pointer; font-size: 14px; margin: 5px; }
  .btn-on { background: #4caf50; color: white; }
  .btn-off { background: #f44336; color: white; }
</style>
</head><body>
<div class="header">
  <h1>ESP32 Dashboard</h1>
  <p><span class="status" id="dot"></span><span id="status">Connecting...</span></p>
</div>
<div class="grid">
  <div class="card">
    <div class="value" id="temp">--</div>
    <div class="label">Temperature (degC)</div>
  </div>
  <div class="card">
    <div class="value" id="hum">--</div>
    <div class="label">Humidity (%)</div>
  </div>
  <div class="card">
    <div class="value" id="uptime">--</div>
    <div class="label">Uptime (s)</div>
  </div>
</div>
<div style="padding: 20px">
  <h3>GPIO Control</h3>
  <button class="btn btn-on" onclick="sendCmd('gpio',2,1)">LED ON</button>
  <button class="btn btn-off" onclick="sendCmd('gpio',2,0)">LED OFF</button>
</div>
<script>
  const ws = new WebSocket(`ws://${location.host}/ws`);
  ws.onopen = () => {
    document.getElementById('status').textContent = 'Connected';
    document.getElementById('dot').style.background = '#4caf50';
  };
  ws.onclose = () => {
    document.getElementById('status').textContent = 'Disconnected';
    document.getElementById('dot').style.background = '#f44336';
  };
  ws.onmessage = (e) => {
    const d = JSON.parse(e.data);
    if (d.type === 'sensor') {
      document.getElementById('temp').textContent = d.temp?.toFixed(1) ?? '--';
      document.getElementById('hum').textContent = d.hum?.toFixed(0) ?? '--';
      document.getElementById('uptime').textContent = d.uptime ?? '--';
    }
  };
  function sendCmd(type, pin, state) {
    ws.send(JSON.stringify({type, pin, state}));
  }
</script>
</body></html>
DHT20 SIP Packaged Temperature and Humidity Sensor
The upgraded DHT20 with I2C interface and better accuracy — perfect for your ESP32 web dashboard project for precision environmental monitoring.

4 x 18650 Lithium Battery Shield for ESP32/ESP8266
Power your ESP32 web dashboard server portably — this 4-cell 18650 shield with 5V USB output keeps your dashboard running for hours without mains power.
Frequently Asked Questions
How many simultaneous connections can the ESP32 web server handle?
The ESP32 can handle approximately 4-8 simultaneous TCP connections for web serving. ESPAsyncWebServer is more efficient than blocking servers and can handle bursts of requests well. For WebSocket connections, memory is the limiting factor — each client uses ~1-2 KB RAM, so with 320 KB RAM available (after WiFi stack), you can support 10-20 concurrent WebSocket clients comfortably.
Can I use HTTPS on the ESP32 web server?
Yes, but it requires significant resources. Use the AsyncWebServer with a TLS context using Espressif’s esp_tls component. Self-signed certificates work for local use but browsers will show a security warning. Alternatively, use HTTP locally (on a trusted LAN) and set up an HTTPS reverse proxy with Nginx on a Raspberry Pi or router for external access.
How do I make the dashboard accessible from outside my home network?
Several approaches work: (1) Port forward port 80 or 8080 on your router to the ESP32’s local IP — not recommended for security. (2) Use ngrok or Cloudflare Tunnel to create a secure HTTPS URL — free tier available. (3) Use MQTT to publish sensor data to a cloud broker and build the dashboard in a cloud app. Option 3 is the most scalable and secure for production use.
Why does the ESP32 web server crash after a few hours?
Common causes: (1) WebSocket clients not being cleaned up — call ws.cleanupClients() in your loop. (2) Memory leaks from creating String objects in request handlers — use const char* literals where possible. (3) Watchdog timer expiring if your loop takes too long — add vTaskDelay(1) to yield to the RTOS. Check free heap with ESP.getFreeHeap() to identify memory leaks.
Can the ESP32 web server handle file uploads?
Yes. ESPAsyncWebServer supports multipart form uploads via the onFileUpload callback. Uploaded files can be saved directly to LittleFS. This is useful for OTA firmware updates, certificate uploads, or configuration file updates through the browser interface.
Get Your ESP32 Development Boards from Zbotic
Build your ESP32 web dashboard with boards and sensors sourced from Zbotic — India’s trusted electronics component store with fast delivery and genuine components.


Add comment