
An ESP32-CAM robot that streams video and is controlled via a mobile browser is one of the most satisfying beginner-to-intermediate robotics projects you can build. The ESP32-CAM module — a ₹400–₹600 board with a built-in camera, Wi-Fi, and enough processing power to run a web server — makes this achievable without any dedicated streaming hardware. In this guide, you’ll learn how to wire the chassis, write the firmware, and access your robot’s live feed and controls from any smartphone on the same Wi-Fi network.
What You Need: Components List
Here’s everything required for the complete ESP32-CAM robot project:
- ESP32-CAM module (AI-Thinker variant recommended) — includes OV2640 camera
- FTDI FT232RL USB-to-Serial adapter or a USB-C ESP32-CAM board variant (for flashing firmware)
- L298N or L9110S motor driver module — L9110S is better for this project (3.3V compatible, less current draw)
- 2WD robot chassis with two DC gear motors
- 18650 Li-ion battery x2 in series (7.4V) or a 5V power bank (for ESP32-CAM, motors need separate supply)
- Buck converter module (MT3608 or LM2596) — to power ESP32-CAM at 5V from 7.4V battery
- Jumper wires, breadboard or PCB
- Optional: Ultrasonic sensor (HC-SR04) for obstacle detection, LED for illumination
Power architecture note: The ESP32-CAM is power-hungry when streaming (~200–300mA peak). Run it from a dedicated 5V rail (step-down from LiPo) and the motors from the LiPo directly (7.4V through L298N).

2WD Mini Round Double-Deck Smart Robot Car Chassis DIY Kit
Compact 2-wheel-drive chassis with motors and wheels included. The ideal base for your ESP32-CAM FPV robot — plenty of room on the upper deck for the camera module and driver board.
ESP32-CAM Module Overview
The ESP32-CAM is built around the ESP32-S chip with these relevant specs for this project:
- CPU: Dual-core Xtensa LX6 at 240MHz
- RAM: 520KB SRAM + 4MB PSRAM (crucial for frame buffer storage)
- Flash: 4MB
- Wi-Fi: 802.11 b/g/n (2.4GHz only)
- Camera interface: Built-in 24-pin MIPI CSI connector for OV2640
- GPIO: 9 usable GPIO pins (some shared with flash LED and SD card)
- GPIO0: Must be pulled LOW during flashing, then HIGH (or floating) for normal operation
Critical GPIO limitation: Pins GPIO6–GPIO11 are connected to internal flash — DO NOT use them. GPIO16 drives the onboard flash LED. For motor control, use GPIO12, GPIO13, GPIO14, GPIO15 (safe for PWM output).
Wiring: ESP32-CAM to Motor Driver and Chassis
Connect the ESP32-CAM to an L9110S dual motor driver as follows:
ESP32-CAM    →    L9110S Motor Driver
-----------       -------------------
GPIO12       →    A-IA (Left motor direction A)
GPIO13       →    A-IB (Left motor direction B)
GPIO14       →    B-IA (Right motor direction A)
GPIO15       →    B-IB (Right motor direction B)
GND          →    GND

Battery (7.4V)  →  VCC on L9110S (motor power)
Buck converter (5V out) → 5V/GND on ESP32-CAM

Note: L9110S control pins are 3.3V compatible — safe for ESP32.
Camera position: Mount the ESP32-CAM at the front of the upper chassis deck, angled slightly downward (5–10°) so the view includes ground ahead of the robot at close distances. Use a 3D-printed or acrylic servo bracket as a camera tilt mount for adjustable viewing angle.

ACEBOTT ESP32 Tank Robot Car Expansion Pack for QD001–QD004
ESP32-based tank robot with robust track-style locomotion — perfect for adding an ESP32-CAM for FPV exploration over rough indoor terrain.
Firmware: Web Server + Video Stream + Motor Control
The firmware runs a web server that serves the control page, handles motor commands via HTTP GET requests, and streams MJPEG video. Install Arduino IDE 2.x with the ESP32 board package by Espressif (version 2.x or 3.x).
Step 1: Camera initialization
#include "esp_camera.h"
#include <WiFi.h>
#include "esp_http_server.h"

// AI-Thinker ESP32-CAM pin definitions
#define PWDN_GPIO_NUM  32
#define RESET_GPIO_NUM -1
#define XCLK_GPIO_NUM  0
#define SIOD_GPIO_NUM  26
#define SIOC_GPIO_NUM  27
#define Y9_GPIO_NUM    35
#define Y8_GPIO_NUM    34
#define Y7_GPIO_NUM    39
#define Y6_GPIO_NUM    36
#define Y5_GPIO_NUM    21
#define Y4_GPIO_NUM    19
#define Y3_GPIO_NUM    18
#define Y2_GPIO_NUM    5
#define VSYNC_GPIO_NUM 25
#define HREF_GPIO_NUM  23
#define PCLK_GPIO_NUM  22

void initCamera() {
  camera_config_t config;
  config.ledc_channel = LEDC_CHANNEL_0;
  config.ledc_timer   = LEDC_TIMER_0;
  config.pin_d0 = Y2_GPIO_NUM;
  // ... (assign all pins as above)
  config.xclk_freq_hz = 20000000;
  config.pixel_format = PIXFORMAT_JPEG;
  config.frame_size   = FRAMESIZE_VGA;  // 640x480
  config.jpeg_quality = 12;             // 0-63, lower = better quality
  config.fb_count     = 1;
  esp_camera_init(&config);
}
Step 2: Motor control functions
#define LEFT_A  12
#define LEFT_B  13
#define RIGHT_A 14
#define RIGHT_B 15

void initMotors() {
  pinMode(LEFT_A,OUTPUT); pinMode(LEFT_B,OUTPUT);
  pinMode(RIGHT_A,OUTPUT); pinMode(RIGHT_B,OUTPUT);
}

void motorStop()     { digitalWrite(LEFT_A,0); digitalWrite(LEFT_B,0); digitalWrite(RIGHT_A,0); digitalWrite(RIGHT_B,0); }
void motorForward()  { digitalWrite(LEFT_A,1); digitalWrite(LEFT_B,0); digitalWrite(RIGHT_A,1); digitalWrite(RIGHT_B,0); }
void motorBackward() { digitalWrite(LEFT_A,0); digitalWrite(LEFT_B,1); digitalWrite(RIGHT_A,0); digitalWrite(RIGHT_B,1); }
void motorLeft()     { digitalWrite(LEFT_A,0); digitalWrite(LEFT_B,1); digitalWrite(RIGHT_A,1); digitalWrite(RIGHT_B,0); }
void motorRight()    { digitalWrite(LEFT_A,1); digitalWrite(LEFT_B,0); digitalWrite(RIGHT_A,0); digitalWrite(RIGHT_B,1); }
Step 3: HTTP handlers for commands and video stream
// Command handler: GET /action?go=forward
esp_err_t cmd_handler(httpd_req_t *req) {
  char query[64];
  httpd_req_get_url_query_str(req, query, sizeof(query));
  char action[16];
  httpd_query_key_value(query, "go", action, sizeof(action));

  if      (!strcmp(action, "forward"))  motorForward();
  else if (!strcmp(action, "backward")) motorBackward();
  else if (!strcmp(action, "left"))     motorLeft();
  else if (!strcmp(action, "right"))    motorRight();
  else                                  motorStop();

  httpd_resp_send(req, "OK", 2);
  return ESP_OK;
}

// MJPEG stream handler: GET /stream
esp_err_t stream_handler(httpd_req_t *req) {
  httpd_resp_set_type(req, "multipart/x-mixed-replace; boundary=frame");
  while (true) {
    camera_fb_t *fb = esp_camera_fb_get();
    if (!fb) break;
    httpd_resp_send_chunk(req, "--framernContent-Type: image/jpegrnrn", 38);
    httpd_resp_send_chunk(req, (const char*)fb->buf, fb->len);
    httpd_resp_send_chunk(req, "rn", 2);
    esp_camera_fb_return(fb);
  }
  return ESP_OK;
}
Mobile Web Interface Design
The web interface is served by the ESP32-CAM itself as a single HTML page. It shows the live video stream and touch-friendly control buttons. Store the HTML as a string in PROGMEM (program memory) to avoid consuming RAM.
const char INDEX_HTML[] PROGMEM = R"(
<!DOCTYPE html>
<html>
<head>
  <meta name="viewport" content="width=device-width, initial-scale=1">
  <style>
    body { margin:0; background:#111; display:flex; flex-direction:column; align-items:center; }
    img  { width:100%; max-width:640px; border:2px solid #ff6b00; }
    .controls { display:grid; grid-template-columns:repeat(3,80px); gap:10px; margin:20px; }
    button { height:70px; font-size:24px; background:#ff6b00; color:#fff;
             border:none; border-radius:8px; touch-action:none; }
  </style>
</head>
<body>
  <img src="/stream">
  <div class="controls">
    <div></div>
    <button ontouchstart="cmd('forward')" ontouchend="cmd('stop')">▲</button>
    <div></div>
    <button ontouchstart="cmd('left')"    ontouchend="cmd('stop')">◄</button>
    <button ontouchstart="cmd('stop')"   ontouchend="cmd('stop')">■</button>
    <button ontouchstart="cmd('right')"  ontouchend="cmd('stop')">►</button>
    <div></div>
    <button ontouchstart="cmd('backward')" ontouchend="cmd('stop')">▼</button>
    <div></div>
  </div>
  <script>
    function cmd(action) {
      fetch('/action?go=' + action).catch(e => console.log(e));
    }
  </script>
</body>
</html>
)";
Access the robot at http://<ESP32_IP>/ from any browser on the same Wi-Fi network. The IP is printed to Serial on boot.
ACEBOTT ESP32 Basic Starter Kit (Project Expansion Pack) – QE201
Comprehensive ESP32 starter kit with peripherals, ideal for learning web server and Wi-Fi streaming before integrating the ESP32-CAM module.
Camera Settings for Smooth Streaming
The OV2640 camera in the ESP32-CAM is configurable via the sensor_t struct after initialization. Tune these for best FPV experience:
- Frame size: Start with
FRAMESIZE_QVGA(320×240) for smooth streaming on congested Wi-Fi, upgrade toFRAMESIZE_VGA(640×480) on a clear channel. - JPEG quality: Values 10–15 are a good balance of image quality and bandwidth. Lower number = better quality = larger file = lower FPS.
- FPS: Expected 10–25 FPS on QVGA, 5–12 FPS on VGA over Wi-Fi (single HTTP stream).
- Brightness/contrast: Adjust
s->set_brightness(s, 1)ands->set_contrast(s, 1)for indoor vs outdoor lighting. - Flip image: If camera is mounted upside-down, use
s->set_vflip(s, 1)ands->set_hmirror(s, 1). - Wi-Fi transmit power: Set max TX power with
esp_wifi_set_max_tx_power(78)for best range (78 = 19.5 dBm).
Extending Range and Avoiding Obstacles
Extending Wi-Fi Range
The ESP32-CAM’s onboard PCB antenna limits range to ~20–30m indoors. For longer range:
- Use an ESP32-CAM variant with an external antenna connector (IPEX/U.FL socket) and attach a 2.4GHz whip antenna
- Place your Wi-Fi router or a Wi-Fi extender closer to the robot’s operating area
- For outdoor/long-range use, consider a dedicated 2.4GHz directional antenna on the access point
Adding Obstacle Detection
Pair an HC-SR04 ultrasonic sensor using GPIO2 (trigger) and GPIO4 (echo — but GPIO4 drives the flash LED, use a level shifter or resistor). When distance < threshold, publish a warning on the web page and optionally auto-stop:
// Add to loop or a FreeRTOS task
long duration = pulseIn(echoPin, HIGH, 10000);
float distance_cm = duration * 0.034 / 2;
if (distance_cm < 20.0 && distance_cm > 0) {
  motorStop(); // Auto-stop on obstacle
}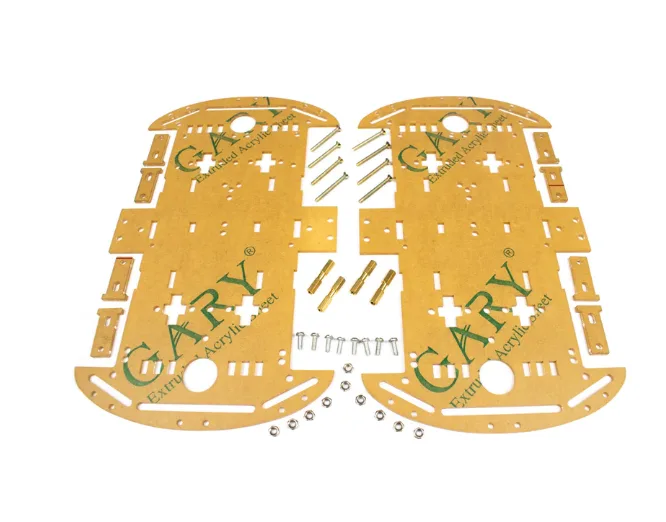
4 Wheels Car Chassis Acrylic Frame
Spacious 4-wheel acrylic robot chassis with ample mounting space. Ideal for ESP32-CAM robot builds with extra room for ultrasonic sensor, battery, and electronics.

100pcs 5mm Light Assorted Kit DIY LEDs Set
Add white LEDs to your ESP32-CAM robot for illumination in dark environments. Improves camera image quality significantly in low-light indoor settings.
Frequently Asked Questions
Q: Can I access the ESP32-CAM robot over the internet (not just LAN)?
Yes, but it requires port forwarding on your router (not recommended for security reasons) or a tunneling service like ngrok or Cloudflare Tunnel. For a more secure approach, use MQTT over a cloud broker and stream video via WebRTC or a separate RTSP server.
Q: The video stream is choppy/laggy. How do I fix it?
Reduce frame size to QVGA, increase JPEG quality value (e.g. 20), ensure only one browser tab is connected to the stream, and check Wi-Fi signal strength (should be above -70 dBm). Also ensure the ESP32-CAM power supply is stable — brownouts cause resets.
Q: The ESP32-CAM gets very hot. Is that normal?
Mild warmth is normal during video streaming (ESP32-S chip runs at 240MHz with Wi-Fi active). Excessive heat (too hot to touch after 5 min) usually indicates a power supply issue or insufficient voltage regulation. Ensure you’re supplying clean 5V, not 3.3V.
Q: Can I record video from the ESP32-CAM to an SD card while streaming?
Yes. The ESP32-CAM has an SD card slot (shares pins with GPIO2, GPIO4, GPIO12, GPIO13). You can write MJPEG frames to the SD card while streaming, but this significantly reduces FPS due to SD write latency. Use a Class 10 U1 or faster SD card.
Q: Can two phones control the robot simultaneously?
Multiple clients can view the stream (each gets its own connection), but command conflicts will arise if two users send different directions. Implement a simple session token to allow only one active controller at a time.
Zbotic stocks robot chassis kits, motor drivers, LEDs, and all the electronics you need to build a live-streaming mobile-controlled robot. Shop the Robotics & Automation collection — fast delivery across India.


Add comment