
Drone Thermal Camera: FLIR Lepton Integration Guide for DIY Builders
Thermal imaging from drones is transforming industries across India — from detecting irrigation failures in Punjabi wheat fields, locating fire hotspots in Uttarakhand forests, to solar panel fault detection in Rajasthan’s massive solar parks. The FLIR Lepton is the go-to thermal module for DIY drone builders: a compact, low-power, 160×120 or 160×120–based thermal sensor that can be integrated into custom payloads without the ₹5–15 lakh cost of commercial thermal cameras.
This guide walks you through the complete FLIR Lepton integration — from hardware selection to SPI wiring, Raspberry Pi or Jetson Nano setup, data streaming, and mounting on your drone platform.
1. FLIR Lepton Overview and Variants
The FLIR Lepton is a microbolometer-based uncooled thermal sensor module made by FLIR Systems (now Teledyne FLIR). It detects infrared radiation in the 8–14 µm band (long-wave IR) — the range corresponding to heat emitted by objects at ambient temperatures. Unlike visible-light cameras, it does not need lighting and sees through smoke, haze, and dust.
Lepton Variants
| Model | Resolution | HFOV | Radiometry | Frame Rate |
|---|---|---|---|---|
| Lepton 2.5 | 80×60 | 50° | Optional (2.5R) | 8.7 Hz |
| Lepton 3.0 | 160×120 | 57° | No | 8.7 Hz |
| Lepton 3.5 | 160×120 | 57° | Yes (±5°C) | 8.7 Hz |
For drone applications in India, the Lepton 3.5 is recommended — the 160×120 resolution with radiometric temperature measurement gives you actual temperature values per pixel, enabling automated fault detection algorithms rather than just a visual heat map.
Key Specifications (Lepton 3.5)
- Resolution: 160×120 (19,200 pixels)
- Pixel pitch: 12µm
- Temperature range: -10°C to 140°C (extended range with shutter calibration)
- NETD (Noise Equivalent Temperature Difference): <50 mK — detects 0.05°C differences
- Power: <150 mW operating
- Interface: SPI (VSYNC + CS + MISO + SCK) + I2C (for configuration/CCI)
- Size: 11.8 × 12.7 × 7.2mm (module only)
- Weight: ~1g (module) + breakout board
2. Hardware You Need
Here is the complete bill of materials for a Lepton 3.5 drone integration:
| Component | Specification |
|---|---|
| Thermal module | FLIR Lepton 3.5 (with radiometry) |
| Breakout board | PureThermal 2 (GroupGets) or Lepton breakout v1.4 |
| Companion computer | Raspberry Pi Zero 2W, RPi 4, or Jetson Nano |
| Drone frame | 6″ or larger quad / industrial frame with payload bay |
| Flight controller | Pixhawk 4 / Cube Orange (ArduCopter) |
| Telemetry | 915MHz or 433MHz radio (for MAVLink data) |
| Video transmitter | 5.8GHz VTx or WiFi (for thermal stream) |
| GPS | u-blox M8N with compass |
| Micro SD | 32GB+ Class 10 for thermal video recording |
| BEC | 5V 3A regulated for RPi and Lepton |
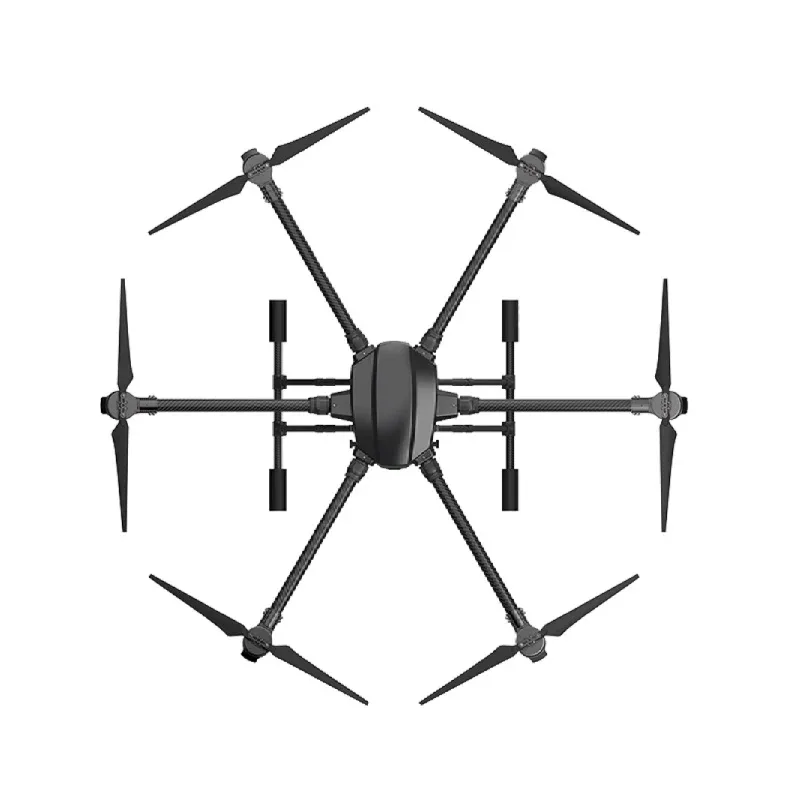
3. Choosing the Drone Platform
Your drone must be capable of carrying the thermal payload with adequate flight time. A Lepton 3.5 + RPi Zero 2W + breakout board assembly weighs approximately 60–80g. A full payload bay with gimbal mount can reach 150–250g.
For agricultural and surveying thermal missions, a large industrial agricultural frame provides the payload capacity, stability, and flight time required. The EFT E416P frame is purpose-built for heavy payload operations.

EFT E416P 16L 4 Axis Agricultural Drone Frame
Industrial 4-arm frame with 16L payload capacity and wide undercarriage. Ideal base for thermal camera payload — stable platform, ample space for companion computer and gimbal mount.
View on ZboticFor surveillance missions requiring multi-hour endurance on a larger platform:
EFT 6120 Multifunction Surveillance Drone Frame
Heavy-duty hexacopter frame engineered for surveillance payloads. Dedicated payload bay, redundant motor layout, and vibration-damped mounting rail for thermal camera systems.
View on Zbotic4. Lepton Breakout Board and Wiring
The FLIR Lepton module uses a 51-pin FPC (Flexible Printed Circuit) connector — not user-solderable. You must use a breakout board:
Breakout Board Options
- PureThermal 2 (GroupGets): USB-C output, direct plug-and-play with UVC driver on Linux. Simplest integration — treated as a USB webcam by the OS. No custom SPI code needed.
- Lepton Breakout Board v1.4: Exposes raw SPI, I2C, and GPIO. Requires writing SPI code but gives direct access to radiometric data. Smallest and lightest option.
- SparkFun FLIR Breakout: Popular with Arduino/Raspberry Pi community. Well-documented library support.
SPI Wiring (Lepton Breakout v1.4 to Raspberry Pi)
| Lepton Pin | Raspberry Pi GPIO | Function |
|---|---|---|
| VIN | Pin 1 (3.3V) | Power |
| GND | Pin 6 (GND) | Ground |
| CS | Pin 24 (GPIO8 / CE0) | SPI Chip Select |
| MISO | Pin 21 (GPIO9) | SPI Data (Lepton → Pi) |
| SCK | Pin 23 (GPIO11) | SPI Clock |
| SDA | Pin 3 (GPIO2) | I2C Data (CCI) |
| SCL | Pin 5 (GPIO3) | I2C Clock (CCI) |
Important: The Lepton operates at 3.3V logic. If using a Raspberry Pi (3.3V GPIO) this is directly compatible. Do NOT connect to 5V Arduino pins without a level shifter.
Keep SPI wiring short (<15cm) and use twisted pairs for CLK/MISO to reduce noise. Thermal sensor data is very susceptible to SPI noise causing frame corruptions (“bad frames” or all-zero packets).
5. Raspberry Pi Setup and SPI Configuration
Operating System
Use Raspberry Pi OS Lite (64-bit) for RPi 4/Zero 2W. Headless setup is preferred for weight reduction — no display needed in flight.
Enable SPI and I2C
sudo raspi-config
# Interface Options → SPI → Enable
# Interface Options → I2C → Enable
sudo reboot
Install Dependencies
sudo apt-get update
sudo apt-get install -y python3-pip python3-spidev python3-smbus
  libopencv-dev python3-opencv python3-numpy git
pip3 install pylepton Pillow
SPI Speed Configuration
The Lepton requires SPI clock between 2.2–20 MHz. Start at 10 MHz:
# /boot/config.txt — add:
dtparam=spi=on
dtoverlay=spi0-1cs,cs0_pin=8
core_freq=250
Basic Python Test (pylepton library)
from pylepton import Lepton
import numpy as np
import cv2

with Lepton() as l:
    a, _ = l.capture()
    # Normalise to 8-bit for display
    img = cv2.normalize(a, None, 0, 255, cv2.NORM_MINMAX, dtype=cv2.CV_8U)
    cv2.imwrite('/tmp/thermal_frame.png',
                cv2.applyColorMap(img, cv2.COLORMAP_INFERNO))
    print(f"Min temp: {a.min()}, Max temp: {a.max()}")
If you get all-zero frames, check: SPI wiring, CS polarity, and that you are reading at least 60 frames (Lepton performs a flat-field correction on startup — first 60 frames may contain FFC reset frames).
6. Software Stack and Image Processing
Temperature Conversion (Lepton 3.5 Radiometric Mode)
With the Lepton 3.5 in radiometric mode, raw pixel values represent temperature in Kelvin × 100:
# Raw value to Celsius
temp_celsius = (raw_value / 100.0) - 273.15

# Get hottest pixel location (e.g., for fire detection)
max_val = np.max(a)
max_loc = np.unravel_index(np.argmax(a), a.shape)
max_temp_c = (max_val / 100.0) - 273.15
print(f"Hottest point: {max_temp_c:.1f}°C at pixel {max_loc}")
False-Colour Visualization
OpenCV’s colour maps convert 8-bit intensity to thermal false colour:
COLORMAP_INFERNO— black→purple→orange→yellow (popular for industrial inspection)COLORMAP_HOT— black→red→yellow→white (classic fire detection)COLORMAP_JET— blue→cyan→green→yellow→red (scientific gradient)COLORMAP_WINTER— blue→green (useful for cold environment detection)
Continuous Frame Capture to Video
import cv2, numpy as np
from pylepton import Lepton
import time

out = cv2.VideoWriter('/data/thermal.avi',
       cv2.VideoWriter_fourcc(*'XVID'), 8.7, (160, 120), True)

with Lepton() as l:
    while True:
        frame, _ = l.capture()
        norm = cv2.normalize(frame, None, 0, 255,
                             cv2.NORM_MINMAX, dtype=cv2.CV_8U)
        colour = cv2.applyColorMap(norm, cv2.COLORMAP_INFERNO)
        out.write(colour)
        time.sleep(0.115)  # ~8.7 fps
7. ArduPilot / Mission Planner Integration
Overlaying thermal data with GPS coordinates enables geotagged thermal mapping — the primary use case for agricultural and survey drones in India.
MAVLink Telemetry from Companion Computer
The Raspberry Pi connects to Pixhawk via UART (ttyS0 or ttyAMA0) and runs a MAVLink bridge:
pip3 install pymavlink mavproxy

# Start MAVProxy bridge
mavproxy.py --master=/dev/ttyAMA0,921600
  --out=udp:192.168.1.100:14550
Geotagging Thermal Frames
Read GPS position from MAVLink and stamp each thermal frame:
from pymavlink import mavutil
import json, time

master = mavutil.mavlink_connection('/dev/ttyAMA0', baud=921600)

def get_gps():
    msg = master.recv_match(type='GLOBAL_POSITION_INT', blocking=True)
    return {
        'lat': msg.lat / 1e7,
        'lon': msg.lon / 1e7,
        'alt': msg.relative_alt / 1000.0
    }

# In capture loop:
gps = get_gps()
geotag = {**gps, 'timestamp': time.time(), 'frame_id': frame_count}
with open(f'/data/tags/{frame_count:06d}.json', 'w') as f:
    json.dump(geotag, f)

3DR 100mW Radio Telemetry 915MHz for APM / PX4 / Pixhawk
915MHz telemetry link for Mission Planner. Monitor flight parameters and receive MAVLink telemetry from your companion computer during thermal survey missions.
View on Zbotic8. Live Video Streaming to GCS
For real-time thermal viewing at the GCS, stream the processed thermal video over WiFi or a dedicated 5.8GHz video link:
GStreamer WiFi Streaming (RPi to Laptop)
# On Raspberry Pi:
gst-launch-1.0 -v
  appsrc ! videoconvert !
  video/x-raw,format=I420,width=160,height=120,framerate=8/1 !
  x264enc tune=zerolatency bitrate=500 !
  rtph264pay ! udpsink host=192.168.1.100 port=5600

# On GCS laptop:
gst-launch-1.0 udpsrc port=5600 !
  application/x-rtp ! rtph264depay !
  avdec_h264 ! videoconvert ! autovideosink
For latency-critical surveillance, use a 5.8GHz analog VTx connected to the RPi’s composite output (configure framebuffer output on RPi Zero) or use a dedicated digital video transmitter. For WiFi-based streaming, practical range is 100–300m depending on 2.4GHz/5GHz and antenna gain.
9. Gimbal and Mount Design
The Lepton is sensitive to mechanical vibration (motor vibration causes image smearing). Vibration isolation is critical:
- Mount the entire payload assembly (Lepton + RPi + breakout) on rubber dampers, isolated from the main frame
- Use a single-axis brushless gimbal for stabilisation on survey drones
- For simpler builds, foam-and-rubber isolators reduce vibration by 60–70%
- Orient the camera downward (nadir view) for mapping, or angled 30–45° for inspection
The Hobbywing X9 Plus motors for your platform offer exceptionally smooth, low-vibration operation — reducing the mechanical noise reaching your thermal sensor:

Hobbywing X9 Plus Motor – CCW
Premium industrial drone motor with ultra-smooth operation and integrated ESC. Low vibration signature is critical for thermal camera image quality. Ideal for professional survey platforms.
View on Zbotic
T-Motor A8-X KV115 CCW Modular Propulsion System
High-efficiency T-Motor A8 propulsion system for industrial drone builds. Low vibration and matched motor-ESC-prop combination reduces gimbal compensation requirements.
View on Zbotic10. Indian Use Cases for Drone Thermal Cameras
India has unique environmental and industrial conditions that make drone thermal imaging particularly valuable:
Agriculture (Highest Demand)
- Irrigation stress detection: Water-stressed crops show 2–5°C higher canopy temperature than healthy crops — detectable at 30m AGL with Lepton 3.5
- Pest and disease mapping: Fungal infections and certain pest infestations alter plant thermal signature before visible symptoms appear
- Soil moisture mapping: Correlate thermal data with soil maps for precision irrigation in Maharashtra sugarcane and Punjab wheat fields
Solar Farm Inspection
- India has 80+ GW of solar capacity (target: 500 GW by 2030). Manual panel inspection is cost-prohibitive.
- Faulty cells (hotspots, bypass diode failures, delamination) show 10–40°C temperature elevation above surrounding panels
- One drone operator can inspect 1–2 MW of solar capacity per day vs 0.1 MW by foot
- Rajasthan, Gujarat, Andhra Pradesh, and Tamil Nadu solar parks are high-demand markets
Forest Fire Detection
- Early fire detection in Uttarakhand, Himachal Pradesh, and Western Ghats — smoke obscures visible cameras but thermal cuts through smoke
- Monitor smoldering hotspots that can reignite 24–48 hours after apparent extinguishing
- NDRF and state forest departments are actively procuring thermal drone capability
Infrastructure Inspection
- Electrical transmission tower and transformer inspection — thermal anomalies indicate failing insulation or overloaded equipment
- Building energy audit — identify thermal bridges, poor insulation, and HVAC leaks in commercial buildings
- Bridge and road surface inspection — detect subsurface delamination and moisture ingress
Security and Surveillance
- Night perimeter monitoring for industrial facilities, ports, and border areas
- Wildlife monitoring and anti-poaching operations in protected areas
- Search and rescue operations — thermal drone located missing person in body-heat signature
FAQs
A: At 30m AGL, the Lepton 3.5 (160×120 at 57° HFOV) gives approximately 2cm/pixel ground resolution — sufficient for solar panel hotspot detection. At 80m, resolution drops to ~5cm/pixel, still useful for crop stress mapping. Above 100m, resolution falls below practical inspection thresholds for small targets.
A: A functional Lepton 3.5 + RPi Zero 2W thermal survey drone on an EFT frame starts at approximately ₹80,000–1,20,000 including the Lepton module import (~₹15,000–25,000), frame, motors, flight controller, and electronics. Commercial thermal drones from DJI or FLIR cost ₹5–25 lakh for equivalent capability.
A: Yes. With the PureThermal 2 breakout board, the Lepton appears as a standard UVC USB camera and can be connected to any single-board computer (Jetson Nano, BeagleBone, etc.) or even a Windows laptop via USB. For minimal weight, STM32-based solutions can also read the SPI interface with a custom firmware.
A: There is no separate DGCA approval specifically for thermal cameras. Standard drone registration and airspace permissions apply. However, for commercial thermal survey work (paid inspection services), you need a Remote Pilot Certificate and may need sector-specific permissions (e.g., from utilities companies for grid inspection).
A: Most likely causes: (1) SPI CS polarity wrong — Lepton uses active-low CS, verify with a logic analyser; (2) Clock speed too high — try reducing to 2.2 MHz; (3) Missing FFC frame filter — discard packets where all bytes are identical (FFC reset frame); (4) Power supply noise — add 10µF decoupling cap near the Lepton VIN pin.
Build Your Thermal Survey Drone with Zbotic
Frames, motors, flight controllers, telemetry, and GPS modules for your thermal drone project — all at Zbotic with fast India delivery.
Shop Drone Components


Add comment