
Drone Payload Systems: How to Add a Camera Gimbal to Your Drone
A camera gimbal transforms your drone from a flying toy into a serious aerial imaging platform. By mechanically isolating the camera from the drone’s vibrations and attitude changes, a gimbal delivers the smooth, cinematic footage you see in professional aerial productions. Whether you’re an agricultural surveyor, a real estate photographer or a content creator in India, adding a gimbal payload to your drone is one of the highest-impact upgrades you can make.
This tutorial covers everything from understanding payload limits to tuning your gimbal for buttery smooth footage, with practical advice for Indian conditions and budget considerations.
Understanding Drone Payload Capacity
The first and most critical concept in payload drone design is the relationship between All-Up Weight (AUW), thrust-to-weight ratio (TWR), and payload capacity.
The Thrust-to-Weight Rule
For stable, controllable hovering, a drone needs at minimum a 2:1 thrust-to-weight ratio — meaning your motors must produce twice the aircraft’s total weight in thrust. For example, if your drone with battery, electronics and gimbal weighs 2kg, you need at least 4kg of total thrust from your motors.
For agricultural and payload drones operating in the turbulent Indian summer heat, a 2.5:1 to 3:1 TWR is recommended. Air density decreases at higher temperatures and altitudes, reducing motor thrust by up to 10–15% on a hot afternoon in Rajasthan or the Deccan plateau compared to a cool morning in the hills.
Calculating Available Payload
The formula is simple:
Available Payload = (Max Thrust / Required TWR) − Drone Empty Weight
A drone with 5kg max thrust at 2.5:1 TWR can carry a payload of up to 2kg minus the drone’s dry weight. Always design for the worst case — high temperature, high altitude flying.
Weight Distribution
Payload position affects flight stability. Mount your gimbal directly below the drone’s centre of gravity whenever possible. An off-centre gimbal creates a pendulum effect that fights the flight controller’s stabilisation. On multi-rotor agricultural drones, the gimbal typically hangs from the central mounting plate on vibration-damping standoffs.
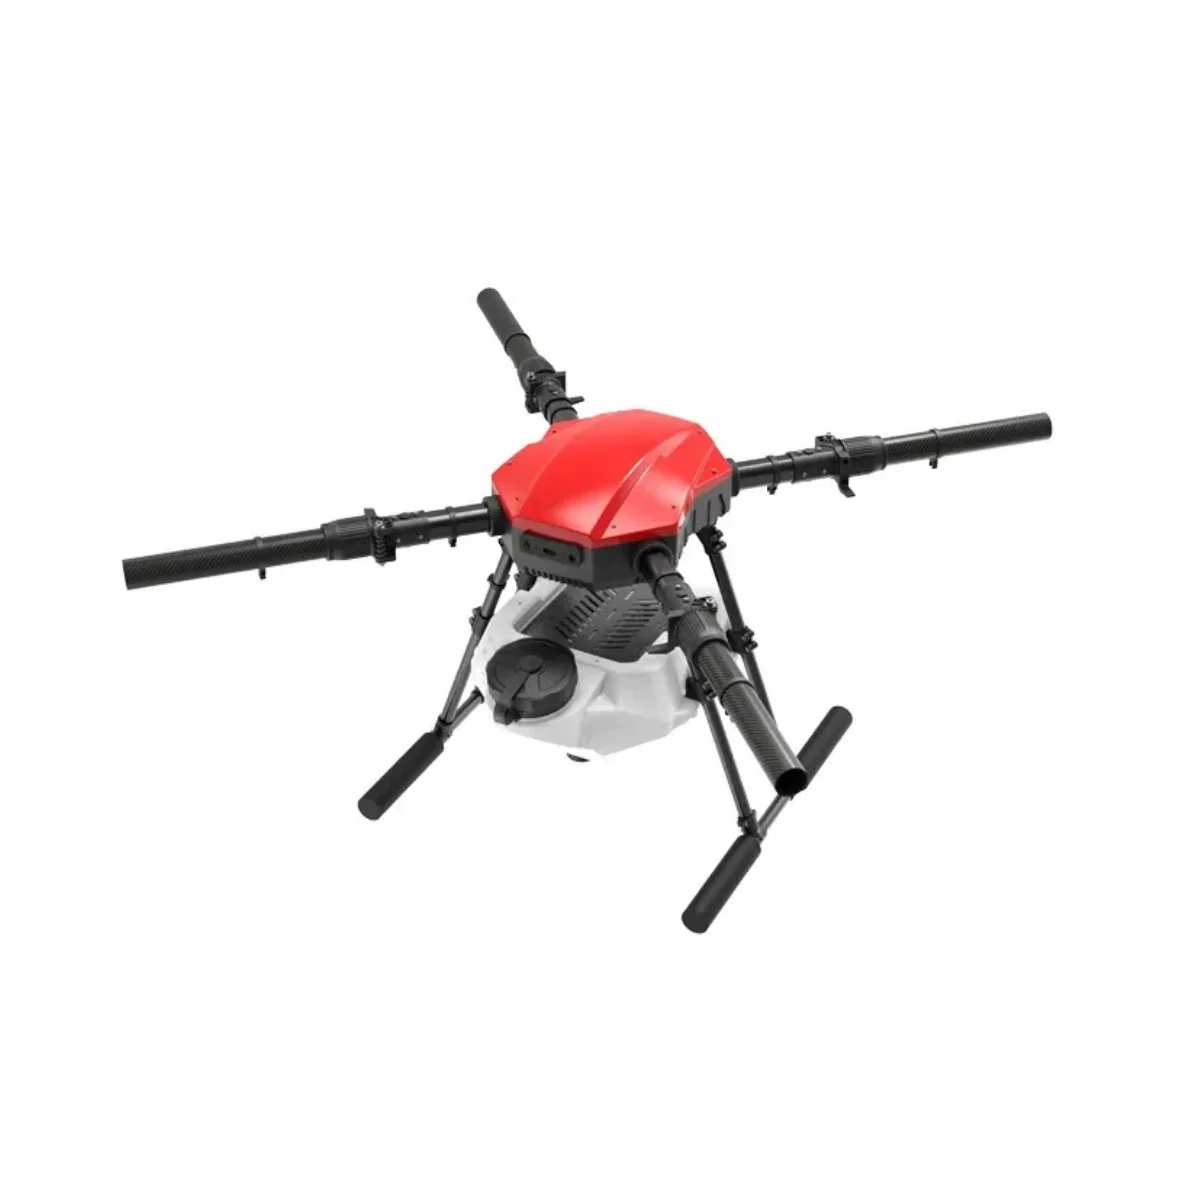
EFT E410P 10L 4 Axis Agricultural Drone Frame
Heavy-duty 4-axis drone frame with dedicated gimbal mounting points and high payload capacity. Designed for agricultural and inspection missions with camera systems up to 2kg in India.
View on Zbotic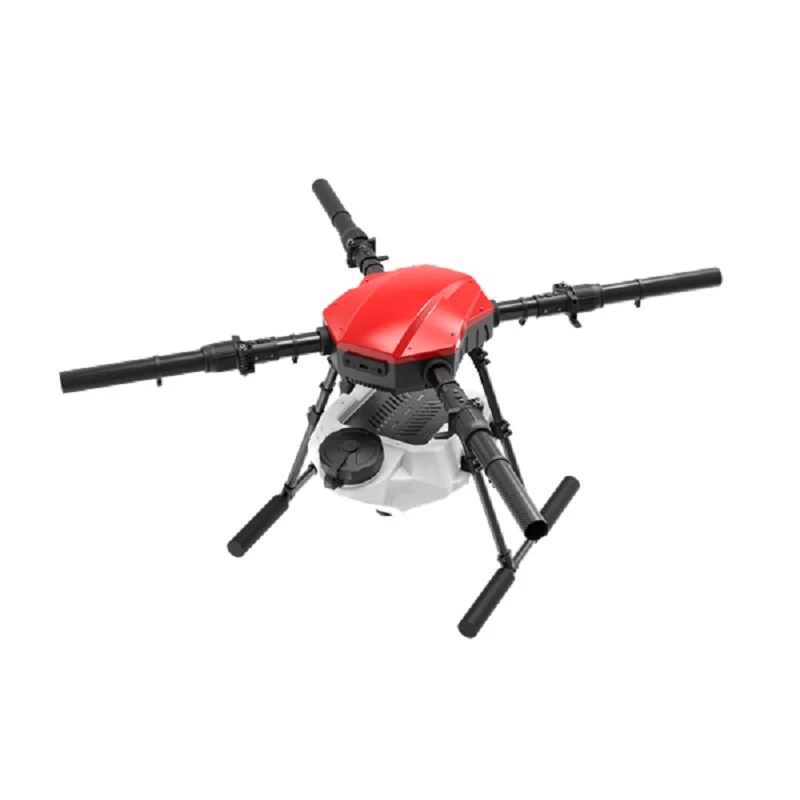
EFT E416P 16L 4 Axis Agricultural Drone Frame
Larger 16-litre agricultural drone frame with foldable arms and industrial-grade payload mounting. Suitable for heavy gimbals carrying action cameras or thermal imaging sensors.
View on ZboticTypes of Camera Gimbals
2-Axis Gimbals
2-axis gimbals stabilise roll and pitch. They are lighter, simpler and less expensive. Most basic aerial photography applications only require roll and pitch stabilisation — yaw motion is typically handled by the drone itself flying a smooth heading. For straight-and-level survey passes, a 2-axis gimbal often suffices.
3-Axis Gimbals
3-axis gimbals add yaw stabilisation, completely decoupling the camera from the drone’s heading changes. This is essential for cinematic footage, orbiting shots, and point-of-interest filming where the drone rotates but the camera must maintain a fixed pointing angle. All professional aerial gimbals (DJI Zenmuse series, Gremsy, Taisync) are 3-axis.
Single-Axis (Pitch-only)
Some FPV-oriented gimbals only control pitch, allowing the pilot to tilt the camera angle remotely for different perspectives. These are common on FPV freestyle rigs where full 3-axis stabilisation is not desired — the pilot controls the shot with stick inputs rather than isolating the camera from the quad’s motion.
Electronic Image Stabilisation (EIS)
Not a true gimbal but worth mentioning. Cameras like GoPro and DJI Action series with RockSteady/HorizonSteady use digital cropping and image shifting to compensate for vibration. EIS works well for moderate vibration but doesn’t compare to a physical gimbal for severe turbulence or aggressive manoeuvres. EIS also reduces effective field of view.
Choosing the Camera for Your Gimbal
Your gimbal choice and camera choice are interdependent — gimbals are designed for specific camera sizes and weights.
Action Cameras (GoPro, DJI Action, Insta360)
Compact, lightweight (100–150g), wide-angle lens, excellent image quality. Best for smaller hexacopter or quad builds with payload capacity of 300–500g. The Sony RX0 series offers cinema-quality image in an action camera-sized body but at higher cost.
Mirrorless and DSLR Cameras
For professional cinematography or photogrammetry, full-frame and APS-C mirrorless cameras (Sony A7 series, Fujifilm X-T series) mounted on Gremsy T3 or T7 gimbals produce genuinely broadcast-quality output. These camera+gimbal combinations weigh 1.5–3kg and require large hexacopter or octocopter frames.
Thermal and Multispectral Cameras
Agriculture and industrial inspection applications often use thermal imaging cameras (FLIR Vue, DJI Zenmuse XT2) or multispectral sensors (Micasense RedEdge) for crop health mapping and heat signature surveys. These are specialist, high-cost systems (₹2–8 lakh) but are increasingly used by Indian precision agriculture startups.
Mounting the Gimbal: Step-by-Step
Step 1: Assess Your Frame’s Gimbal Mount
Check your frame’s underside mounting pattern. Most agricultural and survey frames have a standard 30×30mm or 50×50mm mounting pattern with M3 or M4 threaded holes. Measure the spacing and verify your gimbal bracket matches, or plan to use an adapter plate.
Step 2: Install Vibration Dampers
Never mount a gimbal rigidly to the frame. Motor and propeller vibrations at 50–200Hz can saturate the gimbal’s IMU and cause rapid, high-frequency oscillations that look like trembling in footage. Use silicone ball dampers or rubber grommets between the gimbal mounting plate and the frame. A stack of M3 silicone balls at each corner provides excellent high-frequency attenuation.
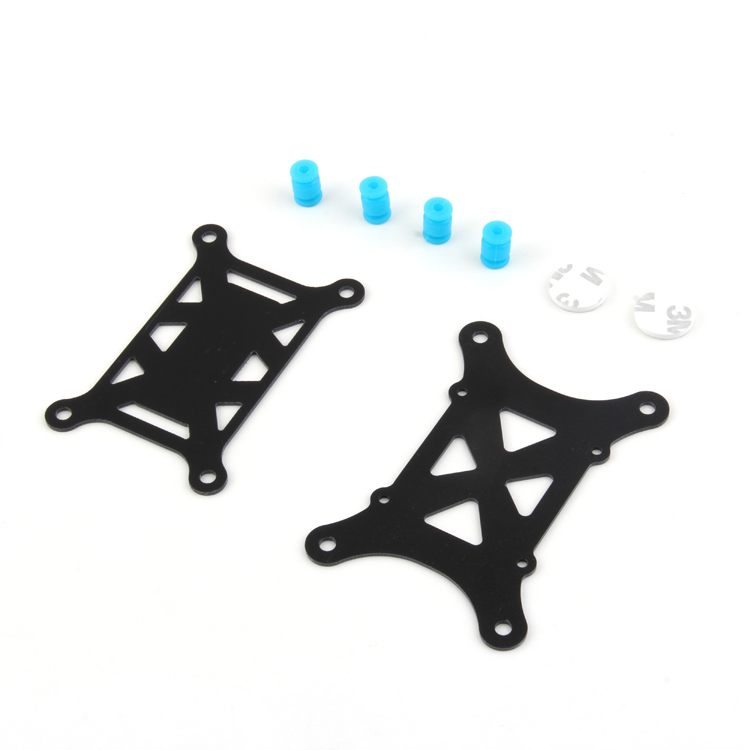
Anti-Vibration Shock Absorber for APM/KK/MWC/PixHawk
Silicone vibration damping mounts essential for gimbal and flight controller installation. Reduces motor and propeller vibration transmission for smooth footage and stable FC sensor readings.
View on ZboticStep 3: Balance the Camera on the Gimbal
Most gimbals have sliding or threaded balance adjustments on each axis. Balance is critical — an unbalanced gimbal forces the motors to constantly fight gravity, drawing excess current and causing vibrations that the IMU may not fully compensate. Procedure:
- Mount the camera without powering the gimbal
- Adjust the pitch axis first — the camera should stay in any position without motors powered
- Adjust roll axis — the same test applies
- Adjust yaw (tilt relative to vertical) so the camera lens axis is perfectly vertical
Step 4: Connect the Gimbal to the FC
Most gimbals accept PWM or PPM servo signals from the flight controller to control pan, tilt and roll remotely. Some professional gimbals use serial communication (MAVLink, CAN bus) for more precise control and telemetry feedback. Wire the gimbal’s power input to your BEC, not directly to the main battery, to provide clean regulated voltage.
Wiring and Power Setup
Gimbal power requirements vary significantly by size:
- Micro gimbals (≤200g load): 5V/2A from a dedicated BEC
- Mid-size gimbals (200g–800g load): 12V/3A from a dedicated BEC or regulator
- Professional gimbals (>800g load): Direct 4S–6S LiPo input through their own internal regulators
Run gimbal power wires separately from ESC signal wires. Never share grounds between the gimbal controller and the FC ESC output pins without a proper ground loop — this can introduce video interference visible as rolling bars in footage.

2-6S 5V 5A BEC for Quadcopter Drone
Wide-input BEC providing clean 5V/5A regulated power for your gimbal, FPV camera and other accessories. Prevents voltage noise from degrading gimbal performance.
View on ZboticVibration Isolation Techniques
Vibration is the enemy of clean gimbal footage. Even a well-tuned gimbal cannot fully compensate for resonant frequencies induced by imbalanced props or worn motor bearings. Address vibration at the source before relying on the gimbal to compensate.
Propeller Balancing
An unbalanced propeller creates vibration at its rotation frequency (typically 50–120Hz at flying RPM). Use a prop balancer to ensure each blade half has equal weight. Even 0.1g imbalance creates noticeable vibration at 6,000RPM. For carbon fibre props, this is especially important as manufacturing variations are larger than plastic props.
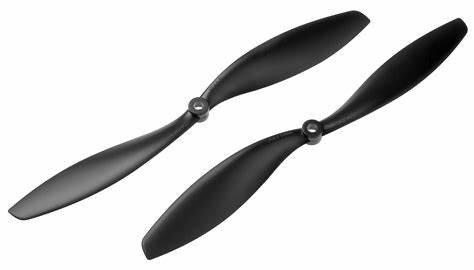
1045 2 Blades Carbon Fiber Propeller CW&CCW
High-quality 10×4.5″ carbon fibre props for professional drone builds. Carbon construction provides excellent stiffness and reduced vibration compared to plastic alternatives.
View on ZboticMotor Checks
Spin each motor without a prop and listen for rough bearing sounds or feel for vibration. Worn bearings create broadband vibration that no amount of damping fully eliminates. Replace any motor with noisy bearings before a gimbal-equipped flight.
Frame Resonance
Some frame materials resonate at specific frequencies. Carbon fibre tube frames have different resonance characteristics than carbon plate frames. If footage shows a specific trembling pattern at certain throttle levels, the frame may be resonating. Adding frame stiffeners or switching motor mounting plate material can help.
Tuning the Gimbal PID
Most DIY gimbals run SimpleBGC (Basecam) firmware. Tuning procedure for SimpleBGC:
1. Auto-calibrate the IMU
Place the drone on a level surface and run the accelerometer calibration in SimpleBGC GUI. This ensures the gimbal knows what “level” means.
2. Set Motor Power
Start with low motor power (50–80 out of 255) and gradually increase until the motors hold position firmly without oscillating. Too high causes oscillations; too low allows drift.
3. Tune PID Values
- P (Proportional): Increase until the axis responds quickly to disturbances but before oscillation starts.
- I (Integral): Increase slowly to eliminate slow drift. Too high causes a slow “wobble” response.
- D (Derivative): Increase to damp oscillations. Too high causes high-frequency buzzing.
Tune each axis independently. Pitch is typically tuned first (easiest to observe), then roll, then yaw.
4. Follow Mode Settings
Configure how the gimbal responds to the drone’s yaw (heading) changes. For aerial video, “follow mode” where the camera slowly follows drone heading changes creates natural-looking shots. For mapping, “lock mode” where the camera maintains a fixed compass heading is preferable.
Real World Use Cases in India
Real Estate Photography
India’s booming real estate market creates strong demand for aerial photography. A DJI Mavic 3 Pro or a custom hexacopter with a Sony A6000 on a Gremsy T1 gimbal can produce marketing imagery indistinguishable from shots taken with hired helicopters. Pilots in cities like Pune, Bangalore, Hyderabad and Mumbai command ₹5,000–25,000 per shoot.
Agricultural Inspection
Farmers and agri-tech companies in Punjab, Haryana, Andhra Pradesh and Maharashtra use drones with multispectral or RGB cameras for crop health monitoring. A large hexacopter or octocopter with an agricultural frame carrying a 500g camera gimbal can survey 50–100 acres per flight. Combined with photogrammetry software like Pix4D or DroneDeploy, these drones generate detailed NDVI maps for precision farming inputs.
Infrastructure Inspection
Bridges, transmission lines, dams and wind turbines require regular inspection. A drone with a 3-axis zoom gimbal (like a DJI Zenmuse Z30 with 30× optical zoom) can inspect tower components from a safe distance, reducing the need for expensive human climbing teams. NHPC, NTPC and private infrastructure companies in India are adopting this actively.
Frequently Asked Questions
A standard 450mm quad with 2212-class motors can typically carry 200–400g of payload including a small gimbal and action camera. For heavier cameras (500g+), step up to a 550mm or 680mm hexacopter with 2814-class or 4014-class motors.
Servo-controlled gimbals work with any FC that has free servo output channels. More advanced gimbals using MAVLink communication require compatible FCs like Pixhawk, ArduPilot or iNAV running on appropriate hardware. SimpleBGC-based gimbals are the most universally compatible.
A gimbal physically moves the camera to compensate for drone movement using motors and sensors. EIS digitally crops and shifts the image in post-processing or in-camera. Gimbals are far superior for large corrections and fast movement but add weight and complexity. EIS is simpler but degrades image quality through cropping.
DJI Phantom 4 and similar commercial drones have proprietary gimbal ports designed exclusively for their manufacturer’s cameras. DIY gimbals cannot be easily added. For custom payload flexibility, build on an open-platform frame running ArduPilot or iNAV where any servo-compatible gimbal can be integrated.
Entry-level 2-axis gimbals for GoPro-sized cameras start around ₹3,000–6,000 from Chinese manufacturers. Quality 3-axis SimpleBGC gimbals for action cameras cost ₹8,000–15,000. Professional gimbals for mirrorless cameras (Gremsy, DJI Zenmuse) cost ₹50,000–3,00,000 and above.
Build Your Aerial Imaging Platform with Zbotic
From agricultural drone frames to motors, ESCs and vibration dampers — Zbotic supplies all the components you need for a professional payload drone build in India.
Shop Drone Parts at Zbotic


Add comment