
How to Build a 48V Lithium E-Bike Battery Using 18650 Cells
If you want to build a 48V e-bike battery using 18650 cells, you’re on the right path to getting a custom, high-performance power pack at a fraction of the commercial price. Whether you’re converting an old bicycle or upgrading an existing e-bike kit, a DIY 48V lithium battery gives you full control over capacity, weight, and performance. In this comprehensive guide, we’ll walk you through every step — from understanding cell chemistry to wiring the BMS and final assembly — tailored for Indian makers and e-bike enthusiasts.
Why 18650 Cells for E-Bike Batteries?
The 18650 cylindrical lithium-ion cell is the most widely used battery cell format in the world — the same chemistry powers Tesla vehicles, laptops, and power tools. For DIY e-bike builders in India, 18650 cells offer an outstanding combination of energy density, availability, and cost-effectiveness.
- High energy density: Typically 2000–3500 mAh per cell, with good cycle life (300–800+ cycles depending on brand).
- Widely available: Cells like Samsung 25R, LG HG2, Sanyo GA, and Molicel P28A are accessible through importers and online stores.
- Proven reliability: Used in millions of commercial e-bikes globally.
- Modular design: Damaged cells can be replaced individually, unlike pouch or prismatic packs.
For a 48V e-bike motor (typically 500W–1500W), 18650 cells hit the sweet spot of performance, weight, and price — making them the go-to choice for Indian DIY builders.
Understanding 48V Battery Configuration
A 48V lithium battery requires 13 cells in series (13S) because each fully charged lithium cell is 4.2V, giving 13 × 4.2V = 54.6V maximum, and a nominal voltage of 13 × 3.6V = 46.8V (approximately 48V).
The number of cells in parallel (P) determines your total capacity (Ah) and thus your range. Common configurations:
| Config | Total Cells | Capacity (2500mAh cell) | Approx. Range (500W motor) |
|---|---|---|---|
| 13S4P | 52 cells | 10Ah / 480Wh | 30–40 km |
| 13S5P | 65 cells | 12.5Ah / 600Wh | 40–55 km |
| 13S7P | 91 cells | 17.5Ah / 840Wh | 60–80 km |
For most Indian commuters covering 30–50 km daily, a 13S4P or 13S5P pack using quality 2500–3000 mAh cells is ideal.
Materials and Tools You Need
Before you start building, gather everything in advance. Rushing midway through assembly with a half-assembled pack is dangerous.
Materials
- 18650 lithium cells (matched capacity and internal resistance)
- Nickel strip (0.15mm thickness, pure nickel — not nickel-plated steel)
- 13S BMS (Battery Management System) rated for your motor current
- Battery spot welder or welding machine
- 18AWG–12AWG silicone wires (for balance leads and main leads)
- PVC heat shrink tubing (large diameter)
- Kapton tape or fish paper for cell insulation
- XT60 or XT90 connectors
- Cell holders or cardboard spacers for 18650
- Multimeter and cell capacity tester
Tools
- Spot welder (kWeld or SUNKKO are popular in India)
- Multimeter
- Soldering iron + flux
- Wire strippers and crimping tools
- Heat gun
- Safety goggles and insulated gloves

Ebike 500W 24V DC 2500 RPM Motor MY1020
High-torque DC motor ideal for e-bike conversions, scooters, and go-karts. Pairs well with a custom lithium battery pack for reliable performance.
Choosing the Right 18650 Cells in India
Cell quality is the single most important factor in your battery pack’s performance and safety. In India, the market is flooded with counterfeit or rewrapped cells — here’s how to choose wisely.
Top Recommended 18650 Cells for E-Bikes
- Samsung INR18650-25R (2500mAh, 20A cont.): Excellent power cell, great balance of capacity and discharge current. Good for 500W–750W motors.
- LG HG2 (3000mAh, 20A cont.): Higher capacity, suitable for longer range builds.
- Molicel P28A (2800mAh, 35A cont.): High drain cell, ideal for 1000W+ motors.
- Sanyo GA (3500mAh, 10A cont.): Maximum capacity, but lower discharge — best for throttle-light builds.
How to Spot Fake Cells
- Buy only from reputable suppliers or import directly — prices well below ₹250–300/cell are suspicious.
- Always test capacity with a dedicated cell tester (like the OPUS BT-C3100 or similar).
- Check internal resistance: quality cells should measure 20–40 mΩ on a proper tester.
- Match cells within ±20mAh capacity and ±5 mΩ IR for parallel groups.
Selecting and Wiring the BMS
The Battery Management System (BMS) is the brain of your battery pack. It protects against overcharge, over-discharge, short circuits, and balances cell voltages. For a 48V (13S) pack, you need a 13S BMS.
Key BMS Specs to Match Your Build
- Voltage: 13S (48V) — must match exactly.
- Continuous discharge current: Should be ≥ your motor’s peak current. A 500W motor at 48V draws ~10A continuous but can spike to 20–25A. Choose a 30A–40A BMS for headroom.
- Balance current: 50–100mA passive balancing is standard; active balancing is more efficient but costly.
- Common types: 13S 40A BMS (most popular), 13S 60A BMS for higher power builds.
BMS Wiring
A 13S BMS has:
- B- (Battery Negative): Connects to the pack negative terminal.
- P- (Pack/Load Negative): Connects to the motor controller negative.
- C- (Charge Negative): Connects to the charger negative.
- Balance wires: 14 wires connecting to each series junction (B0 to B13).
Tip: Double-check balance wire connections. Wrong wiring here is the #1 cause of BMS failure and fire risk.
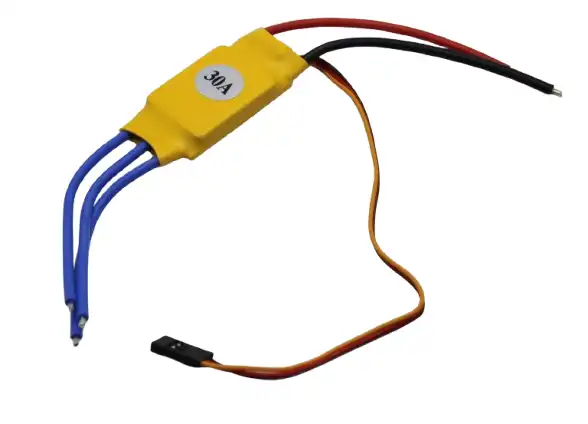
30A BLDC ESC Brushless Electronic Speed Controller
A reliable 30A ESC for controlling brushless motors in e-bike and EV projects. Handles high current demands efficiently with smooth speed control.
Step-by-Step Battery Assembly
Now that you have all materials ready, follow these steps carefully. Work in a clean, dry environment. Keep a fire extinguisher (CO₂ type) nearby.
Step 1: Test and Sort Cells
Charge all cells to the same voltage (ideally 3.6V nominal). Use a capacity tester to group cells by capacity. Match cells within ±20mAh for parallel groups. Label each group.
Step 2: Build Parallel Groups
Arrange your cells in parallel groups (e.g., 4 cells for a 4P pack). Use cell holders to fix positions. Wrap each cell in Kapton tape to prevent accidental shorts. Spot-weld nickel strips across the positive terminals of each parallel group, then across the negatives.
Always weld negative first, then positive — less risk of accidental short circuit.
Step 3: Connect Series Groups
Once all parallel groups are assembled and tested (each should read ~4.1–4.2V if freshly charged), connect them in series using nickel strips or bus bars. Arrange them in a brick or ladder layout. Use fish paper between groups to prevent shorts.
Step 4: Attach Balance Wires
Solder the BMS balance wires to each junction point between series groups. Label them B0 (negative end) through B13 (positive end). Route wires carefully to avoid stress on solder joints.
Step 5: Connect the BMS
Connect B- to pack negative, then balance wires in order. Test voltages at each balance lead with a multimeter before connecting the BMS circuit. Once confirmed correct, secure the BMS to the pack using double-sided thermal tape or a mount.
Step 6: Main Power Leads and Connectors
Solder heavy-gauge silicone wire (12AWG or 10AWG) to B+/P+, C-, and P-. Attach XT60 or XT90 connectors. Use heat shrink tubing over all exposed connections.
Step 7: Final Testing
Measure full pack voltage at P+ and P- — should be ~54V if fully charged. Measure charge port voltage. Test BMS protection by momentarily short-circuiting (P+ and P-) with a protected test lead — BMS should cut off immediately.
Step 8: Enclosure
Wrap the completed pack in large PVC heat shrink. For permanent installation, fabricate a plastic or aluminum enclosure. Mount on the e-bike frame (down tube or rear rack are common positions).

Waveshare DDSM115 Direct Drive Hub Motor – Low Noise, High Torque
A precision hub motor with direct drive design offering low noise and high torque — perfect for e-bike conversion projects requiring smooth and efficient power delivery.
Safety Tips and Best Practices
Lithium batteries are energy-dense and potentially dangerous if mishandled. Follow these safety rules without exception:
- Never short-circuit cells — even momentary shorts can cause immediate heat, venting, and fire.
- Use a quality BMS always — never run a lithium pack without BMS protection.
- Charge in a fireproof bag or metal box — especially during the first few cycles of a new pack.
- Never charge unattended overnight.
- Store at 50% charge if not using for extended periods (more than 2 weeks).
- Keep away from heat and water — the pack should be in a sealed, weatherproof enclosure.
- Use appropriate charger: For a 48V (13S) pack, use a 54.6V lithium charger only. Never use a lead-acid charger.
- Label your pack clearly with voltage, capacity, and chemistry for emergency responders.

Waveshare All-metal Compact UGV Suspension (A) for Hub Motor
High-strength spring suspension designed for DDSM115 hub motor platforms — ideal for rugged e-bike and EV builds needing robust chassis support with 7.5KG load capacity.

25GA-370 12V 12RPM DC Reducer Gear Motor
A compact gear motor useful for automated battery enclosure locks, battery management system mechanical components, and small EV auxiliary systems.
Frequently Asked Questions
How much does it cost to build a 48V 10Ah 18650 e-bike battery in India?
Approximately ₹8,000–₹14,000 for a 13S4P pack with quality cells (Samsung/LG), a 13S BMS, nickel strips, wires, and connectors. Commercial packs of the same spec cost ₹18,000–₹28,000, so DIY saves 30–50%.
Can I use recovered laptop 18650 cells for an e-bike battery?
Technically yes, but it is not recommended. Recovered cells have unknown cycle count, inconsistent capacity, and can have degraded chemistry. The risk of thermal runaway is significantly higher. Use new, quality cells from reputable suppliers.
What charger do I need for a 48V (13S) lithium battery?
You need a 54.6V lithium-ion charger (13S × 4.2V = 54.6V). Never use a 48V lead-acid charger — it will overcharge and can damage or ignite lithium cells. Choose a charger with CC/CV (constant current / constant voltage) output.
Do I need a spot welder, or can I solder 18650 cells directly?
Spot welding is strongly preferred. Soldering applies prolonged heat directly to cell terminals which can damage lithium cells internally and cause capacity loss or failure. A spot welder applies heat for milliseconds, making it safe. Entry-level spot welders suitable for this work are available for ₹3,000–₹6,000 in India.
What is the typical lifespan of a DIY 18650 e-bike battery?
With quality cells and a good BMS, expect 300–600 full charge cycles before capacity drops to 80%. That translates to 3–5 years of daily commuting use. Proper storage (50% charge, cool dry place) significantly extends lifespan.
Start Building Your 48V E-Bike Battery Today
Building your own 48V lithium e-bike battery using 18650 cells is one of the most rewarding DIY electronics projects you can undertake. You save money, gain performance insight, and get a battery perfectly matched to your needs. The key is patience, proper cell matching, a quality BMS, and strict safety discipline.
At Zbotic, we stock a wide range of motors, ESCs, drivers, and electronic components to power your e-bike and EV projects. Explore our E-Bikes & Electric Vehicles category for everything you need to bring your build to life.


Add comment