
Hall effect sensors are everywhere — inside your brushless drone motors, inside the ABS wheel speed sensors in your car, inside the lid switch of your laptop, and even in your smartphone’s compass. Despite being so ubiquitous, many hobbyists have never actually built a circuit with one. This guide changes that.
We will cover how the Hall effect works at a physics level, the difference between linear (analog) and digital Hall sensors, how to wire them to an Arduino, and complete project code for three practical applications: RPM measurement, position sensing, and current sensing.
1. What Is the Hall Effect?
The Hall effect was discovered by American physicist Edwin Hall in 1879. When a conductor or semiconductor carrying an electrical current is placed in a perpendicular magnetic field, a voltage develops across the conductor — perpendicular to both the current and the magnetic field. This is the Hall voltage.
The physics behind this: moving charge carriers (electrons) in the current experience a Lorentz force due to the external magnetic field. This force deflects them to one side of the conductor, creating a charge separation that manifests as a measurable voltage across the width of the material.
The Hall voltage (V_H) is given by:
V_H = (I × B) / (n × e × t)
Where I is current, B is magnetic field strength, n is carrier density, e is electron charge, and t is the thickness of the material. For practical Hall sensors, this is typically in the microvolt range — which is why internal amplification is necessary in real ICs.
2. How a Hall Effect Sensor Works
A modern Hall effect sensor IC integrates several blocks on a single chip:
- Hall element: A thin semiconductor plate (usually silicon or InSb) where the Hall voltage is generated
- Amplifier: Amplifies the tiny Hall voltage (µV range) to a usable signal level
- Schmitt trigger / comparator: (In digital types) Converts the analog signal to a clean HIGH/LOW output with hysteresis
- Open-collector or push-pull driver: Output stage that interfaces to a microcontroller
- Voltage regulator: Allows operation over a range of supply voltages (typically 3.3V–24V)
The sensor detects the presence and polarity of a magnetic field. Bring the north pole of a magnet near the active face of the sensor, and the output changes. Move the magnet away, and it reverts.
3. Types: Linear vs Digital Hall Sensors
Digital (Switch) Hall Sensors
These output a binary HIGH or LOW depending on whether the magnetic field exceeds a threshold. They come in two sub-types:
- Unipolar: Activates on the south pole (or north, depending on orientation), deactivates when the magnet is removed. The A3144 is the classic unipolar switch.
- Bipolar (latch): Sets to one state when the south pole is detected, and only resets when the north pole is detected. Great for brushless motor commutation where you need a memory element.
- Omnipolar: Activates on either pole — simpler to use when magnet orientation is unpredictable.
Linear (Analog) Hall Sensors
These output an analog voltage proportional to the magnetic field strength. The SS49E is a popular example. At zero field, the output is exactly Vcc/2 (ratiometric). A south pole increases the output above centre; a north pole decreases it below centre. These are used for angle measurement, current sensing, and anywhere you need to know field magnitude, not just presence.
| Feature | Digital Hall Sensor | Linear Hall Sensor |
|---|---|---|
| Output | HIGH / LOW | Analog voltage (0V to Vcc) |
| Arduino pin | Digital input | Analog input (ADC) |
| Use case | RPM, position switch, door sensor | Current sensing, angle measurement |
| Example IC | A3144, US1881, DRV5013 | SS49E, ACS712, A1302 |
| Complexity | Low (just read pin state) | Medium (requires ADC + calibration) |
4. Popular Hall Effect ICs: A3144, SS49E, ACS712
A3144 — Digital Unipolar Switch
- Supply voltage: 4.5V to 28V
- Output: Open-collector NPN (needs pull-up resistor to VCC)
- Operate point: ~17mT (B_OP), Release point: ~8mT (B_RP)
- Package: TO-92-3, same as a transistor
- Common uses: RPM counters, door/lid detection, gear tooth counting
SS49E — Linear Ratiometric Sensor
- Supply voltage: 3V to 6.5V (suitable for 3.3V and 5V systems)
- Quiescent output: Vcc/2 (2.5V at 5V supply) at zero field
- Sensitivity: ~1.4 mV/Gauss
- Range: ±1000 Gauss
- Uses: Rotary encoder, joystick, contactless position sensing
ACS712 — Integrated Current Sensor
- Variants: 5A, 20A, 30A
- Works on Hall effect principle to sense magnetic field around current-carrying conductor
- Sensitivity: 185mV/A (5A), 100mV/A (20A), 66mV/A (30A)
- Isolation: 2.1kV RMS — safe for mains current sensing
- Zero-current output: VCC/2 = 2.5V at 5V supply
5. Wiring a Hall Sensor to Arduino
Digital Hall Sensor (A3144) Wiring
A3144 Pin 1 (VCC) → Arduino 5V
A3144 Pin 2 (GND) → Arduino GND
A3144 Pin 3 (OUT) → Arduino D2 (interrupt-capable)
                  → 10kΩ pull-up resistor to 5V
The A3144 has an open-collector output — it sinks current when active (magnet present) and floats when inactive. The pull-up resistor (4.7kΩ–10kΩ) ensures the pin reads HIGH in the inactive state.
Linear Hall Sensor (SS49E) Wiring
SS49E Pin 1 (VCC) → Arduino 5V
SS49E Pin 2 (GND) → Arduino GND
SS49E Pin 3 (OUT) → Arduino A0
                  → 0.1µF bypass cap to GND (recommended)

0.1µF Multilayer Ceramic Capacitor (Pack of 50)
Place a 100nF bypass capacitor between VCC and GND near your Hall sensor to filter noise and stabilise analog readings.
6. Project 1: RPM Measurement with Hall Sensor
A digital Hall sensor and a small neodymium magnet glued to a rotating shaft make an excellent non-contact RPM tachometer. Every time the magnet passes the sensor, the output pulses LOW. Count these pulses per unit time to calculate RPM.
// Hall Effect RPM Meter
// Hardware: A3144 digital Hall sensor + 1 magnet on shaft
// Sensor output → Arduino Pin 2 (INT0)

const int HALL_PIN = 2;
volatile unsigned long pulseCount = 0;
unsigned long lastTime = 0;

void hallISR() {
  pulseCount++;
}

void setup() {
  Serial.begin(9600);
  pinMode(HALL_PIN, INPUT_PULLUP);
  attachInterrupt(digitalPinToInterrupt(HALL_PIN), hallISR, FALLING);
}

void loop() {
  unsigned long now = millis();
  if (now - lastTime >= 1000) {  // Calculate every 1 second
    detachInterrupt(digitalPinToInterrupt(HALL_PIN));
    unsigned long count = pulseCount;
    pulseCount = 0;
    attachInterrupt(digitalPinToInterrupt(HALL_PIN), hallISR, FALLING);

    // 1 magnet per revolution: RPM = count × 60
    float rpm = count * 60.0;

    Serial.print("RPM: ");
    Serial.println(rpm, 1);
    lastTime = now;
  }
}
For multiple magnets (e.g., 4 magnets equally spaced), divide the count by the number of magnets before multiplying by 60: rpm = (count / 4.0) * 60.0.
7. Project 2: Magnetic Position Sensing
A linear Hall sensor (SS49E) can measure the distance and direction of a magnet. As you move a magnet closer or further from the sensor face, the analog output voltage changes proportionally. This creates a contactless linear position sensor with no mechanical wear.
// Linear Hall Sensor Position Reading
// Hardware: SS49E connected to A0

const int HALL_PIN = A0;
const float VCC = 5.0;
const float SENSITIVITY = 0.0014; // V/Gauss for SS49E
const float ZERO_FIELD_V = 2.5;   // VCC/2 at zero field

void setup() {
  Serial.begin(9600);
}

void loop() {
  int raw = analogRead(HALL_PIN);
  float voltage = (raw / 1023.0) * VCC;
  float fieldGauss = (voltage - ZERO_FIELD_V) / SENSITIVITY;

  Serial.print("Voltage: "); Serial.print(voltage, 3); Serial.print("V | ");
  Serial.print("Field: "); Serial.print(fieldGauss, 1); Serial.println(" Gauss");

  delay(100);
}
Positive Gauss values indicate south pole facing the sensor; negative values indicate north pole. By calibrating output against known magnet positions, you can create a lookup table for accurate distance measurement.
8. Project 3: AC/DC Current Sensing with ACS712
The ACS712 is a complete Hall-based current sensor in a SOIC-8 package. The current path runs through a copper conductor on the IC, generating a magnetic field that the internal Hall element detects.
// ACS712 Current Sensor (20A variant)
// Output pin → Arduino A1
// Sensitivity: 100mV/A for 20A variant

const int ACS_PIN = A1;
const float VCC = 5.0;
const float SENSITIVITY = 0.100; // 100mV per Ampere (20A model)
const float ZERO_V = 2.5;        // Voltage at 0A
const int SAMPLES = 500;          // Average multiple samples

void setup() {
  Serial.begin(9600);
}

float readCurrentRMS() {
  float sumSq = 0;
  for (int i = 0; i < SAMPLES; i++) {
    float v = (analogRead(ACS_PIN) / 1023.0) * VCC;
    float current = (v - ZERO_V) / SENSITIVITY;
    sumSq += current * current;
    delayMicroseconds(200); // ~200µs per sample for 50Hz AC
  }
  return sqrt(sumSq / SAMPLES);
}

void loop() {
  float irms = readCurrentRMS();
  Serial.print("Current: ");
  Serial.print(irms, 3);
  Serial.println(" A RMS");
  delay(500);
}

10CM Female to Female Breadboard Jumper Wires – 40Pcs
Use F-F jumper wires to connect Hall sensor modules (which come with header pins) directly to your Arduino’s header pins.
9. Magnet Selection Tips
The magnet is just as important as the Hall sensor. A few guidelines:
- Neodymium (NdFeB) magnets: Strong, compact, affordable — ideal for RPM sensing where you need a small magnet on a rotating part
- Field strength: For digital Hall sensors like A3144, you need at least 15–25mT at the sensing face. A 5mm × 2mm neodymium disc magnet at 5mm distance typically delivers this
- Pole orientation: The A3144 is unipolar — only the south pole (or only the north, depending on IC variant) activates it. Orient the magnet so the activating pole faces the sensor’s flat face
- Linear sensor distance: For the SS49E, the linear range is typically 0–10mm from the sensor face. Calibrate empirically
- Avoid ferromagnetic materials nearby: Steel shafts or brackets close to the sensor can distort the field and cause erratic readings
10. Troubleshooting Hall Sensor Problems
Sensor Always Reads LOW (Digital Type)
Check that you have a pull-up resistor (4.7kΩ–10kΩ) from the output pin to VCC. Without it, the open-collector output floats and will appear active. Also confirm you are using the correct pole of the magnet for your sensor type.
Analog Output Always Reads 2.5V Even with Magnet
The magnet may not be strong enough, or the distance is too great. Try holding the magnet flat against the sensor face. If the output still doesn’t change, verify the sensor orientation — the active face is the flat (marked) side.
RPM Readings Are Erratic
Contact bounce is rare with Hall sensors (non-contact) but noise can be an issue at high speeds. Add a 100nF capacitor between the output and GND, and ensure the interrupt service routine is minimal — just increment a counter.
ACS712 Current Reads High at Zero Current
The zero-point may not be exactly 2.5V due to offset voltage. Measure the actual zero-current output voltage and use that as your baseline in the code instead of assuming 2.5V.
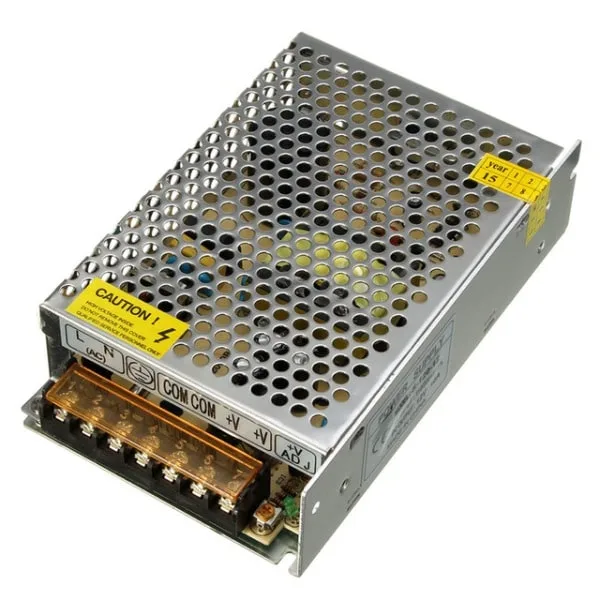
12V 10A SMPS – 120W DC Power Supply
Power your Hall sensor test bench with a stable regulated supply — essential when using the ACS712 for accurate current measurements.
Frequently Asked Questions
Can Hall sensors detect through plastic or wood?
Yes. Hall sensors are only affected by magnetic fields — non-magnetic materials like plastic, wood, aluminium, and glass do not block the field. This makes them ideal for sealed enclosures where a physical switch cannot be used.
What is the difference between a Hall sensor and a Reed switch?
A reed switch uses two ferromagnetic contacts that physically close in a magnetic field. It handles higher currents directly but is fragile, slow (2–3ms response), and wears out after millions of cycles. A Hall sensor is solid-state, responds in microseconds, has no moving parts, and lasts indefinitely — but requires power and outputs a signal (not a contact closure).
Can I use a Hall sensor to detect DC current without breaking the circuit?
Yes — this is exactly what the ACS712 does. It detects the magnetic field around a current-carrying conductor without electrical connection to the load circuit. For custom solutions, you can also use a ferrite toroid around the conductor and place a Hall sensor in the gap.
Will a phone affect my Hall sensor?
Smartphones contain permanent magnets (speaker, haptic motor, magnetic compass calibration magnets). At close range (under 5cm), they can trigger Hall sensors. Keep sensitive setups away from phones and other magnetic devices during testing.
What is the maximum RPM a Hall sensor can measure?
The A3144 has a response time of about 1µs, allowing measurement of up to ~500,000 pulses per second in theory. In practice, interrupt latency on Arduino limits you to about 50,000–100,000 RPM for single-magnet setups — well beyond any mechanical system you will encounter in a hobby project.
Conclusion
Hall effect sensors are one of the most versatile sensing technologies available to hobbyists. A simple digital Hall sensor like the A3144 costs under ₹10 and can measure RPM, detect door position, and count encoder pulses. A linear Hall sensor opens up contactless position measurement and proximity sensing. The ACS712 lets you safely measure mains AC current without touching a live conductor.
Start with the digital A3144 RPM project — it requires only three wires, a 10kΩ pull-up, and a neodymium magnet, and you will have working results in 15 minutes. From there, the same underlying technology scales to industrial current sensors and precision brushless motor control.


Add comment