
Stepper motors are brilliant for precise open-loop position control — no encoder required. But if you simply jump a stepper to full speed from standstill, the motor will stall, miss steps, and your project will fail. The answer is controlled acceleration and deceleration, and the AccelStepper Arduino library makes this straightforward. This comprehensive guide walks you through everything: installing AccelStepper, understanding motion profiles, writing clean code, and avoiding the pitfalls that trip up most beginners.
Why Stepper Motors Need Acceleration
A stepper motor works by switching current through coil phases. Each switch snaps the rotor to the next position — typically 1.8 degrees per step on a standard motor. The rotor has inertia. If you demand steps faster than the rotor can physically follow, it simply does not move — the electromagnetic force is insufficient to overcome rotational inertia at that step rate.
This limit is called the pull-in torque or start-stop rate. For a typical NEMA17 with an A4988 driver, this is around 200–500 steps/second. Above that rate, the motor must be ramped up gradually — increasing step rate from zero up to the target speed over a period of time. The same applies when stopping: an abrupt stop at high speed causes the rotor to overshoot and potentially back-drive, losing position.
Proper acceleration also dramatically increases the maximum achievable speed. A NEMA17 that stalls at 800 steps/s when started abruptly can reach 2000+ steps/s with a gentle ramp. This is the core benefit of the AccelStepper library over simple delay-based stepper code.
Installing the AccelStepper Library
AccelStepper was written by Mike McCauley and is the industry standard for Arduino stepper control. It is available directly from the Arduino Library Manager:
- Open Arduino IDE
- Go to Sketch → Include Library → Manage Libraries
- Search for
AccelStepper - Find the entry by Mike McCauley and click Install
Alternatively, download from the official website (airspayce.com) and install via Sketch → Include Library → Add .ZIP Library. The library supports Arduino Uno, Mega, Nano, ESP32, and most other platforms — it is pure software timing with no platform-specific dependencies.
Hardware: NEMA17 + A4988 Wiring
The most common stepper combination in Indian maker projects is the NEMA17 motor with an A4988 microstepping driver. Here is the complete wiring table:
| A4988 Pin | Arduino Pin | Notes |
|---|---|---|
| STEP | Pin 3 | One pulse per step |
| DIR | Pin 4 | HIGH/LOW sets direction |
| ENABLE | Pin 5 (optional) | LOW to enable driver |
| VDD / GND | 5V / GND | Logic supply from Arduino |
| VMOT / GND | 12V PSU | Motor supply (separate from logic) |
| 1A, 1B, 2A, 2B | Motor coils | Check coil pairs with multimeter |
Critical: Always add a 100 µF capacitor across VMOT and GND, as close to the A4988 as possible. Without it, voltage spikes from the motor’s back-EMF can instantly destroy the driver chip. This is the single most common cause of A4988 failures.
Set the current limit by adjusting the small potentiometer on the A4988. Measure the voltage at the VREF pin relative to GND; current limit = VREF / (8 × Rcs) where Rcs is the current sense resistor (typically 0.1 Ω on the RED board). For a NEMA17 rated 1.5A, set VREF to about 0.75 V (conservative start, increase if motor stalls under load).

NEMA17 5.6 kg-cm Stepper Motor — Detachable Cable
High-torque NEMA17 ideal for 3D printers, CNC routers, and laser cutters. D-type shaft and detachable cable make installation clean and professional.
A4988 Stepper Motor Driver Controller Board (Red)
The classic microstepping driver for NEMA17 motors. Supports full, half, quarter, eighth, and sixteenth step modes. Works seamlessly with AccelStepper library.
Basic AccelStepper Code
Here is a minimal working sketch that moves a motor 2000 steps forward and back, with smooth acceleration and deceleration:
#include <AccelStepper.h>

// AccelStepper::DRIVER = step + direction interface
AccelStepper stepper(AccelStepper::DRIVER, 3, 4); // STEP=3, DIR=4

void setup() {
  stepper.setMaxSpeed(1000);      // steps/second
  stepper.setAcceleration(500);   // steps/second^2
  stepper.moveTo(2000);           // move 2000 steps forward
}

void loop() {
  // run() must be called as fast as possible
  if (stepper.distanceToGo() == 0) {
    stepper.moveTo(-stepper.currentPosition()); // reverse
  }
  stepper.run();
}
The most important rule with AccelStepper: call stepper.run() as frequently as possible in loop(). AccelStepper is not interrupt-driven — it uses software timing. Any delay or blocking call in loop() (including Serial.println(), delay(), or slow sensor reads) can cause steps to be missed at high speeds.
Key AccelStepper Methods
setMaxSpeed(float)— maximum speed in steps per secondsetAcceleration(float)— acceleration in steps per second squaredmoveTo(long)— move to absolute positionmove(long)— move relative to current positionrun()— move one step if due (call in every loop iteration)runToPosition()— blocking move to target (avoid in production code)stop()— decelerate and stop at a new targetcurrentPosition()— current step count from origindistanceToGo()— remaining steps to targetisRunning()— returns true if still moving
Understanding Motion Profiles
AccelStepper implements a trapezoidal velocity profile: the motor ramps up from 0 to maximum speed (acceleration phase), travels at constant maximum speed (cruise phase), then ramps down to 0 at the target (deceleration phase). For very short moves where the acceleration distance exceeds half the total move distance, it produces a triangular profile — it never reaches maximum speed, just accelerates and immediately decelerates.
The acceleration value is in steps per second squared. A value of 500 means the motor increases speed by 500 steps/s every second. Starting from zero, it reaches 1000 steps/s in exactly 2 seconds. The distance covered during the ramp is v² / (2×a) = 1000² / (2×500) = 1000 steps. This means a move shorter than 2000 steps will never reach maximum speed.
Tuning advice:
- Set
setMaxSpeedconservatively first (500–800 steps/s for full-step, 1500–2500 for 1/8 step) - Start with acceleration at half the max speed value
- Increase max speed in 10% increments until the motor first misses steps, then back off 20%
- Use microstepping — 1/8 or 1/16 step mode allows much higher step rates for the same physical speed
Advanced AccelStepper Features
Speed-Only Mode
For continuous rotation at a fixed speed (like a turntable or conveyor), use setSpeed() and runSpeed() instead of position-based methods:
stepper.setMaxSpeed(1000);
stepper.setSpeed(500); // constant 500 steps/s, no accel
// In loop():
stepper.runSpeed();
Setting Initial Position
After homing (moving to a limit switch), set the current position as zero:
stepper.setCurrentPosition(0); // define current as homeDisabling Motor When Idle
Stepper motors consume full current when stopped (holding torque). To save power and reduce heat, disable the driver after the move completes:
if (stepper.distanceToGo() == 0) {
  digitalWrite(ENABLE_PIN, HIGH); // HIGH disables A4988
}
Running Multiple Steppers Simultaneously
AccelStepper provides the MultiStepper class for coordinating multiple motors to reach their targets simultaneously — useful for CNC gantries and robotic arms:
#include <AccelStepper.h>
#include <MultiStepper.h>

AccelStepper motor1(AccelStepper::DRIVER, 3, 4);
AccelStepper motor2(AccelStepper::DRIVER, 5, 6);
MultiStepper steppers;

void setup() {
  motor1.setMaxSpeed(800);
  motor2.setMaxSpeed(800);
  steppers.addStepper(motor1);
  steppers.addStepper(motor2);
}

void loop() {
  long positions[2] = {1000, 500}; // target positions
  steppers.moveTo(positions);
  steppers.runSpeedToPosition(); // blocking, but coordinated
}
Note: MultiStepper does not support acceleration — it scales each motor’s speed so all reach their targets at the same time. For CNC applications needing full acceleration, control each motor independently with separate run() calls and synchronise at waypoints.
Using AccelStepper with 28BYJ-48
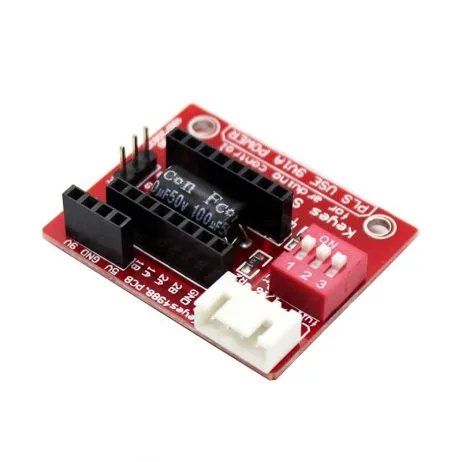
The 28BYJ-48 is a unipolar stepper motor driven via ULN2003 module, not a step+direction driver. AccelStepper supports this with the FULL4WIRE or HALF4WIRE interface:
// 28BYJ-48 via ULN2003 (pins IN1-IN4)
AccelStepper stepper(AccelStepper::HALF4WIRE, 8, 10, 9, 11);

void setup() {
  stepper.setMaxSpeed(500);
  stepper.setAcceleration(200);
  stepper.moveTo(2048); // ~1 revolution in half-step mode
}

void loop() {
  stepper.run();
}
The 28BYJ-48 has a gear ratio of 64:1 and 32 steps per revolution, giving 2048 steps/revolution in half-step mode. Maximum reliable speed is around 600–800 steps/s due to the motor’s small size and limited torque.
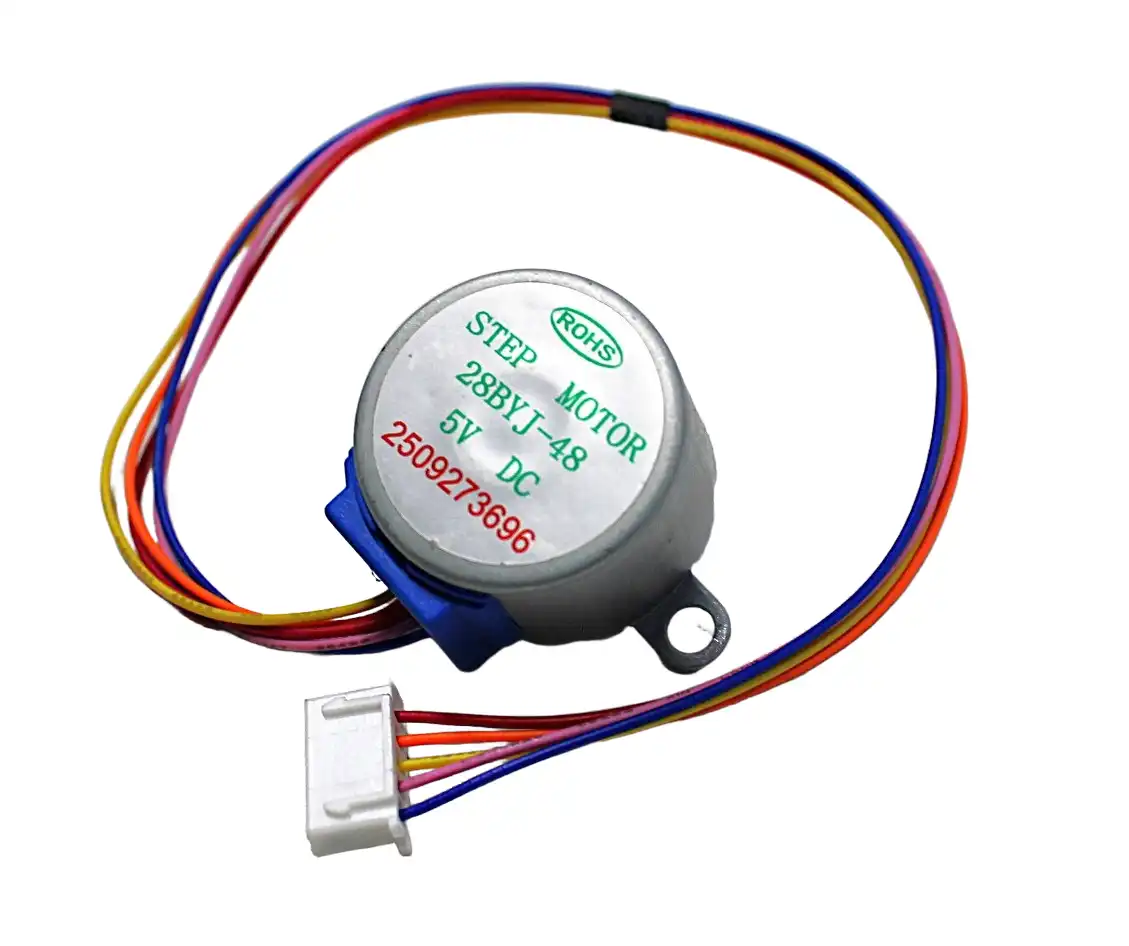
28BYJ-48 5V Stepper Motor
Budget-friendly 5V stepper motor with ULN2003 driver, perfect for learning AccelStepper basics before moving to NEMA17. Great for small angle-control projects.
Troubleshooting Missed Steps and Stalls
Motor vibrates but does not rotate
Usually means the acceleration is too high or max speed is above the pull-in rate. Reduce both values significantly and increase gradually. Also check motor coil wiring — if pairs are swapped, the motor cannot step properly.
Motor loses position over time
If steps are missed, the software position counter diverges from the physical position. First check if the current limit is set correctly — too low and the motor lacks torque. Then reduce max speed and check for mechanical binding. Adding a limit switch for periodic rehoming is the robust solution for critical applications.
Motor runs hot
Reduce the current limit on the A4988. Also enable microstepping — the higher step rate distributes power more evenly across the coils, reducing thermal stress. If possible, add a small 30mm fan over the driver heatsink.
AccelStepper suddenly slows or stops mid-move
Something in loop() is blocking the run() call. Look for delay(), Serial.println(), or sensor reads with blocking timeouts. Move print statements to a timed interval check and replace blocking sensor reads with non-blocking alternatives.
Project Ideas
- Motorised camera slider: NEMA17 on a GT2 belt system with AccelStepper gives smooth cinematic moves.
- Filament extruder tester: AccelStepper controls extrusion rate precisely for material characterisation.
- Telescope focuser: Battery-powered focuser with AccelStepper’s speed ramping prevents vibration during focus adjustments.
- Automatic blind controller: Geared motor + AccelStepper + limit switches creates a reliable window blind actuator.
- PCB drilling machine: Two-axis AccelStepper-controlled stage with homing on all four limit switches.
Frequently Asked Questions
Is AccelStepper compatible with the ESP32?
Yes. AccelStepper works on ESP32 without modification. However, because ESP32 is dual-core with FreeRTOS, consider running the stepper on a dedicated task pinned to Core 1 while Core 0 handles WiFi/Bluetooth. This eliminates latency from wireless stack interruptions.
What is the maximum speed AccelStepper can achieve?
On Arduino Uno (16 MHz), AccelStepper can deliver approximately 4000 steps per second maximum. On Arduino Mega (same MCU), similar. On ESP32 (240 MHz), it can easily exceed 20,000 steps/s. The motor itself is usually the limiting factor, not the library.
Can I use AccelStepper with a TMC2208 or TMC2209 driver?
Absolutely. TMC drivers use the same STEP/DIR interface as A4988. Set TMC to standalone mode (UART configuration not required for AccelStepper). Benefits: much quieter operation (StealthChop), more current and better thermal management, and StallGuard can replace limit switches in some applications.
How do I convert steps to millimetres for a leadscrew or belt drive?
For a leadscrew: steps/mm = (steps_per_rev * microstepping) / lead_mm. For a GT2 belt with 20-tooth pulley: steps/mm = (steps_per_rev * microstepping) / (20 * 2mm). NEMA17 at 1/16 microstep = 3200 steps/rev; GT2 20T = 40 mm/rev; so 3200/40 = 80 steps/mm.
AccelStepper vs Stepper library — which should I use?
Always use AccelStepper for real projects. The built-in Arduino Stepper library is blocking (it uses delay() internally) and has no acceleration support. AccelStepper is non-blocking, supports acceleration, multiple interface types, and is actively maintained.
Browse our complete selection of NEMA17 steppers, 28BYJ-48 motors, and A4988/TMC drivers at Zbotic Motors & Actuators. All products shipped with GST invoice across India.


Add comment