
Force Sensitive Resistors (FSRs) are thin, flexible sensors that change their electrical resistance in response to applied pressure or force. Unlike piezoelectric sensors that only detect changes in force, an FSR can measure sustained pressure—making it ideal for touch detection, weight measurement, human interface devices, and smart footwear. These sensors are incredibly popular among Indian makers for interactive installations, robotics gripper feedback, and healthcare applications like pressure ulcer prevention mats.
This in-depth guide walks you through everything: how FSRs work, wiring to Arduino, voltage divider design, calibration, code examples, and practical project ideas you can build today.
What Is a Force Sensitive Resistor?
A Force Sensitive Resistor (FSR) is a polymer thick-film (PTF) device whose resistance decreases as the force applied to its active sensing area increases. In its natural state (no force), an FSR has very high resistance—typically over 1MΩ, effectively open circuit. Under maximum rated force, resistance drops to a few hundred ohms.
FSRs are manufactured as flexible, thin (less than 0.5mm) laminated devices. They are not true precision force measurement instruments—accuracy is typically ±10–25%. However, they are inexpensive (₹80–₹500), flexible enough to embed in curved surfaces, and interface directly with Arduino analog inputs without needing an amplifier. For applications where relative force or touch presence matters more than precise measurement, FSRs are the ideal choice.
The most common FSRs in India come from Interlink Electronics (FSR 400 series) and TE Connectivity. Many budget variants are also available from Chinese manufacturers at significantly lower cost, though with less consistent specifications.
How FSR Sensors Work
FSRs use a conductive polymer principle. The sensing area consists of two layers:
- Conductive electrodes layer: Interdigitated (interleaved) electrodes printed on a polyester substrate
- Resistive semiconductor layer: A polymer film with conductive particles (typically carbon or graphite)
When no force is applied, the two layers barely touch, and resistance is very high. As force increases, more of the resistive layer makes contact with the electrodes, creating parallel conductive paths. More contact = lower resistance. This relationship is approximately:
Resistance ∝ 1/Force  (inverse relationship)

Approx values (Interlink FSR 402, 18mm disc):
  No force:      > 1,000,000 Ω (open circuit)
  100g (0.98N):  ~30,000 Ω
  500g (4.9N):   ~6,000 Ω
  1kg (9.8N):    ~3,000 Ω
  5kg (49N):     ~1,000 Ω
  10kg (98N):    ~500 Ω
The resistance vs. force relationship is logarithmic, not linear. This means FSRs are most sensitive at low forces and become less discriminating at higher forces. They work best in the 100g–10kg range for typical disc-type sensors.
Types and Sizes of FSR Sensors
By Shape
- Round/Disc FSR: Most common. Diameters from 7.5mm to 44mm (Interlink FSR 400, 402, 406). Suitable for button-like pressure detection, finger presses, seat occupancy.
- Square/Rectangle FSR: Interlink FSR 408 (43.7×43.7mm). Good for flat surface pressure mapping.
- Long/Strip FSR: Narrow strips (e.g. 2mm × 100mm). Used in keyboard sensing, grip detection on handles, medical compression bandages.
- Custom shapes: Manufacturers can produce FSRs in custom shapes for OEM applications.
By Force Range
- Gentle touch: 100g–1kg (FSR 400 series) — finger presses, pen pressure
- Medium: 1kg–10kg — grip sensing, occupancy detection
- High force: 10kg–100kg+ — industrial, foot pressure
Popular FSR Modules
Many FSR breakout boards include the voltage divider resistor onboard and a buffer op-amp, providing a stable 0–5V output directly readable by Arduino. These simplify wiring but cost more than raw FSR elements.
FSR Specifications and Characteristics
| Parameter | Typical Value | Notes |
|---|---|---|
| Force Range | 0.1N – 100N | Varies by model |
| Resistance Range | 100Ω – >1MΩ | Depends on applied force |
| Repeatability | ±2% (same session) | Better within a single use session |
| Hysteresis | ±10% | Different loading vs unloading paths |
| Accuracy | ±10–25% | Not for precision weighing |
| Response Time | <1ms | Very fast for dynamic sensing |
| Lifetime | >1 million actuations | At specified force range |
| Temperature Range | -30°C to +70°C | Resistance varies ±10% over range |
| Thickness | 0.3–0.5mm | Very thin, flexible |
Voltage Divider Circuit Design
An FSR is a variable resistor (not a voltage source), so you cannot connect it directly to an ADC. You need a voltage divider circuit with a fixed resistor to convert resistance variation into a voltage variation:
5V ── FSR ──┬── Analog Pin
            |
           R1 (fixed resistor)
            |
           GND

Vout = 5V × R1 / (R_FSR + R1)
Choosing the Right R1 Value
The choice of R1 determines the sensitivity range:
- R1 = 10kΩ: Best sensitivity at low forces (100g–2kg). Voltage spans most of the 0–5V range at light loads. Use for touch/tap detection.
- R1 = 47kΩ: Shifts sensitivity to very low force range, better for gentle touch applications.
- R1 = 1kΩ: Better for heavy loads (5kg–20kg). Compresses the output range at low forces but gives usable resolution at high force.
The general rule: choose R1 ≈ √(R_min × R_max) for the geometric mean. For a typical FSR with R ranging from 500Ω (max force) to 100kΩ (light touch), √(500 × 100000) ≈ 7kΩ. A standard 10kΩ resistor is a good choice for most applications.
Worked Example
R1 = 10kΩ, Vcc = 5V

No force    (R_FSR = 1MΩ):  Vout = 5V × 10k/(1M+10k) ≈ 0.05V  → ADC ≈ 10
Light touch (R_FSR = 30kΩ): Vout = 5V × 10k/(30k+10k) = 1.25V → ADC ≈ 256
500g load   (R_FSR = 6kΩ):  Vout = 5V × 10k/(6k+10k)  = 3.13V → ADC ≈ 640
5kg load    (R_FSR = 1kΩ):  Vout = 5V × 10k/(1k+10k)  = 4.55V → ADC ≈ 930
This shows good spread across the ADC range for typical usage.
Wiring FSR to Arduino
Basic Wiring Diagram
| Component | Connection |
|---|---|
| FSR Pin 1 | Arduino 5V |
| FSR Pin 2 | Arduino A0 + R1 (10kΩ) to GND |
| R1 (10kΩ) | Between FSR Pin 2 and GND |
FSRs are non-polarized (no polarity). Either terminal can connect to 5V or ground—just be consistent with your voltage divider orientation. If you swap them, a higher reading means less force instead of more.
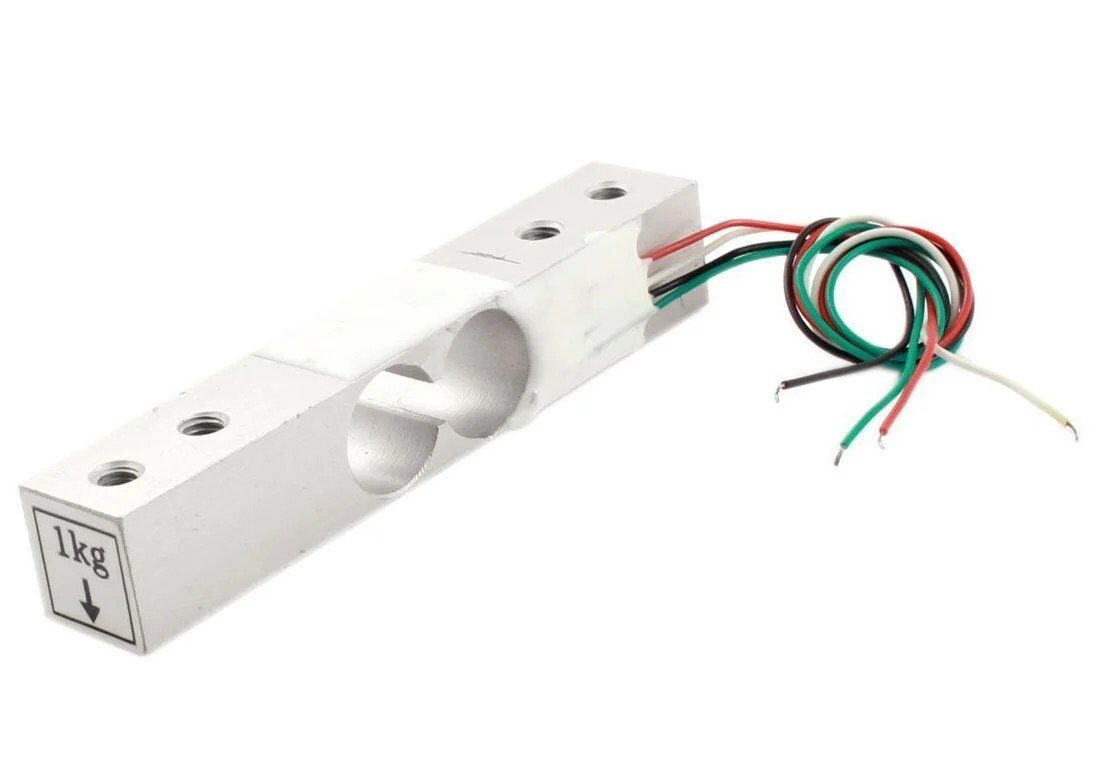
1Kg Load Cell – Electronic Weighing Scale Sensor
Need precision weight measurement? A load cell with HX711 gives ±1g accuracy vs FSR’s ±10–25%. Perfect for kitchen scales and laboratory use.
Arduino Code Examples
1. Basic FSR Reading and Serial Plot
const int fsrPin = A0;
const int R1 = 10000;  // 10kΩ pull-down resistor

void setup() {
  Serial.begin(9600);
  Serial.println("FSR Pressure Sensor Demo");
}

void loop() {
  int adcValue = analogRead(fsrPin);

  // Calculate FSR resistance
  float voltage = adcValue * (5.0 / 1023.0);
  float fsrResistance;

  if (adcValue == 0) {
    Serial.println("No pressure detected");
  } else {
    fsrResistance = R1 * (5.0 - voltage) / voltage;

    Serial.print("ADC: "); Serial.print(adcValue);
    Serial.print(" | Voltage: "); Serial.print(voltage, 2); Serial.print("V");
    Serial.print(" | FSR Resistance: "); Serial.print(fsrResistance, 0); Serial.println(" ohms");
  }

  delay(200);
}
2. Force Estimation in Grams
const int fsrPin = A0;
const int R1 = 10000;

// Calibration constants (adjust by weighing known objects)
const float A = 0.0001;  // FSR-specific constant

void setup() { Serial.begin(9600); }

float readForceGrams() {
  int adc = analogRead(fsrPin);
  if (adc  100000) {
    force_grams = 0;  // Open / no touch
  } else if (resistance < 600) {
    force_grams = 5000;  // Max range
  } else {
    // Linear interpolation in conductance domain
    force_grams = conductance * 1000000 * 120;  // Adjust 120 via calibration
  }

  return force_grams;
}

void loop() {
  float force = readForceGrams();
  Serial.print("Force: "); Serial.print(force, 0); Serial.println(" g");
  delay(300);
}
3. Touch Zone Detection (Multiple FSRs)
// 4-zone pressure mat with 4 FSRs
const int fsrPins[] = {A0, A1, A2, A3};
const char* zones[] = {"Front-Left", "Front-Right", "Back-Left", "Back-Right"};
const int threshold = 50;  // ADC threshold for "pressed"

void setup() { Serial.begin(9600); }

void loop() {
  bool anyPressed = false;

  for (int i = 0; i  threshold) {
      Serial.print(zones[i]); Serial.print(": ");
      Serial.print(val); Serial.print(" | ");
      anyPressed = true;
    }
  }

  if (anyPressed) Serial.println();
  delay(100);
}
4. Smart Doorbell with FSR
const int fsrPin = A0;
const int buzzerPin = 8;
const int pressThreshold = 200;  // Adjust for button firmness
bool wasPressed = false;

void setup() {
  pinMode(buzzerPin, OUTPUT);
  Serial.begin(9600);
}

void loop() {
  int fsrVal = analogRead(fsrPin);
  bool isPressed = (fsrVal > pressThreshold);

  // Detect press edge (not held)
  if (isPressed && !wasPressed) {
    Serial.println("DOORBELL PRESSED!");
    tone(buzzerPin, 880, 200);  // 880Hz for 200ms
    delay(200);
    tone(buzzerPin, 1100, 300);
  }

  wasPressed = isPressed;
  delay(20);
}
Calibration and Force Calculation
For applications where quantitative force measurement matters (not just presence/absence of touch), calibration is essential:
Step-by-Step Calibration Process
- Gather reference weights: Coins are convenient. A standard ₹10 coin weighs 7.74g. A stack of 10 = 77.4g reference.
- Record ADC values: Place each reference weight on the FSR sensing area, wait 2 seconds for settling, record the ADC value.
- Plot conductance vs force: Conductance (1/R_FSR) should be approximately linear with applied force. Use this linear relationship for conversion.
- Store calibration: Save the slope and intercept constants in your code.
- Recheck periodically: FSR readings drift slightly with temperature and age. Re-calibrate every few months for best accuracy.
Sample Calibration Table
| Applied Force | ADC Value (10kΩ divider) | FSR Resistance |
|---|---|---|
| None (0g) | 0–10 | >1MΩ |
| Gentle touch (~10g) | 30–60 | ~800kΩ |
| 100g | 140–180 | ~25–30kΩ |
| 500g | 550–650 | ~5–7kΩ |
| 1000g (1kg) | 750–820 | ~2–3kΩ |
| 5000g (5kg) | 920–960 | ~500–700Ω |
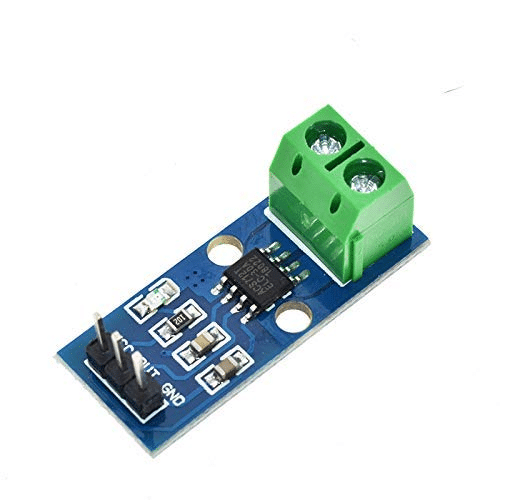
30A Range Current Sensor Module ACS712
Expand your sensing capabilities — pair FSR pressure sensing with current sensing to build comprehensive smart home and automation systems.
Project Ideas and Applications
1. Smart Doormat / Visitor Detector
Embed 2–4 FSR strips under a doormat to detect when someone stands on it. Connect to a NodeMCU for WiFi notification via Telegram or WhatsApp. Can distinguish between a person (weight >20kg pressing multiple zones) and a cat or package (smaller area, lighter weight).
2. Robotic Gripper Pressure Feedback
Mount FSR discs on robot gripper fingers to detect grip force. Arduino reads FSR and adjusts servo position to maintain a target grip force—firm enough to hold objects securely without crushing fragile items like eggs or fruit.
3. Bed/Chair Occupancy Sensor
Four FSRs under furniture legs detect occupancy. Useful in hospitals (patient out of bed alert), smart homes, and office meeting room booking systems. Integration with Home Assistant or MQTT makes this very powerful.
4. Musical Instrument Controller
Create a pressure-sensitive drum pad or MIDI controller. FSR reading maps to note velocity—harder press = louder note. Eight FSRs on a pad can create a velocity-sensitive drum kit for music production.
5. Balance Board / Posture Monitor
Four FSRs at the corners of a standing board map weight distribution. An OLED display shows center of pressure, helping with rehabilitation exercises or yoga pose correction.
6. Smart Packaging / Shipping Weight Check
Low-cost FSR-based weighing station for shipping departments. Not precision enough for billing, but useful for checking if a parcel is approximately the right weight before dispatch.
7. Anti-Theft Pressure Plate
An FSR under a valuable item triggers an alarm when the weight is removed. When someone lifts the item, the FSR reading drops sharply and an alert is triggered.
FSR vs Load Cell vs Piezo: Choosing Right
| Property | FSR | Load Cell | Piezo Sensor |
|---|---|---|---|
| Measures static force | Yes | Yes | No (dynamic only) |
| Accuracy | ±10–25% | ±0.05–0.5% | Relative (calibrated) |
| Cost | ₹80–500 | ₹200–2000 | ₹5–50 |
| Amplifier needed | No (just R divider) | Yes (HX711) | Optional |
| Flexibility | Very flexible | Rigid | Semi-flexible (disc) |
| Best for | Touch, presence, relative force | Precision weight | Vibration, knock, impact |
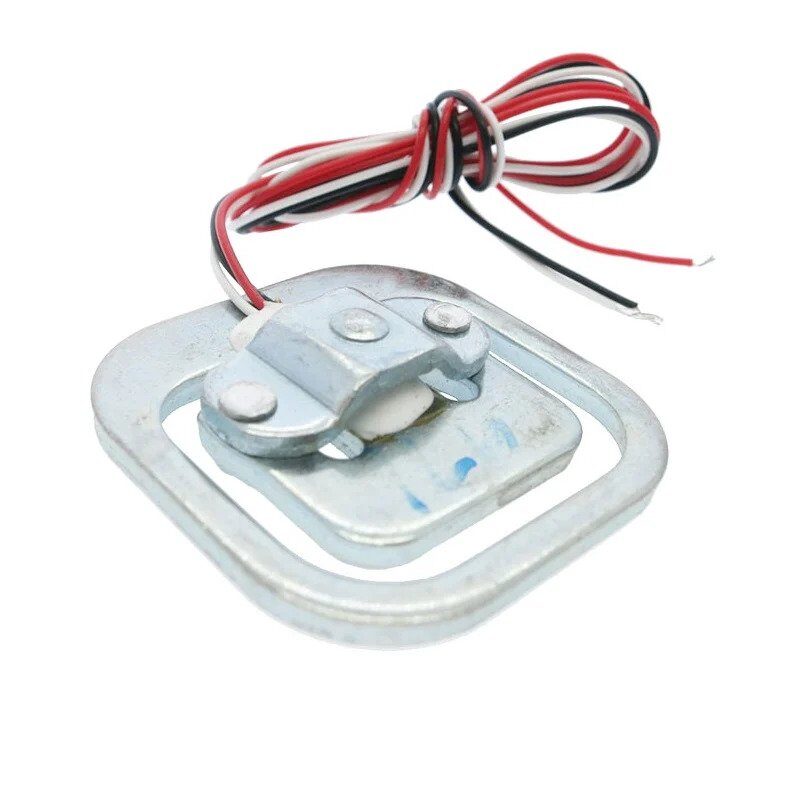
50kg Half-bridge Body Scale Load Cell Sensor
When FSR accuracy is not enough, upgrade to a load cell for precision body weight and industrial force measurement up to 50kg.
Tips and Common Mistakes
Pro Tips
- Distribute force evenly: FSRs measure force over their active area. Pointed/sharp objects concentrate force and give inconsistent readings. Use a small rigid disc (10mm acrylic or aluminium) over the FSR to distribute contact evenly.
- Avoid creep errors: FSR readings drift (creep) under sustained constant load. For sustained-load applications, take differential readings (load vs. no-load) rather than absolute values.
- Multiple readings average: Take 5–10 ADC readings and average them to reduce noise, especially at high resistance (low force) where electrical noise is proportionally larger.
- Protect from moisture: The polymer resistive layer is sensitive to humidity and sweat. Cover with a thin silicone sheet or clear plastic film if used in wet or body-contact applications.
- Zero offset: Always sample the “no force” baseline at startup and subtract it from all readings. This corrects for unit-to-unit variation and temperature effects.
Common Mistakes
- No pull-down resistor: Without R1, the FSR connects your ADC pin directly to 5V at all times when not pressed, and floats when pressed. Always use the voltage divider.
- Pressing on the tail: The flexible tail of the FSR is fragile. Apply force only on the circular active sensing area, never bend the tail sharply.
- Wrong R1 for force range: Using a 10kΩ resistor for a 0–50kg application gives terrible resolution at low forces. Choose R1 appropriate to your expected force range.
- Expecting precision: FSR is not a precision weighing sensor. If your application needs ±1% accuracy, use a load cell with HX711 amplifier instead.
Frequently Asked Questions
Only approximately. A single FSR disc under a foot can detect presence vs. absence, and roughly estimate weight distribution, but the ±10–25% accuracy is not suitable for a medical or fitness scale. For a bathroom scale project, use a 50kg half-bridge load cell with HX711 amplifier for ±100g accuracy.
Each FSR needs its own voltage divider (R1) and connects to a separate analog pin. Arduino Uno has 6 analog pins (A0–A5), so you can read up to 6 FSRs simultaneously. For more FSRs, use a multiplexer IC like the 4051 or 4067, or upgrade to Arduino Mega with 16 analog inputs.
10kΩ works well for most applications covering 50g–5kg force range. For very light touch (under 50g), try 47kΩ to shift sensitivity lower. For heavier loads (5–50kg), use 1kΩ–4.7kΩ to maintain useful voltage range at high force. Always verify with your specific FSR’s datasheet.
With careful calibration against known weights, you can get ±15% force accuracy in Newtons, which is acceptable for many educational and hobby applications. The resistance-to-force relationship follows an inverse power law that can be linearised by working in conductance (1/R) space. Interlink Electronics provides detailed conductance vs. force curves in their datasheets for accurate conversion.
No. A tactile switch is binary (on/off) with a snap action. An FSR provides a continuous analog output proportional to force—you can detect gradations of pressure. However, for simple button detection (pressed or not), you can threshold the FSR reading, effectively using it as a soft analog button that activates at a configurable force level.
Yes. Simply replace the 5V supply with 3.3V. The voltage divider output will scale proportionally (0–3.3V instead of 0–5V). The ADC reference voltage of your microcontroller must match—most ESP32 and Pi ADCs use 3.3V reference. The sensitivity remains the same; only the output voltage range changes.
Conclusion
Force Sensitive Resistors are a gateway component for anyone interested in human-machine interaction, robotics, and smart physical computing. Their extreme simplicity—two wires, one resistor, one analog input—makes them accessible to absolute beginners, while their versatility in multi-sensor arrays, pressure mapping, and force feedback systems keeps even advanced makers engaged.
The key to success with FSRs lies in understanding their limitations: they are not precision instruments. Use them for touch detection, presence sensing, relative force comparison, and user interface inputs. For precision weighing, trust a load cell. For vibration and impact detection, reach for a piezo sensor. With the right sensor for the right job, your projects will be more reliable and your frustration much lower.
Build Your Pressure Sensing Project Today
Browse Zbotic’s full sensor catalogue including load cells, FSRs, and measurement modules.


Add comment