
A gyroscope sensor is the electronic heart of every modern drone, stabilized camera gimbal, self-balancing robot, and flight controller. Without gyroscopes, a drone would instantly flip and crash within milliseconds of takeoff. In this comprehensive guide, we explain how gyroscope sensors work, the difference between MEMS and optical gyroscopes, the best gyroscope modules available for makers in India, and how to choose the right one for your drone or robotics project.
What Is a Gyroscope Sensor?
A gyroscope is a sensor that measures angular velocity — how fast an object is rotating around a given axis. The output is typically measured in degrees per second (°/s) or sometimes radians per second (rad/s). By integrating the angular velocity over time, you can determine the current angular position (tilt angle) of the device.
In practical terms:
- If a drone tilts 30° to the left in 0.1 seconds, the gyroscope measures -300°/s on the roll axis
- The flight controller reads this and commands the motors to compensate — the entire PID control loop runs hundreds of times per second
Modern consumer drones and flight controllers use MEMS (Micro-Electro-Mechanical Systems) gyroscopes — microscopic mechanical structures etched onto silicon chips, combined with signal processing electronics. These replaced the older spinning-mass gyroscopes and optical (fiber optic) gyroscopes which were too large, fragile, and expensive for consumer applications.
How MEMS Gyroscopes Work
A MEMS gyroscope operates on the Coriolis Effect — a physical phenomenon where a mass moving in a rotating reference frame experiences a force perpendicular to its motion. Here’s the step-by-step process inside a MEMS gyroscope chip:
- Drive vibration: A tiny mass (proof mass) is kept vibrating at a constant frequency along one axis using electrostatic actuation
- Coriolis force: When the chip rotates, the Coriolis force causes the vibrating mass to deflect perpendicular to both the vibration axis and the rotation axis
- Capacitive sensing: The deflection is measured by changes in capacitance between the proof mass and fixed electrodes
- Signal processing: On-chip electronics convert the capacitance change to a voltage proportional to angular velocity
- Digital output: An ADC and I2C/SPI interface output the angular velocity data to the microcontroller
This entire mechanism fits inside a package smaller than 3mm × 3mm × 1mm — a remarkable achievement of microfabrication technology. Common chips used in drone flight controllers include the ICM-42688-P, ICM-20689, and MPU-6000 from InvenSense/TDK.
Key Gyroscope Parameters Explained
Understanding these specifications will help you choose the right gyroscope for your application:
Full-Scale Range (FSR)
The maximum angular velocity the gyroscope can measure. Common options: ±250°/s, ±500°/s, ±1000°/s, ±2000°/s. Drones need ±2000°/s because during aggressive maneuvers (flips, rolls), the angular velocity can exceed 1000°/s. For a self-balancing robot that moves slowly, ±250°/s gives much better resolution.
Sensitivity (Scale Factor)
The output voltage (or digital count) per degree per second. At ±250°/s range with a 16-bit ADC, sensitivity = 131 LSB/(°/s). Higher sensitivity = better resolution at low angular rates but smaller maximum range. Lower sensitivity = detects faster rotations.
Zero-Rate Output (ZRO) / Bias
The output when no rotation is present. Ideally this should be zero, but in practice it has a small offset (bias) that causes apparent rotation even when stationary. This is the source of gyro drift. ZRO is specified in °/s and is temperature-dependent.
Noise Density
The RMS noise per √Hz bandwidth. A lower number means cleaner readings. Typical MEMS gyros: 0.005–0.02 °/s/√Hz. Multiply by √(sample rate) to get approximate noise floor at your sampling frequency.
Sample Rate
How fast the gyroscope outputs new data. Modern drone-grade gyros support up to 32kHz internal sampling, outputted at 1–8kHz to the flight controller. DIY projects rarely need more than 1kHz.
Gyroscope vs Accelerometer vs IMU
| Sensor | Measures | Output Unit | Weakness |
|---|---|---|---|
| Gyroscope | Angular velocity | °/s | Drift over time |
| Accelerometer | Linear acceleration + gravity | m/s² or g | Noisy during vibration |
| Magnetometer | Magnetic field (heading) | µT or Gauss | Susceptible to interference |
| IMU (6-DOF) | Gyro + Accelerometer | Both | No heading reference |
| AHRS (9-DOF) | Gyro + Accel + Mag | All three | Cost, magnetometer noise |
For drones: A 6-DOF IMU (gyro + accelerometer) is the minimum for stable flight. Adding a magnetometer (9-DOF) enables absolute heading reference for GPS-assisted flight and auto-heading modes.
Best Gyroscope Modules for Drones & Robotics in India
1. MPU-6050 — The Maker’s Favourite
The InvenSense MPU-6050 combines a 3-axis gyroscope (±250/500/1000/2000°/s) with a 3-axis accelerometer (±2/4/8/16g) in a single 4mm × 4mm package. Communicates via I2C. It has an onboard DMP (Digital Motion Processor) that can compute quaternion orientation without loading the main CPU. At its price point (typically ₹80–150 for a GY-521 breakout board), nothing beats it for DIY drones and robotics.
Best for: Beginner to intermediate drone builds, self-balancing robots, gimbal stabilizers
2. MPU-9250 — 9-DOF with Magnetometer
The MPU-9250 adds an AK8963 magnetometer to the MPU-6050’s gyro/accelerometer combination, giving you 9 degrees of freedom in one chip. Supports both I2C and SPI (up to 1MHz I2C, 1MHz SPI). The magnetometer enables AHRS (Attitude and Heading Reference System) computation using Mahony or Madgwick filter algorithms.
Best for: GPS drones, compass-assisted navigation, heading-hold modes
3. ICM-42688-P — High-Performance Drone Grade
Used in professional flight controllers (BetaFlight, ArduPilot builds). Features a 32kHz internal sample rate, ultra-low noise floor (0.0028°/s/√Hz), programmable FIFO, and SPI interface only. The ICM-42688-P represents the current gold standard for freestyle FPV and racing drones.
Best for: High-performance racing drones, professional flight controllers
4. BMI088 — Vibration-Resistant
Bosch’s BMI088 is specifically designed for drone applications with enhanced vibration robustness. Its synchronized gyro and accelerometer minimize aliasing errors from motor vibration. Used in the Pixhawk 4 and other professional autopilots.
Best for: Agricultural drones, heavy-lift platforms where vibration suppression matters
5. L3GD20H — ST’s Gyroscope
STMicroelectronics’ 3-axis MEMS gyroscope with ±250/500/2000°/s range and SPI/I2C interface. Used on the Arduino Mega IMU Shield and various robotics shields. Available on GY-L3GD20H breakout boards.
Best for: Projects using STM32 microcontrollers or Arduino shields
MPU-6050 Wiring & Arduino Code
The MPU-6050 (GY-521 breakout board) is the most accessible gyroscope module for beginners in India.
Wiring (I2C)
- VCC → Arduino 3.3V (module has onboard 3.3V regulator, can also use 5V)
- GND → Arduino GND
- SCL → Arduino A5 (SCL)
- SDA → Arduino A4 (SDA)
- INT → Arduino D2 (optional, for interrupt-driven reads)
- AD0 → GND (sets I2C address to 0x68; pull HIGH for 0x69)
Install the MPU6050 library by Electronic Cats in Arduino IDE.
#include <Wire.h>
#include <MPU6050.h>

MPU6050 mpu;

void setup() {
  Serial.begin(115200);
  Wire.begin();
  mpu.initialize();

  if (!mpu.testConnection()) {
    Serial.println("MPU6050 not found!");
    while(1);
  }
  Serial.println("MPU6050 Ready");

  // Set gyro range: 0=±250°/s, 1=±500, 2=±1000, 3=±2000
  mpu.setFullScaleGyroRange(MPU6050_GYRO_FS_250);
  // Set accel range: 0=±2g, 1=±4g, 2=±8g, 3=±16g
  mpu.setFullScaleAccelRange(MPU6050_ACCEL_FS_2);
}

void loop() {
  int16_t ax, ay, az; // Raw accelerometer values
  int16_t gx, gy, gz; // Raw gyroscope values

  mpu.getMotion6(&ax, &ay, &az, &gx, &gy, &gz);

  // Convert raw gyro to °/s (at ±250°/s range: scale = 131 LSB/°/s)
  float gyroX = gx / 131.0;
  float gyroY = gy / 131.0;
  float gyroZ = gz / 131.0;

  // Convert raw accel to g (at ±2g range: scale = 16384 LSB/g)
  float accelX = ax / 16384.0;
  float accelY = ay / 16384.0;
  float accelZ = az / 16384.0;

  Serial.print("Gyro (°/s): ");
  Serial.print(gyroX); Serial.print(", ");
  Serial.print(gyroY); Serial.print(", ");
  Serial.println(gyroZ);

  Serial.print("Accel (g): ");
  Serial.print(accelX); Serial.print(", ");
  Serial.print(accelY); Serial.print(", ");
  Serial.println(accelZ);

  delay(100);
}
Understanding Gyro Drift & Sensor Fusion
Gyro drift is the most significant challenge with MEMS gyroscopes. Even when stationary, the gyroscope output is never exactly zero — there is always a small bias offset. When you integrate this bias over time to get angle, the error accumulates. Over 10 seconds, a gyro with 0.1°/s bias will show 1° of drift. Over 1 minute: 6°.
The solution is sensor fusion — combining the gyroscope with an accelerometer (and optionally magnetometer). The complementary filter or Kalman filter merges the two sources:
- Gyroscope: Fast, accurate for short periods, drifts over time
- Accelerometer: Slow, noisy (especially with vibration), but gives absolute angle reference via gravity
- Fusion: Use the gyro for fast dynamics, use the accelerometer to correct drift over time
// Simple Complementary Filter for Roll Angle
float alpha = 0.98; // Weight for gyro (high = trust gyro more)
float roll = 0.0;
unsigned long lastTime = 0;

void loop() {
  unsigned long now = millis();
  float dt = (now - lastTime) / 1000.0; // seconds
  lastTime = now;

  // Read sensor values (from MPU-6050)
  // accelAngle: angle from accelerometer (via atan2)
  // gyroRate: angular velocity from gyroscope in °/s

  float accelAngle = atan2(accelY, accelZ) * 180.0 / PI;

  // Complementary filter
  roll = alpha * (roll + gyroX * dt) + (1.0 - alpha) * accelAngle;

  Serial.print("Roll: "); Serial.println(roll);
  delay(10);
}
For better performance, the Madgwick filter (open source, computationally efficient) is widely used in flight controllers. Libraries like MadgwickAHRS are available for Arduino.
How Flight Controllers Use Gyroscopes
Modern flight controllers like BetaFlight (F4, F7 boards) and ArduPilot use the gyroscope as follows:
- High-speed sampling: Gyro data sampled at 8–32kHz to capture fast motor-induced vibrations
- Filtering: Notch filters, low-pass filters remove motor noise while preserving flight dynamics
- PID control: Gyro rate data feeds into the PID controller. The P term reacts to current error, D term dampens oscillation, I term corrects sustained error
- Attitude estimation: Sensor fusion (gyro + accelerometer ± barometer ± GPS) estimates the drone’s 3D orientation
- Motor mixing: PID outputs are mixed into individual motor speed commands to correct the drone’s attitude
The entire loop runs at 1–8kHz on an F4 processor (168MHz). This is why gyroscope quality, noise performance, and interface speed matter so much for flight controller performance.
Applications Beyond Drones
Gyroscope sensors are used in many more applications than just drones:
- Camera Gimbals: 3-axis motorized stabilizers use gyros to detect and compensate for camera shake
- Self-Balancing Robots: Segway-style robots use gyro + accelerometer to maintain upright balance via PID control
- VR/AR Headsets: Track head orientation for immersive experiences
- Automotive: Electronic Stability Control (ESC) systems use yaw rate gyros
- Smartphones: Screen rotation, gaming input, camera OIS (Optical Image Stabilization)
- Industrial robots: Joint angle tracking in robotic arms
Buying Guide for India Makers
When buying a gyroscope module in India, consider:
| Use Case | Recommended Module | Approx. India Price |
|---|---|---|
| Arduino beginner / student projects | MPU-6050 (GY-521) | ₹80–150 |
| Self-balancing robot | MPU-6050 or MPU-6886 | ₹100–200 |
| DIY drone / quadcopter | MPU-6000 / ICM-20602 | On F4/F7 FC: ₹1500+ |
| GPS / compass drone | MPU-9250 (GY-91) | ₹250–400 |
| High-performance racing drone | ICM-42688-P on FC | ₹2500–5000 (FC) |
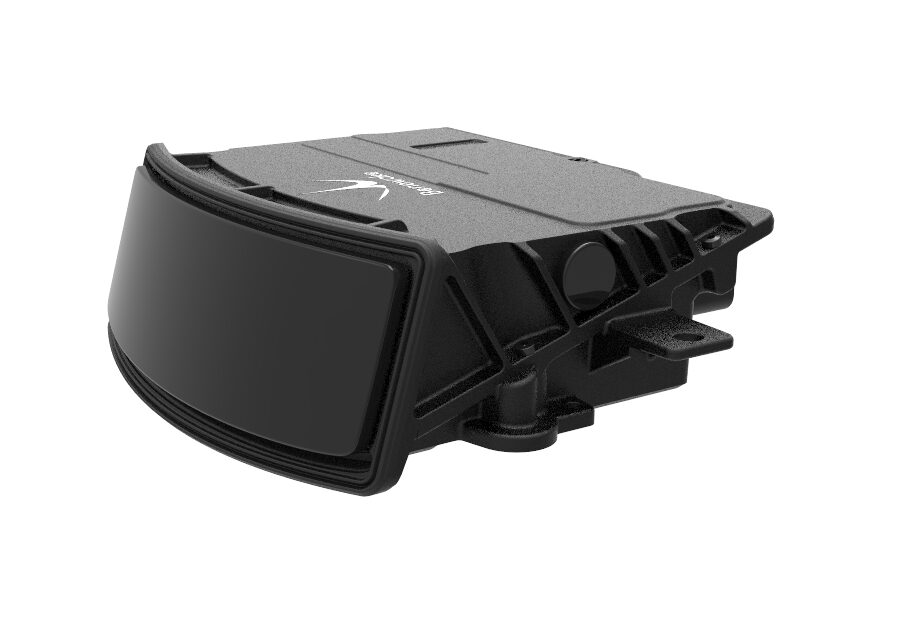
Benewake AD2-S-X3 High-Performance LiDAR
Combine gyroscope orientation data with LiDAR for precise drone positioning and obstacle avoidance — the foundation of autonomous flight systems.
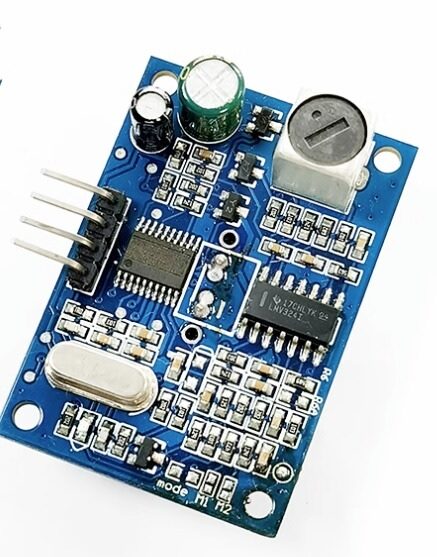
JSN-SR04T Waterproof Ultrasonic Rangefinder
Add altitude hold to your drone project — ultrasonic rangefinders work great for low-altitude hover stabilization when combined with gyro/IMU data.
Frequently Asked Questions
Yes! Many successful DIY drones run on flight controllers with the MPU-6050 or equivalent. The key is good motor damping (anti-vibration mounts), proper PID tuning, and software filtering. Drones like those running BetaFlight on F4 boards with MPU-6000 perform excellently for freestyle and sport flying.
DOF (Degrees of Freedom) refers to the number of axes being measured. A 6-DOF IMU has a 3-axis gyroscope + 3-axis accelerometer. A 9-DOF IMU adds a 3-axis magnetometer. The magnetometer provides a compass heading reference, which is essential for GPS-stabilized drones and autonomous navigation.
Use a complementary filter or Madgwick/Mahony filter to fuse gyroscope and accelerometer data. Calibrate the gyro bias at startup (average readings over 2–3 seconds while stationary). Keep the sensor away from heat sources (temperature changes cause bias shifts). For long-duration applications, consider a temperature-compensated IMU or periodic recalibration.
For DIY and educational projects, absolutely yes. The MPU-6050 is no longer recommended for high-performance racing drones (the ICM-42688-P is far better for that use case), but for self-balancing robots, Arduino projects, gimbals, and learning IMU programming, it remains excellent value at under ₹150.
For a simple wheeled robot going straight, not necessarily. But for a robot that needs to maintain heading, make precise turns, or operate on uneven terrain, a gyroscope significantly improves navigation accuracy. It’s also essential for any robot that balances (segway-type) or for robotic arms where joint angle tracking is needed.
Conclusion
Understanding gyroscope sensors is fundamental to building drones, robots, stabilizers, and any project that needs to track or control orientation. MEMS gyroscopes have made high-quality motion sensing affordable — the same technology used in premium flight controllers is accessible to Indian makers for just a few hundred rupees in the form of MPU-6050 breakout boards.
The key takeaways: gyroscopes measure rotation speed (not angle directly), they drift over time and must be fused with accelerometer data, the MPU-6050 is your best starting point for DIY projects, and for drone applications always consider the gyro sample rate and noise characteristics relative to your flight controller’s loop frequency.
Shop Gyroscope & IMU Modules at Zbotic
Find all the sensors, modules, and components you need for your drone and robotics projects — quality parts at India’s best prices.


Add comment