
Table of Contents
- Why Build a 3D Printer Enclosure?
- Enclosure Types and Frame Materials
- Sizing Your Enclosure
- Panel Materials for Walls and Doors
- Temperature Control and Heating
- Ventilation and Fume Filtration
- Fire Safety Considerations
- Wiring and Electronics
- Sourcing Materials in India
- Step-by-Step Build Overview
- Frequently Asked Questions
Building an enclosure for your 3D printer is one of the most impactful upgrades you can make — particularly if you print engineering materials like ABS, ASA, Nylon (PA), or Polycarbonate. These materials warp severely when exposed to uncontrolled ambient air temperatures and air currents, making a reliable enclosure not just a convenience but a functional necessity.
Beyond material compatibility, an enclosure also controls the fumes and VOCs (Volatile Organic Compounds) generated during printing. In India’s typically smaller home and office spaces, this safety aspect is increasingly important. This comprehensive guide walks you through designing, building, and optimising a DIY 3D printer enclosure — from selecting frame materials to implementing temperature regulation and active fume filtration.
Why Build a 3D Printer Enclosure?
1. Material Benefits: Enabling Engineering Filaments
The most technically important reason for an enclosure is controlling the thermal environment around your print. ABS, ASA, and Nylon all have high glass transition temperatures (Tg) and significant thermal contraction during cooling. When a hot printed layer cools unevenly — because part of it faces a cold draft and another part faces the ambient room air — differential contraction causes warping and layer delamination.
An enclosure raises the ambient temperature inside to 40–60°C, dramatically slowing the cooling rate of printed layers. The result: ABS, ASA, and Nylon print with virtually no warping, strong inter-layer adhesion, and consistent dimensional accuracy.
2. Consistency for PLA and PETG
Even for PLA and PETG, an enclosure eliminates the variability caused by air conditioning vents, ceiling fans, and open windows — common in Indian households and offices. Consistent ambient temperature means more predictable first layer adhesion, fewer random failures, and better surface consistency across long prints.
3. Fume and Particle Control
All FDM printing releases ultrafine particles (UFPs) and VOCs. ABS printing in particular releases styrene — a potential health concern with prolonged exposure. An enclosure with a filtered exhaust system traps these particles and either filters them with HEPA + activated carbon or routes them outside.
4. Noise Reduction
A well-built enclosure with sound-dampening material (foam lining) can reduce printer noise by 10–20 dB — meaningful if your printer runs near a workspace or bedroom.
5. Dust and Pet Hair Protection
In Indian homes, dust ingress can clog cooling fans and affect filament quality. An enclosure keeps the print environment clean between print sessions.
Enclosure Types and Frame Materials
Option 1: IKEA Lack Table Stack (Lack Enclosure)
The IKEA Lack table enclosure is the most popular DIY enclosure among Ender 3, Ender 3 Pro, and similar printer users worldwide. Three IKEA Lack tables (two for the sides, one for the top) are stacked with 3D-printed corner brackets to create a simple enclosure. The tables’ hollow cores provide some insulation.
Pros: Inexpensive, no cutting required, widely documented
Cons: MDF construction — not ideal for high temperatures (60°C+), limited sealing, no built-in ventilation system
Best for: ABS printing at moderate temperatures, budget-conscious builds
Option 2: Aluminium Profile (2020/3030) Frame
The most versatile and professional approach. 2020 or 3030 aluminium extrusion profiles are bolted together using T-nuts and corner brackets, creating a rigid, reconfigurable frame. This is the same approach used by commercial printer manufacturers and the Voron printer community.
Pros: Extremely rigid, fully customisable dimensions, panels easily attach with T-slot accessories, expandable
Cons: More planning required, higher cost than IKEA approach, some cutting of profiles needed
Best for: Serious builders wanting a permanent, high-performance enclosure
Option 3: Wooden Frame (MDF or Plywood)
A custom wooden box built from 12–18mm MDF or plywood is inexpensive and easy to work with using standard tools available in India. Line the interior with aluminium foil tape for heat reflection and fire resistance.
Pros: Cheap, abundant materials, good insulation properties
Cons: Fire risk if not properly designed (must use fire retardant lining), heavy, not adjustable
Best for: Makers with woodworking tools and a fixed printer footprint
Option 4: Commercial Enclosure (Modified)
Several commercial enclosures are available in India (foldable fabric-frame types, rigid plastic types). These can be modified with added HEPA filters, temperature sensors, and heating elements to improve performance.
Pros: Fast setup, no building required
Cons: Fabric types don’t retain heat well, limited modification possibilities, often poor seal
Best for: Temporary solution or starting point for future upgrades
Sizing Your Enclosure
Getting the enclosure dimensions right is critical. Too small and you cannot access the printer properly; too large and heating the interior to target temperature consumes excessive energy and time.
Interior Clearance Guidelines
- Sides: Add 100–150mm on each side of the printer’s footprint for panel clearance and wiring access
- Front: Add 200–300mm for filament spool clearance (if spool is inside) or 100mm minimum for door swing
- Top: Add 100–200mm above the printer’s maximum Z height for filament path clearance
- Bottom: 50–100mm if you plan to mount electronics below; otherwise the printer can sit on the enclosure floor
Example Sizing: Ender 3
The Ender 3 has a footprint of approximately 440×470mm and height of ~540mm. A practical enclosure for the Ender 3 is:
- Interior width: 650mm
- Interior depth: 600mm
- Interior height: 700mm
This provides enough room for the printer, filament spool on top of the gantry, and comfortable access through a front-mounted door.
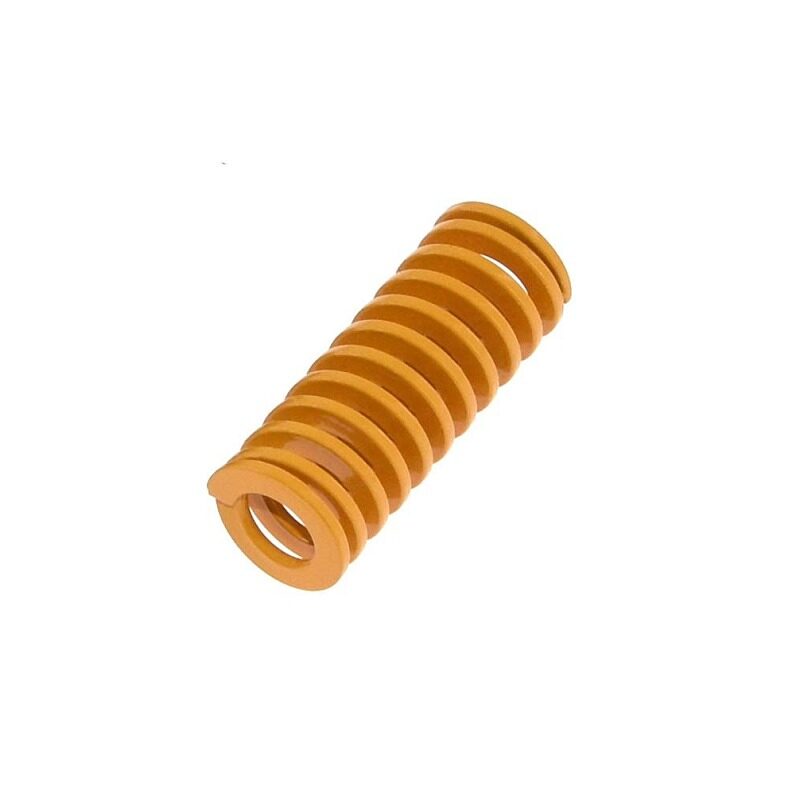
3D Printer Parts Spring for Heated Bed MK3 CR-10 Hotbed
Levelling springs for heated beds on MK3, CR-10, and similar printers. Inside an enclosure, bed levelling springs can soften with heat — stiffer replacement springs maintain consistent bed level at elevated chamber temperatures.
Panel Materials for Walls and Doors
Acrylic (PMMA) Panels
Clear acrylic is the most popular choice for enclosure panels. It is readily available in India from acrylic sheet suppliers (3–5mm thickness is standard), can be laser-cut or scored-and-snapped, and provides excellent visibility of prints in progress.
Consideration: Standard acrylic begins to soften at 80–90°C — well above typical enclosure temperatures (40–60°C), so it is safe. However, avoid using acrylic within 50mm of the heated bed or hotend housing.
Polycarbonate (PC) Panels
Polycarbonate has a much higher heat tolerance than acrylic (softens at ~130°C) and is impact-resistant. More expensive and harder to work with (requires specific cutting methods) but the better long-term choice for enclosures that reach 60°C+ regularly.
Foam Core Board
For non-viewing panels (sides and back), foam core board with an outer aluminium foil laminate provides excellent insulation at very low cost. Popular in the Indian maker community as a quick enclosure material. Not suitable for panels near heat sources.
Tempered Glass
Some makers use tempered glass for the door panel — heavy but provides excellent visibility and fire resistance. Expensive but adds a premium look to the build.
Temperature Control and Heating
For serious engineering material printing (ABS, ASA, Nylon), you need to actively raise the enclosure temperature to 40–60°C. Here is how to approach this:
Passive Heating (Printer Waste Heat)
The heated bed is a significant heat source — most printers’ heated beds draw 100–300W. In a well-insulated enclosure, the heated bed alone can raise chamber temperature to 35–45°C without any additional heating. This is often sufficient for ABS with good success rates.
Active Heating Options
1. Small Space Heater (fan heater): A compact 200–500W fan heater inside or attached to the enclosure raises temperature quickly and uniformly. Use a PID temperature controller and an NTC thermistor mounted inside the chamber for closed-loop control.
2. PTC Ceramic Heater Element: Safer than traditional coil heaters — PTC elements self-limit their temperature, reducing fire risk. 100–300W PTC heaters are available from electronics suppliers and work well as chamber heaters.
3. Peltier Heat Pump: Can both heat and cool the chamber — useful in hot Indian summers where you need to warm the chamber for ABS but don’t want overheating. More complex to implement but provides precise temperature control.
Temperature Regulation
Always use a dedicated temperature controller for chamber heating — never run a heater unregulated inside an enclosure. A REX-C100 or similar PID controller paired with an SSR (Solid State Relay) and a 10k NTC thermistor provides safe, precise chamber temperature control. Target temperatures:
- ABS: 40–50°C chamber
- ASA: 45–55°C chamber
- Nylon (PA6): 45–55°C chamber
- PC (Polycarbonate): 55–65°C chamber
- PLA: No heating needed — actually reduce to room temperature for best PLA results
Important: If you heat the chamber, your printer’s stepper motor drivers and electronics may overheat. Most common solutions:
- Mount the printer’s control board (electronics) outside the enclosure
- Route stepper motor cables through small sealed ports to a control box outside
- Use TMC stepper drivers (which generate less heat) and ensure good heatsinking
Ventilation and Fume Filtration
A proper ventilation system is arguably as important as heating control — especially for ABS, which releases styrene during printing. Two approaches are standard:
External Exhaust (Ducted Ventilation)
Route enclosure air outside through a flexible duct hose (like HVAC ducting). A 12V or 24V axial fan (80–120mm) creates negative pressure inside the enclosure, pulling fumes through the duct and out through a window or wall penetration.
Pros: Simple, effective, removes all fumes from living space
Cons: Requires a window or wall penetration; in humid Indian monsoon conditions, external air can introduce moisture
Active Carbon + HEPA Filtration (Recirculating)
A recirculating system pulls enclosure air through a filter media stack — typically:
- Pre-filter (captures large particles and filament strands)
- HEPA filter (captures ultrafine particles down to 0.3 microns)
- Activated carbon filter (absorbs VOCs and odours)
Filtered air is returned to the enclosure. No external duct required — ideal for apartments.
Pros: Works in any space, no window penetration needed
Cons: Filter replacement required regularly; activated carbon saturates over time
Combined Approach
Many serious makers use both: a carbon/HEPA filter for everyday operation and a switchable exhaust duct for ABS printing sessions. The exhaust duct provides maximum airflow during high-fume printing; the filter system handles post-print purge cycles.
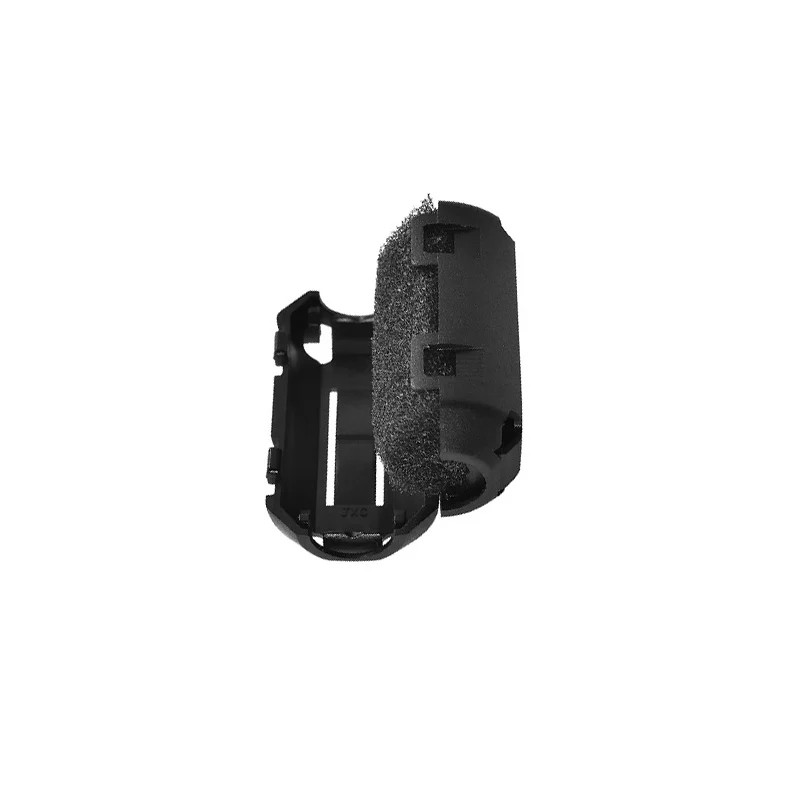
ABS PLA PETG 1.75mm Filament Filter Cleaner – Dust Removal Block
Filament cleaner and dust filter for 1.75mm filaments. Inside an enclosure where dust is trapped, this inline filament filter ensures debris does not enter your hotend — protecting the nozzle and extruder mechanism.
Fire Safety Considerations
A 3D printer enclosure concentrates heat in a confined space with electrical components and flammable materials (filament, printed parts). Fire safety is non-negotiable:
Essential Safety Features
- Smoke Detector: Mount a smoke/heat detector inside or directly above the enclosure. Test it regularly.
- Fire Suppression: Many serious makers mount a small Amerex or similar fire suppression canister that automatically activates when an internal temperature threshold is exceeded.
- Automatic Power Cutoff: Wire the enclosure through a smart plug or relay that cuts all power if the smoke detector triggers.
- Non-flammable Lining: Line interior surfaces with aluminium foil tape or use fire-resistant panels. Avoid foam insulation directly adjacent to heat sources.
- Thermal Runaway Firmware: Ensure your printer runs Marlin with THERMAL_RUNAWAY_PROTECTION enabled — this prevents heater runaway caused by failed thermistors.
- Never Leave Unattended: Especially during ABS printing in an enclosure. Monitor via webcam (OctoPrint, Obico, or Bambu’s built-in camera) if you must leave the room.
Electrical Considerations
- All wiring inside the enclosure must be rated for the expected temperatures
- Use silicone-insulated wire (rated 150–200°C) for any runs near heated components
- Keep mains voltage wiring (bed heater, PSU) away from the enclosure interior — only low-voltage DC wiring should be inside
- Install a quality MCB (Miniature Circuit Breaker) on the printer’s power circuit
Wiring and Electronics
Routing Cables Through the Enclosure
If your printer’s control board is mounted outside the enclosure (recommended for heat management), you need to route motor cables, thermistor wires, endstop cables, and heater wires through the enclosure wall. Use:
- Rubber cable grommets to prevent wires chafing against panel edges
- Ferrite cores on motor cables to reduce electrical interference
- Cable length extensions rated for the ambient temperature inside the enclosure
Lighting
LED light strips (12V or 24V) mounted inside the enclosure provide excellent visibility for monitoring prints. Use LED strips rated for 50°C+ if placing them inside a heated enclosure.
Webcam / Monitoring
A small USB or Wi-Fi webcam mounted inside the enclosure enables remote monitoring. Popular setups include OctoPrint (Raspberry Pi-based) or OrcaSlicer’s built-in network printing and camera monitoring features. Keep the camera away from direct hot air flows.
Sourcing Materials in India
One of the great advantages of building an enclosure in India is that most materials are readily available locally:
- Aluminium profiles (2020/3030): Available from industrial suppliers on IndiaMART, Amazon India, and local aluminium dealers in most cities
- Acrylic panels: Acrylic sheet suppliers in most cities; can be laser-cut at local laser cutting shops (very affordable in India)
- T-nuts and corner brackets: Online (Amazon, Robu, Zbotic) or from local aluminium profile suppliers
- PID temperature controllers (REX-C100, etc.): Electronics distributors in SP Road (Bangalore), Lamington Road (Mumbai), Nehru Place (Delhi), or online
- NTC thermistors, SSRs, fans: Electronics suppliers and maker stores
- Activated carbon, HEPA filters: Aquarium shops (for activated carbon), air purifier replacement filters
- Foam sealing tape (for edge sealing): Hardware stores (Fevicol foam tape or weather stripping)

Frosted Heated Bed Sticker Build Plate Tape with Adhesive Backing for 3D Printer
A 220×220mm frosted build plate sticker for 3D printer beds. Inside an enclosure printing ABS and ASA, proper build surface adhesion is critical — this frosted surface provides excellent grip for high-temperature filaments.
Step-by-Step Build Overview
Phase 1: Planning (1–2 days)
- Measure your printer’s footprint and maximum height with filament spool
- Decide on enclosure type (aluminium profile recommended for permanence)
- Calculate internal dimensions with all clearances
- Draw a basic sketch or CAD model
- Create a materials list and source locally or online
Phase 2: Frame Construction (1–2 days)
- Cut aluminium profiles to length (or order pre-cut from supplier)
- Assemble frame using corner brackets and M5 T-nuts
- Verify squareness with a tape measure (check diagonals)
- Mount the frame on a stable surface or add feet/casters
Phase 3: Panel Installation (1 day)
- Cut acrylic or polycarbonate panels to fit frame openings
- Mount panels using T-slot panel clips or frame-mounted hinges
- Install door with hinges and magnetic or latch closure
- Apply foam tape sealing strip around all panel edges
Phase 4: Climate Control (1–2 days)
- Mount temperature sensor (NTC thermistor) at mid-chamber height
- Install PID controller and SSR in an external control box
- Wire heater element (or PTC heater) through enclosure wall
- Test temperature control system without printer present
Phase 5: Ventilation (1 day)
- Cut exhaust port hole in rear or top panel
- Mount exhaust fan (with speed control)
- Install activated carbon filter cartridge at exhaust port
- Add intake with pre-filter foam on opposite side for airflow
Phase 6: Final Touches (1 day)
- Install LED lighting strips inside enclosure
- Mount webcam for remote monitoring
- Install smoke detector above or inside enclosure
- Route all printer cables through sealed grommets
- Print calibration test (temperature tower) to verify enclosure performance
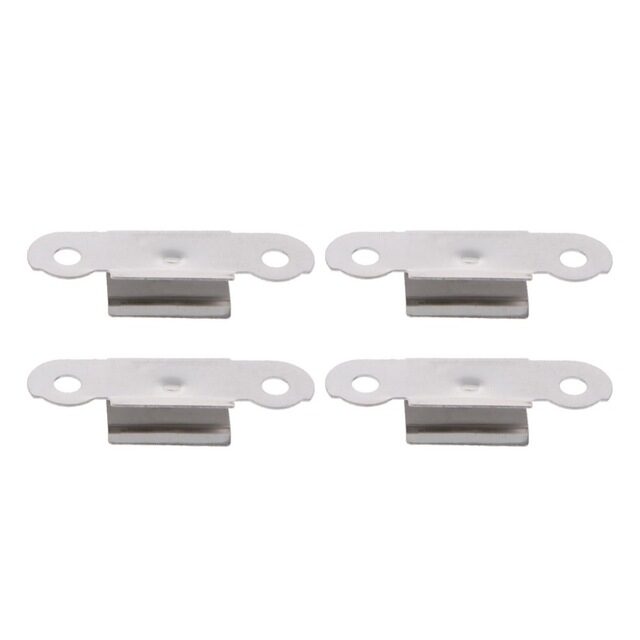
3D Printer Build Platform Glass Retainer Heated Bed Clip (Pack of 4)
Stainless steel glass retainer clips for 3D printer heated beds. Ensures your glass build plate stays secure during ABS and ASA printing inside an enclosure where differential thermal expansion can loosen inadequate clips.
Frequently Asked Questions
Do I need an enclosure for PLA printing?
No — PLA actually prints better in open air with good cooling. An enclosure is primarily for engineering materials (ABS, ASA, Nylon, PC) that require elevated ambient temperature to prevent warping. If you only print PLA and PETG, spend your money on other upgrades instead of an enclosure.
Can I enclose a Bambu Lab X1C or already-enclosed printer?
The X1C is already fully enclosed. Adding another enclosure around it creates an over-insulated environment that may cause electronics overheating. For already-enclosed printers, focus on the printer’s built-in ventilation rather than adding external enclosures.
How hot should the enclosure get for ABS printing?
A chamber temperature of 40–50°C is optimal for most ABS filaments. At this temperature, ABS layers cool slowly and uniformly, preventing the differential shrinkage that causes warping. Above 60°C, stepper motors and PTFE-lined hotends can be affected — either mount electronics outside or ensure they are rated for higher temperatures.
Is ABS printing safe indoors in India?
ABS printing releases styrene and ultrafine particles, which are potential health concerns with sustained exposure. In India’s typically limited ventilation spaces, this risk is amplified. Always use an enclosure with active carbon filtration or exhaust ventilation when printing ABS indoors. Alternatively, consider ASA (similar properties to ABS but lower VOC emissions) for outdoor parts or PETG for indoor functional parts.
How do I prevent my stepper drivers from overheating inside the enclosure?
The best solution is to mount the printer’s control board and electronics outside the enclosure. Route stepper motor cables, thermistor wires, and heater wires through sealed ports in the enclosure wall. Alternatively, add a dedicated cooling fan for the electronics bay that draws outside (cooler) air directly over the drivers, keeping them isolated from the chamber heat.
What is the minimum cost to build a basic enclosure in India?
A basic IKEA Lack stack enclosure (or Indian equivalent using local tables/furniture) can be built for ₹3,000–5,000 including acrylic panels and printed corner brackets. A proper aluminium profile enclosure with active carbon filtration and temperature control will cost ₹8,000–15,000 depending on size and features. Both are still far cheaper than a commercial enclosed printer.
Start Your Enclosure Build Today
A well-designed 3D printer enclosure transforms what your printer can do. The ability to reliably print ABS, ASA, Nylon, and Polycarbonate opens up functional part applications that PLA and PETG simply cannot match for heat resistance and chemical resistance. Combined with proper fume filtration, you also create a safer printing environment for your home or workplace.
The build requires some planning and a weekend of work, but the result — a printer that reliably handles engineering materials with almost no warping — is well worth the effort. Start with a design that matches your budget, then iterate with additional features (active heating, HEPA filtration, automated camera monitoring) as you grow your setup.
Shop 3D Printer Accessories at Zbotic: From heated bed components and build surfaces to nozzles and filament cleaning tools, Zbotic.in stocks everything you need to optimise your 3D printer setup — enclosed or open. Browse our complete 3D Printing range and build with confidence.


Add comment