
Table of Contents
- What Is a Servo Motor and How Does It Work?
- Types of Servo Motors for Robotic Arms
- Key Specifications to Understand
- SG90 vs MG90S vs MG996R: Head-to-Head
- Choosing the Right Servo for Each Joint
- Power Supply and Wiring Basics
- Essential Accessories
- Buying Tips for India
- Frequently Asked Questions
Building a robotic arm in India has never been more accessible. Whether you are a college student working on a final-year project, a hobbyist exploring automation, or a startup prototyping an assembly-line gripper, the servo motor is the heart of every joint. Yet walk into any online store and you will find dozens of options — SG90, MG90S, MG995, MG996R, DS3218, and more — with wildly different price tags and spec sheets that feel written in a foreign language.
This guide cuts through the noise. By the end, you will know exactly which servo motor fits each joint of your robotic arm, how to wire it safely, and where to buy quality parts in India without overspending.
What Is a Servo Motor and How Does It Work?
A servo motor is a closed-loop actuator that moves to a precise angular position based on a control signal. Unlike a regular DC motor that simply spins, a servo contains three key components inside its housing: a DC motor, a gear train that reduces speed while multiplying torque, and a potentiometer (or encoder on digital servos) that provides position feedback to an internal control board.
The industry-standard control signal is PWM (Pulse Width Modulation): a 50 Hz signal whose pulse width between 1 ms and 2 ms maps to positions between 0° and 180°. A 1.5 ms pulse centres the servo. This three-wire interface — power (red), ground (brown/black), and signal (orange/yellow/white) — is universal across almost all hobby servos, making them trivially easy to connect to an Arduino, Raspberry Pi, or any microcontroller with a PWM pin.
For robotic arms specifically, servos excel because:
- Positional accuracy is maintained without continuous power (gears hold position)
- No external driver board is needed — the controller is internal
- They are compact and self-contained
- The 0–180° range maps naturally to arm joint angles
Types of Servo Motors for Robotic Arms
Analog Servo
The classic type. The internal control board samples the PWM signal at about 50 Hz. Affordable, widely available, and perfectly adequate for slow to medium-speed arms. The SG90 is the most popular example.
Digital Servo
The internal processor samples at 300 Hz or higher. This means faster response, higher holding torque, and better resolution. The MG996R from TowerPro is technically a digital servo. Digital servos draw more current at idle, so plan your power supply accordingly.
Continuous Rotation Servo
The position pot is replaced by a circuit that maps pulse width to speed and direction rather than angle. Useful for wheels or conveyor sections but not for arm joints where precise positioning is required.
Linear Servo
Converts rotary motion to linear push/pull. Used in gripper jaws or wrist tilt mechanisms where you need stroke motion rather than rotation.
Key Specifications to Understand
Torque (kg·cm)
Torque is the single most important spec for a robotic arm. It tells you how much weight (in kg) the servo can hold at 1 cm from the pivot point. If you need to lift 200 g at 10 cm from the shoulder joint, you need at least 200 g × 10 cm = 2000 g·cm = 2 kg·cm of torque — before safety margin. Always apply a 1.5× safety factor, so plan for 3 kg·cm minimum.
Torque is listed at a specific voltage (typically 4.8 V and 6 V). Running at 6 V gives you ~25% more torque than at 4.8 V.
Speed (seconds per 60°)
Listed as time to rotate 60°. Lower numbers = faster. A 0.10 sec/60° servo moves noticeably faster than a 0.20 sec/60° one. For arms that need smooth, precise motion, slower can actually be better — less overshoot and vibration.
Gear Material: Plastic vs Metal
Plastic gears are fine for lightweight applications under 1 kg·cm load but will strip under shock loads. Metal gear servos (marked MG) cost more but survive crashes and repeated high-torque use. For robotic arms, use metal gears on shoulder, elbow, and wrist joints. Plastic is acceptable only for the gripper fingers if payload is light.
Bearing Type: Bushing vs Ball Bearing
Bushings are plain cylindrical sleeves. Ball bearings reduce friction and dramatically improve lateral load resistance — important when a joint must support the weight of the arm hanging off it. Premium servos like the MG996R come with dual ball bearings.
Deadband Width
The minimum pulse change the servo can detect. A 5 µs deadband means positions finer than 0.9° are indistinguishable. For precision tasks like pick-and-place, choose servos with ≤5 µs deadband.
SG90 vs MG90S vs MG996R: Head-to-Head
| Spec | SG90 | MG90S | MG996R |
|---|---|---|---|
| Weight | 9 g | 13.4 g | 55 g |
| Torque @ 4.8V | 1.2 kg·cm | 1.8 kg·cm | 9.4 kg·cm |
| Torque @ 6V | 1.6 kg·cm | 2.2 kg·cm | 11 kg·cm |
| Speed @ 6V | 0.10 s/60° | 0.08 s/60° | 0.17 s/60° |
| Gears | Plastic | Metal | Metal |
| Bearings | Bushing | 1 ball bearing | Dual ball bearing |
| Best for | Gripper, light wrist | Wrist, small elbow | Shoulder, main elbow |
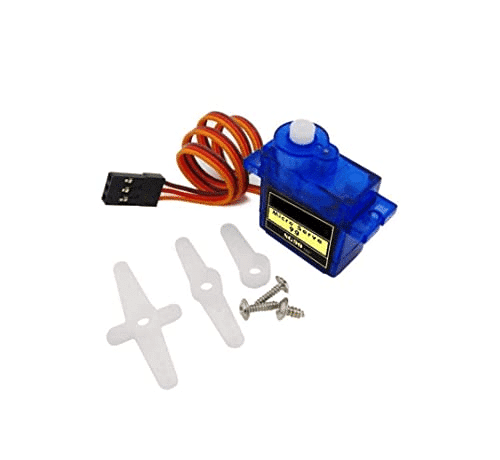
TowerPro SG90 180 Degree Rotation Servo Motor
The industry-standard 9g micro servo — ideal for gripper fingers, light wrist joints, and prototype arms where weight matters most.
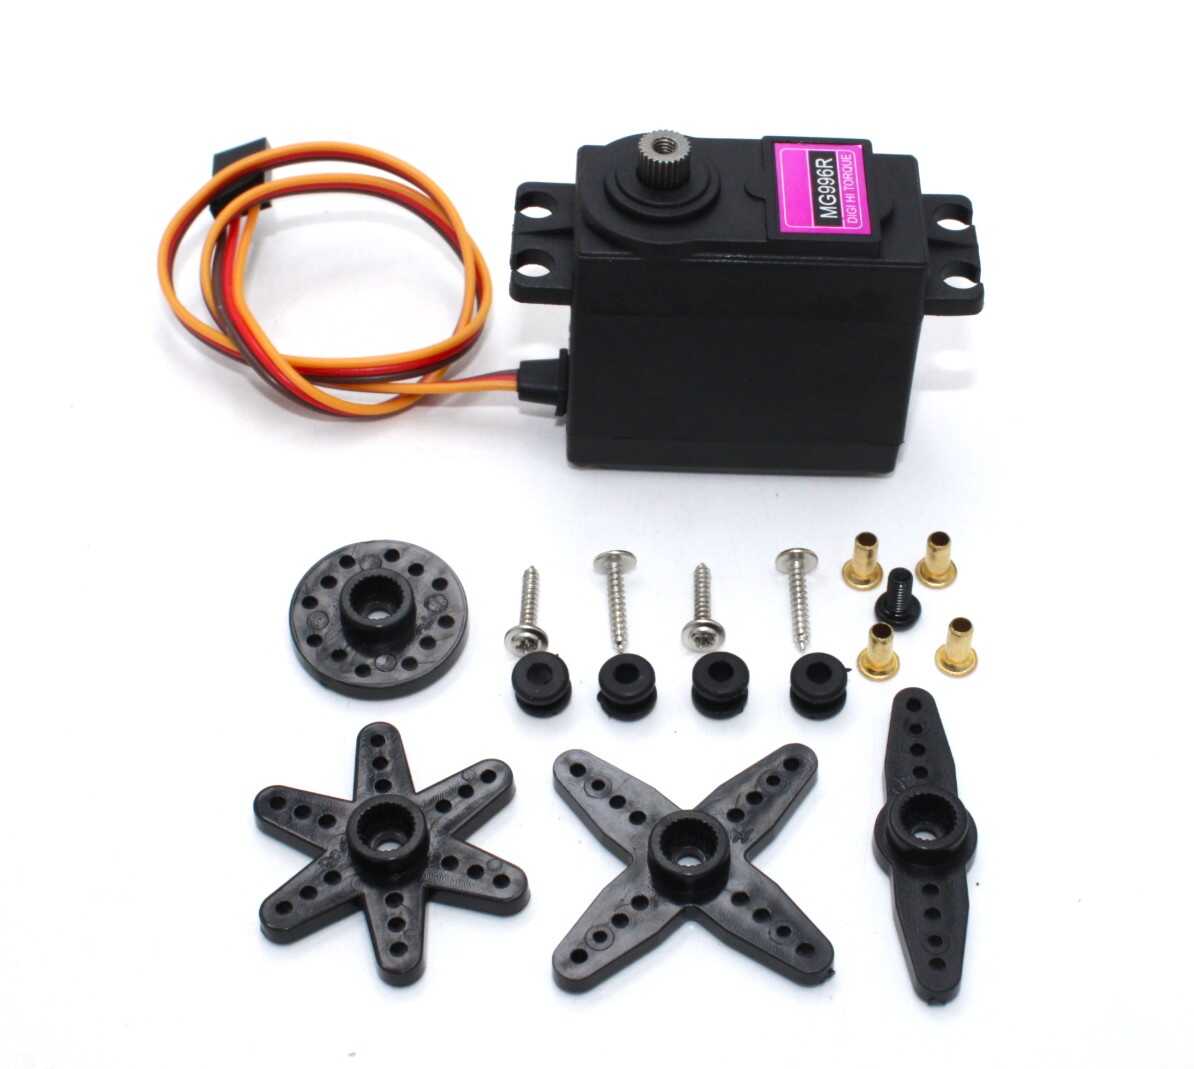
Servo MG996 13KG 180 Degree (High Quality)
High-torque metal gear servo with dual ball bearings — the go-to choice for shoulder and elbow joints carrying real loads.
Choosing the Right Servo for Each Joint
A typical 5-DOF (degree-of-freedom) robotic arm has: base rotation, shoulder, elbow, wrist pitch, wrist roll, and gripper. Here is how to spec each:
Base Rotation Joint
This joint carries the entire weight of the arm above it. For a medium arm (300–500 mm reach) with a 200 g payload, the base servo must handle 8–12 kg·cm minimum. Use an MG996R or better. If you are building a larger arm, consider a dedicated gear-reduction DC motor with encoder instead.
Shoulder Joint
The shoulder is the second-hardest-working joint. It lifts everything above it (forearm + wrist + gripper + payload). MG996R at 6V is the minimum; for heavier arms, stack two servos on the same axis using a Y-type servo wire.
Elbow Joint
Carries forearm weight only. An MG90S or a single MG996R works depending on forearm length. Keep the forearm as light as possible (use aluminium or 3D-printed PLA sections) to reduce elbow torque demand.
Wrist Pitch
Needs moderate torque for payload manipulation. MG90S is often sufficient. If you plan to lift more than 100 g at the gripper, step up to MG996R.
Wrist Roll
Rotational axis — only rotates the gripper, very low torque demand. An SG90 or MG90S handles this easily.
Gripper
Depends entirely on grip force needed. For light objects (pen, small component), SG90 is fine. For firm grip on heavier objects, MG90S with a mechanical advantage linkage gripper design is better.
Servo Mount Holder Bracket For SG90/MG90 (Pack of 2)
Metal servo brackets that rigidly mount SG90 or MG90S servos to your arm frame — essential for joints that carry lateral loads.
Power Supply and Wiring Basics
This is where most beginners make a critical mistake: they try to power servos directly from the Arduino’s 5V pin. Do not do this. A single MG996R under load can draw 1–2 A peak. An Arduino’s voltage regulator can only supply 300–500 mA total. Connecting multiple servos this way will brown-out your Arduino and potentially damage it.
Recommended Power Approach
- Separate servo power rail: Use a dedicated 5V or 6V power supply (3A minimum for a 4-servo arm, 5A for 6-servo). Connect power and ground to the servo power rail directly, and only the signal wire to the Arduino pin.
- Common ground: Always connect the Arduino GND to the servo power supply GND. Without a common ground, PWM signals will be unreliable.
- Decoupling capacitors: Place a 100 µF electrolytic capacitor across the power and ground of each servo. This absorbs the current spikes when servos start moving and prevents voltage dips from affecting neighbours.
- Voltage choice: Run at 6V for maximum torque if your servos are rated for it. Most hobby servos support 4.8–7.2V.
Wiring with an Arduino Mega
The Arduino Mega has 15 hardware PWM pins (D2–D13 + D44–D46), making it the preferred board for 6-DOF arms. Use the Servo.h library, which handles PWM timing automatically. Each servo needs one digital pin. Example:
#include <Servo.h>
Servo shoulder;
Servo elbow;

void setup() {
  shoulder.attach(9);   // Signal to pin 9
  elbow.attach(10);     // Signal to pin 10
}
void loop() {
  shoulder.write(90);   // Move to 90 degrees
  delay(1000);
  elbow.write(45);
  delay(1000);
}
Essential Accessories
Servo Horns and Arms
Every servo ships with a basic plastic horn, but for structural joints you want metal servo horns. The aluminium 25T round disc horns are compatible with MG995/MG996R and provide multiple mounting holes for rigid linkage attachment.
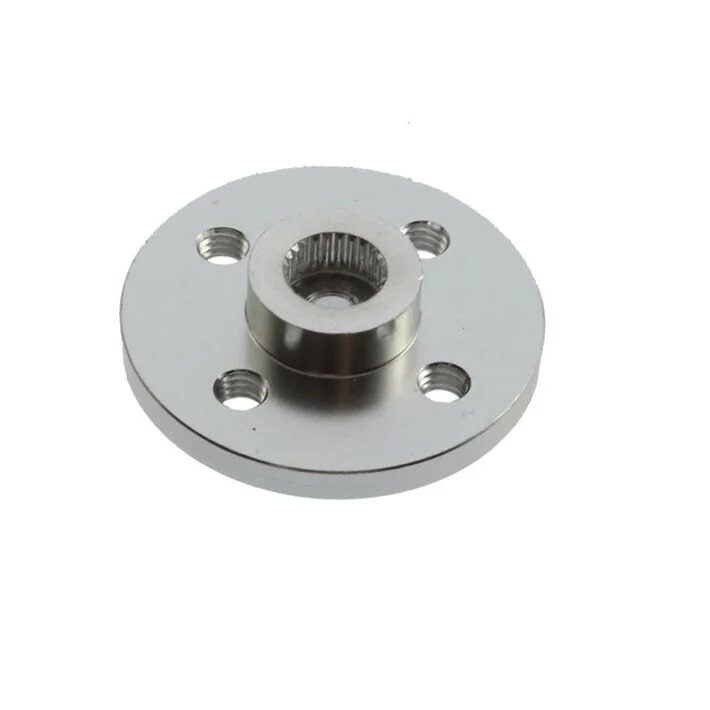
Aluminum Servo Horn/Arm 25T Round Type Disc MG995 MG996
CNC-machined aluminium horn with 25 tooth spline — provides multiple mounting points and far greater rigidity than plastic horns under load.
Extension Wires
Most servos ship with 150–300 mm cables. For a larger arm where the controller is mounted at the base, you will need servo extension cables. Use 26AWG or thicker wire for runs over 300 mm to minimise voltage drop on the power conductors.
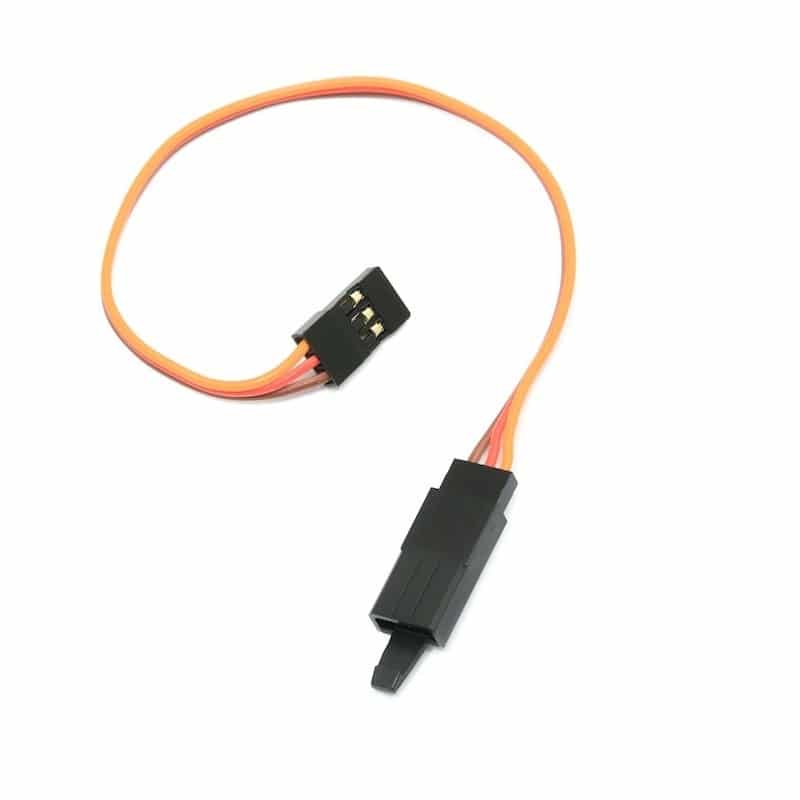
15 CM 26AWG Servo Lead Extension (JR) Cable
Standard 26AWG servo extension in JR format — daisy-chain these to reach servos mounted along the full arm length.
Buying Tips for India
India’s hobbyist electronics market has grown enormously, but quality varies. Here is what to watch for:
Beware of Clone Servos
The market is flooded with SG90 and MG996R clones from no-name brands. They often have lower actual torque than spec, plastic gears that strip under the listed load, and short lifespans. Always buy from reputable stores like Zbotic that stock genuine or quality-equivalent components.
Buy Extras for Prototyping
Servos fail during development — especially when code has bugs that command continuous movement against a mechanical stop. Budget for 20% extra units on your first build.
Consider a Servo Tester
A standalone servo tester (a small board with a pot and battery) lets you verify servo movement and range before integrating into your arm. It saves hours of debugging by separating mechanical issues from code issues.
Check Dimensions
SG90, MG90S, and many other micro servos share the same footprint (22.2 × 11.8 × 31 mm). This means brackets designed for SG90 also accept MG90S — useful when upgrading torque without redesigning your frame. MG996R is larger (40 × 19 × 43 mm) and needs its own brackets.
Frequently Asked Questions
Can I use servo motors directly with a Raspberry Pi for a robotic arm?
Yes, but with a caveat. Raspberry Pi GPIO is 3.3V and lacks dedicated hardware PWM on most pins. Use a PCA9685 16-channel PWM driver board (I2C) between the Pi and servos — it generates stable 50 Hz PWM in hardware while the Pi sends simple I2C commands. Power the servos from a separate 5–6V supply, not from the Pi’s 5V rail.
How many servos can an Arduino Uno control?
The Arduino Servo library can control up to 12 servos on an Uno using timer-based software PWM, but the Uno has only 6 true PWM hardware pins. For 6-DOF arms, use an Arduino Mega (15 PWM pins) or a PCA9685 board. Always power servos externally regardless of which board you use.
What is the difference between MG995 and MG996R?
The MG996R is the updated version of MG995 with slightly higher torque rating, improved dead-band, and a revised gear train. Both use metal gears and dual ball bearings. The MG996R is preferred for new designs; the MG995 is still found in many existing designs and is functionally interchangeable.
Is servo motor torque the same as holding torque and stall torque?
Servo datasheets list stall torque — the maximum torque before the output shaft stops moving. Holding torque (keeping a position against a static load) is typically 70–80% of stall torque. Always design with at least 1.5× safety factor against stall torque for longevity.
Can I control servo speed in Arduino?
The Servo.h library moves servos as fast as they can go. To control speed, use a slow position increment loop: move from current angle to target angle in small steps with delays between each step. Libraries like VarSpeedServo also automate this pattern for you.
Do servos need a heatsink?
Standard hobby servos do not need heatsinks under normal intermittent use. However, if your arm holds a heavy load continuously (servo resisting gravity for minutes), the motor inside will heat up. Either redesign the arm to use a worm gear drive (self-locking, no power needed to hold position) or allow rest periods in your duty cycle.
Ready to Start Building?
Building a robotic arm with servo motors is one of the most rewarding projects in electronics. Start with a 3-DOF arm using SG90 servos to learn the basics, then graduate to a full 6-DOF arm with MG996R at the heavy joints. Zbotic stocks all the servo motors, mounting brackets, extension wires, and aluminium horns you need to complete your project, with fast shipping across India.


Add comment