
Fire detection is one of the most critical safety functions in any building, factory, or automated system. Flame and fire sensors using infrared (IR) detection provide a fast, reliable, and low-cost method of detecting the presence of an open flame — triggering alarms, suppression systems, or automated shutdowns within milliseconds of detection. In this comprehensive guide, we cover how IR flame sensors work, how to interface them with Arduino, complete wiring and code examples, and how to build professional-grade fire safety systems for real-world use.
What Is a Flame Sensor?
A flame sensor is an electronic detector designed to sense the presence of fire or an open flame by detecting the specific infrared radiation emitted by burning gases. Unlike smoke detectors (which detect combustion byproducts) or heat detectors (which respond to temperature rise), flame sensors respond directly and nearly instantly to the radiation produced by a flame itself.
This makes flame sensors particularly valuable in:
- Industrial gas turbine flame monitoring
- Boiler and furnace safety interlocks
- Home fire alarm systems with Arduino
- Robotic fire-fighting competitions
- Automated fire suppression systems
- Drone-based wildfire early detection
For Arduino projects, the most common and affordable type is the YG1006 phototransistor-based IR flame sensor module, which detects flames at wavelengths between 760 nm and 1100 nm.
How IR Flame Detection Works
Every flame — whether from a candle, gas burner, or wood fire — emits a characteristic spectrum of radiation. A significant portion of this radiation falls in the near-infrared (NIR) range, between approximately 700 nm and 1100 nm. The flame also flickers at characteristic frequencies (typically 1–20 Hz for open flames), which further distinguishes it from steady-state IR sources like the sun or incandescent lights.
The IR flame sensor uses a photodiode or phototransistor with a filter that passes only wavelengths in the 760–1100 nm range. When flame-specific IR radiation hits the sensor element, the photodetector’s conductivity increases, changing the output voltage. An onboard comparator circuit converts this into a clean digital signal.
Detection angle: The standard IR flame sensor module has a detection angle of approximately 60° and can detect a candle flame at up to 80 cm (approximately 30 inches). Gas burner flames can be detected from 1–2 metres. Detection distance increases significantly for larger fires.
Types of Flame Sensors
Understanding the different flame sensor technologies helps you select the right one for your application:
UV Flame Detectors
Detect the ultraviolet radiation emitted by hydrogen flames and other clean-burning gases. Very fast response (under 3ms) and immune to sunlight interference. Used in industrial and aviation applications. More expensive than IR sensors.
IR Flame Detectors (Single-band)
The standard Arduino-compatible module. Responds to 760–1100 nm IR radiation. Low cost, easy to use, suitable for candles, butane, and propane flames. Susceptible to interference from hot objects (incandescent lights, heated metal).
IR Flame Detectors (Multi-band)
Use multiple spectral bands and compare the ratio of signals to distinguish a genuine flame from a hot background. Much more reliable in industrial settings with high ambient temperatures. More complex signal processing required.
UV-IR Flame Detectors
Combine UV and IR sensing for the highest reliability. Used in petrochemical plants, aircraft engine bays, and munitions storage areas.
Flame Sensor Module Pinout
A standard 4-pin flame sensor module has these connections:
- VCC: Power supply, 3.3V or 5V
- GND: Ground reference
- DO: Digital output — LOW when flame detected (active low), HIGH when no flame. Connected to digital interrupt pin on Arduino.
- AO: Analog output — voltage decreases as flame intensity increases. Connect to Arduino analog pin for intensity measurement.
An onboard LED indicates power (red/green LED) and flame detection status. A blue potentiometer trims the digital threshold sensitivity.
Wiring Flame Sensor to Arduino
For a complete fire alarm circuit:
- VCC → Arduino 5V
- GND → Arduino GND
- DO → Arduino D2 (interrupt-capable pin)
- AO → Arduino A0
Additional components for a full alarm:
- Active buzzer → Arduino D8 (with 220 Ω series resistor for passive buzzer)
- Red LED → Arduino D13 (with 220 Ω resistor)
- Relay module → Arduino D7 (to control solenoid valve for water suppression or 230V fan)
Safety note: If connecting to mains voltage (230V) via relay, use an optoisolated relay module and ensure proper electrical safety practices. Never expose mains wiring in hobbyist prototypes.
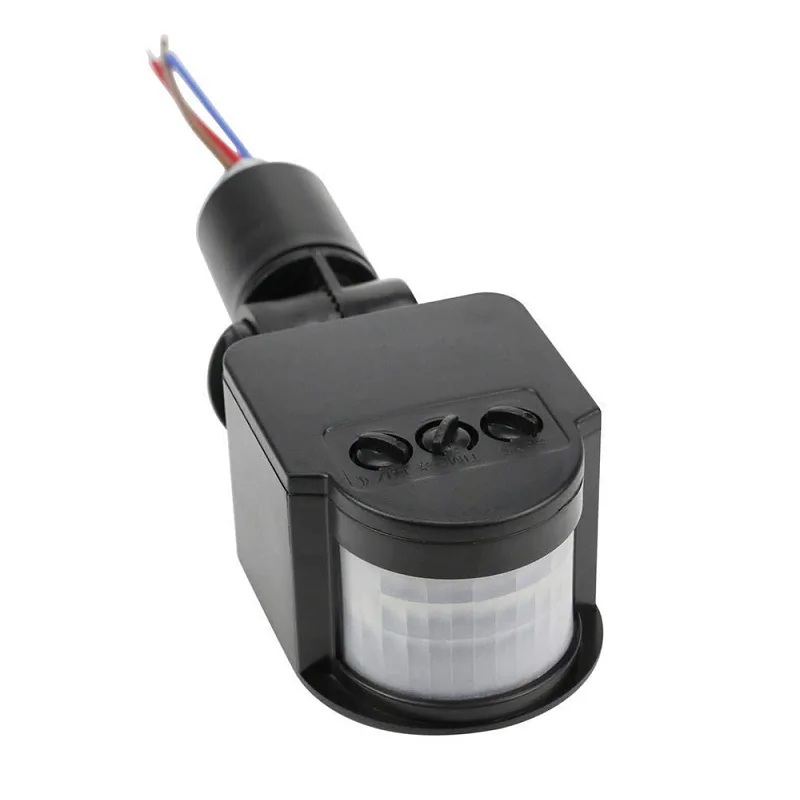
AC 220V PIR Motion Sensor with LED Switch
Pair your flame sensor safety system with this PIR motion sensor to detect unauthorized presence in a fire-risk zone and trigger additional alerts.
Basic Flame Detection Code
A clean, interrupt-driven flame detection sketch for reliable response time:
// Flame Fire Sensor - Basic Detection with Interrupt
// Zbotic.in - Sensors & Measurement Tutorial

const int FLAME_DO_PIN = 2;  // Digital output (interrupt pin)
const int FLAME_AO_PIN = A0; // Analog output
const int BUZZER_PIN   = 8;
const int ALARM_LED    = 13;
const int RELAY_PIN    = 7;  // Fire suppression relay

volatile bool flameDetected = false;

void flameISR() {
  flameDetected = true;  // Set flag in interrupt service routine
}

void setup() {
  Serial.begin(9600);
  pinMode(FLAME_DO_PIN, INPUT);
  pinMode(BUZZER_PIN, OUTPUT);
  pinMode(ALARM_LED,  OUTPUT);
  pinMode(RELAY_PIN,  OUTPUT);
  digitalWrite(RELAY_PIN, LOW); // Relay off by default

  // Attach interrupt: trigger on FALLING edge (DO goes LOW when flame detected)
  attachInterrupt(digitalPinToInterrupt(FLAME_DO_PIN), flameISR, FALLING);

  Serial.println("Fire Safety System Active - Monitoring...");
}

void loop() {
  if (flameDetected) {
    int intensity = analogRead(FLAME_AO_PIN);
    // Lower analog value = stronger flame signal
    int flameLevel = map(intensity, 0, 1023, 100, 0);

    Serial.print("FLAME DETECTED! Intensity: ");
    Serial.print(flameLevel);
    Serial.println("%");

    // Trigger alarms
    digitalWrite(ALARM_LED, HIGH);
    tone(BUZZER_PIN, 1000, 500);  // 1kHz tone, 500ms

    if (flameLevel > 60) {
      Serial.println("CRITICAL FIRE! Activating suppression relay!");
      digitalWrite(RELAY_PIN, HIGH);  // Activate water valve
    }

    delay(2000); // Hold alarm for 2 seconds

    // Check if flame is still present
    if (digitalRead(FLAME_DO_PIN) == HIGH) {
      // Flame gone — all clear
      flameDetected = false;
      digitalWrite(ALARM_LED, LOW);
      digitalWrite(RELAY_PIN, LOW);
      Serial.println("All clear — flame no longer detected.");
    }
  }

  // Also read analog for continuous monitoring
  int analogVal = analogRead(FLAME_AO_PIN);
  if (analogVal < 900) { // Some IR present but below threshold
    Serial.print("IR Activity: ");
    Serial.println(analogVal);
  }

  delay(100);
}
Building a Full Fire Alarm Circuit
Elevate your basic detection to a fully functional fire alarm system with these enhancements:
LCD status display
Add a 16×2 I2C LCD to show real-time status: “System OK”, “FLAME DETECTED — Zone 1”, intensity percentage, and a timestamp of the last event. This is invaluable for security and maintenance personnel monitoring the system.
GSM/Wi-Fi notification
Connect an ESP8266 (or use an ESP32 as the main controller) to send alerts via Telegram, WhatsApp (via Twilio), or SMS (via SIM800L GSM module). Here is the Telegram alert logic:
// ESP32 + Flame Sensor + Telegram Alert (pseudo-code)
#include <WiFi.h>
#include <UniversalTelegramBot.h>

// On flame detection:
void sendFireAlert(int zone, int intensity) {
  String msg = "🔥 FIRE ALERT!n";
  msg += "Zone: " + String(zone) + "n";
  msg += "Intensity: " + String(intensity) + "%n";
  msg += "Time: " + getTimestamp() + "n";
  msg += "Please evacuate and call emergency services.";
  bot.sendMessage(CHAT_ID, msg);
}
Battery backup
Use a 12V sealed lead-acid battery with a charger module to ensure the system remains active during power cuts — critical for fire safety applications. Add a low-battery alert to the alarm system.
Multi-Zone Fire Detection System
A realistic home or small commercial installation needs multiple detection zones. Here is how to implement a 4-zone system:
// Multi-Zone Flame Detection System
const int ZONE_COUNT = 4;
const int FLAME_PINS[] = {2, 3, 18, 19};  // Digital pins for 4 zones
const char* ZONE_NAMES[] = {"Kitchen", "Living Room", "Garage", "Basement"};
bool zoneStatus[ZONE_COUNT] = {false};

void setup() {
  Serial.begin(9600);
  for (int i = 0; i < ZONE_COUNT; i++) {
    pinMode(FLAME_PINS[i], INPUT_PULLUP);
  }
}

void loop() {
  for (int zone = 0; zone < ZONE_COUNT; zone++) {
    bool detected = (digitalRead(FLAME_PINS[zone]) == LOW);
    if (detected && !zoneStatus[zone]) {
      zoneStatus[zone] = true;
      Serial.print("FIRE IN ZONE: ");
      Serial.println(ZONE_NAMES[zone]);
      triggerAlarm(zone);
    } else if (!detected && zoneStatus[zone]) {
      zoneStatus[zone] = false;
      Serial.print("ALL CLEAR - Zone: ");
      Serial.println(ZONE_NAMES[zone]);
    }
  }
  delay(100);
}
Industrial Safety Applications
In industrial environments, flame sensor systems go far beyond the hobbyist Arduino implementation:
Gas turbine flame monitoring
Industrial gas turbines require real-time flame confirmation during start-up and continuous operation. Loss of flame (flame-out) at high speed can cause catastrophic fuel accumulation and explosion. Multi-spectral UV-IR detectors with sub-10ms response time are used here, but understanding the principle is the same as our Arduino project.
Boiler safety interlock
Natural gas boilers use flame detectors to confirm burner ignition. If the flame is not confirmed within 5 seconds of gas valve opening (the “trial for ignition” period), the gas valve closes and a fault lockout is triggered. This prevents gas accumulation and explosion. An Arduino-based educational version of this logic is excellent for understanding PLC safety systems.
Hazardous area monitoring
Paint booths, solvent storage areas, and hydrogen production facilities use ATEX/IECEx certified flame detectors in explosion-proof enclosures. The sensing principle (IR photodetection) is the same, but the electronics are packaged to prevent ignition of surrounding flammable atmosphere.

MQ-131 Ozone Gas Detection Sensor
Complement your fire detection system with gas sensors to detect combustion byproducts and hazardous gas leaks for comprehensive fire safety monitoring.
Limitations and False Positive Prevention
Understanding the limitations of IR flame sensors helps you build more reliable systems:
Common false triggers
- Sunlight: Direct sunlight contains significant IR radiation. Shield sensors from direct sunlight or add a sunlight-blocking filter.
- Incandescent lights: Old-style incandescent and halogen bulbs emit substantial IR. LED and fluorescent lights are far less problematic.
- Hot metal surfaces: Heated metal can emit IR in the sensor’s detection range. Mount sensors away from ovens, heaters, and machinery.
- Welding arcs: Electric arc welding produces intense IR. Always disable and shield sensors in welding areas.
False positive prevention techniques
- Flicker detection: Real flames flicker at 1–20 Hz. Sample the sensor at 50 Hz and check for characteristic flickering pattern using FFT or simple threshold crossing counting.
- Dual-sensor confirmation: Require two adjacent sensors to trigger simultaneously before sounding the alarm.
- Time delay: Require continuous detection for 3–5 seconds before triggering alarm to filter brief IR flashes.
- IR bandpass filter: Add a physical 850 nm or 950 nm bandpass optical filter over the sensor to narrow its spectral response.

AC110-240V PIR Infrared Motion Sensor
Combine with flame sensors for a comprehensive safety system — detect both fire and unauthorized access in critical areas using IR motion and flame detection together.
Frequently Asked Questions
What is the maximum detection range of an IR flame sensor module?
A standard YG1006-based flame sensor module can detect a candle flame from 80 cm (about 2.6 feet) and a larger gas burner flame from 1–2 metres. Detection distance increases with flame size. For longer range detection in large industrial spaces, use dedicated industrial flame detectors rated for 20–65 metre detection ranges.
Can a flame sensor detect fire through glass?
Standard glass blocks a significant portion of near-IR radiation (760–1100 nm range). A flame on the other side of ordinary window glass may not trigger the sensor reliably. IR-transparent materials like sapphire glass or germanium windows are used in professional flame detectors that need to sense through barriers.
Is an IR flame sensor the same as a smoke detector?
No. Smoke detectors use either ionization (radioactive source) or optical (photoelectric) technology to detect smoke particles in the air. IR flame sensors detect the infrared radiation emitted directly by a flame. Flame sensors respond much faster but require line-of-sight to the flame. A complete fire safety system should include both smoke detectors and flame sensors for maximum coverage.
Why does my flame sensor trigger even without a fire?
Common causes are direct sunlight on the sensor, nearby incandescent or halogen lights, or the potentiometer sensitivity set too high. Adjust the blue potentiometer anticlockwise to reduce sensitivity. Shield the sensor from direct light sources. Implement software filtering such as requiring 5 consecutive detections before triggering an alarm.
Can I use a flame sensor to detect infrared remote controls?
Standard IR flame sensor modules are tuned for the continuous IR spectrum of flames (760–1100 nm) and may respond weakly to IR remotes, which operate at 38 kHz modulated bursts. For reliable IR remote signal decoding, use dedicated IR receiver modules (TSOP4838 or similar) with the IRremote Arduino library instead.
Build Your Fire Safety System with Zbotic
Get all the sensors, modules, and components for your Arduino fire alarm and safety project at Zbotic.in. We stock flame sensors, gas sensors, PIR modules, relay boards, and everything else you need for a complete safety system — with fast delivery across India.


Add comment