
Table of Contents
- Introduction: Why Add a Payload Release to Your Drone?
- Types of Payload Release Mechanisms
- Components Required
- Building a Servo-Based Release Mechanism
- Wiring and Flight Controller Integration
- Configuring in Mission Planner (ArduPilot)
- Testing the Release Mechanism Safely
- Payload Attachment Methods
- Legal Considerations in India
- Project Ideas Using Payload Release
- Frequently Asked Questions
Introduction: Why Add a Payload Release to Your Drone?
A drone payload release mechanism is a device mounted on your drone that allows you to drop or release a physical object mid-flight, controlled remotely by the pilot or triggered automatically by the flight controller. This capability opens up a tremendous range of practical and creative applications: delivering supplies to remote locations, dropping seed balls in reforestation projects, releasing fishing lines over water, and even delivering medicines to patients in areas with poor road access.
In India, agricultural and humanitarian applications of payload-carrying drones are gaining significant traction. Research institutions, startups, and hobbyists are all experimenting with payload release systems built on platforms ranging from small 5-inch FPV drones to large hexacopter frames. This guide shows you how to build a reliable, simple DIY payload release mechanism that integrates directly with your flight controller and can be triggered via your RC transmitter or automatically through Mission Planner.
Types of Payload Release Mechanisms
There are three main types of DIY drone payload release systems, each with its own advantages:
1. Servo-Based Latch Release
A servo motor moves a latch, pin, or hook that holds the payload. When actuated, the latch retracts and the payload falls or slides off. This is the most popular DIY approach due to its simplicity, low cost, and compatibility with any RC system. The servo is connected to a spare channel on the receiver or flight controller.
2. Electromagnet Release
An electromagnet is powered on to hold a metal plate attached to the payload. Cutting power to the electromagnet releases the payload. This approach is smooth, has no moving parts (the magnet itself), and is very reliable. It requires a relay or MOSFET circuit and a power supply on the drone.
3. 3D-Printed Gripper / Claw
A servo-actuated claw or gripper made from 3D-printed parts can hold objects of various shapes, then open to release them. This is more complex to build but is very versatile. It is popular for competition drones that need to pick up and drop specific objects.
For this guide, we will focus on the servo-based latch release — it is the most practical for most Indian builders and requires the fewest specialist components.
Components Required
- 1x Standard servo motor (SG90 or MG90S for lighter loads; MG996R for heavier payloads up to 500g)
- Thin steel wire or a 3D-printed latch arm (for the payload cradle)
- Small M3 bolts and standoffs (for mounting to the frame)
- Spare AUX/auxiliary channel on your flight controller or receiver
- Lightweight payload cradle (can be 3D printed, bent aluminium, or carbon fibre sheet)
- A large, stable drone frame rated for the payload weight you intend to carry
- Signal wire (servo extension) to route from the flight controller to the release servo
- Heat shrink tubing and zip ties for tidy wiring
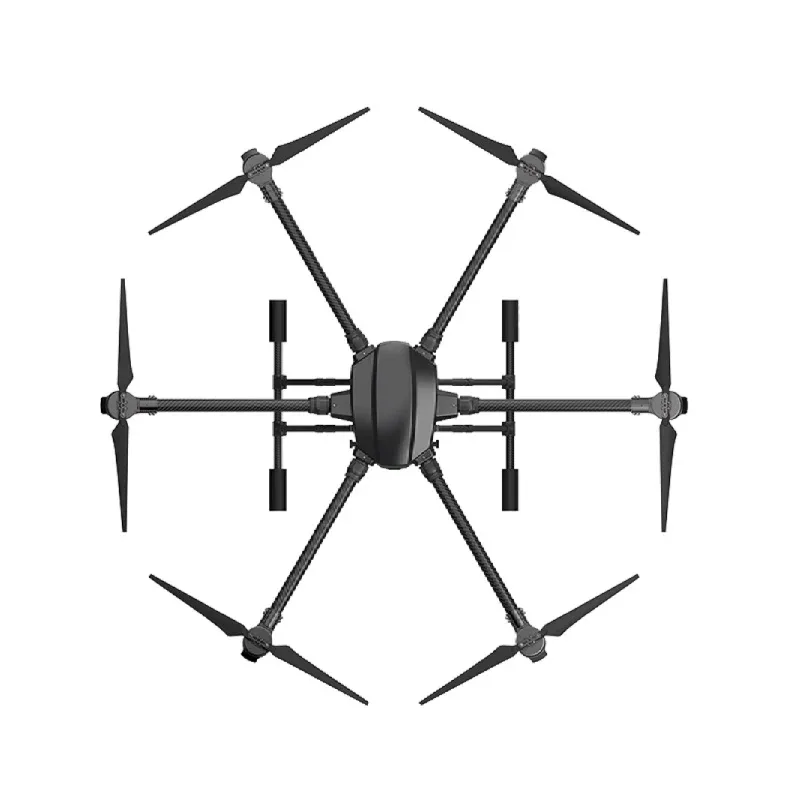
EFT 6120 Multifunction Surveillance Drone Frame
A large, robust hexacopter frame designed for surveillance and payload-carrying missions. With its 6-motor configuration, this frame has the lift capacity to carry meaningful payloads reliably, making it an excellent base for a payload release build.
Building a Servo-Based Release Mechanism
Step 1: Design Your Payload Cradle
The payload cradle is the holder that keeps your payload attached to the drone until the servo releases it. The simplest design is a U-shaped or hook-shaped bracket that can swing open when the servo rotates. You can 3D-print this from PETG or ABS, or bend a piece of 2mm aluminium sheet with pliers.
The cradle should be mounted on the underside of the drone’s centre plate. Keep it as close to the centre of gravity as possible — a payload hanging off-centre will affect stability significantly.
Step 2: Mount the Servo
Mount the servo adjacent to the cradle using M3 bolts or double-sided tape reinforced with zip ties. The servo horn should be positioned so that in its default (centred) position, it holds the latch closed over the payload, and a ~90-degree rotation in either direction opens the latch.
For an SG90 micro servo, use a custom 3D-printed horn arm that is longer than the standard horn — this gives more mechanical leverage to overcome any spring tension in the latch system.
Step 3: Connect the Latch
Run a short length of 0.8mm stainless steel wire (or a rigid 3D-printed link) from the servo horn to the latch pin. When the servo rotates, the wire pulls the latch pin back, allowing the payload to fall free. Test this mechanism by hand multiple times before mounting it on the drone.
Step 4: Build the Payload Hook
The payload should have a loop, ring, or hook at its top that engages with the latch pin. For small objects, a simple plastic ring works. For heavier items, use a metal carabiner clip — these are strong, reliable, and easy to load in the field.

EFT E416P 16L 4-Axis Agricultural Drone Frame
A heavy-duty agricultural quad frame with 16L spray tank capacity. If you are building a payload delivery system for agricultural applications like medicine or seed drops, this rugged frame is an excellent starting point.
Wiring and Flight Controller Integration
Most modern flight controllers (Pixhawk, Cube, Matek, etc.) have multiple AUX (auxiliary) output pins. These can be configured to drive a servo signal on any RC channel. Here is how to connect your release servo:
- Identify a spare AUX output on your flight controller (e.g., AUX1, which corresponds to channel 9 in ArduPilot).
- Run a 3-wire servo extension from the flight controller AUX pin to the servo. Match signal (orange/white), power (red), and ground (black/brown) wires correctly.
- Important: Power the servo from the BEC output of your power module, not directly from the flight controller AUX rail, if your servo draws significant current (MG996R can draw 500mA+). Small SG90 servos are fine on the FC rail at 5V.
- On the RC transmitter, assign a 2-position or 3-position switch to the channel controlling AUX1. In ArduPilot, this switch will correspond to the RC channel you configure for the gripper/payload release.

2-6S 5V 5A BEC For Quadcopter Drone
A standalone 5V 5A BEC (Battery Eliminator Circuit) that provides clean regulated power for servos, FPV cameras, and other 5V accessories on 2S–6S drone builds. Essential when running high-torque servos from your main battery.
Configuring in Mission Planner (ArduPilot)
ArduPilot supports payload release through its servo function system. Here is how to configure it:
- Open Mission Planner and connect to your drone via telemetry or USB.
- Go to Config > Full Parameter List.
- Find
SERVO9_FUNCTION(for AUX1 on most Pixhawk boards). Set it to 0 (passthrough) — this passes the RC channel signal directly to the servo output. - Set
SERVO9_MINto 1000 (closed/locked position) andSERVO9_MAXto 2000 (open/released position). Adjust based on your servo geometry. - In your transmitter, map a switch to CH9 (or whichever channel controls AUX1). Flipping the switch sends either 1000 or 2000 microseconds of PWM to the servo, opening or closing the latch.
Automated Release via Waypoint
ArduPilot supports DO_SET_SERVO commands in waypoint missions. In Mission Planner’s Plan tab, add a waypoint at the drop location, then add a DO_SET_SERVO command (from the command dropdown) specifying the servo number and PWM value. The drone will fly to that GPS location and automatically trigger the release — no pilot input needed.
Testing the Release Mechanism Safely
Before flying, always test on the ground:
- With the drone stationary on a table (props off), power on and connect transmitter.
- Load a test payload (sand bag of the same weight as the real payload).
- Flip the release switch. The servo should rotate and the payload should drop cleanly.
- Reset and repeat 5–10 times to verify mechanical reliability.
- Conduct a hover test at 1–2 metres altitude over soft ground. Verify the payload stays attached during flight, then release it cleanly.
- Never test release over people, vehicles, or hard surfaces from height.
Payload Attachment Methods
How you package and attach the payload affects reliability and safety:
- Drawstring bag: Put the payload in a soft drawstring bag with a rope loop at the top for hooking. The bag cushions the landing impact.
- Rigid container: For fragile payloads, use a small rigid box with foam padding inside. Attach a metal loop to the lid.
- Parachute (for high-altitude drops): Attach a small parachute to the payload for gentle landing — important if dropping fragile medicine vials or electronics from height.
Always secure the payload firmly enough that drone vibration and manoeuvring does not shake it loose prematurely, but loosely enough that the release servo can overcome the weight without stalling.
Legal Considerations in India
Drone payload delivery in India is regulated under the DGCA Drone Rules 2021. Key points for Indian builders:
- Drones used for payload carrying or dropping require UIN (Unique Identification Number) registration with DGCA regardless of weight class.
- Commercial drone delivery requires an Operator Permit (OP) from DGCA.
- Dropping any object from a drone over populated areas requires explicit permission and must not create any hazard.
- Research and educational payload release experiments should be conducted in open, unpopulated areas and must be logged.
- Check the Digital Sky portal (digitalsky.dgca.gov.in) for your specific state’s regulations and any local restrictions.
For research institutions and universities conducting drone payload experiments, DGCA has a simplified experimental permission process. Always document your build and operations for compliance.
Project Ideas Using Payload Release
- Seed bomb dispersal: Drop seed balls in reforestation projects in areas not accessible by foot. Very popular with environmental NGOs in India.
- Fishing line delivery: Fly a drone over a river or reservoir and release a fishing line to reach spots inaccessible from the shore.
- First aid kit delivery: In accident-prone areas or during emergencies, deliver a basic first aid kit before human responders arrive.
- Competition payload challenges: Many college robotics fests across India include drone payload delivery challenges — a servo release system is perfect for these events.
- Agricultural drone experiments: Test precision dropping of fertiliser pods or beneficial insect capsules for pest management.
Frequently Asked Questions
Q: How much payload can a DIY drone carry?
A: It depends entirely on the drone’s thrust-to-weight ratio. A well-built 5-inch quad can carry 100–200g safely. Larger hexacopter or octocopter builds on agricultural frames can carry 1–5 kg. Always ensure your drone has at least 2:1 thrust-to-weight ratio with the payload onboard.
Q: Can I trigger the release automatically without pilot input?
A: Yes — ArduPilot’s DO_SET_SERVO command in autonomous waypoint missions allows automatic release at a specific GPS coordinate. This is used for precision delivery applications.
Q: What is the best servo for a payload release mechanism?
A: For payloads up to 300g, an SG90 micro servo is sufficient. For 300g–1kg payloads, use an MG90S or MG996R metal gear servo. For heavier payloads, consider a high-torque digital servo rated above 10 kg-cm.
Q: Is an electromagnet release better than a servo release?
A: Electromagnets are more reliable for smooth, silent drops of metallic payload holders, but require additional electronics (relay/MOSFET) and drain battery continuously. Servos are simpler, cheaper, and work with any payload material. For most DIY builds, the servo approach is preferred.
Q: Do I need DGCA approval for a payload release experiment in a farm field?
A: Technically yes — any drone carrying a payload with intent to drop it in India should be registered and may require additional DGCA permission. Contact DGCA or consult a drone legal expert for your specific case. Always fly responsibly and safely.
Conclusion
Building a DIY drone payload release mechanism is a rewarding project that transforms a standard drone into a practical tool for delivery, agriculture, research, and competition. The servo-based latch approach is simple enough for a weekend build, reliable enough for field use, and fully compatible with ArduPilot and Mission Planner’s advanced mission capabilities.
Start with a small proof-of-concept on a stable drone frame, test thoroughly on the ground, and work your way up to automated mission-triggered releases. The possibilities — from reforestation to emergency response — are genuinely exciting for the Indian drone community.
Find large drone frames, BEC modules, ESCs, and all the components you need for a payload drone build at Zbotic.
Shop drone frames, BECs, ESCs, and GPS modules for payload drone builds at zbotic.in. Fast shipping across India with expert support.


Add comment