
One of the most practical features of the ESP32 is its built-in Bluetooth Classic support, which includes the Serial Port Profile (SPP). This allows your ESP32 to appear as a Bluetooth serial device to your Android phone — just like those HC-05/HC-06 modules, but without the extra hardware or cost. In this tutorial, you will learn exactly how to set up ESP32 Bluetooth Serial, write the Arduino firmware, and build a simple Android app interface to send commands and receive sensor data wirelessly.
1. Bluetooth Classic vs BLE on ESP32
The ESP32 supports two Bluetooth standards, and it is important to understand the difference before starting:
| Feature | Bluetooth Classic (BT 2.0+) | Bluetooth Low Energy (BLE) |
|---|---|---|
| Speed | Up to 2.1 Mbps | Up to 1 Mbps (practical ~50-100 KB/s) |
| Power use | Higher | Much lower |
| Connection | Persistent (like a cable) | Can be intermittent (notifications) |
| Android support | All Android versions | Android 4.3+ |
| Best use case | Streaming data, terminal emulator | IoT sensors, beacons, wearables |
This tutorial focuses on Bluetooth Classic SPP (Serial Port Profile), which is the easiest to use — it behaves exactly like a wired serial connection. The ESP32’s built-in BluetoothSerial library handles all the complexity.
Important: Only the original ESP32 (and ESP32-S3 for BT Classic) supports Bluetooth Classic SPP. The ESP32-S2 has NO Bluetooth. The ESP32-C3 only has BLE, not Bluetooth Classic. This tutorial requires the standard ESP32 (ESP32-WROOM-32 or ESP32-WROVER).
2. What You Will Need
- ESP32 development board (ESP32-WROOM-32 based)
- DHT11 or DHT22 temperature/humidity sensor
- LED + 220Ω resistor (for the control demo)
- Breadboard and jumper wires
- Micro USB cable
- Android smartphone
- Arduino IDE with ESP32 board package

Ai Thinker NodeMCU-32S-ESP32 Development Board – IPEX Version
Classic ESP32 board with Bluetooth Classic + BLE + Wi-Fi — the perfect board for this Bluetooth Serial tutorial.
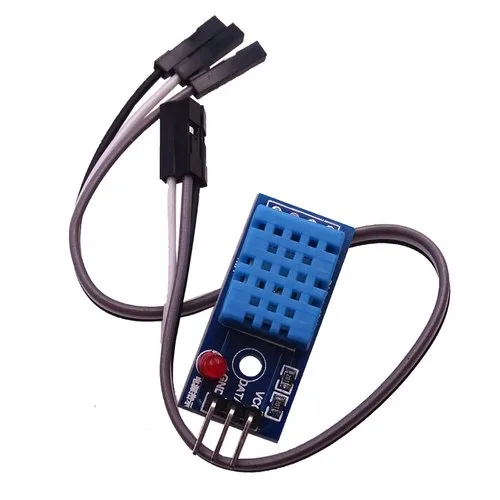
DHT11 Temperature And Humidity Sensor Module with LED
Integrated DHT11 module with status LED and pull-up resistor onboard — just connect VCC, GND, and DATA to your ESP32.
3. Setting Up Arduino IDE for ESP32
If you haven’t already set up the ESP32 Arduino core:
- Open Arduino IDE → File → Preferences.
- In Additional Board Manager URLs, add:
https://raw.githubusercontent.com/espressif/arduino-esp32/gh-pages/package_esp32_index.json - Go to Tools → Board → Board Manager, search for esp32, and install the package by Espressif Systems.
- Select your board: Tools → Board → ESP32 Arduino → ESP32 Dev Module (or NodeMCU-32S).
- Select the correct COM port.
The BluetoothSerial library comes built-in with the ESP32 Arduino core — no separate installation needed.
4. Basic Bluetooth Serial Sketch
Let’s start with the simplest possible example — echoing data received over Bluetooth back to the sender:
#include "BluetoothSerial.h"

// Check if Bluetooth is available
#if !defined(CONFIG_BT_ENABLED) || !defined(CONFIG_BLUEDROID_ENABLED)
#error Bluetooth is not enabled! Please run menuconfig to enable it
#endif

BluetoothSerial SerialBT;

void setup() {
  Serial.begin(115200);
  // "ESP32-BT" is the device name visible on Android
  SerialBT.begin("ESP32-BT");
  Serial.println("Bluetooth Started! Waiting for connection...");
}

void loop() {
  // Forward USB Serial to Bluetooth
  if (Serial.available()) {
    SerialBT.write(Serial.read());
  }
  // Forward Bluetooth to USB Serial
  if (SerialBT.available()) {
    char c = SerialBT.read();
    Serial.write(c);
    SerialBT.write(c);  // echo back
  }
  delay(20);
}
Upload this sketch. Open the Arduino Serial Monitor at 115200 baud. On your Android phone, go to Settings → Bluetooth, scan for new devices, and you should see ESP32-BT appear. Pair it (no PIN required by default). Now open a Bluetooth terminal app (see Section 7) and connect to ESP32-BT. Type anything — it will echo back to you.
5. Sending Sensor Data via Bluetooth
Now let’s make it useful. We will read temperature and humidity from a DHT11 and stream the data to your Android phone every 2 seconds. Wire the DHT11: VCC → 3.3V, GND → GND, DATA → GPIO 4.
#include "BluetoothSerial.h"
#include <DHT.h>

#define DHTPIN  4
#define DHTTYPE DHT11

BluetoothSerial SerialBT;
DHT dht(DHTPIN, DHTTYPE);

unsigned long lastSendTime = 0;
const unsigned long SEND_INTERVAL = 2000;

void setup() {
  Serial.begin(115200);
  dht.begin();
  SerialBT.begin("ESP32-Sensor");
  Serial.println("Bluetooth sensor node ready!");
}

void loop() {
  unsigned long now = millis();
  if (now - lastSendTime >= SEND_INTERVAL) {
    lastSendTime = now;

    float temp = dht.readTemperature();
    float hum  = dht.readHumidity();

    if (!isnan(temp) && !isnan(hum)) {
      // Send CSV format: T:28.5,H:62.0n
      String data = "T:" + String(temp, 1) +
                    ",H:" + String(hum, 1) + "n";
      SerialBT.print(data);
      Serial.print("Sent: "); Serial.print(data);
    } else {
      SerialBT.println("ERR:sensor_read_failed");
    }
  }
}
On your Bluetooth terminal app, you will see lines like T:28.5,H:62.0 appearing every 2 seconds. This simple comma-separated format is easy to parse in any Android app or MIT App Inventor.
6. Receiving Commands from Android
A Bluetooth connection is bidirectional. Here is how to receive text commands from the Android app and act on them:
#include "BluetoothSerial.h"

#define LED_PIN 2

BluetoothSerial SerialBT;
String receivedCommand = "";

void processCommand(String cmd) {
  cmd.trim();
  Serial.println("Command: " + cmd);

  if (cmd == "LED_ON") {
    digitalWrite(LED_PIN, HIGH);
    SerialBT.println("LED turned ON");
  } else if (cmd == "LED_OFF") {
    digitalWrite(LED_PIN, LOW);
    SerialBT.println("LED turned OFF");
  } else if (cmd == "STATUS") {
    String status = "LED:" + String(digitalRead(LED_PIN) ? "ON" : "OFF");
    SerialBT.println(status);
  } else {
    SerialBT.println("Unknown command: " + cmd);
  }
}

void setup() {
  Serial.begin(115200);
  pinMode(LED_PIN, OUTPUT);
  SerialBT.begin("ESP32-Control");
  Serial.println("ESP32 BT Control ready!");
}

void loop() {
  while (SerialBT.available()) {
    char c = SerialBT.read();
    if (c == 'n') {
      processCommand(receivedCommand);
      receivedCommand = "";
    } else {
      receivedCommand += c;
    }
  }
}
Send LED_ON or LED_OFF from your Bluetooth terminal app. The onboard LED on GPIO 2 will respond instantly.
7. Android Apps for Bluetooth Serial
You don’t need to build an Android app from scratch to get started. These free apps from the Play Store work great with ESP32 Bluetooth Serial:
- Serial Bluetooth Terminal (by Kai Morich) — Clean terminal emulator, supports macros, newline handling, and even simple graphing of incoming data. This is our top recommendation.
- Bluetooth Terminal HC-05 — Simple and works out of the box with SPP devices including ESP32.
- Arduino Bluetooth Controller — Pre-built buttons for sending common commands (great for the LED control example).
- MIT App Inventor BlueTooth Controller — If you build your own app with App Inventor, a compatible BT controller helps test before building your UI.
Important settings in Serial Bluetooth Terminal:
- Tap the three-dot menu → Settings → Terminal.
- Set Newline (send) to LF (n). This ensures your commands end with the newline character our ESP32 code expects.
- Set Newline (receive) to LF for proper display.
8. Complete Project: LED Control + Temperature Monitor
Let’s combine everything into one complete, polished project. This sketch sends temperature/humidity data every 3 seconds AND responds to LED commands:
#include "BluetoothSerial.h"
#include <DHT.h>

#define DHTPIN   4
#define DHTTYPE  DHT11
#define LED_PIN  2

BluetoothSerial SerialBT;
DHT dht(DHTPIN, DHTTYPE);

String  rxBuffer    = "";
unsigned long lastUpdate = 0;
const long    UPDATE_MS  = 3000;
bool clientConnected = false;

void btCallback(esp_spp_cb_event_t event, esp_spp_cb_param_t *param) {
  if (event == ESP_SPP_SRV_OPEN_EVT) {
    Serial.println("Client connected!");
    clientConnected = true;
  } else if (event == ESP_SPP_CLOSE_EVT) {
    Serial.println("Client disconnected.");
    clientConnected = false;
  }
}

void handleCommand(String cmd) {
  cmd.trim();
  if      (cmd == "LED_ON")  { digitalWrite(LED_PIN, HIGH); SerialBT.println("OK:LED_ON");  }
  else if (cmd == "LED_OFF") { digitalWrite(LED_PIN, LOW);  SerialBT.println("OK:LED_OFF"); }
  else if (cmd == "PING")    { SerialBT.println("PONG"); }
  else                       { SerialBT.println("ERR:unknown_cmd"); }
}

void setup() {
  Serial.begin(115200);
  pinMode(LED_PIN, OUTPUT);
  dht.begin();
  SerialBT.register_callback(btCallback);
  SerialBT.begin("Zbotic-ESP32");
  Serial.println("Ready. Pair 'Zbotic-ESP32' on Android.");
}

void loop() {
  // Read incoming commands
  while (SerialBT.available()) {
    char c = SerialBT.read();
    if (c == 'n') { handleCommand(rxBuffer); rxBuffer = ""; }
    else rxBuffer += c;
  }

  // Send periodic sensor data
  if (clientConnected && millis() - lastUpdate >= UPDATE_MS) {
    lastUpdate = millis();
    float t = dht.readTemperature();
    float h = dht.readHumidity();
    if (!isnan(t) && !isnan(h)) {
      SerialBT.printf("DATA:T=%.1f,H=%.1f,LED=%sn",
                       t, h, digitalRead(LED_PIN) ? "ON" : "OFF");
    }
  }
}
Wiring summary:
- DHT11 DATA → GPIO 4 (with 10kΩ pull-up if using raw sensor; module version has it built in)
- LED anode → GPIO 2 → 220Ω resistor → GND (or use the onboard LED)
9. Pairing ESP32 with Android Step-by-Step
- Power on the ESP32 and upload the sketch.
- On Android: Settings → Connected devices → Pair new device.
- Wait for Zbotic-ESP32 (or whatever name you set) to appear in the list.
- Tap it to pair. No PIN is needed (the default PIN is
1234if prompted). - Open Serial Bluetooth Terminal app → Tap the Bluetooth icon → Select Zbotic-ESP32.
- Tap Connect. You should see the connection message in Arduino Serial Monitor.
- Start sending commands or watching incoming data.
Tip for Indian users: If you are using a Chinese Android phone (Xiaomi, Realme, Oppo, Vivo) and Bluetooth Classic pairing fails, go to Developer Options → Bluetooth Audio Codec and try toggling the BT settings. Some MIUI builds have aggressive background app killers that disconnect BT serial apps — add the app to the battery whitelist.
10. Troubleshooting
| Problem | Fix |
|---|---|
| ESP32-BT not visible in Android scan | Make sure the sketch is running; ESP32 is only discoverable for a limited time after boot. Toggle Bluetooth off/on on Android. |
| Pairing fails or asks for PIN | Try PIN 1234. Or add SerialBT.setPin("1234"); before SerialBT.begin(). |
| Data appears garbled in terminal | Check that terminal app newline setting matches what your ESP32 sends (n vs rn). |
| Bluetooth conflicts with Wi-Fi | ESP32 uses a co-existence mechanism. Avoid using both simultaneously for high-throughput tasks. For most IoT use cases they coexist fine. |
| Sketch compiles but BT not working on ESP32-S2 | ESP32-S2 has no Bluetooth. You must use the original ESP32 (WROOM-32 or WROVER). |
11. Going Further: Custom Android App with MIT App Inventor
MIT App Inventor (appinventor.mit.edu) is a free visual programming tool for building Android apps, similar to how Scratch works for programming. You can build a custom BT Serial app in under 30 minutes without writing Java code.
Key App Inventor blocks to use:
- BluetoothClient.Connect — Connect to a paired ESP32 device.
- BluetoothClient.SendText — Send a command string.
- BluetoothClient.ReceiveText — Receive data (use a Clock component to poll every 500 ms).
- Label.Text — Display received temperature/humidity values.
- Button.Click → SendText “LED_ONn” — Toggle the LED.
This approach is widely used in engineering college projects across India (VTU, Mumbai University, Anna University curricula). It is the fastest way to build a working Bluetooth-controlled device with a custom Android interface without needing Android Studio.
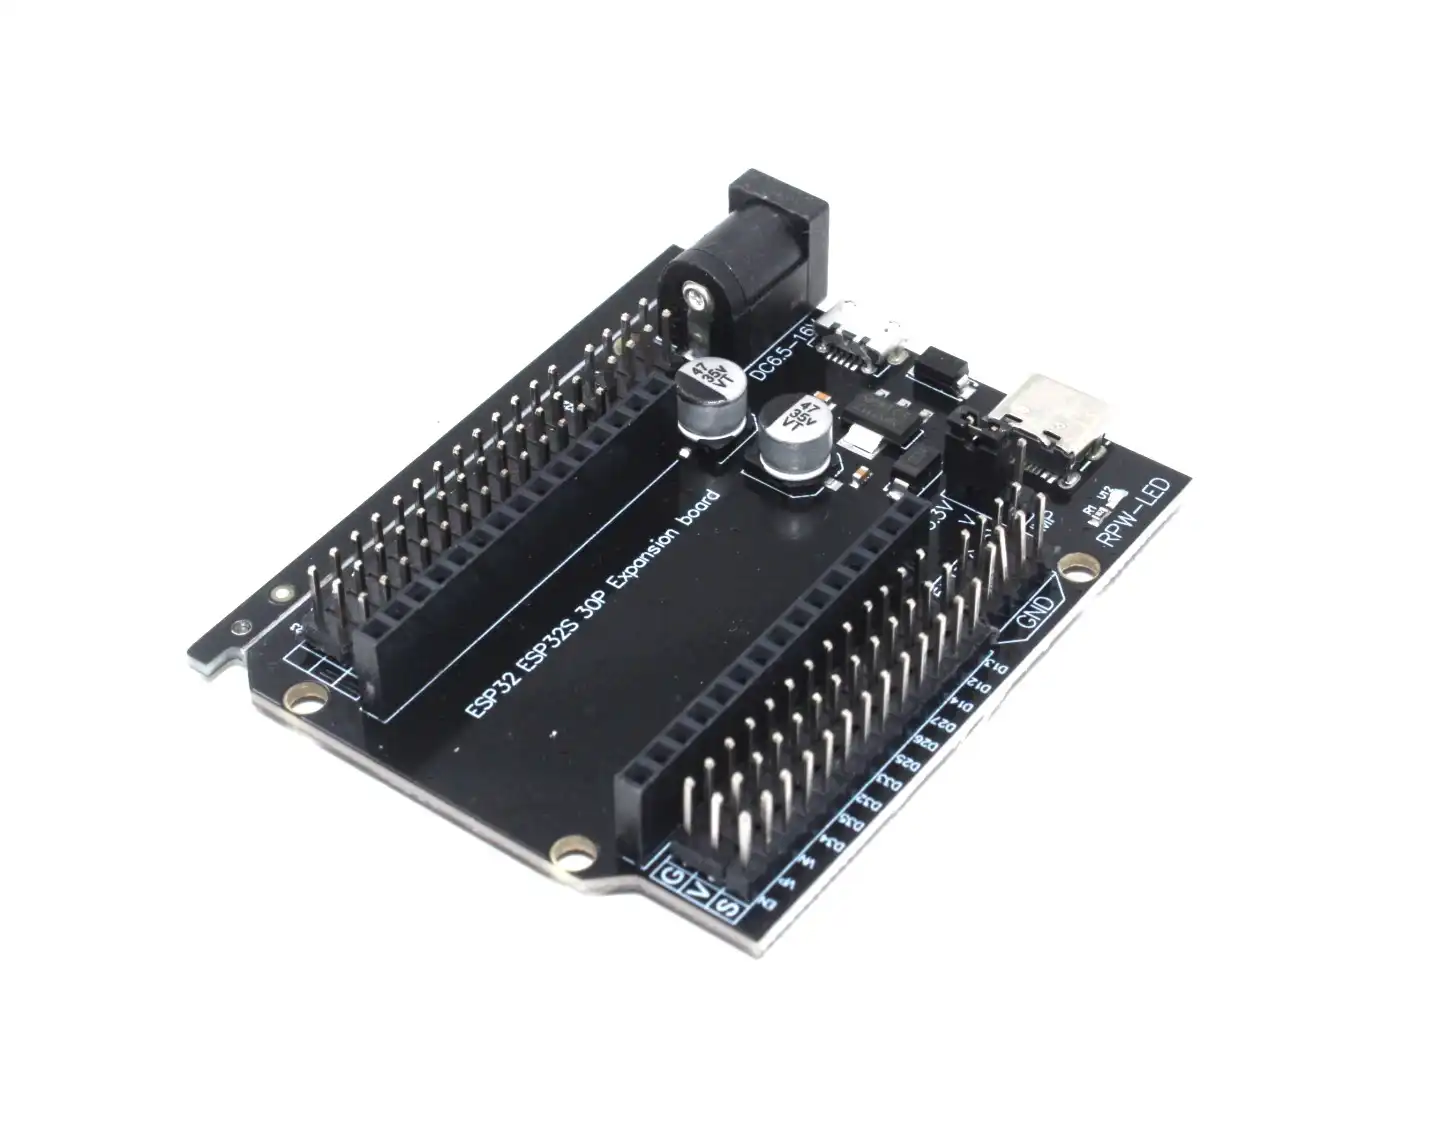
30Pin ESP32 Expansion Board with Type-C USB and Micro USB Dual Interface
Breakout board for 30-pin ESP32 modules with easy-access screw terminals — great for adding sensors to your Bluetooth project without a breadboard.
Frequently Asked Questions
Can I use ESP32 Bluetooth Serial with an iPhone?
No. Apple iOS does not support Bluetooth Classic SPP for third-party apps. iPhones only support BLE (Bluetooth Low Energy). For iOS compatibility, you need to implement BLE GATT instead of using the BluetoothSerial library.
What is the maximum Bluetooth range of the ESP32?
The ESP32 Bluetooth range is approximately 10 metres indoors (with walls) and up to 30 metres in open space. This is class 2 Bluetooth power (4 dBm). Using an IPEX external antenna module can extend range to 80–100 metres in open space.
Can multiple Android phones connect to the same ESP32 at once?
Bluetooth Classic SPP supports only one connection at a time. For multiple simultaneous connections, use Wi-Fi (WebSocket or HTTP) or implement BLE with multiple subscriber characteristics.
Is it safe to use Bluetooth Serial for sending passwords or sensitive data?
Bluetooth Classic has basic encryption (AES-128 at the link layer after pairing). For hobby projects it is generally fine. Avoid sending plaintext passwords over Bluetooth if the device will be used in a public or commercial setting — use a challenge-response mechanism or HMAC instead.
Can I use ESP32 Bluetooth Serial and Wi-Fi at the same time?
Yes. The ESP32’s RF hardware supports simultaneous BT and Wi-Fi using a time-division coexistence mechanism. Both work together, though throughput may be slightly reduced when both are heavily active at the same time.
Conclusion
You now have a working ESP32 Bluetooth Serial communication system that can send sensor data and receive commands from an Android app. This is one of the fastest ways to add wireless control to any Arduino/ESP32 project without needing a router, server, or internet connection — just a phone and an ESP32 in the same room.
The total cost for this project is under ₹400 if you already have a smartphone. Grab your ESP32 and sensor from Zbotic and start building your wireless IoT project today!
Get Your ESP32 Bluetooth Project Started
Shop genuine ESP32 boards and sensors at Zbotic — fast shipping across India at the best prices.


Add comment