
If you’ve been looking to build a WLED ESP32 smart LED strip setup at home, you’re in the right place. WLED is an open-source firmware that transforms a basic ESP32 microcontroller into a powerful, WiFi-enabled RGB LED controller — no cloud subscription, no proprietary app lock-in, just full local control from your browser or phone. In this comprehensive guide, we’ll walk through every step: from hardware selection and wiring to flashing WLED firmware and configuring stunning light effects for your Indian home, workshop, or maker lab.
What Is WLED and Why Use It with ESP32?
WLED (short for Web LED) is a free, open-source firmware written by Aircookie that runs on ESP8266 and ESP32 microcontrollers. It exposes a clean web interface and REST/JSON API that lets you control addressable LED strips — WS2812B, SK6812, WS2811, APA102 — directly over your local WiFi network. There is no need for a monthly cloud subscription unlike commercial smart lighting products such as Philips Hue or Govee strips.
The ESP32 is the preferred platform for WLED today because it offers dual-core processing, more GPIO pins, Bluetooth support, and significantly more RAM than the ESP8266. This extra headroom allows WLED to run complex audio-reactive effects, handle multiple LED segments simultaneously, and maintain a stable WebSocket connection to the mobile app without any stutter.
For the Indian maker and DIY smart-home enthusiast, WLED + ESP32 is an ideal combination: the total hardware cost for a 5-metre smart LED strip setup can be under ₹800–₹1200, compared to ₹3000–₹8000 for branded smart lighting products imported from the US or China.
Hardware You Need for WLED Setup
Before you start flashing firmware, gather these components. Choosing the right hardware will save you hours of debugging later.
Microcontroller: ESP32 Development Board
Any standard 30-pin or 38-pin ESP32 DevKit board works. The NodeMCU-32S from Ai Thinker is especially popular in India because of its robust IPEX antenna connector for better WiFi range — useful if your router is in a different room from the LED strip installation.

Ai Thinker NodeMCU-32S-ESP32 Development Board – IPEX Version
The NodeMCU-32S with IPEX antenna connector gives you extended WiFi range — ideal for WLED installations where the controller is inside a ceiling mount or TV backlight enclosure far from the router.
LED Strip: WS2812B Addressable LEDs
WS2812B strips are the most common choice for WLED. Each LED has a built-in IC that lets you control its colour and brightness independently via a single data wire. Available in densities of 30, 60, or 144 LEDs per metre. For a TV backlight or under-cabinet accent light, 60 LED/m is the sweet spot for smoothness without excessive power draw.
Power Supply
Each WS2812B LED draws up to 60 mA at full white. A 5-metre strip at 60 LED/m = 300 LEDs × 60 mA = 18 A peak. In practice you should use a 5V/10A power supply and cap maximum brightness in WLED at 60–70% to avoid overheating. Never power the strip from the ESP32’s 5V pin — the USB regulator on most DevKit boards is rated for only 500 mA.
Other Components
- 1× 300–500 Ω resistor (data line protection)
- 1× 1000 µF / 6.3V capacitor (power rail decoupling)
- Breadboard or PCB for connections
- 5V 10A DC power supply
- Jumper wires

30Pin ESP32 Expansion Board with Type-C USB and Micro USB
This expansion board simplifies WLED wiring with clearly labelled GPIO pins and a screw terminal block — no soldering required for your LED strip data and power connections.
Wiring ESP32 to WS2812B LED Strip
Correct wiring is the most common stumbling block for beginners. Follow this exactly to avoid damaging your LED strip or ESP32.
Step-by-Step Wiring
- Power connections: Connect the 5V power supply positive (+) rail to both the LED strip’s 5V pad and the ESP32’s VIN pin. Connect the negative (GND) from the power supply to both the LED strip GND and the ESP32 GND. This common ground is mandatory.
- Data line: Connect GPIO 2 (or GPIO 16 — both work) on the ESP32 to a 300–500 Ω resistor, then to the DIN (data input) pad of the WS2812B strip. The resistor protects the LED driver IC from voltage spikes.
- Capacitor: Place a 1000 µF capacitor across the 5V and GND rails as close to the LED strip power injection point as possible. This absorbs the initial power surge when strips first turn on at full brightness.
- Power injection: For strips longer than 1 metre, inject power again every metre from the second injection point back to the power supply — not daisy-chained through the strip. This prevents voltage drop that causes colour shift (green/yellow tint at the far end).
Important GPIO Notes: Avoid GPIO 0, 2, and 15 for production WLED builds on DevKit boards because these are strapping pins used during boot. GPIO 16 is the safest default data pin for WLED. If you use GPIO 2, hold the strip data line low during boot by using the resistor in series with the data line — this prevents the boot mode conflict.
Flashing WLED Firmware to ESP32
There are two easy ways to flash WLED onto your ESP32 without installing the Arduino IDE or any toolchain:
Method 1: WLED Web Installer (Recommended)
- Open install.wled.me in Google Chrome or Microsoft Edge (must support Web Serial API — Firefox does NOT support this).
- Click Install next to the latest stable WLED release.
- Choose ESP32 as your chip type.
- Connect your ESP32 via USB cable to your PC.
- Click Connect and select the correct COM port from the browser dialog.
- Click Install WLED and wait ~60 seconds for the flash to complete.
- The tool will ask if you want to set up WiFi credentials directly — enter your SSID and password here for a smoother first boot.
Method 2: esptool.py (Advanced)
Download the latest WLED_X.XX.X_ESP32.bin from the WLED GitHub releases page. Then run:
pip install esptool
esptool.py --chip esp32 --port COM3 write_flash 0x0 WLED_0.14.4_ESP32.bin
Replace COM3 with your actual port (Linux: /dev/ttyUSB0, macOS: /dev/cu.usbserial-*).
WiFi Configuration and First Boot
After flashing, the ESP32 will reboot and broadcast an access point named WLED-AP with the password wled1234. Connect your phone or laptop to this network and navigate to 192.168.4.1 in your browser. You’ll see the WLED web interface.
Connecting WLED to Your Home WiFi
- Go to Config → WiFi Setup.
- Enter your home WiFi SSID and password.
- Click Save & Connect. WLED will reboot and connect to your router.
- Find the ESP32’s IP address from your router’s DHCP client list (or use the WLED app on Android/iOS which auto-discovers devices via mDNS).
- Set a static IP in your router (recommended) or in WLED’s WiFi settings to ensure the IP doesn’t change between reboots.
LED Configuration
Go to Config → LED Preferences and set:
- LED count: Total number of LEDs in your strip (e.g., 300 for 5m at 60 LED/m).
- Data GPIO: 16 (or whichever pin you wired to DIN).
- LED type: WS2812B (RGB order may need to be changed to GRB if colours look wrong).
- Maximum current: Set this to 80–90% of your power supply’s rated current (e.g., 8000 mA for a 10A PSU). WLED will automatically dim the LEDs if they would exceed this limit — essential for strip longevity.
Effects, Segments, and Presets
WLED ships with over 180 built-in effects ranging from solid colours to complex audio-reactive animations. Here are the highlights for home use:
Must-Try Effects
- Rainbow Cycle — Smooth hue rotation, great for ambient room lighting.
- Fireworks — Burst animations ideal for festive occasions (Diwali, New Year).
- Twinkle Fox — Slow sparkle effect that mimics starlight — perfect for bedroom ceilings.
- Theater Chase Rainbow — Classic marquee chase with colour cycling.
- Sunrise — Gradually brightens over 10–60 minutes to simulate a natural sunrise. Great as a morning alarm alternative.
Working with Segments
Segments let you divide a single LED strip into independently controlled zones. For example, a 300-LED TV backlight can have four segments — top, bottom, left, right — each with its own effect and colour. Go to the Segments tab in the main WLED interface, click + to add a segment, and define start/end LED indices for each zone.
Creating and Saving Presets
Presets save your favourite effect/segment/brightness combinations for one-touch recall. Go to Presets, configure the lights as desired, then click the save icon. Presets can be triggered via the app, the REST API, Home Assistant automations, or even a physical button wired to an ESP32 GPIO.
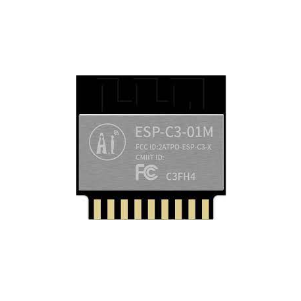
Ai Thinker ESP32-C3-01M Wi-Fi + BLE Module
The compact ESP32-C3 module is perfect for space-constrained WLED builds like TV backlights where you need to tuck the controller behind the display panel.
Integrating with Home Assistant and Google Home
WLED integrates natively with Home Assistant via its built-in integration. When WLED and Home Assistant are on the same network, HA auto-discovers WLED instances via mDNS. The integration exposes a light entity that supports brightness, colour, and effect selection.
Home Assistant Setup
- Go to Settings → Devices & Services → Add Integration.
- Search for WLED and click it.
- Enter the IP address of your WLED controller.
- HA will create light entities for each WLED segment automatically.
You can then create automations like: turn on TV backlight to warm white 20% when the TV input turns on, or switch to a party effect when a motion sensor detects movement after 9 PM.
Google Home / Alexa
WLED does not have native Google Home or Alexa integration, but you can bridge it through Home Assistant’s Google Assistant integration or through Nabu Casa cloud. Alternatively, use the WLED REST API with IFTTT or Node-RED for voice control without Home Assistant.
WLED Android / iOS App
The official WLED app (available on both Play Store and App Store) provides a beautiful touch interface for controlling your lights. Features include a colour wheel, brightness slider, effect browser, preset recall, and a live LED strip preview. The app auto-discovers all WLED devices on your LAN — no account or cloud required.
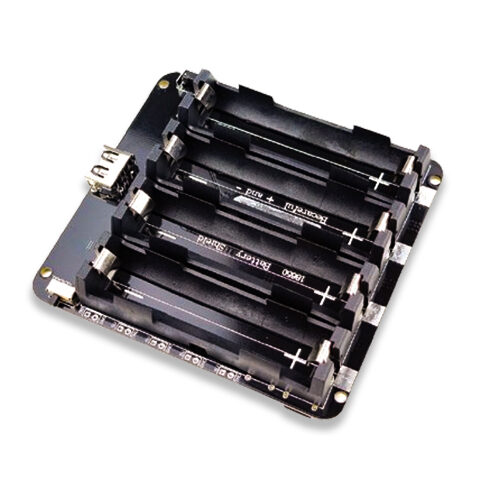
4 x 18650 Lithium Battery Shield for ESP32 with On-Off Button
Power your portable WLED project — like a battery-powered Diwali decoration or wearable costume light strip — with this 4-cell 18650 battery shield designed for ESP32.
Frequently Asked Questions
Can I use ESP8266 instead of ESP32 for WLED?
Yes, WLED supports ESP8266 but with limitations: fewer simultaneous effects, lower maximum LED count (~500 LEDs recommended vs 1500+ on ESP32), and no audio-reactive features. For new builds in 2024–25, always choose ESP32 as it costs nearly the same in India and delivers far better performance.
How many LEDs can one ESP32 WLED controller handle?
ESP32 WLED builds can comfortably drive 1000–1500 LEDs on a single data pin. Beyond that, data signal integrity degrades. For larger installations (e.g., 10+ metres at 60 LED/m = 600+ LEDs), use two ESP32 controllers and sync them via the WLED E1.31 / DDP sync feature.
My WS2812B strip shows wrong colours — red appears blue. How do I fix this?
This is a colour order mismatch. Different strip batches use RGB or GRB order. In WLED, go to Config → LED Preferences and change the Color Order from RGB to GRB (or try BGR/BRG) until the colours display correctly.
WLED is not connecting to my WiFi router. What should I check?
Check that your router’s 2.4 GHz band is enabled — ESP32 does not support 5 GHz. Also verify the SSID does not contain special characters like !, @, # as these sometimes cause WLED connection failures. Try setting a static IP in WLED’s WiFi config to avoid DHCP timeout issues.
Can I add a physical button to WLED to toggle lights without using a phone?
Yes. WLED has a built-in button configuration. Wire a momentary push button between any free GPIO and GND (with the internal pull-up enabled). In Config → LED Preferences → Button, set the GPIO number and assign actions (short press = toggle, long press = next preset, double press = nightlight mode).
Build Your WLED Smart Lighting Setup with Zbotic
Ready to create stunning smart lighting in your home? Zbotic.in stocks all the ESP32 boards, expansion boards, and power accessories you need for a complete WLED build — with fast shipping across India.


Add comment