
Table of Contents
- Introduction
- DC Motor Basics: Voltage, Torque & Speed
- 5V DC Motors: Strengths & Limitations
- 12V DC Motors: Strengths & Limitations
- Head-to-Head Comparison Table
- Arduino Compatibility & Power Supply Considerations
- Choosing the Right Motor Driver
- Use Case Recommendations
- Wiring Examples
- Frequently Asked Questions
- Conclusion
Introduction
One of the most common dilemmas for Arduino hobbyists and engineering students in India is deciding between a 5V DC motor and a 12V DC motor. Both have their place in robotics, automation, and DIY electronics — but choosing the wrong one can lead to underpowered robots, blown motor drivers, or fried Arduino pins. This comprehensive guide breaks down everything you need to know about 5V vs 12V DC motors for Arduino projects, from electrical fundamentals to real-world use cases.
Whether you are building a line-following robot, a motorised camera slider, a conveyor belt prototype, or a home automation mechanism, this comparison will help you make the right call before you spend a single rupee on components.
DC Motor Basics: Voltage, Torque & Speed
A DC (Direct Current) motor converts electrical energy into rotational mechanical energy. The key parameters that define any DC motor are:
- Rated Voltage (V): The voltage at which the motor operates at its specified speed and torque. Running below this reduces performance; running above risks damage.
- No-Load Speed (RPM): How fast the motor spins when no load is applied.
- Stall Torque (g·cm or N·m): Maximum torque before the motor stalls.
- Stall Current (A): Current drawn when the motor is stalled — the worst-case scenario for your driver.
- Operating Current (A): Typical current draw under normal load.
The relationship between these values matters enormously when you are designing a circuit. A motor is essentially a resistive-inductive load — it draws significantly more current at start-up and during stall than at steady-state running. Your motor driver and power supply must be sized accordingly.
Power (Watts) = Voltage x Current. So a 5V motor drawing 1A delivers 5W, while a 12V motor drawing 1A delivers 12W. Higher voltage motors can deliver more mechanical power per ampere of current — an important consideration when current capacity of your motor driver is the bottleneck.
5V DC Motors: Strengths & Limitations
What Makes a 5V Motor Attractive?
The biggest advantage of a 5V DC motor is its direct compatibility with Arduino’s USB power supply. When you power an Arduino via USB, you get a regulated 5V rail (500mA from USB, or more with an external 5V adapter). This makes 5V motors appealing for quick prototypes where a single power supply is preferred.
5V motors are also widely used in small robot kits — the classic TT gear motor (also called the yellow motor) found in almost every beginner Arduino robot runs at 3-6V. These motors are inexpensive, easy to find, and drive easily with common motor drivers like the L298N at lower voltages.
Practical Limitations
- Low torque at 5V: Small motors rated 5V typically have modest stall torques in the range of 100–600 g·cm. Not suitable for carrying significant loads.
- High current spikes: Even at 5V, stall currents can exceed 1.5–2A, which is beyond what an Arduino’s 5V pin can supply safely (max ~400mA from the onboard regulator).
- Cannot run directly from Arduino: Despite being 5V motors, you must never connect a motor directly to an Arduino I/O pin (max 40mA) or even the 5V power pin under load. A dedicated motor driver is always required.
- Speed and power ceiling: If your project needs significant mechanical force — moving a robot chassis over uneven surfaces, lifting weight, driving a pump — a 5V motor may not cut it.
12V DC Motors: Strengths & Limitations
Why 12V is the Workhorse Voltage
12V is arguably the most popular voltage in practical robotics and automation projects. It is the standard voltage for car batteries, lead-acid batteries, lithium battery packs, and a huge range of 12V wall adapters. This makes sourcing a 12V power supply trivially easy in India — whether you use a salvaged laptop power supply or a dedicated switching power supply.
12V DC gear motors, such as the popular 25GA-370 series, offer substantially more torque and power than their 5V equivalents at similar physical sizes. The 25GA-370 12V 12RPM variant, for example, delivers enough torque for robotic arm joints, wheeled robots, and conveyor mechanisms.
Practical Limitations
- You need two power rails: Arduino itself runs at 5V (or 3.3V). A 12V supply must be stepped down or a separate 5V supply used for the Arduino, unless you power Arduino from the 12V rail via its barrel jack (which internally regulates to 5V, but wastes heat for high currents).
- Motor driver voltage rating: Ensure your motor driver supports 12V. The L298N handles up to 46V, but simpler modules may be rated only to 5V or 6V.
- Higher voltage = greater caution: 12V systems require more careful wiring to prevent shorts. Fuse protection is advisable.
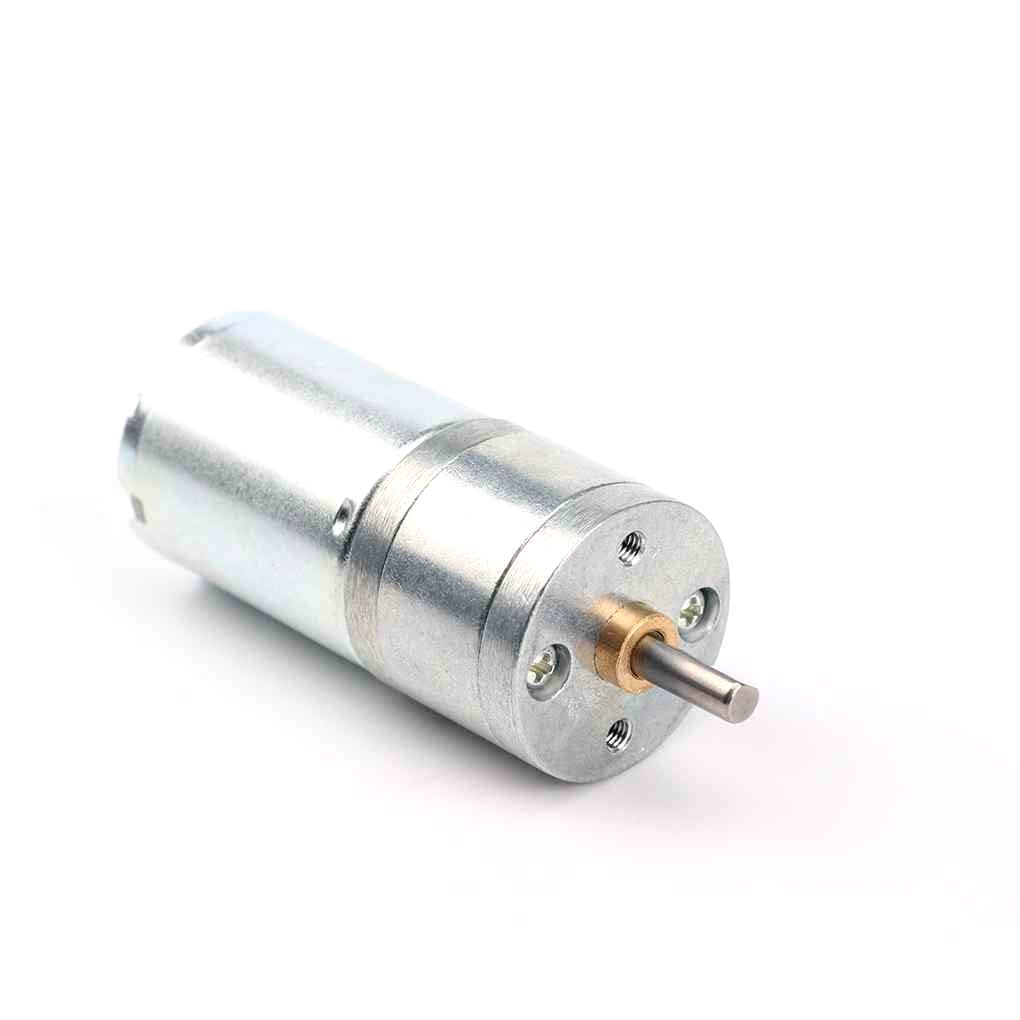
25GA-370 12V 12RPM DC Reducer Gear Motor
A reliable 12V gear motor with high torque at low RPM — ideal for robotic chassis, conveyor belts, and slow-moving mechanisms needing sustained force.
Head-to-Head Comparison Table
| Parameter | 5V DC Motor | 12V DC Motor |
|---|---|---|
| Power supply availability | USB, phone charger | Laptop adapter, 12V SLA battery |
| Torque (typical small motor) | 100–600 g·cm | 500–5000+ g·cm |
| Current draw | Lower amperage | Similar or higher amperage |
| Arduino power rail | Same rail possible (with caution) | Separate supply needed |
| Driver compatibility | L298N, L293D, DRV8833, TB6612 | L298N, BTS7960, IBT-2, DRV8871 |
| Suitable project scale | Small robots, fans, light loads | Medium–heavy robots, actuators |
| Cost (typical) | Lower | Moderate to higher |
| Heat generation | Less (at low load) | More (driver dissipates more) |
Arduino Compatibility & Power Supply Considerations
This is the section where most beginners make mistakes. Let us be very clear:
Rule 1: Never power a motor from an Arduino I/O pin. Arduino digital I/O pins are rated at 40mA maximum, with a recommended maximum of 20mA. Even the smallest 5V motor draws 100–300mA at no load.
Rule 2: Be careful about sharing a power supply between Arduino and motor. When a motor starts or stalls, it creates a large current spike. This spike causes a voltage dip on the shared supply rail. If the Arduino detects this as a brownout, it resets unexpectedly — often mid-operation. Always use separate decoupling capacitors (at least 100µF and 100nF) across the motor driver power pins.
Rule 3: For 12V systems, use a dedicated 5V regulator or a separate 5V USB source for the Arduino. Powering Arduino through its barrel jack from 12V is fine for light-duty use, but the onboard linear regulator (AMS1117 or equivalent) will get warm if the Arduino is also drawing 100mA+ from 5V peripherals.
The cleanest solution for 12V motor projects is a DC-DC buck converter (like the LM2596 module, available on Zbotic) to step down 12V to a stable 5V for Arduino — this is far more efficient than using the Arduino’s onboard linear regulator.
Choosing the Right Motor Driver
Regardless of whether you choose 5V or 12V motors, you will need a motor driver IC between the Arduino and the motor. Here is a quick guide:
For 5V Motors
- L293D: Classic dual H-bridge, handles up to 600mA per channel at 4.5–36V. Good for tiny motors, runs warm.
- DRV8833: More efficient dual H-bridge from TI, handles 1.5A per channel, excellent for small 5V motors.
- TB6612FNG: 1.2A per channel continuous, low dropout, efficient. Preferred for 5V and 6V small robots.
- L298N: Can run 5V motors but with voltage drop across the driver — you may need a 7V supply to get effective 5V to the motor.
For 12V Motors
- L298N: The most popular module for Arduino + 12V motors. Dual H-bridge, 2A per channel, handles up to 46V. Note the ~2V voltage drop.
- BTS7960 / IBT-2: For high-current motors (up to 43A peak). Used in heavy robots and e-bikes.
- DRV8871: TI’s compact single H-bridge for 12V, 3.6A peak — discussed in detail in another guide in this series.
Use Case Recommendations
Choose a 5V DC Motor When:
- Building a very small indoor robot (under 500g) powered from a USB power bank
- Driving a small fan, agitator, or stirrer
- Making a compact haptic feedback device
- Building a simple pen plotter or small CNC where torque requirements are minimal
- Working on a battery-powered wearable where power budget is critical
Choose a 12V DC Motor When:
- Building a wheeled robot that needs to carry a payload (sensor arrays, a laptop, etc.)
- Driving a pump, conveyor, or industrial-style actuator
- Making a robotic arm joint that lifts more than a few hundred grams
- Running from a 12V lead-acid battery or 3S LiPo pack
- Needing significant torque at low RPM (gear motors)
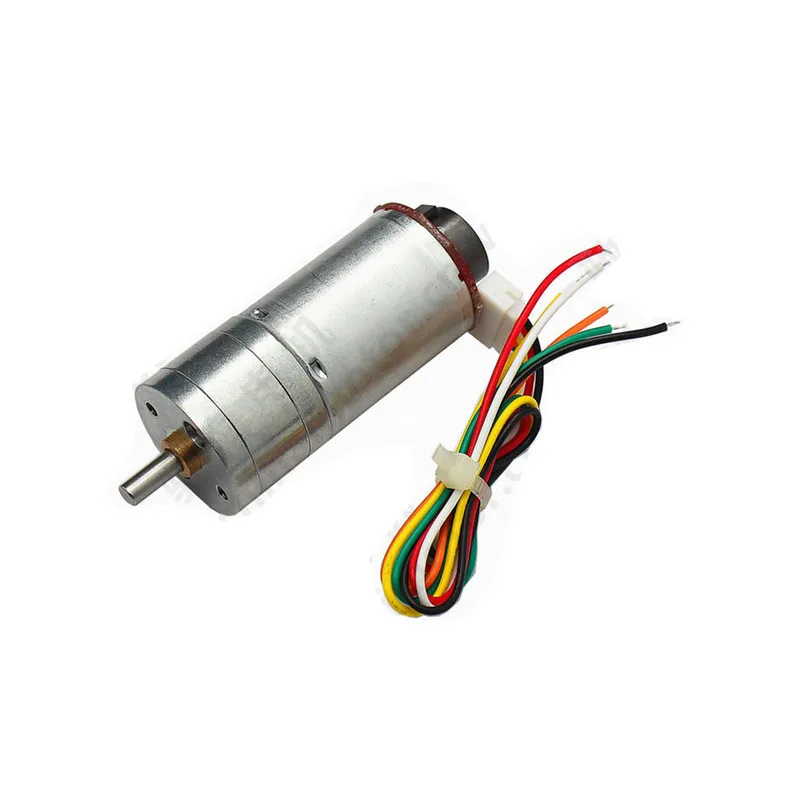
25GA-370 12V 12RPM DC Reducer Gear Motor with Encoder
Same powerful 12V gear motor with a built-in encoder for closed-loop position and speed control — great for precision robotics applications.
Wiring Examples
5V Motor + L298N + Arduino (5V supply shared via USB)
Arduino 5V to L298N VCC (logic supply)
External 5V PSU to L298N VS (motor supply) — important: NOT from Arduino 5V pin
Arduino GND to L298N GND (common ground)
Arduino D9 to L298N ENA (PWM speed control)
Arduino D8 to L298N IN1
Arduino D7 to L298N IN2
Motor to L298N OUT1, OUT2
12V Motor + L298N + Arduino
12V Supply to L298N VS
L298N 5V reg output to Arduino VIN (or use separate USB for Arduino)
Arduino GND + 12V Supply GND to L298N GND (common ground always)
Arduino D9 to ENA, D8 to IN1, D7 to IN2
Motor to OUT1, OUT2
100uF capacitor across VS and GND (near driver)
Important: If you enable the L298N onboard 5V regulator jumper, you can power Arduino from the L298N’s 5V output pin only if the motor supply voltage is 12V or less and the total 5V load is under 500mA. Remove the jumper if you supply more than 12V to prevent overheating the onboard regulator.
Frequently Asked Questions
Q: Can I run a 12V DC motor on 5V?
Yes, technically — but the motor will spin slower and produce much less torque than its rated values. For brief testing this is acceptable, but do not use a 12V motor continuously at 5V in a final design, as it is an inefficient mismatch.
Q: Can I connect a 5V motor directly to the Arduino 5V pin?
No. Even if the motor is rated 5V, it draws far more current than the Arduino’s 5V pin (which is limited by the onboard regulator to ~400mA on Uno, ~900mA on Mega). Always use a motor driver and a dedicated power supply for the motor.
Q: My 12V motor project keeps resetting the Arduino. What is wrong?
This is almost always a shared ground problem or motor current spike causing a brownout. Add a 100µF electrolytic capacitor across the motor driver power pins and ensure the Arduino and motor driver share a common ground but have separate power inputs.
Q: Which is better for a line-following robot — 5V or 12V?
For a small line-follower (200–500g, powered by a 2S LiPo or AA batteries), 5V gear motors (like the classic TT motor) are ideal. For a heavier competition bot that needs speed and torque simultaneously, 12V gear motors with an L298N or BTS7960 driver are better.
Q: What voltage should I use for PWM speed control?
PWM (Pulse Width Modulation) works at any voltage. You set the motor’s rated voltage as the supply and control effective speed by adjusting duty cycle. At 50% duty cycle on a 12V supply, the motor effectively sees ~6V average. PWM frequency matters too — typically 1–20 kHz for DC motors to avoid audible whine and driver heating.
Q: Is the L298N good for both 5V and 12V motors?
The L298N works from 4.5V to 46V on the motor supply. However, it has a ~2V voltage drop across the H-bridge. This means if you supply 5V, the motor only gets about 3V — reducing torque significantly. For 5V motors, prefer the TB6612FNG or DRV8833 which have much lower dropout voltages.
Conclusion
Choosing between a 5V DC motor and a 12V DC motor for your Arduino project comes down to three factors: power source availability, torque requirements, and motor driver selection. Small, lightweight projects powered from USB banks favour 5V motors. Anything needing real mechanical force — carrying weight, moving heavy mechanisms, or running continuously under load — benefits from 12V motors and the abundant power supplies available at that voltage.
For most intermediate and advanced Arduino projects in India, 12V DC gear motors with an L298N or DRV8871 driver represent the practical sweet spot: widely available, well-documented, and capable enough for a wide range of robotics and automation tasks.
Whatever voltage you choose, remember the golden rules: always use a dedicated motor driver, always share grounds between subsystems, and always add decoupling capacitors near your motor driver’s power pins. These habits will save you hours of debugging unexplained resets and erratic behaviour.
Ready to Get Started?
Zbotic stocks a wide range of DC gear motors, motor drivers, and accessories for Arduino projects. Explore our Motors, Drivers and Actuators category to find the right motor for your next build — with fast shipping across India.


Add comment