
SLAM navigation lidar mapping autonomous robot projects represent the frontier of DIY robotics in India. SLAM — Simultaneous Localisation and Mapping — is the technology that allows a robot to build a map of an unknown environment while simultaneously tracking its own position within that map. It is the core capability behind autonomous vacuum cleaners, warehouse robots, and self-driving cars. This guide shows you how to implement SLAM on a budget Raspberry Pi robot using an RPLIDAR sensor and the ROS2 Nav2 stack.
What is SLAM and How Does it Work?
Imagine placing a blindfolded person in an unfamiliar building and asking them to draw an accurate floor plan while simultaneously knowing exactly where they stand in it at all times. That is precisely the SLAM problem. It is mathematically hard because both the map and the robot’s position are unknowns — yet each depends on the other.
Modern SLAM algorithms handle this through probabilistic estimation. At each timestep, the robot:
- Predicts its new position using odometry (wheel encoder data or IMU integration).
- Observes the environment using LIDAR, which returns a 360° distance scan (thousands of range measurements per rotation).
- Updates its position estimate by matching the current scan against the partial map built so far — called scan matching.
- Extends the map with newly observed areas that do not match existing map features.
The two dominant SLAM variants used in ROS2 today are:
- Graph SLAM (e.g., Cartographer, RTAB-Map): Builds a graph of pose nodes connected by constraints. Periodically performs global loop-closure — recognises when the robot revisits a known location and corrects accumulated drift.
- Filter-based SLAM (e.g., AMCL + gmapping): Uses a particle filter. Simpler, lower CPU, but prone to drift over large areas.
For a room-scale indoor robot (school, home, small warehouse), Cartographer or SLAM Toolbox on ROS2 provides excellent results at low cost.
Choosing a LIDAR for Your Robot
LIDAR sensors for DIY robotics span a wide price range. Here is a comparison of the most accessible options in India:
| Sensor | Range | Frequency | Interface | Approx. Price (India) |
|---|---|---|---|---|
| RPLIDAR A1 | 0.15–12m | 5.5 Hz | USB serial | ₹6,000–9,000 |
| RPLIDAR A2 | 0.15–18m | 10 Hz | USB serial | ₹12,000–16,000 |
| RPLIDAR S1 | 0.1–40m | 10 Hz | USB serial | ₹25,000–30,000 |
| YDLIDAR X4 | 0.12–10m | 6–12 Hz | USB serial | ₹5,000–7,500 |
| Hokuyo URG-04LX | 0.06–4m | 10 Hz | USB | ₹40,000+ (used) |
For beginners in India, the RPLIDAR A1 is the best starting point. It costs under ₹9,000, has an official ROS2 driver, provides 360° 2D scanning at 5.5 Hz with 8,000 samples/rotation, and is supported by a large community. It is more than adequate for mapping rooms, corridors, and small office environments.
Robot Hardware for SLAM
A SLAM-capable mobile robot needs three things: motion (drive motors + encoders), perception (LIDAR), and computation (a computer to run ROS2). Here is a practical hardware stack:
- Base platform: 4WD acrylic chassis or custom aluminium base with enough surface for Raspberry Pi + LIDAR mounting. LIDAR must be at least 15 cm from the ground and centred on the robot’s rotation axis for accurate odometry alignment.
- Drive motors with encoders: JGA25 DC motors with optical or magnetic encoders. Encoders are essential — SLAM without odometry relies entirely on scan matching and drifts rapidly.
- Motor driver: L298N or TB6612FNG controlled by Arduino Mega/Nano, which handles encoder reading and PWM output then bridges to Raspberry Pi via USB serial.
- Computation: Raspberry Pi 4 (4 GB or 8 GB) running Ubuntu Server 22.04 + ROS2 Humble. SLAM Toolbox alone uses ~600 MB RAM; with Nav2 add another 400 MB. 4 GB is the minimum, 8 GB is comfortable.
- LIDAR: RPLIDAR A1 connected to the Raspberry Pi via USB. Avoid powering LIDAR from the same rail as motors — it needs a stable 5V.
- IMU (optional but recommended): MPU6050 or BNO055. An IMU significantly improves odometry accuracy, especially when wheel slip occurs on smooth floors.
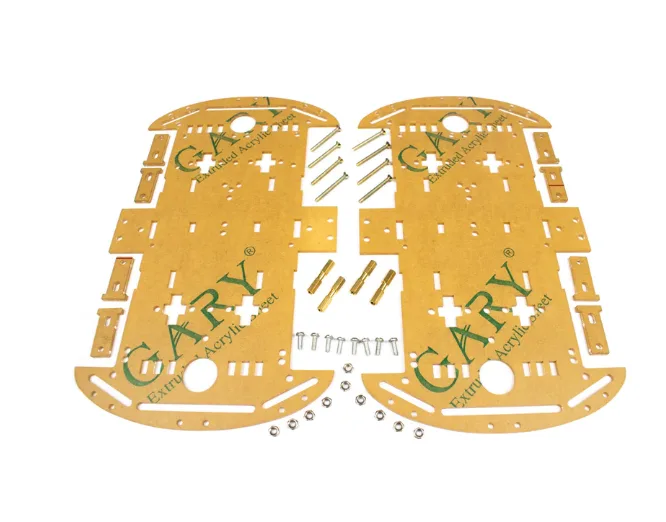
4 Wheels Car Chassis Acrylic Frame
Roomy 4WD acrylic chassis with ample deck space to mount an RPLIDAR, Raspberry Pi, battery, and motor driver for a full SLAM robot build.
ROS2 and Nav2 Setup for SLAM
Assuming ROS2 Humble is installed (see our ROS2 beginners guide), install the packages needed for SLAM and navigation:
# Install SLAM Toolbox
sudo apt install ros-humble-slam-toolbox -y

# Install Nav2 (navigation stack)
sudo apt install ros-humble-nav2-bringup ros-humble-nav2-bt-navigator
  ros-humble-nav2-map-server ros-humble-nav2-planner ros-humble-nav2-controller
  ros-humble-nav2-recoveries -y

# Install RPLIDAR ROS2 driver
sudo apt install ros-humble-rplidar-ros -y

# Install robot_localization for sensor fusion (odometry + IMU)
sudo apt install ros-humble-robot-localization -y
You will also need to describe your robot in a URDF (Unified Robot Description Format) file. The URDF defines the robot’s geometry, coordinate frames, and sensor placements. The robot_state_publisher node reads the URDF and broadcasts the /tf transforms that SLAM Toolbox uses to align LIDAR data with the robot’s motion history.
A minimal URDF for a differential drive robot with a centred LIDAR looks like this (simplified):
<!-- robot.urdf -->
<robot name="myrobot">
  <link name="base_link"/>
  <link name="base_footprint"/>
  <joint name="base_footprint_joint" type="fixed">
    <parent link="base_footprint"/>
    <child  link="base_link"/>
    <origin xyz="0 0 0.05"/>
  </joint>
  <link name="lidar_link"/>
  <joint name="lidar_joint" type="fixed">
    <parent link="base_link"/>
    <child  link="lidar_link"/>
    <origin xyz="0 0 0.12"/>  <!-- 12cm above base -->
  </joint>
</robot>
Running SLAM with Cartographer
Google Cartographer is a graph SLAM implementation with excellent loop-closure performance. Install and run it as follows:
# Install Cartographer
sudo apt install ros-humble-cartographer ros-humble-cartographer-ros -y

# Terminal 1: Start RPLIDAR
ros2 launch rplidar_ros rplidar_a1_launch.py

# Terminal 2: Start your robot's serial bridge / odometry node
# (custom node publishing /odom and listening to /cmd_vel)

# Terminal 3: Start SLAM with Cartographer
ros2 launch cartographer_ros cartographer.launch.py
  use_sim_time:=false
  configuration_basename:=revo_lds.lua

# Terminal 4: Visualise in RViz2
ros2 launch cartographer_ros cartographer_rviz.launch.py
Drive the robot around the room using a teleop node (ros2 run teleop_twist_keyboard teleop_twist_keyboard). Watch the map build in RViz2 in real time. When the map is complete, save it:
# Save map to disk
ros2 run nav2_map_server map_saver_cli -f ~/my_room_map
# Creates my_room_map.pgm (image) and my_room_map.yaml (metadata)
The saved map is a grayscale occupancy grid: white = free space, black = obstacle, grey = unknown. This map is then loaded by Nav2 for autonomous navigation.

ACEBOTT ESP32 Tank Robot Car Expansion Pack (QD001–QD004)
Tank-track robot base ideal for SLAM experiments — stable, wide platform with ground clearance that handles floor sensor placement well.
Autonomous Navigation with Nav2
With a saved map, the robot can navigate autonomously to any goal point on the map using Nav2. The stack includes:
- Map Server: Loads and serves the saved occupancy grid
- AMCL (Adaptive Monte Carlo Localisation): Estimates the robot’s pose within the known map using LIDAR scan matching with a particle filter
- Global Planner (NavFn or Smac): Plans an optimal path from current pose to goal using A* or Dijkstra on the occupancy grid
- Local Planner (DWB or MPPI): Converts the global path into velocity commands, avoiding dynamic obstacles in real-time
- BT Navigator: Orchestrates the whole sequence using a behaviour tree — handles retries, recovery behaviours, and goal management
Launch the full Nav2 stack with:
ros2 launch nav2_bringup bringup_launch.py
  map:=$HOME/my_room_map.yaml
  use_sim_time:=false
In RViz2, use the “2D Pose Estimate” tool to tell AMCL where the robot currently is on the map. Then use the “Nav2 Goal” button to send a navigation target. The robot will plan a path, drive to the goal, rotate to the goal heading, and stop — completely autonomously.
Tuning SLAM for Indian Indoor Environments
Indian homes and offices present specific challenges for SLAM: glass partitions (transparent to LIDAR), open-plan areas with few features, tile floors with strong reflections, and ceiling fans that appear as moving obstacles at certain LIDAR mounting heights.
Glass and Mirrors
Low-end LIDARs based on ToF (time-of-flight) cannot detect glass reliably — the beam passes through or reflects at an angle that misses the sensor. Solution: Tape temporary paper strips at LIDAR height on glass partitions during mapping, then remove them for navigation. The map will correctly show these as walls.
Low-Feature Open Spaces
Cartographer’s scan matching relies on distinct geometric features (corners, doorframes). In a large open space (e.g., a hall or office floor), there may be insufficient features for good loop closure. Add corner reflectors (small cardboard L-shapes) as temporary landmarks during mapping.
Scan Frequency vs CPU Load
On a Raspberry Pi 4, Cartographer running at 10 Hz LIDAR + 50 Hz odometry uses ~60% CPU. Reduce the LIDAR publish rate to 5 Hz in the rplidar launch file if you need CPU headroom for other nodes. SLAM Toolbox in online async mode is gentler on CPU than Cartographer at the cost of slightly slower map updates.
Odometry Calibration
The most common SLAM failure is incorrect odometry scale. Measure your wheel diameter precisely (use digital calipers, not printed specs). Calculate the encoder ticks per metre as ticks = (ticks_per_rev / (pi × diameter_m)) and verify by commanding 1 metre of forward motion and measuring the actual distance. A 5% error in wheel diameter gives dramatic map distortion over a 10-metre corridor.

2WD Mini Round Double-Deck Smart Robot Car Chassis DIY Kit
Compact double-deck chassis with ample top deck space — a great lightweight base for an RPLIDAR SLAM robot build on a budget.
Frequently Asked Questions
Can SLAM work without LIDAR using just a camera?
Yes — this is called Visual SLAM (VSLAM). ORB-SLAM3 and RTAB-Map support RGB-D cameras (like Intel RealSense) or stereo cameras for 3D mapping. Monocular camera SLAM (single camera, no depth) is possible but less robust. LIDAR SLAM is preferred for indoor ground robots because it is more accurate, works in low light, and requires less CPU than deep-learning visual methods.
How large a map can SLAM Toolbox handle on a Raspberry Pi 4?
SLAM Toolbox in lifelong mode (serialises map to disk) can handle maps covering thousands of square metres. For in-memory online SLAM on a Pi 4, maps up to ~500 square metres are practical at a 5 cm resolution. Beyond this, you need a more powerful computer or to use a serialised/deserialised pose graph approach.
Why does my map have gaps or distortions after mapping?
The most common causes are: (1) Odometry scale error (wrong wheel diameter or encoder ticks). (2) LIDAR scan frequency too low causing scan gaps during fast turns. (3) Missing loop closure — drive slowly through doorways twice to give Cartographer enough data for closure. (4) Robot moving faster than the scan period — slow down during mapping.
Is RPLIDAR A1 suitable for a school or college competition?
Yes. Most Indian college robotics competitions (including Robocon India autonomous tasks) allow any sensor suite. RPLIDAR A1 at ₹6,000–9,000 is affordable for college teams and provides ample performance for 10×10 metre competition arenas. Pair it with ROS2 SLAM Toolbox for a competitive advantage.
How do I send ROS2 navigation goals from a web application?
Use rosbridge_suite and roslibjs. The rosbridge server exposes all ROS2 topics and services over WebSocket. Your web app uses roslibjs to publish a geometry_msgs/PoseStamped message to /goal_pose — Nav2 picks it up automatically. This enables robot control from a mobile phone browser over the local WiFi network.
Build your autonomous SLAM robot today! Browse robot chassis, motor drivers, servo motors, and development boards at Zbotic.in – Robotics & DIY. Fast shipping across India with expert technical support.


Add comment