
Soldering Iron Temperature Guide: What Temperature for Each Task
One of the most common mistakes new electronics makers make is setting their soldering iron temperature too high — or too low — for the job at hand. A proper soldering iron temperature guide can save your components, improve joint quality, and dramatically reduce frustrating cold solder joints. Whether you’re doing SMD rework, soldering a PCB header, or joining thick wires, there’s an ideal temperature range for every task. This guide covers everything an Indian maker or hobbyist needs to know about selecting the right temperature for every soldering job.
Why Temperature Matters in Soldering
Temperature is the single most important variable in soldering, affecting everything from joint quality to component survival. Here’s why getting it right is crucial:
Too low: Solder doesn’t melt cleanly. You get cold joints — dull, grainy, high-resistance connections that look like the solder stuck to the surface but didn’t actually wet and bond. Cold joints are a leading cause of intermittent faults in DIY electronics.
Too high: Excess heat damages components (especially ICs and electrolytic capacitors), lifts PCB pads, burns flux (leaving crusty black residue), and oxidises the solder and tip faster. It also shortens tip life dramatically.
Just right: Solder flows smoothly, wets both pad and lead, and forms a shiny concave fillet joint in 2–3 seconds. The flux activates properly, removing oxides and promoting wetting. The component and pad experience minimal thermal stress.
The key insight is that you’re not just melting solder — you’re heating the joint (pad + lead) to above solder’s melting point so the solder flows into and wets the metal surfaces. The iron temperature must be high enough to heat the joint quickly, but not so high that you cook the component before the solder flows.
Soldering Temperature Chart by Task
| Task | Recommended Temp (Leaded) | Recommended Temp (Lead-Free) | Notes |
|---|---|---|---|
| Through-hole PCB (headers, resistors) | 320–360°C | 350–380°C | Standard hobbyist work |
| SMD 0603/0805 resistors/capacitors | 300–330°C | 320–350°C | Small mass, heats fast |
| SMD IC (SOIC, TSSOP) | 300–330°C | 320–350°C | Short dwell time, use flux |
| QFP/QFN fine-pitch IC | 300–320°C | 320–340°C | Use drag soldering or hot air |
| Connectors (USB, barrel jack) | 350–380°C | 370–400°C | Higher mass, more heat needed |
| Thin wire to PCB (<24 AWG) | 330–360°C | 360–390°C | Tin wire first |
| Thick wire (>20 AWG, power) | 380–420°C | 400–430°C | High mass, use larger tip |
| Desoldering (removing component) | 350–400°C | 380–420°C | Add fresh solder to help flow |
| Stained glass / copper pipe | N/A | N/A | Use propane torch, not electronics iron |
Leaded vs Lead-Free Solder
The solder you use is just as important as the iron temperature. Here’s a quick comparison:
Leaded Solder (60/40 or 63/37 Tin-Lead)
The classic hobbyist solder, with a melting point of 183°C for 63/37 eutectic and 183–188°C for 60/40. Leaded solder is forgiving: it flows beautifully, wets easily, and creates shiny joints. Setting your iron to 320–360°C gives you 140–180°C of margin above the melting point — enough to quickly heat the joint without cooking components.
In India, leaded solder is still widely used by hobbyists and repair shops, though it’s banned for commercial electronics manufacturing under RoHS regulations. The most common type available is 60/40 rosin core in 0.5mm, 0.8mm, and 1.0mm diameter. For hobby use in India, 60/40 is excellent — easier to work with than lead-free.
Lead-Free Solder (SAC305: 96.5% Tin, 3% Silver, 0.5% Copper)
Lead-free solder melts at 217–220°C — about 35°C higher than leaded. This means you need a higher iron temperature setting. Lead-free joints look duller and more granular than leaded joints (this is normal — don’t mistake it for a cold joint). Lead-free solder is more prone to cold joint formation if the iron is slightly too cool, so working cleanly and quickly is even more important.
Lead-free is required for commercial products sold in Europe. If you’re manufacturing products for export, use SAC305. For personal hobbyist projects in India, leaded is simpler and more forgiving.

BAKON Soldering Iron Tip 900M-T-I
A precision I-shaped tip for fine-pitch SMD work. The narrow profile allows accurate heat application on small pads without bridging adjacent pins. Compatible with 900M series irons.
Tip Selection and Heat Transfer
The iron’s temperature setting is not the temperature at the joint — the tip shape and contact area determine how much heat actually transfers. Understanding this prevents the most common beginner mistake: cranking up the temperature to compensate for a poor tip choice.
Common Tip Shapes and Their Uses
- Conical (sharp point): Precision SMD work, fine-pitch ICs. Low thermal mass — heats and cools quickly. Best for 0402, 0603 components. Set temperature slightly higher (20°C) to compensate for small contact area.
- Chisel (flat, angled): The most versatile tip. Excellent for through-hole, large SMD, and drag soldering. The flat face makes full contact with pads. This is the best all-round tip for most hobbyist work at 320–360°C leaded.
- Bevel (hoof): Great for drag soldering fine-pitch ICs and soldering large ground pads. The concave face holds a small bead of solder.
- Knife (blade): For cutting solder bridges and reworking in tight spaces.
- Large chisel / screwdriver: High thermal mass for thick wires, large connectors, and ground plane pads. Efficient heat delivery reduces the need to raise temperature.
The key principle: match tip size to joint size. Using a tiny conical tip on a large connector pad means you’re constantly pumping heat into a large thermal mass through a tiny contact. You’ll end up either dwelling too long (overheating the component) or raising the temperature to compensate. Use the largest tip that fits comfortably.
SMD Component Temperatures
Surface mount components require special care because they’re small, have no leads to absorb heat, and sit directly on the PCB with minimal thermal mass.
Passive SMD (Resistors, Capacitors)
0805 and larger passives can handle quick soldering at 320–340°C with leaded solder. Touch the tip to the pad, apply solder, and lift in 1–2 seconds. 0402 and 0201 components are more delicate — use a fine tip, minimum time, and 300–320°C. Ceramic capacitors (particularly MLCC types in large packages) can crack from thermal shock; always pre-heat the pad slightly before soldering.
ICs and Logic Chips
Most standard ICs (74HC series, ATmega, etc.) are rated for a maximum of 260°C at the solder joint for <10 seconds (J-STD-020 reflow spec). When hand soldering at 320–330°C, your iron tip is hotter than this, but the brief contact time (1–2 seconds per pin) means the actual component lead sees far less heat. With a good temperature-controlled iron and proper technique, IC damage from hand soldering is rare.
Heat-Sensitive Components
Electrolytic capacitors are the most temperature-sensitive common component. The electrolyte can vaporise if overheated. LED packages can delaminate at high temperatures — always keep LED leads cool (use a heatsink clip or shorten dwell time). Crystals and oscillators are also temperature-sensitive.
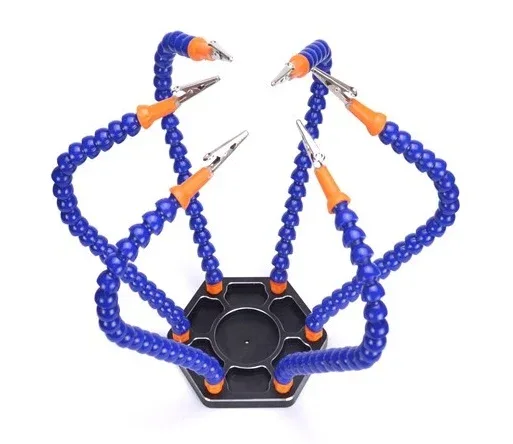
6 Flexible Arms Soldering Station with Alligator Clips
Hold your PCB, components, and wires hands-free while you solder. The 6 flexible arms with swivelling alligator clips let you position everything precisely, leading to better joints and less frustration.
Wire and Connector Soldering
Wires and connectors are often the hardest joints to get right — they have high thermal mass and the insulation can melt if you’re too slow.
Tinning Wire Before Soldering
Always tin your wire before soldering it to a pad or connector. Strip about 5mm of insulation, twist the strands tightly, and tin with solder. This step — often skipped — greatly improves final joint quality because you only need to melt the tinned wire’s solder plus the pad’s solder, not flow solder into bare stranded wire.
Power Wiring (Thick Wire)
Soldering 18 AWG or thicker wire (common in power electronics, LED strips, and motors) requires higher temperatures and a large tip. Set your iron to 380–420°C leaded and use a chisel or bevel tip. Pre-tin both the wire and the pad. Then join them quickly — typically 2–4 seconds. If you need more than 5 seconds, you’re losing heat somewhere (dirty tip, wrong tip size, or iron wattage too low).
Connectors on PCBs
USB-B, barrel jacks, and similar connectors have large metal bodies that act as heat sinks. Setting your iron to 350–380°C leaded helps. Solder the mechanical/ground tabs first (which have the most metal mass), then the signal pins. If you’ve already populated other components on the board, a brief pre-warm with a heat gun (60°C, 30 seconds) helps the entire board get to working temperature faster.
Common Temperature Mistakes and Fixes
Mistake 1: Too Low — Cold Joints
Symptom: Dull, grainy, lumpy solder joint. Solder didn’t flow or wet properly. Joint may crack or fail under vibration.
Fix: Increase temperature by 20–30°C. Ensure tip is clean (bright and tinned). Re-melt the joint, add a tiny amount of fresh solder and flux, and let it flow properly before lifting.
Mistake 2: Too High — Pad Lifting
Symptom: PCB pad peels off the board (especially on older or thin PCBs). Black residue around pads. Component discolouration.
Fix: Reduce temperature. Use a larger tip for better thermal efficiency at lower temperature. Work faster — 2 seconds is usually enough for a good joint.
Mistake 3: Oxidised Tip Reduces Heat Transfer
Symptom: Solder beads up and won’t wet the tip. Joint takes much longer than usual, forcing you to raise temperature unnecessarily.
Fix: Clean the tip on a wet sponge or brass wool. Re-tin immediately with fresh solder. Store the iron with a tinned tip. Never set the iron above its maximum rated temperature.
Mistake 4: Moving the Joint Before Solder Sets
Symptom: Disturbed joint looks grainy and matte, even if the correct temperature was used. High resistance or intermittent failure.
Fix: Don’t move the component or wire for 3–5 seconds after lifting the iron. Leaded solder solidifies almost immediately, but any movement before that ruins the joint.

0.1MM Copper Enamelled Repair Reel Wire
Extremely fine enamelled copper wire perfect for PCB repair jumpers and coil winding. The enamel burns off during soldering — you don’t need to strip it first. Set iron to 380°C+ to ensure the enamel breaks down cleanly.
Soldering Iron Recommendations for India
Temperature control is only useful if your iron actually reaches and holds the set temperature. Here’s a breakdown of what’s available in India:
Non-Temperature-Controlled Irons (Budget, ₹200–500)
Basic 25W or 40W soldering irons with no temperature control. The tip temperature depends on ambient temperature and thermal load. These irons are useful for basic wire soldering and learning, but unreliable for precision PCB work. The tip typically runs at 350–450°C — sometimes too hot for sensitive components. If this is what you have, use a lower wattage (25W) for SMD work.
Temperature-Controlled Stations (Recommended, ₹1,500–5,000)
Hakko FX-888D, Weller WE1010, or Chinese equivalents (KSGER T12, Sequre SQ-D60B) give you precise temperature control, fast heating, and interchangeable tips. These are the best value upgrade any hobbyist can make. Set to 320–340°C for most work. The difference from a basic iron is immediately noticeable in joint quality.
Hot Air Rework Stations (For SMD, ₹2,000–8,000)
Essential for soldering QFN, BGA, and fine-pitch ICs. Hot air temperature is typically set higher (350–400°C) because the air cools significantly before reaching the component. Use at 300–350°C air temp and 25–35 litres/minute airflow for most SMD work.

10CM Male To Female Breadboard Jumper Wires – 40Pcs
Pre-made breadboard jumper wires — use these instead of soldering for quick prototyping and testing. When you’re ready to solder your final build, these give you a working reference circuit to solder from.
Frequently Asked Questions
Q: What temperature should I use for a basic Arduino project?
For soldering headers and through-hole components on an Arduino shield, 330–350°C with leaded 60/40 solder is ideal. If using lead-free solder (often supplied with kits), increase to 360–380°C. Always use a chisel tip for better heat transfer to the pins.
Q: My solder iron is 60W but has no temperature control. What should I do?
A 60W non-controlled iron typically runs very hot — suitable for thick wire but risky for PCB work. Use it briefly and remove it quickly. Better solution: get a cheap temperature controller module (₹300–500) that plugs inline and controls power via a dial. Or upgrade to a temperature-controlled station — it’s worth every rupee.
Q: Can I use higher temperature to solder faster?
Only up to a point. Higher temperature does speed up heat transfer, but past about 400°C (leaded), you’re degrading the tip, burning flux before it can activate, and risking component damage. 360°C should be fast enough for any normal through-hole joint in 2–3 seconds. If it’s taking longer, the problem is tip contact, not temperature.
Q: Why does my solder ball up and not wet the pad?
Usually oxidation on the pad, the component lead, or the iron tip. Apply rosin flux (liquid or gel) to the pad before soldering — this dissolves oxides and dramatically improves wetting. Also ensure your tip is clean and tinned. If the board is old or stored without protection, lightly sand the pad with fine sandpaper before soldering.
Q: Is there a minimum wattage for soldering electronics?
For PCB work, 25–30W is the minimum for non-controlled irons. For thick wires and large connectors, 40–60W. For a temperature-controlled station, the wattage matters less than the tip temperature stability — a 40W station with good temperature regulation outperforms an uncontrolled 80W iron.
Upgrade Your Soldering Setup
From soldering tips and stations to helping hands and quality wire, Zbotic has everything you need for professional-quality soldering results. Browse our soldering tools and components today — fast shipping across India.


Add comment